


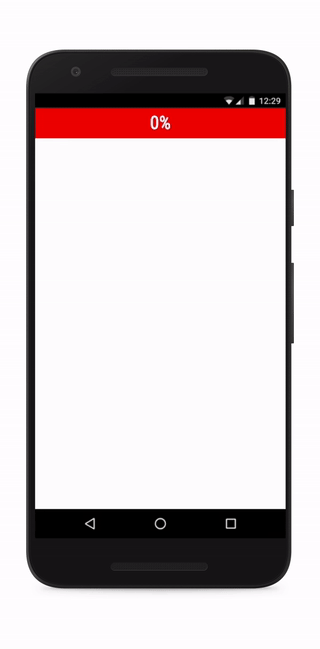
网页开发时,常常需要了解某个元素是否进入了"视口"(viewport),即用户能不能看到它。
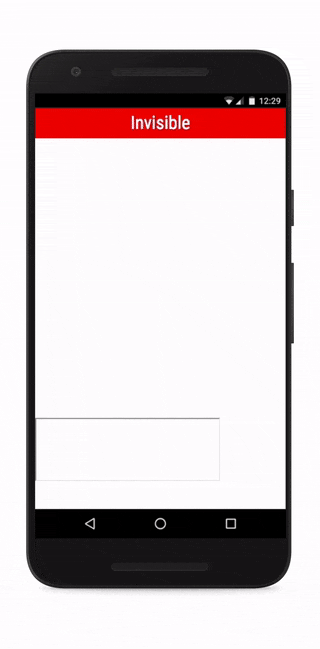
上图的绿色方块不断滚动,顶部会提示它的可见性。
传统的实现方法是,监听到scroll事件后,调用目标元素(绿色方块)的getBoundingClientRect()方法,得到它对应于视口左上角的坐标,再判断是否在视口之内。这种方法的缺点是,由于scroll事件密集发生,计算量很大,容易造成性能问题。
目前有一个新的 IntersectionObserver API,可以自动"观察"元素是否可见,Chrome 51+ 已经支持。由于可见(visible)的本质是,目标元素与视口产生一个交叉区,所以这个 API 叫做"交叉观察器"。
IntersectionObserver 特点
- 非阻塞性质:该 API 以异步方式运行,利用浏览器的高效内部处理机制,不会影响到主线程的运行,有效避免了性能瓶颈。
- 资源高效:与传统的滚动事件监听或定时器相比,IntersectionObserver 能够精确监测元素与视窗的相交情况,减少了不必要的计算和回调函数的触发,从而降低了资源消耗。
- 多元素监控:IntersectionObserver 允许同时对多个元素进行监控,通过回调函数逐一通知开发者在视窗中的相交状态,便于实现批量处理。
- 阈值自定义:开发者可以设置一个或多个阈值,以定义元素与视窗相交的程度。一旦相交比例达到或低于这些阈值,便会激活相应的回调函数。
利用 IntersectionObserver,开发者能够轻松实现诸如图片懒加载、滚动加载更多内容、广告可见性控制等功能,这些都能够显著提高网页的性能和用户的互动体验
一、API
语法:
var io = new IntersectionObserver(callback, option);上面代码中,IntersectionObserver是浏览器原生提供的构造函数,接受两个参数:callback是可见性变化时的回调函数,option是配置对象(该参数可选)。
构造函数的返回值是一个观察器实例。实例的observe方法可以指定观察哪个 DOM 节点。
// 开始观察
io.observe(document.getElementById('example'));

// 停止观察
io.unobserve(element);

// 关闭观察器
io.disconnect();上面代码中,observe的参数是一个 DOM 节点对象。如果要观察多个节点,就要多次调用这个方法。
io.observe(elementA);
io.observe(elementB);
二、callback 参数
目标元素的可见性变化时,就会调用观察器的回调函数callback。
callback一般会触发两次。一次是目标元素刚刚进入视口(开始可见),另一次是完全离开视口(开始不可见)。
var io = new IntersectionObserver(
  entries => {
    console.log(entries);
  }
);上面代码中,回调函数采用的是箭头函数的写法。callback函数的参数(entries)是一个数组,每个成员都是一个IntersectionObserverEntry对象。举例来说,如果同时有两个被观察的对象的可见性发生变化,entries数组就会有两个成员。
三、IntersectionObserverEntry 对象
IntersectionObserverEntry对象提供目标元素的信息,一共有六个属性。
{
  time: 3893.92,
  rootBounds: ClientRect {
    bottom: 920,
    height: 1024,
    left: 0,
    right: 1024,
    top: 0,
    width: 920
  },
  boundingClientRect: ClientRect {
     // ...
  },
  intersectionRect: ClientRect {
    // ...
  },
  intersectionRatio: 0.54,
  target: element
}
每个属性的含义如下:
- time:可见性发生变化的时间,是一个高精度时间戳,单位为毫秒
- target:被观察的目标元素,是一个 DOM 节点对象
- rootBounds:根元素的矩形区域的信息,getBoundingClientRect()方法的返回值,如果没有根元素(即直接相对于视口滚动),则返回null
- boundingClientRect:目标元素的矩形区域的信息
- intersectionRect:目标元素与视口(或根元素)的交叉区域的信息
- intersectionRatio:目标元素的可见比例,即intersectionRect占boundingClientRect的比例,完全可见时为1,完全不可见时小于等于0
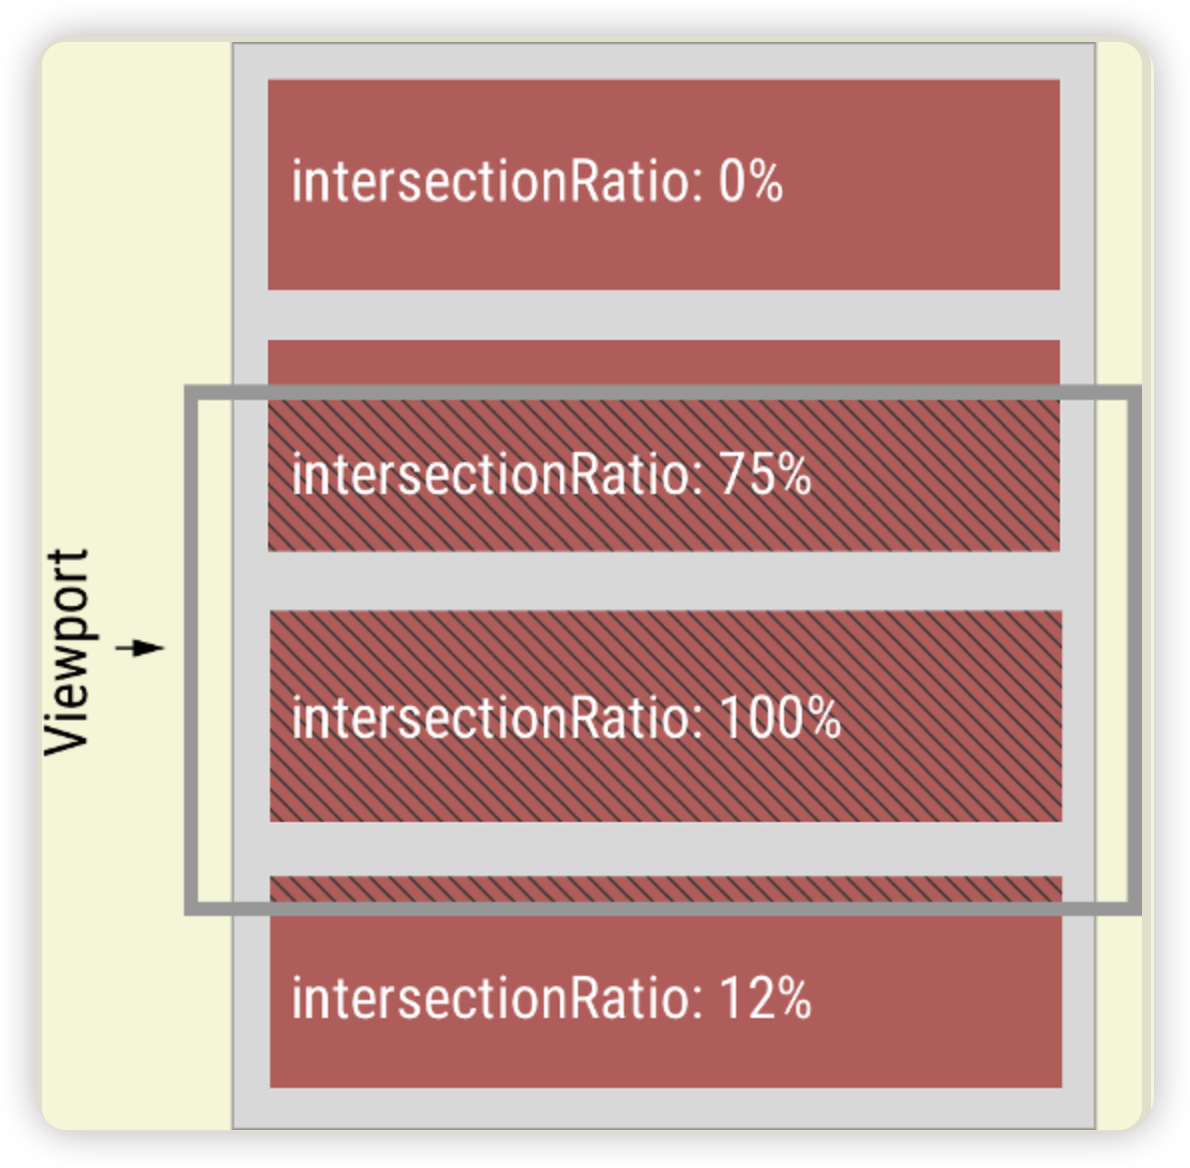
上图中,灰色的水平方框代表视口,深红色的区域代表四个被观察的目标元素。它们各自的intersectionRatio图中都已经注明。
演示示例:
<!DOCTYPE html>
<html>
<head>
  <meta charset="utf-8">
  <meta name="viewport" content="width=device-width">
  <title>JS Bin</title>
  <style>
    div {
      height: 500px;
      width: 30%;
      margin-bottom: 50px;
      }

      #a {
      background-color: red;
        float: left;
      }

      #b {
      background-color: black;
        float: left;
      }

      #c {
      background-color: blue;
      clear: left;
      }
  </style>
</head>
<body>
  <div id="a"></div>
  <div id="b"></div>
  <div id="c"></div>
</body>
<script>
  var io = new IntersectionObserver(
    entries => {
      entries.forEach(i => {
        console.log('Time: ' + i.time);
        console.log('Target: ' + i.target);
        console.log('IntersectionRatio: ' + i.intersectionRatio);
        console.log('rootBounds: ' + i.rootBounds);
        console.log(i.boundingClientRect);
        console.log(i.intersectionRect);
        console.log('================');
      });
    },
    {
        /* Using default options. Details below */
    }
);
// Start observing an element
io.observe(document.querySelector('#a'));
io.observe(document.querySelector('#b'));
</script>
</html>
注意,这个 Demo 只能在 Chrome 51+ 运行。
四、Option 对象
IntersectionObserver构造函数的第二个参数是一个配置对象。它可以设置以下属性。
threshold 属性
threshold属性决定了什么时候触发回调函数。它是一个数组,每个成员都是一个门槛值,默认为[0],即交叉比例(intersectionRatio)达到0时触发回调函数。
new IntersectionObserver(
  entries => {/* ... */},
  {
    threshold: [0, 0.25, 0.5, 0.75, 1]
  }
);用户可以自定义这个数组。比如,[0, 0.25, 0.5, 0.75, 1]就表示当目标元素 0%、25%、50%、75%、100% 可见时,会触发回调函数。
root 属性,rootMargin 属性
- 很多时候,目标元素不仅会随着窗口滚动,还会在容器里面滚动(比如在
iframe窗口里滚动)。容器内滚动也会影响目标元素的可见性,参见本文开始时的那张示意图。 - IntersectionObserver API 支持容器内滚动。
root属性指定目标元素所在的容器节点(即根元素)。注意,容器元素必须是目标元素的祖先节点。
var opts = {
  root: document.querySelector('.container'),
  rootMargin: "500px 0px"
};

var observer = new IntersectionObserver(
  callback,
  opts
);上面代码中,除了root属性,还有rootMargin属性。后者定义根元素的margin,用来扩展或缩小rootBounds这个矩形的大小,从而影响intersectionRect交叉区域的大小。它使用CSS的定义方法,比如10px 20px 30px 40px,表示 top、right、bottom 和 left 四个方向的值。
这样设置以后,不管是窗口滚动或者容器内滚动,只要目标元素可见性变化,都会触发观察器。
五、注意点
IntersectionObserver API 是异步的,不随着目标元素的滚动同步触发。
规格写明,IntersectionObserver的实现,应该采用requestIdleCallback(),即只有线程空闲下来,才会执行观察器。这意味着,这个观察器的优先级非常低,只在其他任务执行完,浏览器有了空闲才会执行。
六、参考来源
阮一峰:IntersectionObserver API 使用教程 - 阮一峰的网络日志
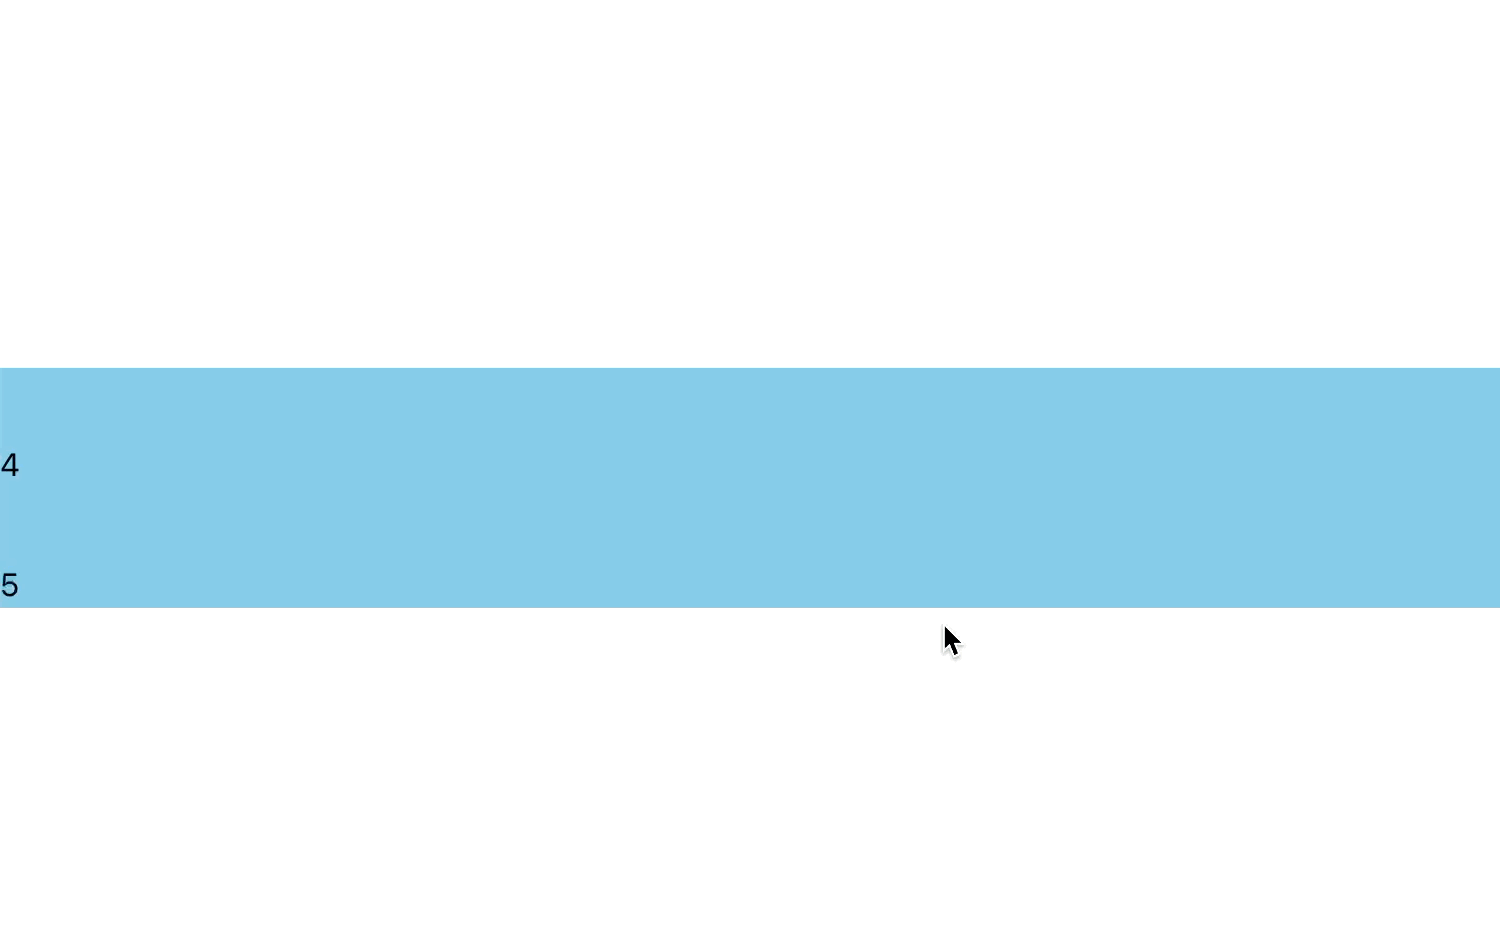
案例--使用 IntersectionObserver 实现自动无限滚动
效果
实现代码
import React, { useEffect, useRef, useState } from "react";
import styles from "./index.module.scss";

const dataSource = new Array(50).fill(0).map((_, index) => index + 1);
const ITEM_5_ID = "item-5";

export default function CycleScrollList() {
  const [data, setData] = useState(dataSource.slice(0, 10));

  const intersectionObserverRef = useRef();
  const item5Ref = useRef(null);

  const nextIndex = useRef(10); // 持续从 dataSource 拿数据的下一个 index
  const justVisible5 = useRef(false); // 原来是否为可视

  useEffect(() => {
    intersectionObserverRef.current = new IntersectionObserver((entries) => {
      entries.forEach((item) => {
        if (item.target.id === ITEM_5_ID) {
          // 与视图相交(开始出现)
          if (item.isIntersecting) {
            justVisible5.current = true;
          }
          // 从可视变为不可视
          else if (justVisible5.current) {
            replaceData();
            justVisible5.current = false;
          }
        }
      });
    });
    startObserver();

    return () => {
      intersectionObserverRef.current?.disconnect();
      intersectionObserverRef.current = null;
    };
  }, []);

  const startObserver = () => {
    if (item5Ref.current) {
      // 对第五个 item 进行监测
      intersectionObserverRef.current?.observe(item5Ref.current);
    }
  };

  const replaceData = () => {
    let newData = [];
    if (nextIndex.current - 5 < 0) {
      newData = [
        ...dataSource.slice(nextIndex.current - 5),
        ...dataSource.slice(0, nextIndex.current + 5),
      ];
    } else {
      newData = [
        ...dataSource.slice(nextIndex.current - 5, nextIndex.current + 5),
      ];
    }
    // 使用当前的后半份数据,再从 dataSource 中拿新数据
    console.log(newData);
    const nextIndexTemp = nextIndex.current + 5;
    const diff = nextIndexTemp - dataSource.length;
    if (diff < 0) {
      nextIndex.current = nextIndexTemp;
    } else {
      // 一轮数据用完,从头继续
      nextIndex.current = diff;
    }
    setData(newData);
  };

  return (
    <div className={styles.box}>
      <div className={styles.visibleView}>
        <div className={styles.container}>
          {data.map((item, index) =>
            index === 4 ? (
              <div
                id={ITEM_5_ID}
                ref={item5Ref}
                key={index}
                className={styles.div}
              >
                {item}
              </div>
            ) : (
              <div key={index} className={styles.div}>
                {item}
              </div>
            )
          )}
        </div>
      </div>
    </div>
  );
}
index.module.scss
$itemHeight: 60px; // 单个item的高度

$itemShowTime: 3s; // 单个item从完整出现到消失的时长
$oneCycleItemNum: 5; // 单个循环上移的item条数
$oneScreenItemNum: 3; // 同屏出现的item条数(不能大于 oneCycleItemNum)

$oneCycleItemTime: calc($itemShowTime + ($oneCycleItemNum - $oneScreenItemNum) * ($itemShowTime / $oneScreenItemNum));

@keyframes dynamics-rolling {
  from {
    transform: translateY(0);
  }
  to {
    transform: translateY(-$itemHeight * $oneCycleItemNum);
  }
}
.container {
  height: 600px;

  animation: dynamics-rolling $oneCycleItemTime linear infinite;
  .div {
    line-height: 60px;
  }
}

.visibleView {
  width: 100%;
  height: 120px;
  overflow: hidden;
  background-color: skyblue;

}
.box {
  width: 100%;
  height: 100vh;
  display: flex;
  justify-content: center;
  align-items: center;
}


 1513
1513

 被折叠的 条评论
为什么被折叠?
被折叠的 条评论
为什么被折叠?
 到【灌水乐园】发言


