


@[TOC](Spring Boot2 系列(一) - 自定义 Spring Boot 中的 starter)
概括
Starter 的核心就是条件注解 @Conditional ,当 classpath 下存在某一个 Class 时,某个配置才会生效
定义自己的Starter
首先,要在maven项目中,添加 Starter 的自动化配置类
        <dependency>
            <groupId>org.springframework.boot</groupId>
            <artifactId>spring-boot-autoconfigure</artifactId>
            <version>2.1.8.RELEASE</version>
        </dependency>
然后创建Properties类,用来接收application.properties配置文件注入的值
@ConfigurationProperties(prefix = "wu")
public class HelloProperties {
    private static final String DEFAULT_NAME = "小杰";
    private static final String DEFAULT_MSG = "一个爱吃代码的小伙";
    private String name = DEFAULT_NAME;
    private String msg = DEFAULT_MSG;
    public String getName() {
        return name;
    }
    public void setName(String name) {
        this.name = name;
    }
    public String getMsg() {
        return msg;
    }
    public void setMsg(String msg) {
        this.msg = msg;
    }
}
这个配置类很好理解,将 application.properties 中配置的属性值直接注入到这个实例中,
@ConfigurationProperties 类型安全的属性注入,
即将 application.properties 文件中前缀为 wu 的属性注入到这个类对应的属性上
wu.name=wuweijie
wu.msg=小伙子
定义一个 Service
public class HelloService {
    private String name;
    private String msg;

    public String sayHello() {
        return name + " say " + msg + " !";
    }

    public String getName() {
        return name;
    }

    public void setName(String name) {
        this.name = name;
    }

    public String getMsg() {
        return msg;
    }

    public void setMsg(String msg) {
        this.msg = msg;
    }
}
最后,重要的来了
@Configuration
@EnableConfigurationProperties(HelloProperties.class)
//ConditionalOnClass 表示当项目当前 classpath
// 下存在 HelloService 时,后面的配置才生效。
@ConditionalOnClass(HelloService.class)
public class HelloServiceAutoConfiguration {

    @Autowired
    HelloProperties helloProperties;

    @Bean
    HelloService helloService(){
        HelloService helloService = new HelloService();
        helloService.setName(helloProperties.getName());
        helloService.setMsg(helloProperties.getMsg());
        return helloService;
    }

}
顾名思义,HelloService 的 自动配置类
- 首先来看一下第一个注解 @Configuration 表明这是一个配置类
- @EnableConfigurationProperties(**Properties.class) 使我们之前配置的 @ConfigurationProperties 生效,让配置的属性成功的进入 Bean 中
- @ConditionalOnClass 表示当项目当前 classpath 下存在 HelloService 时,后面的配置才生效
- 自动配置类中首先注入 HelloProperties ,这个实例中含有我们在 application.properties 中配置的相关数据
- 提供一个 HelloService 的实例,将 HelloProperties 中的值注入进去
最后还需要一个spring.factories 文件
原理:
大家知道我们的 Spring Boot 项目的启动类都有一个 @SpringBootApplication 注解,这个注解的定义如下:
@SpringBootConfiguration
@EnableAutoConfiguration
@ComponentScan(excludeFilters = {
		@Filter(type = FilterType.CUSTOM, classes = TypeExcludeFilter.class),
		@Filter(type = FilterType.CUSTOM,
				classes = AutoConfigurationExcludeFilter.class) })
public @interface SpringBootApplication {
}
大家看到这是一个组合注解,其中的一个组合项就是 @EnableAutoConfiguration ,这个注解是干嘛的呢?
@EnableAutoConfiguration 表示启用 Spring 应用程序上下文的自动配置,该注解会自动导入一个名为 AutoConfigurationImportSelector 的类,而这个类会去读取一个名为 spring.factories 的文件, spring.factories 中则定义需要加载的自动化配置类,我们打开任意一个框架的 Starter ,都能看到它有一个 spring.factories 文件,例如 MyBatis 的 Starter 如下:

在 Maven 项目的 resources 目录下创建一个名为 META-INF 的文件夹,然后在文件夹中创建一个名为 spring.factories 的文件,文件内容如下:
org.springframework.boot.autoconfigure.EnableAutoConfiguration=com.wu.pojo.HelloServiceAutoConfiguration
使用 Starter
将上面的项目打成jar包,新建一个springboot项目引入自己的starter
        <dependency>
            <groupId>cm.wu.pro</groupId>
            <artifactId>01CustomizeStarter</artifactId>
            <version>1.0-SNAPSHOT</version>
            <systemPath>${basedir}/lib/01CustomizeStarter-1.0-SNAPSHOT.jar</systemPath>
        </dependency>
配置application.properties
wu.name=wuweijie
wu.msg=小牧码
编写初识类
@SpringBootTest
class S01userstarterApplicationTests {

    @Autowired
    HelloService helloService;

    @Test
    void contextLoads() {

        System.out.println(helloService.sayHello());
    }

}
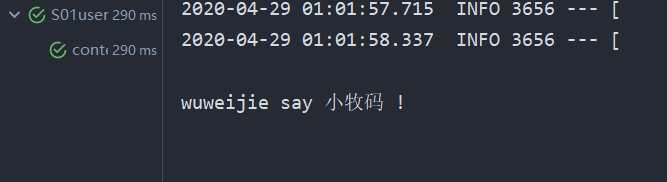
运行结果:


 2693
2693


 被折叠的 条评论
为什么被折叠?
被折叠的 条评论
为什么被折叠?
 到【灌水乐园】发言


