


一、 Spring 整合 Junit
<?xml version="1.0" encoding="UTF-8"?>
<project xmlns="http://maven.apache.org/POM/4.0.0"
         xmlns:xsi="http://www.w3.org/2001/XMLSchema-instance"
         xsi:schemaLocation="http://maven.apache.org/POM/4.0.0 http://maven.apache.org/xsd/maven-4.0.0.xsd">
    <modelVersion>4.0.0</modelVersion>

    <groupId>org.qiu</groupId>
    <artifactId>spring-015-junit</artifactId>
    <version>1.0-SNAPSHOT</version>

    <properties>
        <maven.compiler.source>8</maven.compiler.source>
        <maven.compiler.target>8</maven.compiler.target>
    </properties>

    <dependencies>
        <dependency>
            <groupId>org.springframework</groupId>
            <artifactId>spring-context</artifactId>
            <version>5.3.23</version>
        </dependency>
        <dependency>
            <groupId>org.springframework</groupId>
            <artifactId>spring-test</artifactId>
            <!-- Spring6 的支持 junit4 还有 junit5 -->
            <version>5.3.23</version>
        </dependency>
        <!--使用Junit则将下面改为Junit5版本即可-->
        <dependency>
            <groupId>junit</groupId>
            <artifactId>junit</artifactId>
            <version>4.13.2</version>
            <scope>test</scope>
        </dependency>
    </dependencies>

</project>
package org.qiu.spring.bean;
import org.springframework.beans.factory.annotation.Value;
import org.springframework.stereotype.Component;
/**
* @author 秋玄
* @version 1.0
* @email qiu_2022@aliyun.com
* @project Spring
* @package org.qiu.spring.bean
* @date 2022-11-30-21:55
* @since 1.0
*/
@Component
public class User {
@Value("张三")
private String name;
@Override
public String toString() {
return "User{" +
"name='" + name + '\'' +
'}';
}
public String getName() {
return name;
}
public void setName(String name) {
this.name = name;
}
public User() {
}
public User(String name) {
this.name = name;
}
}<?xml version="1.0" encoding="UTF-8"?>
<beans xmlns="http://www.springframework.org/schema/beans"
xmlns:xsi="http://www.w3.org/2001/XMLSchema-instance"
xmlns:context="http://www.springframework.org/schema/context"
xsi:schemaLocation="http://www.springframework.org/schema/beans http://www.springframework.org/schema/beans/spring-beans.xsd
http://www.springframework.org/schema/context http://www.springframework.org/schema/context/spring-context.xsd">
<context:component-scan base-package="org.qiu.spring.bean"/>
</beans>package org.qiu.spring.test;
import org.junit.Test;
import org.junit.runner.RunWith;
import org.qiu.spring.bean.User;
import org.springframework.beans.factory.annotation.Autowired;
import org.springframework.test.context.ContextConfiguration;
import org.springframework.test.context.junit4.SpringJUnit4ClassRunner;
/**
* @author 秋玄
* @version 1.0
* @email qiu_2022@aliyun.com
* @project Spring
* @package org.qiu.spring.test
* @date 2022-11-30-21:56
* @since 1.0
*/
@RunWith(SpringJUnit4ClassRunner.class)
@ContextConfiguration("classpath:spring.xml")
public class JunitTest {
@Autowired
private User user;
@Test
public void testUser(){
System.out.println(user.getName());
}
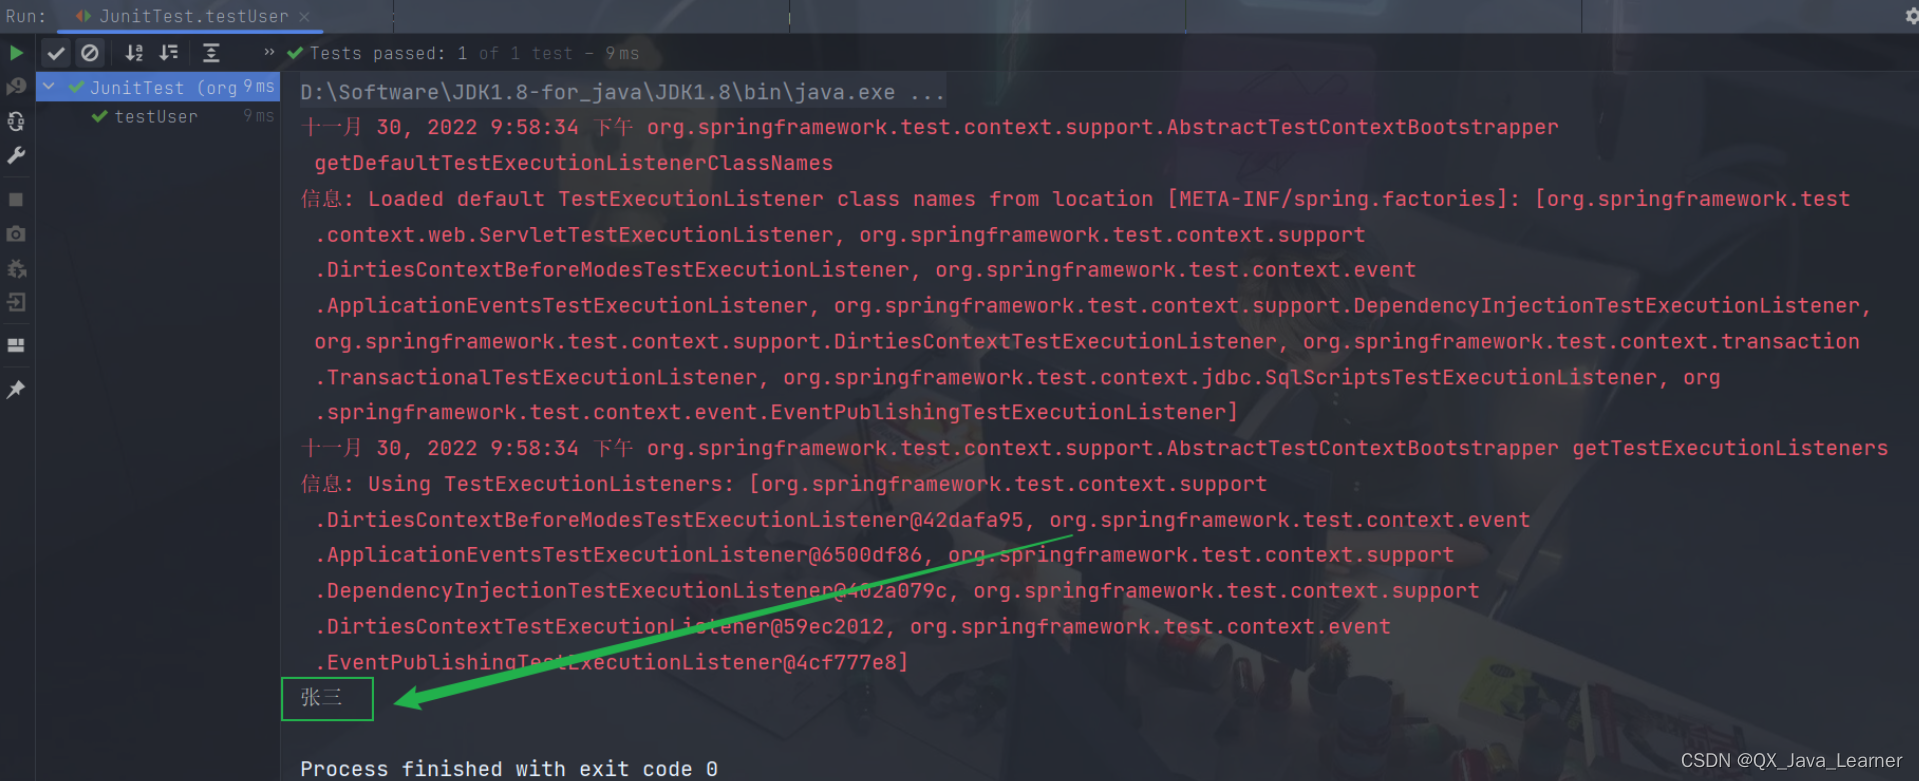
}运行效果:
Spring提供的方便主要是这几个注解:
@RunWith(SpringJUnit4ClassRunner.class) @ContextConfiguration("classpath:spring.xml")
在单元测试类上使用这两个注解之后,在单元测试类中的属性上可以使用@Autowired。比较方便
在JUnit5当中,可以使用Spring提供的以下两个注解,标注到单元测试类上,这样在类当中就可以使用@Autowired注解了
@ExtendWith(SpringExtension.class)
@ContextConfiguration("classpath:spring.xml")
二、Spring 集成 MyBatis
1、实验步骤
-
第一步:准备数据库表
-
使用t_act表(账户表)
-
-
第二步:IDEA中创建一个模块,并引入依赖
-
spring-context
-
spring-jdbc
-
mysql驱动
-
mybatis
-
mybatis-spring:mybatis提供的与spring框架集成的依赖
-
德鲁伊连接池
-
junit
-
-
第三步:基于三层架构实现,所以提前创建好所有的包
-
com.qiu.bank.mapper
-
com.qiu.bank.service
-
com.qiu.bank.service.impl
-
com.qiu.bank.pojo
-
-
第四步:编写pojo
-
Account,属性私有化,提供公开的setter getter和toString。
-
-
第五步:编写mapper接口
-
AccountMapper接口,定义方法
-
-
第六步:编写mapper配置文件
-
在配置文件中配置命名空间,以及每一个方法对应的sql。
-
-
第七步:编写service接口和service接口实现类
-
AccountService
-
AccountServiceImpl
-
-
第八步:编写jdbc.properties配置文件
-
数据库连接池相关信息
-
-
第九步:编写mybatis-config.xml配置文件
-
该文件可以没有,大部分的配置可以转移到spring配置文件中。
-
如果遇到mybatis相关的系统级配置,还是需要这个文件。
-
-
第十步:编写spring.xml配置文件
-
组件扫描
-
引入外部的属性文件
-
数据源
-
SqlSessionFactoryBean配置
-
注入mybatis核心配置文件路径
-
指定别名包
-
注入数据源
-
-
Mapper扫描配置器
-
指定扫描的包
-
-
事务管理器DataSourceTransactionManager
-
注入数据源
-
-
启用事务注解
-
注入事务管理器
-
-
-
第十一步:编写测试程序,并添加事务,进行测试
2、具体实现
<?xml version="1.0" encoding="UTF-8"?>
<project xmlns="http://maven.apache.org/POM/4.0.0"
         xmlns:xsi="http://www.w3.org/2001/XMLSchema-instance"
         xsi:schemaLocation="http://maven.apache.org/POM/4.0.0 http://maven.apache.org/xsd/maven-4.0.0.xsd">
    <modelVersion>4.0.0</modelVersion>

    <groupId>org.qiu</groupId>
    <artifactId>spring-016-sm</artifactId>
    <version>1.0-SNAPSHOT</version>

    <properties>
        <maven.compiler.source>8</maven.compiler.source>
        <maven.compiler.target>8</maven.compiler.target>
    </properties>

    <dependencies>
        <!--spring-context-->
        <dependency>
            <groupId>org.springframework</groupId>
            <artifactId>spring-context</artifactId>
            <version>5.3.23</version>
        </dependency>
        <!--spring-jdbc-->
        <dependency>
            <groupId>org.springframework</groupId>
            <artifactId>spring-jdbc</artifactId>
            <version>5.3.23</version>
        </dependency>
        <!--mysql驱动-->
        <dependency>
            <groupId>mysql</groupId>
            <artifactId>mysql-connector-java</artifactId>
            <version>8.0.30</version>
        </dependency>
        <!--mybatis-->
        <dependency>
            <groupId>org.mybatis</groupId>
            <artifactId>mybatis</artifactId>
            <version>3.5.10</version>
        </dependency>
        <!--mybatis-spring:mybatis提供的与spring框架集成的依赖-->
        <dependency>
            <groupId>org.mybatis</groupId>
            <artifactId>mybatis-spring</artifactId>
            <version>2.0.3</version>
        </dependency>
        <!--德鲁伊连接池-->
        <dependency>
            <groupId>com.alibaba</groupId>
            <artifactId>druid</artifactId>
            <version>1.2.15</version>
        </dependency>
        <!--junit-->
        <dependency>
            <groupId>junit</groupId>
            <artifactId>junit</artifactId>
            <version>4.13.2</version>
            <scope>test</scope>
        </dependency>
    </dependencies>

</project>
package org.qiu.spring.pojo;
/**
* @author 秋玄
* @version 1.0
* @email qiu_2022@aliyun.com
* @project Spring
* @package org.qiu.spring.pojo
* @date 2022-12-01-09:16
* @since 1.0
*/
public class Account {
private String actno;
private Double balance;
public Account() {
}
public Account(String actno, Double balance) {
this.actno = actno;
this.balance = balance;
}
@Override
public String toString() {
return "Account{" +
"actno='" + actno + '\'' +
", balance=" + balance +
'}';
}
public String getActno() {
return actno;
}
public void setActno(String actno) {
this.actno = actno;
}
public Double getBalance() {
return balance;
}
public void setBalance(Double balance) {
this.balance = balance;
}
}package org.qiu.spring.mapper;
import org.qiu.spring.pojo.Account;
import java.util.List;
/**
* 实现类不需要写,由 mybatis 通过动态代理实现即可
* @author 秋玄
* @version 1.0
* @email qiu_2022@aliyun.com
* @project Spring
* @package org.qiu.spring.mapper
* @date 2022-12-01-09:17
* @since 1.0
*/
public interface AccountMapper {
int insert(Account account);
int delete(String atcno);
int update(Account account);
Account selectByActno(String actno);
List<Account> selectAll();
}<?xml version="1.0" encoding="UTF-8"?>
<!DOCTYPE mapper
PUBLIC "-//mybatis.org//DTD Mapper 3.0//EN"
"http://mybatis.org/dtd/mybatis-3-mapper.dtd">
<mapper namespace="org.qiu.spring.mapper">
<insert id="insert">
insert into t_act values (#{actno},#{balance})
</insert>
<delete id="delete">
delete from t_act where actno = #{actno}
</delete>
<update id="update">
update t_act set balance = #{balance} where actno = #{actno}
</update>
<select id="selectByActno" resultType="Account">
select * from t_act where actno = #{actno}
</select>
<select id="selectAll" resultType="Account">
select * from t_act
</select>
</mapper>package org.qiu.spring.service;
import org.qiu.spring.pojo.Account;
import java.util.List;
/**
* @author 秋玄
* @version 1.0
* @email qiu_2022@aliyun.com
* @project Spring
* @package org.qiu.spring.service
* @date 2022-12-01-09:30
* @since 1.0
*/
public interface AccountService {
int save(Account account);
int deleteByActno(String actno);
int modify(Account account);
Account getByActno(String actno);
List<Account> getAll();
void transfer(String fromAccount,String toAccount,Double money);
}package org.qiu.spring.service.impl;
import org.qiu.spring.mapper.AccountMapper;
import org.qiu.spring.pojo.Account;
import org.qiu.spring.service.AccountService;
import org.springframework.beans.factory.annotation.Autowired;
import org.springframework.stereotype.Service;
import java.util.List;
/**
* @author 秋玄
* @version 1.0
* @email qiu_2022@aliyun.com
* @project Spring
* @package org.qiu.spring.service.impl
* @date 2022-12-01-09:33
* @since 1.0
*/
@Service("accountService")
public class AccountServiceImpl implements AccountService {
@Autowired
private AccountMapper accountMapper;
@Override
public int save(Account account) {
return accountMapper.insert(account);
}
@Override
public int deleteByActno(String actno) {
return accountMapper.delete(actno);
}
@Override
public int modify(Account account) {
return accountMapper.update(account);
}
@Override
public Account getByActno(String actno) {
return accountMapper.selectByActno(actno);
}
@Override
public List<Account> getAll() {
return accountMapper.selectAll();
}
@Override
public void transfer(String fromAccount, String toAccount, Double money) {
Account from = accountMapper.selectByActno(fromAccount);
if (from.getBalance() < money) {
throw new RuntimeException("余额不足");
}
Account to = accountMapper.selectByActno(toAccount);
from.setBalance(from.getBalance() - money);
to.setBalance(to.getBalance() + money);
int count = accountMapper.update(from);
count += accountMapper.update(to);
if (count != 2){
throw new RuntimeException("转账失败");
}
}
}jdbc.driver=com.mysql.cj.jdbc.Driver
jdbc.url=jdbc:mysql://localhost:3306/mvc
jdbc.username=root
jdbc.password=mysql<?xml version="1.0" encoding="UTF-8"?>
<!DOCTYPE configuration
PUBLIC "-//mybatis.org//DTD Config 3.0//EN"
"http://mybatis.org/dtd/mybatis-3-config.dtd">
<configuration>
<!--打印 mybatis 日志信息-->
<settings>
<setting name="logImpl" value="STDOUT_LOGGING"/>
</settings>
</configuration><?xml version="1.0" encoding="UTF-8"?>
<beans xmlns="http://www.springframework.org/schema/beans"
xmlns:xsi="http://www.w3.org/2001/XMLSchema-instance"
xmlns:context="http://www.springframework.org/schema/context"
xmlns:tx="http://www.springframework.org/schema/tx"
xsi:schemaLocation="http://www.springframework.org/schema/beans
http://www.springframework.org/schema/beans/spring-beans.xsd
http://www.springframework.org/schema/context
https://www.springframework.org/schema/context/spring-context.xsd
http://www.springframework.org/schema/tx
http://www.springframework.org/schema/tx/spring-tx.xsd">
<!--组件扫描-->
<context:component-scan base-package="org.qiu.spring"/>
<!--引入外部属性文件-->
<context:property-placeholder location="jdbc.properties"/>
<!--数据源-->
<bean id="dataSuorce" class="com.alibaba.druid.pool.DruidDataSource">
<property name="driverClassName" value="${jdbc.driver}"/>
<property name="url" value="${jdbc.url}"/>
<property name="username" value="${jdbc.username}"/>
<property name="password" value="${jdbc.password}"/>
</bean>
<!--SqlSessionFactoryBean-->
<bean class="org.mybatis.spring.SqlSessionFactoryBean">
<!--注入数据源-->
<property name="dataSource" ref="dataSuorce"/>
<!--指定 mybatis 核心配置文件-->
<property name="configLocation" value="mybatis-config.xml"/>
<!--指定别名包-->
<property name="typeAliasesPackage" value="org.qiu.spring.pojo"/>
</bean>
<!--Mapper扫描配置器,扫描Mapper接口,生成代理类-->
<bean class="org.mybatis.spring.mapper.MapperScannerConfigurer">
<property name="basePackage" value="org.qiu.spring.mapper"/>
</bean>
<!--事务管理器-->
<bean id="txManaget" class="org.springframework.jdbc.datasource.DataSourceTransactionManager">
<property name="dataSource" ref="dataSuorce"/>
</bean>
<!--启动事务注解-->
<tx:annotation-driven transaction-manager="txManaget"/>
</beans>由于使用了事务,所以需要给service添加事务注解
@Transactional
@Service("accountService")
public class AccountServiceImpl implements AccountService {
	\\ ......
}
import org.junit.Test;
import org.qiu.spring.service.AccountService;
import org.springframework.context.ApplicationContext;
import org.springframework.context.support.ClassPathXmlApplicationContext;
/**
* @author 秋玄
* @version 1.0
* @email qiu_2022@aliyun.com
* @project Spring
* @package PACKAGE_NAME
* @date 2022-12-01-10:04
* @since 1.0
*/
public class SMTest {
@Test
public void testSM(){
ApplicationContext app = new ClassPathXmlApplicationContext("spring.xml");
AccountService service = app.getBean("accountService", AccountService.class);
try {
service.transfer("act001","act002",10000.0);
System.out.println("转账成功");
} catch (Exception e){
e.printStackTrace();
}
}
}运行效果:
Logging initialized using 'class org.apache.ibatis.logging.stdout.StdOutImpl' adapter.
十二月 01, 2022 10:16:27 上午 com.alibaba.druid.support.logging.JakartaCommonsLoggingImpl info
信息: {dataSource-1} inited
Creating a new SqlSession
Registering transaction synchronization for SqlSession [org.apache.ibatis.session.defaults.DefaultSqlSession@2f666ebb]
JDBC Connection [com.mysql.cj.jdbc.ConnectionImpl@15a04efb] will be managed by Spring
==>  Preparing: select * from t_act where actno = ?
==> Parameters: act001(String)
<==    Columns: actno, balance
<==        Row: act001, 40000.0
<==      Total: 1
Releasing transactional SqlSession [org.apache.ibatis.session.defaults.DefaultSqlSession@2f666ebb]
Fetched SqlSession [org.apache.ibatis.session.defaults.DefaultSqlSession@2f666ebb] from current transaction
==>  Preparing: select * from t_act where actno = ?
==> Parameters: act002(String)
<==    Columns: actno, balance
<==        Row: act002, 10000.0
<==      Total: 1
Releasing transactional SqlSession [org.apache.ibatis.session.defaults.DefaultSqlSession@2f666ebb]
Fetched SqlSession [org.apache.ibatis.session.defaults.DefaultSqlSession@2f666ebb] from current transaction
==>  Preparing: update t_act set balance = ? where actno = ?
==> Parameters: 30000.0(Double), act001(String)
<==    Updates: 1
Releasing transactional SqlSession [org.apache.ibatis.session.defaults.DefaultSqlSession@2f666ebb]
Fetched SqlSession [org.apache.ibatis.session.defaults.DefaultSqlSession@2f666ebb] from current transaction
==>  Preparing: update t_act set balance = ? where actno = ?
==> Parameters: 20000.0(Double), act002(String)
<==    Updates: 1
Releasing transactional SqlSession [org.apache.ibatis.session.defaults.DefaultSqlSession@2f666ebb]
Transaction synchronization committing SqlSession [org.apache.ibatis.session.defaults.DefaultSqlSession@2f666ebb]
Transaction synchronization deregistering SqlSession [org.apache.ibatis.session.defaults.DefaultSqlSession@2f666ebb]
Transaction synchronization closing SqlSession [org.apache.ibatis.session.defaults.DefaultSqlSession@2f666ebb]
转账成功
3、Spring 配置文件的 import
spring 配置文件有多个,并且可以在 spring 的核心配置文件中使用 import 进行引入,我们可以将组件扫描单独定义到一个配置文件中,如下:
<?xml version="1.0" encoding="UTF-8"?>
<beans xmlns="http://www.springframework.org/schema/beans"
       xmlns:xsi="http://www.w3.org/2001/XMLSchema-instance"
       xmlns:context="http://www.springframework.org/schema/context"
       xsi:schemaLocation="http://www.springframework.org/schema/beans
                           http://www.springframework.org/schema/beans/spring-beans.xsd
                           http://www.springframework.org/schema/context
                           https://www.springframework.org/schema/context/spring-context.xsd">

    <!--组件扫描-->
    <context:component-scan base-package="com.qiu.bank"/>

</beans>
然后在核心配置文件中引入:
<?xml version="1.0" encoding="UTF-8"?>
<beans xmlns="http://www.springframework.org/schema/beans"
       xmlns:xsi="http://www.w3.org/2001/XMLSchema-instance"
       xmlns:context="http://www.springframework.org/schema/context"
       xmlns:tx="http://www.springframework.org/schema/tx"
       xsi:schemaLocation="http://www.springframework.org/schema/beans
                           http://www.springframework.org/schema/beans/spring-beans.xsd
                           http://www.springframework.org/schema/context
                           https://www.springframework.org/schema/context/spring-context.xsd
                           http://www.springframework.org/schema/tx
                           http://www.springframework.org/schema/tx/spring-tx.xsd">

    <!--引入其他的spring配置文件-->
    <import resource="common.xml"/>

</beans>
注意:在实际开发中,service单独配置到一个文件中,dao单独配置到一个文件中,然后在核心配置文件中引入,养成好习惯
一 叶 知 秋,奥 妙 玄 心


 459
459

 被折叠的 条评论
为什么被折叠?
被折叠的 条评论
为什么被折叠?
 到【灌水乐园】发言


