


Angular 路由
概念
在单页应用中,可以通过显示或隐藏与特定组件相对应的部分来更改用户看到的内容,而不用去服务器获取新页面。用户执行应用程序任务时,他们需要在定义好的不同视图之间移动。
要处理从一个视图到下一个视图的导航,需要使用 Angular Router。 Router 会通过将浏览器 URL 解释为更改视图的操作指令来启用导航。
官方文档
基本配置
-
创建2个组件:ng g c route-study/crisis-list ; ng g c route-study/hero-list
-
在app.moudle.ts中配置路由:

-
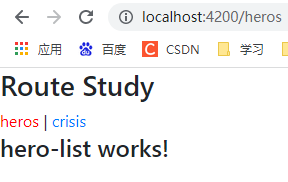
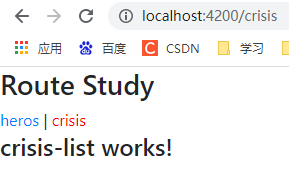
在app.component.html中设置路由:
<h3>Route Study</h3>
<div>
    <!-- routerLink定义路由;  routerLinkActive 设置当前路由添加样式类-->
    <a routerLink="/heros" routerLinkActive="active">heros</a> |
    <a routerLink="/crisis" routerLinkActive="active">crisis</a>
    <!-- 定义路由切换组件填充的位置 -->
    <router-outlet></router-outlet>
</div>
配置路由模块
大型项目如果将路由到放在app.module.ts中会导致文件很大,因此可以按模块划分路由。
- 创建2个模块:ng g m route-study/hero --routing ; ng g m route-study/crisis --routing
- 将根模块中 定义的 heros 和 crisis 路由分别抽取到 hero 和crisis模块的路由中:
import { NgModule } from '@angular/core';
import { Routes, RouterModule } from '@angular/router';
import { HeroListComponent } from './hero-list/hero-list.component';


const routes: Routes = [
  { path: "heros", component: HeroListComponent }
];

@NgModule({
  // 子路由中注册路由使用的RouterModule.forChild(routes)
  imports: [RouterModule.forChild(routes)],
  exports: [RouterModule]
})
export class HeroRoutingModule { }
import { NgModule } from '@angular/core';
import { Routes, RouterModule } from '@angular/router';
import { CrisisListComponent } from './crisis-list/crisis-list.component';


const routes: Routes = [
  { path: "crisis", component: CrisisListComponent }
];

@NgModule({
  // 子路由中注册路由使用的RouterModule.forChild(routes)
  imports: [RouterModule.forChild(routes)],
  exports: [RouterModule]
})
export class CrisisRoutingModule { }
- 默认路由提取到根路由文件中 app-routing.module.ts:
import { NgModule } from '@angular/core';
import { Routes, RouterModule } from '@angular/router';


const routes: Routes = [
  // 没有路由时默认跳转到heros
  { path: "", redirectTo: "heros", pathMatch: "full"},
  // 通配符路由,上面的路由都匹配不到时默认跳转到heros
  { path: "**", redirectTo: "heros"},
];

@NgModule({
  // 根路由中注册路由使用的RouterModule.forRoot(routes)
  imports: [RouterModule.forRoot(routes)],
  exports: [RouterModule]
})
export class AppRoutingModule { }
- 在app.module.ts中引入两个子模块:
@NgModule({
  declarations: [
	...
  ],
  imports: [
    BrowserModule,
    // 子模块需要在AppRoutingModule之前引入,
    // 否则会导致AppRoutingModule中配置的通配符匹配所有路由
    HeroModule,
    CrisisModule,
    AppRoutingModule,
    FormsModule,
  ],
  providers: [],
  bootstrap: [AppComponent]
})
路由跳转
html中跳转
参考前面的章节
<a routerLink="/heros" routerLinkActive="active">heros</a> |
<a routerLink="/crisis" routerLinkActive="active">crisis</a>
代码中跳转
import { Component} from '@angular/core';
import { Router } from '@angular/router';


@Component({
  selector: 'app-root',
  templateUrl: './app.component.html',
  styleUrls: ['./app.component.css']
})
export class AppComponent {

  // 注入路由模块
  constructor(private router: Router) {
  }

  toHeroes() {
    // 绝对路径跳转
    // this.router.navigateByUrl("/heroes");
    // 相对路径跳转,如果没有传入起始路由,那么会默认将根路由作为起始路由
    this.router.navigate(["/heroes"]);
  }

  toCrisis() {
    this.router.navigateByUrl("/crisis");
    // this.router.navigate(["/crisis"]);
  }
}
<h3>Route Study</h3>
<div>
	<!-- 定义click事件,在事件中控制跳转 -->
    <a (click)="toHeroes()" routerLinkActive="active">heros</a> |
    <a (click)="toCrisis()" routerLinkActive="active">heros</a>

    <!-- 定义路由切换组件填充的位置 -->
    <router-outlet></router-outlet>
</div>
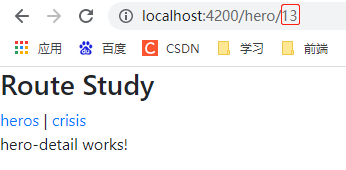
路由传参
创建 hero-detail组件,用于展示hero详情。点击具体hero-list中的hero时传递hero.id,跳转到对应的hero-detail页面。
html中跳转传参
<div class="hero-list">
    <h2>英雄列表</h2>
    <ul class="list-group">
      <li *ngFor="let hero of heroes$ | async"
          class="list-group-item"
          [class.active]="selectedId == hero.id"
          (click)="onSelect(hero.id)">
          {{ hero.name }}
          <a [routerLink]="['/hero', hero.id]" routerLinkActive="active"></a>
      </li>
    </ul>
  </div>
代码中跳转传参
<div class="hero-list">
    <h2>英雄列表</h2>
    <ul class="list-group">
      <!-- 英雄列表 click 事件中跳转到英雄详情 -->
      <li
          *ngFor="let hero of heroes$ | async"
          class="list-group-item"
          [class.active]="selectedId == hero.id"
          (click)="onSelect(hero.id)">{{ hero.name }}</li>
    </ul>
  </div>
  onSelect(id: number) {
    this.selectedId = id;
    // this.router.navigateByUrl("/hero/" + id);
    this.router.navigate(["/hero", id])
  }
获取路由参数
- 跳转到英雄详情页面时,需要拿到英雄id,然后请求英雄详情。
import { Component, OnInit } from '@angular/core';
import { ActivatedRoute } from '@angular/router';
import { Observable } from 'rxjs';
import { switchMap } from 'rxjs/operators';
import { Hero } from '../hero';
import { HeroService } from '../hero.service';


@Component({
  selector: 'app-hero-detail',
  templateUrl: './hero-detail.component.html',
  styleUrls: ['./hero-detail.component.css']
})
export class HeroDetailComponent implements OnInit {
  public hero$: Observable<Hero>

  constructor(
    // 路由信息通过 ActivatedRoute 获取
    private route: ActivatedRoute,
    private heroService: HeroService) { }

  ngOnInit(): void {

    // 1. paramMap 是 map类型,通过params.get("id") 获取其id参数
    // 2. paramMap 本身是Observable类型,通过switchMap转换为Hero Observable 类型获取英雄详情
    this.hero$ = this.route.paramMap.pipe(
      switchMap(params => {
        return this.heroService.getHero(params.get("id"))
      })
    )
  }

}
<div *ngIf="hero$ | async as hero">
    <h2>英雄详情</h2>
    <h3>"{{ hero.name }}"</h3>
    <div>
      <label>Id: </label>{{ hero.id }}</div>
    <div>
      <label>Name: </label>
      <input [(ngModel)]="hero.name" placeholder="name"/>
    </div>
    <p>
  <!--    <button (click)="back(hero.id)" class="btn btn-secondary">Back to Heroes</button>-->
      <!-- <button [routerLink]="['/heroes', { id: hero.id }]" class="btn btn-secondary">Back to Heroes</button> -->
    </p>
  </div>

- 英雄详情页面返回英雄列表页面,英雄列表页面需要高亮显示之前选中的英雄,因此在返回时需要传参给英雄列表页面。
<!-- hero.detail.html -->
<div *ngIf="hero$ | async as hero">
    <h2>英雄详情</h2>
    <h3>"{{ hero.name }}"</h3>
    <div>
      <label>Id: </label>{{ hero.id }}</div>
    <div>
      <label>Name: </label>
      <input [(ngModel)]="hero.name" placeholder="name"/>
    </div>
    <p>
     <!-- 通过点击事件或routerLink跳转回hero-list页面 -->
     <button (click)="back(hero.id)" class="btn btn-secondary">Back to Heroes</button>
      <!-- <button [routerLink]="['/heroes', { id: hero.id }]" class="btn btn-secondary">Back to Heroes</button> -->
    </p>
  </div>
// hero.detail.ts

// 定义back方法通过点击事件跳转回hero-list页面, 通过{id} 传参不会拼接/heroes/id,而是/heroes;id=id
back(id: number) {
  this.router.navigate(["/heroes", {id}])
}
// hero.list.ts

ngOnInit(): void {

  this.heroes$ = this.heroService.getHeroes();
  // 英雄列表组件初始化时,如果路由中没有id则默认选择第一个hero高亮
  this.heroes$.subscribe(val => {
    // 获取路由中的id参数
    this.route.paramMap.subscribe(params => {
      this.selectedId = params.get("id") ? +params.get("id") : val[0]["id"];
    })
  });
}

- 获取查询字符串参数:
  ngOnInit(): void {

    // 获取查询字符串,queryParams返回的是对象,queryParamMap返回的是map类型,两种方式读取参数不一样
    this.route.queryParams.subscribe(res => {
      console.log("queryParams", typeof res, res, res.name, res["name"]);
    })
    this.route.queryParamMap.subscribe(res => {
      console.log("queryParamMap", typeof res, res, res.get("name"));
    })
  }
- 简写方式:
官方文档
在获取路由参数时,如果只是获取路由的参数,则可以通过snapshot 属性获取。
  ngOnInit(): void {

    this.heroes$ = this.heroService.getHeroes();
    // 初始化时,如果路由中没有id则默认选择第一个hero高亮
    this.heroes$.subscribe(val => {
      // 获取路由中的id参数
      // this.route.paramMap.subscribe(params => {
      //   this.selectedId = params.get("id") ? +params.get("id") : val[0]["id"];
      // })

      // 在获取路由参数时,如果只是获取路由的参数,则可以通过 snapshot 属性获取
      let id = this.route.snapshot.paramMap.get("id");
      this.selectedId = id ? +id : val[0]["id"];
    });

    // 获取查询字符串,queryParams返回的是对象,queryParamMap返回的是map类型,两种方式读取参数不一样
    let res = this.route.snapshot.queryParams;
    console.log("queryParams", typeof res, res, res.name, res["name"]);

    let res1 = this.route.snapshot.queryParamMap;
    console.log("queryParamMap", typeof res1, res1, res1.get("name"));
  }
嵌套路由
- 创建组件 : ng g c route-study/crisis/crisis-center ;ng g c route-study/crisis/crisis-detail
- 配置路由 CrisisRoutingModule :
import { NgModule } from '@angular/core';
import { Routes, RouterModule } from '@angular/router';
import { CrisisCenterComponent } from './crisis-center/crisis-center.component';
import { CrisisListComponent } from './crisis-list/crisis-list.component';


const routes: Routes = [
  {
    // 父级路由
    path: "crisis-center",
    component: CrisisCenterComponent ,
    // children 中设置子路由
    children: [
      {
        path: "list",
        component: CrisisListComponent ,
        children: [
          {
            // crisis-center/list/3
            path: ":id",
            component: CrisisDetailComponent ,
          }
        ]
      },
      // 默认加载list子路由,重定向到 crisis-center/list
      {
        path: "",
        redirectTo: "list",
        pathMatch: "full"
      }
    ]
  }
];

@NgModule({
  imports: [RouterModule.forChild(routes)],
  exports: [RouterModule]
})
export class CrisisRoutingModule { }
- 在危机列表中设置子路由的插槽:
<div class="hero-list">
    <h4>危机列表</h4>
    <ul class="list-group">
      <li
          *ngFor="let crisis of crises$ | async"
          class="list-group-item"
          [class.active]="selectedId == crisis.id"
          (click)="onSelect(crisis.id)">{{ crisis.name }}</li>
    </ul>
</div>
<!-- 设置子路由插槽 -->
<router-outlet></router-outlet>
- 在子路由中获取传递的id参数:
// CrisisDetailComponent

import { Component, OnInit } from '@angular/core';
import { ActivatedRoute } from '@angular/router';

@Component({
  selector: 'app-crisis-detail',
  templateUrl: './crisis-detail.component.html',
  styleUrls: ['./crisis-detail.component.css']
})
export class CrisisDetailComponent implements OnInit {

  crisisId: string;
  constructor(private route: ActivatedRoute) { }

  ngOnInit(): void {
    // 获取路由id参数
    this.crisisId = this.route.snapshot.paramMap.get("id");
  }

}

相对路由
如果路由跳转时都使用绝对路径导航,比如跳转某个危机详情时路由为:/crisis-center/list/3,当crisis-center发生改变时需要改所有使用绝对路径导航的地方。

下面的例子中,危机详情页面增加一个按钮跳转回父级路由危机列表页面:
<div>
    <h5>危机详情:Id is {{ crisisId }}</h5>

    <!-- <button [routerLink]="['../', {id: crisisId}]" class="btn btn-secondary">Back to Heroes</button> -->
    <!-- 在事件中跳转回父路由 -->
    <button (click)="back()" class="btn btn-secondary">Back to Heroes</button>
</div>
  back() {
    // 相对路由跳转需要指定当前所在路由,否则会默认当前路由是根路由
    this.router.navigate(["../", { id: this.crisisId }], { relativeTo: this.route })
  }

用命名出口(outlet)显示多重路由
考虑一种场景,一个页面分为A和B两块。A中的按钮可以切换A的不同子路由显示不同内容,但是切换时不会影响B的内容。
比如: A中 路由/crisis-center/A/1 切换到 /crisis-center/A/2, 另一边B/crisis-center/B不变。

前面使用 < router-outlet>< /router-outlet > 作为路由对应视图的插槽,要达到上面所提场景,使用一个插槽显示是不行的。那么就需要使用两个同级的 < router-outlet>< /router-outlet > 分别显示不同路由的视图。
- 添加带有名称的路由插槽:
<!-- app.component.html -->
<div>
    <a routerLink="/heroes" routerLinkActive="active">heros</a> |
    <a routerLink="/crisis-center" routerLinkActive="active">crisis</a> |
    <router-outlet></router-outlet>
</div>
<!-- 添加 name="popup" 的 router-outlet -->
<router-outlet name="popup"></router-outlet>
- 创建 compose-message 组件:ng generate c route-study/compose-message
<h3>Contact Crisis Center</h3>
<div *ngIf="details">
  {{ details }}
</div>
<div>
  <div>
    <label for="message">Enter your message: </label>
  </div>
  <div>
    <textarea id="message" [(ngModel)]="message" rows="10" cols="35" [disabled]="sending"></textarea>
  </div>
</div>
<p *ngIf="!sending">
  <button (click)="send()">Send</button>
  <button (click)="cancel()">Cancel</button>
</p>
import { Component, HostBinding } from '@angular/core';
import { Router } from '@angular/router';

@Component({
  selector: 'app-compose-message',
  templateUrl: './compose-message.component.html',
  styleUrls: ['./compose-message.component.css']
})
export class ComposeMessageComponent {
  details = '';
  message = '';
  sending = false;

  constructor(private router: Router) {}

  send() {
    this.sending = true;
    this.details = 'Sending Message...';

    setTimeout(() => {
      this.sending = false;
      this.closePopup();
    }, 1000);
  }

  cancel() {
    this.closePopup();
  }

  closePopup() {
    // Providing a `null` value to the named outlet
    // clears the contents of the named outlet
    this.router.navigate([{ outlets: { popup: null }}]);
  }
}
textarea {
    width: 100%;
    margin-top: 1rem;
    font-size: 1.2rem;
    box-sizing: border-box;
}
- 添加路由:
// app-routing.module.ts

const routes: Routes = [
  // 没有路由时默认跳转到heros
  { path: "", redirectTo: "heros", pathMatch: "full"},
  // 通配符路由,上面的路由都匹配不到时默认跳转到heros
  { path: "**", redirectTo: "heros"},

  {
    path: 'compose',
    component: ComposeMessageComponent,
    // outlet 设置成了 'popup',对应的组件会显示在 <router-outlet name="popup"></router-outlet> 中
    outlet: 'popup'
  },
];
- 添加路由跳转按钮:
<div>
    <a routerLink="/heroes" routerLinkActive="active">heros</a> |
    <a routerLink="/crisis-center" routerLinkActive="active">crisis</a> |
    <!-- routerLink 数组包含一个只有一个 outlets 属性的对象,它的值是另一个对象,这个对象以一个或多个路由的出口名作为属性名。
    在这里,它只有一个出口名“popup”,它的值则是另一个链接参数数组,指向 compose 路由。 -->
    <a [routerLink]="[{ outlets: { popup: ['compose'] } }]">Contact</a>
    <router-outlet></router-outlet>
</div>
<!-- 添加 name="popup" 的 router-outlet -->
<router-outlet name="popup"></router-outlet>

-
第二路由:
完成上面的步骤后,在点击Contact时,原本的路由后面会添加 (popup:compose)表示第二路由,不管点击heros还是cirsis都不会影响第二路由,主路由和第二路由之间互不影响,因此可以保证第二路由所展示的页面一直存在。


-
清除第二路由:
单击 “send” 或 “cancel” 按钮可以清除第二路由弹出的视图。
closePopup() 函数会使用 Router.navigate() 方法强制导航,并传入一个链接参数数组。就像在 AppComponent 中绑定到的 Contact RouterLink 一样,它也包含了一个带 outlets 属性的对象。 outlets 属性的值是另一个对象,该对象用一些出口名称作为属性名。 唯一的命名出口是 ‘popup’。
但这次,‘popup’ 的值是 null。null 不是一个路由,但却是一个合法的值。 把 popup 这个 RouterOutlet 设置为 null 会清除该出口,并且从当前 URL 中移除第二路由 popup。
  closePopup() {
    // Providing a `null` value to the named outlet
    // clears the contents of the named outlet
    this.router.navigate([{ outlets: { popup: null }}]);
  }

路由守卫
现在,任何用户都能在任何时候导航到任何地方。但有时候出于种种原因需要控制对该应用的不同部分的访问。可能包括如下场景:
- 该用户可能无权导航到目标组件。
- 可能用户得先登录(认证)。
- 在显示目标组件前,你可能得先获取某些数据。
- 在离开组件前,你可能要先保存修改。
- 你可能要询问用户:你是否要放弃本次更改,而不用保存它们?
可以往路由配置中添加守卫,来处理这些场景。
路由守卫返回一个值,以控制路由器的行为:
- 如果它返回 true,导航过程会继续
- 如果它返回 false,导航过程就会终止,且用户留在原地。
- 如果它返回 UrlTree,则取消当前的导航,并且开始导航到返回的这个 UrlTree.

路由器可以支持多种守卫接口:
- 用CanActivate来处理导航到某路由的情况。
- 用CanActivateChild来处理导航到某子路由的情况。
- 用CanDeactivate来处理从当前路由离开的情况。
- 用Resolve在路由激活之前获取路由数据。
- 用CanLoad来处理异步导航到某特性模块的情况。

CanActivate :需要身份验证
应用程序通常会根据访问者来决定是否授予某个特性区的访问权。 你可以只对已认证过的用户或具有特定角色的用户授予访问权,还可以阻止或限制用户访问权,直到用户账户激活为止。
准备工作
- 创建以下模块和组件:
ng generate module admin --routing
ng generate component admin/admin-dashboard
ng generate component admin/admin
ng generate component admin/manage-crises
ng generate component admin/manage-heroes

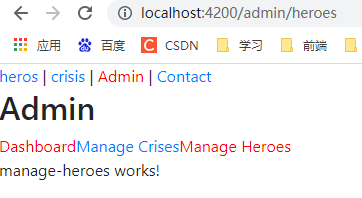
<!-- admin.component.html -->

<h2>Admin</h2>
<nav>
  <!-- 虽然管理仪表盘中的 RouterLink 只包含一个没有其它 URL 段的斜杠 /,但它能匹配管理特性区下的任何路由。 但你只希望在访问 Dashboard 路由时才激活该链接。 往 Dashboard 这个 routerLink 上添加另一个绑定 [routerLinkActiveOptions]="{ exact: true }", 这样就只有当用户导航到 /admin 这个 URL 时才会激活它,而不会在导航到它的某个子路由时。-->
  <a routerLink="./" routerLinkActive="active" [routerLinkActiveOptions]="{ exact: true }">Dashboard</a>
  <a routerLink="./crises" routerLinkActive="active">Manage Crises</a>
  <a routerLink="./heroes" routerLinkActive="active">Manage Heroes</a>
</nav>
<router-outlet></router-outlet>
如果不加routerLinkActiveOptions 就会导致如下情况,导航admin/heroes时也可以匹配到 ./,dashboard也是被激活的。
// admin-routing.module.ts

// AdminComponent 下的子路由有一个 path 和一个 children 属性,但是它没有使用 component,这就定义了一个无组件路由。
// 要把 Crisis Center 管理下的路由分组到 admin 路径下,组件是不必要的。此外,无组件路由可以更容易地保护子路由。

const adminRoutes: Routes = [
  {
    path: 'admin',
    component: AdminComponent,
    children: [
      {
        path: '',
        children: [
          { path: 'crises', component: ManageCrisesComponent },
          { path: 'heroes', component: ManageHeroesComponent },
          { path: '', component: AdminDashboardComponent }
        ]
      }
    ]
  }
];

创建路由守卫
编写一个 CanActivate() 守卫,将正在尝试访问管理组件匿名用户重定向到登录页。
- 在 auth 文件夹中生成一个 AuthGuard:ng generate guard auth/auth;
- 在admin-routing.module.ts 中引入 AuthGuard:
const routes: Routes = [
  {
    path: 'admin',
    component: AdminComponent,
    // /admin下的路由都需要经过 AuthGuard
    canActivate: [AuthGuard],
    children: [
      {
        path: '',
        children: [
          { path: 'crises', component: ManageCrisesComponent },
          { path: 'heroes', component: ManageHeroesComponent },
          { path: '', component: AdminDashboardComponent }
        ]
      }
    ]
  }
];
- 创建auth.service,对外提供login/logout 服务:ng generate service route-study/auth/auth
import { Injectable } from '@angular/core';

import { Observable, of } from 'rxjs';
import { tap, delay } from 'rxjs/operators';

@Injectable({
  providedIn: 'root',
})
export class AuthService {
  // 记录当前登录状态
  isLoggedIn = false;

  // 保存登陆前的路由 url,登陆后跳转回之前的url
  redirectUrl: string | null = null;

  login(): Observable<boolean> {
    return of(true).pipe(
      // 延迟1s 模拟登录
      delay(1000),
      // 将登录状态置为 true
      tap(() => this.isLoggedIn = true)
    );
  }

  logout(): void {
    // 将登录状态置为 false
    this.isLoggedIn = false;
  }
}
- 在 auth.guard 中调用auth.service,校验是否登录:
import { Injectable } from '@angular/core';
import { CanActivate, ActivatedRouteSnapshot, RouterStateSnapshot, UrlTree, Router } from '@angular/router';
import { AuthService } from './auth.service';

@Injectable({
  providedIn: 'root'
})
export class AuthGuard implements CanActivate {
  constructor(private authService: AuthService, private router: Router) {}
  // ActivatedRouteSnapshot 包含了即将被激活的路由,
  // RouterStateSnapshot 包含了该应用即将到达的状态
  canActivate(
    next: ActivatedRouteSnapshot,
    state: RouterStateSnapshot): true|UrlTree {
    // 记录当前url
    const url: string = state.url;

    return this.checkLogin(url);
  }

  checkLogin(url: string): true|UrlTree {
    // 如果已登录,则返回ture,当前路由守卫校验成功
    if (this.authService.isLoggedIn) { return true; }

    // 将当前 url 保存到服务中,登录成功后会跳转回原页面
    this.authService.redirectUrl = url;

    // 重定向到登录页面
    return this.router.parseUrl('/login');
  }

}
- 创建登录组件:ng generate component route-study/auth/login
<!-- login.component.html -->
<h2>Login</h2>
<p>{{message}}</p>
<p>
  <button (click)="login()"  *ngIf="!authService.isLoggedIn">Login</button>
  <button (click)="logout()" *ngIf="authService.isLoggedIn">Logout</button>
</p>
// login.component.ts

import { Component } from '@angular/core';
import { Router } from '@angular/router';
import { AuthService } from '../auth.service';

@Component({
  selector: 'app-login',
  templateUrl: './login.component.html',
  styleUrls: ['./login.component.css']
})
export class LoginComponent {
  message: string;

  constructor(public authService: AuthService, public router: Router) {
    this.message = this.getMessage();
  }

  getMessage() {
    return 'Logged ' + (this.authService.isLoggedIn ? 'in' : 'out');
  }

  login() {
    this.message = 'Trying to log in ...';

	// 调用登录接口
    this.authService.login().subscribe(() => {
      this.message = this.getMessage();
      if (this.authService.isLoggedIn) {
        // Usually you would use the redirect URL from the auth service.
        // However to keep the example simple, we will always redirect to `/admin`.
        const redirectUrl = '/admin';

        // Redirect the user
        this.router.navigate([redirectUrl]);
      }
    });
  }

  logout() {
    this.authService.logout();
    this.message = this.getMessage();
  }
}
- 注册 /login 路由:
// app-routing.module.ts

const routes: Routes = [
  {
    path: "login",
    component: LoginComponent
  },
  // 没有路由时默认跳转到heros
  { path: "", redirectTo: "heroes", pathMatch: "full"},
  // 通配符路由,上面的路由都匹配不到时默认跳转到heros
  { path: "**", redirectTo: "heros"},
  {
    path: 'compose',
    component: ComposeMessageComponent,
    outlet: 'popup'
  },
];
点击 Admin 导航时,会跳转到登录页面:

点击登录后,路由校验通过,进入Admin页面

CanActivateChild:保护子路由
CanActivateChild 守卫和 CanActivate 守卫很像。 它们的区别在于,CanActivateChild 会在任何子路由被激活之前运行。
如果有多个子路由,要保护这些子路由,要么在每个子路由上添加CanActivate ,这样很麻烦。简单的办法时创建一个“无组件路由”,然将CanActivateChild 配置在无组件路由上保护子路由。
实现
扩展 AuthGuard 以便在 admin 路由之间导航时提供保护。 打开 auth.guard.ts 并从路由库中导入 CanActivateChild 接口。
import { Injectable } from '@angular/core';
import { CanActivate, ActivatedRouteSnapshot, RouterStateSnapshot, UrlTree, Router, CanActivateChild } from '@angular/router';
import { AuthService } from './auth.service';

@Injectable({
  providedIn: 'root'
})
export class AuthGuard implements CanActivate, CanActivateChild {
  constructor(private authService: AuthService, private router: Router) {}

  canActivate(
    next: ActivatedRouteSnapshot,
    state: RouterStateSnapshot): true|UrlTree {
    const url: string = state.url;

    return this.checkLogin(url);
  }
  // 实现canActivateChild接口
  canActivateChild(childRoute: ActivatedRouteSnapshot, state: RouterStateSnapshot): true|UrlTree {
    return this.canActivate(childRoute, state);
  }

  checkLogin(url: string): true|UrlTree {
    if (this.authService.isLoggedIn) { return true; }

    // Store the attempted URL for redirecting
    this.authService.redirectUrl = url;

    // Redirect to the login page
    return this.router.parseUrl('/login');
  }

}
const adminRoutes: Routes = [
  {
    path: 'admin',
    component: AdminComponent,
    canActivate: [AuthGuard],
    children: [
      {
        path: '',
        // 在无组件路由中添加 canActivateChild ,保护下面的子路由,而不是为每个路由单独添加这个 AuthGuard。
        canActivateChild: [AuthGuard],
        children: [
          { path: 'crises', component: ManageCrisesComponent },
          { path: 'heroes', component: ManageHeroesComponent },
          { path: '', component: AdminDashboardComponent }
        ]
      }
    ]
  }
];
CanDeactivate:处理未保存的更改
当用户要离开某个导航时,如果用户修改了其中某些字段,你可以让用户自己决定该怎么处理这些未保存的更改。
如果用户选择了取消,就不跳转到其他页面,并允许更多改动;如果用户选择了确认,那就进行保存后离开当前页面。
// 1. can-deactivate 守卫,调用组件中定义的canDeactivate 方法,由组件自己控制是否可以离开

import { Injectable } from '@angular/core';
import { CanDeactivate } from '@angular/router';
import { Observable } from 'rxjs';

export interface CanComponentDeactivate {
 canDeactivate: () => Observable<boolean> | Promise<boolean> | boolean;
}

@Injectable({
  providedIn: 'root',
})
export class CanDeactivateGuard implements CanDeactivate<CanComponentDeactivate> {
  canDeactivate(component: CanComponentDeactivate) {
    // 是否可以离开的逻辑放在组件中,由各个组件自己控制
    // 调用组件的canDeactivate方法,如果没有该方法则返回true,可以离开
    return component.canDeactivate ? component.canDeactivate() : true;
  }
}
// 2. 组件中定义canDeactivate方法,查看是否由修改,如果修改了没有保存就弹框提示用户是否保存

canDeactivate(): Observable<boolean> | boolean {
  // Allow synchronous navigation (`true`) if no crisis or the crisis is unchanged
  if (!this.crisis || this.crisis.name === this.editName) {
    return true;
  }
  // Otherwise ask the user with the dialog service and return its
  // observable which resolves to true or false when the user decides
  return this.dialogService.confirm('Discard changes?');
}
// 3. diglog服务:用于弹框提示用户是否保存修改
import { Injectable } from '@angular/core';
import { Observable, of } from 'rxjs';

/**
 * Async modal dialog service
 * DialogService makes this app easier to test by faking this service.
 * TODO: better modal implementation that doesn't use window.confirm
 */
@Injectable({
  providedIn: 'root',
})
export class DialogService {
  /**
   * Ask user to confirm an action. `message` explains the action and choices.
   * Returns observable resolving to `true`=confirm or `false`=cancel
   */
  confirm(message?: string): Observable<boolean> {
    // 调用系统的弹框,让用户选择是否保存修改
    const confirmation = window.confirm(message || 'Is it OK?');

    return of(confirmation);
  }
}
// 4. 添加守卫
const crisisCenterRoutes: Routes = [
  {
    path: 'crisis-center',
    component: CrisisCenterComponent,
    children: [
      {
        path: '',
        component: CrisisListComponent,
        children: [
          {
            path: ':id',
            component: CrisisDetailComponent,
            // 校验是否可以离开的守卫
            canDeactivate: [CanDeactivateGuard]
          },
          {
            path: '',
            component: CrisisCenterHomeComponent
          }
        ]
      }
    ]
  }
];
Resolve: 预先获取组件数据
查询参数及片段
- 修改校验守卫中的checkLogin方法,设置查询参数和片段:
  checkLogin(url: string): true|UrlTree {
    if (this.authService.isLoggedIn) { return true; }

    this.authService.redirectUrl = url;
    // 定义查询参数和片段 NavigationExtras 类型
    const navigationExtras: NavigationExtras = {
      queryParams: { session_id: 123456789 },
      fragment: 'anchor'
    };

    // return this.router.parseUrl('/login');
    return this.router.createUrlTree(['/login'], navigationExtras);
  }

- 点击登录按钮后会跳转到Admin页面,默认情况下查询参数和片段会消失,可以设置保持:
  login() {
    this.message = 'Trying to log in ...';

    this.authService.login().subscribe(() => {
      this.message = this.getMessage();
      if (this.authService.isLoggedIn) {
        const redirectUrl = '/admin';
		// 设置保持查询参数和片段
        const navigationExtras: NavigationExtras = {
          queryParamsHandling: 'preserve',
          preserveFragment: true
        };

        // Redirect the user
        this.router.navigate([redirectUrl], navigationExtras);
      }
    });
  }

- 接收查询参数和片段:
export class AdminDashboardComponent implements OnInit {

  sessionId!: Observable<string>;
  token!: Observable<string>;

  constructor(private route: ActivatedRoute) { }

  ngOnInit(): void {
    this.sessionId = this.route
      .queryParamMap
      .pipe(map(params => params.get('session_id') || 'None'));

    this.token = this.route
      .fragment
      .pipe(map(fragment => fragment || 'None'));

  }

}

路由懒加载
当前项目是进入首页的时候加载了全部ts文件,这样在项目越来越大时,初始加载会很耗时。
使用异步路由解决这个问题,它会根据请求来惰性加载某些特性模块。惰性加载有很多好处。
- 你可以只在用户请求时才加载某些特性区。
- 对于那些只访问应用程序某些区域的用户,这样能加快加载速度。
- 你可以持续扩充惰性加载特性区的功能,而不用增加初始加载的包体积。
改造路由懒加载
当前项目的路由如下:
- 在根模块app.module中 import 子模块 admin.module;
- admin.module 中引入自己的路由模块 admin-routing.module;
- 在admin-routing.module 定义 /admin 路由。
- 这样在进入页面加载app.module时会直接在家子模块admin.module。

改造为懒加载: - 子模块路由文件 admin-routing.module 将根路由 ‘admin’ 改为 ‘’;
- 在跟模块路由 app-routing.module 中配置 ‘admin’ 路由,并使用es6的懒加载方法导入admin.module;
- 在根模块 app.module.ts 中删除import adminModule,采用路由懒加载的方式导入adminModule

如下,在点击Admin时会加载admin.module。

canLoad 守卫
当前已经使用 CanActivate 保护 AdminModule 了,它会阻止未授权用户访问管理特性区。如果用户未登录,它就会跳转到登录页。
但是路由器仍然会加载 AdminModule —— 即使用户无法访问它的任何一个组件。 理想的方式是,只有在用户已登录的情况下你才加载 AdminModule,这就需要用到 CanLoad 守卫。

点击登录后才会加载admin.module

预加载
除了按需加载模块外,还可以通过预加载方式异步加载模块。
当应用启动时,AppModule 被会立即加载。而 AdminModule 只在用户点击链接时惰性加载。
预加载允许你在后台加载某些访问率高,但不是初始加载的模块,以便当用户激活某个特定的路由时,就可以渲染这些数据了。
-
将CrisisCenterModule 改成惰性加载:


-
配置预加载:
在根路由中配置 preloadingStrategy: PreloadAllModules,这项配置会让 Router 预加载器立即加载所有惰性加载路由(带 loadChildren 属性的路由)。


-
AdminModule 并没有预加载,因为 CanLoad 阻塞了它,PreloadAllModules 策略不会加载被CanLoad守卫所保护的特性区。 CanLoad 守卫的优先级高于预加载策略。如果你要加载一个模块并且保护它防止未授权访问,请移除 canLoad 守卫,只单独依赖CanActivate守卫。
自定义预加载策略
在很多场景下,预加载的每个惰性加载模块都能正常工作。但是,考虑到低带宽和用户指标等因素,可以为特定的特性模块使用自定义预加载策略。
本节将指导你添加一个自定义策略,它只预加载 data.preload 标志为 true 路由。回想一下,你可以在路由的 data 属性中添加任何东西。
- 创建服务SelectivePreloadingStrategyService,在服务中获取自定义路由参数中的 preload是否为 true;
- 配置crisis-center路由的preload: true;
- 在app-routing中配置 预加载策略为自定义的服务。

- 如下:只又crisis-center路由配置了preload: true,所以只预加载了该模块。

- (非必须)展示预加载的模块:在admin-dashboard中注入SelectivePreloadingStrategyService服务,并展示预加载的模块


 3998
3998


 被折叠的 条评论
为什么被折叠?
被折叠的 条评论
为什么被折叠?
 到【灌水乐园】发言


