


一、node_exporter的简介
Node Exporter是一个用于监控主机指标的软件插件。它收集和暴露系统级指标,如CPU、内存、磁盘、网络等信息,供Prometheus监控和报警。Node Exporter可以帮助用户了解主机的性能和健康状态。
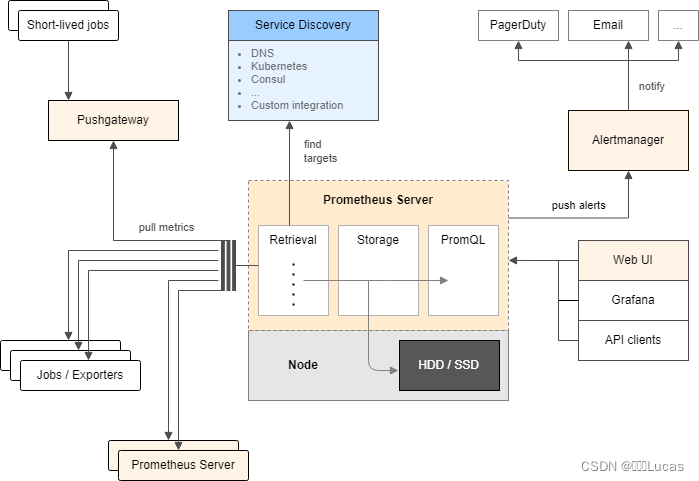
二、prometheus监控体系
三、Rocky Linux系统安装
链接:VMware Workstation 下载安装(含秘钥)
链接:VMware Workstation 创建虚拟机
链接:Rocky_Linux 下载安装
链接:Rocky_Linux 网卡静态配置
链接:MobaXterm 下载安装
四、Rocky Linux安装部署Node_exporter
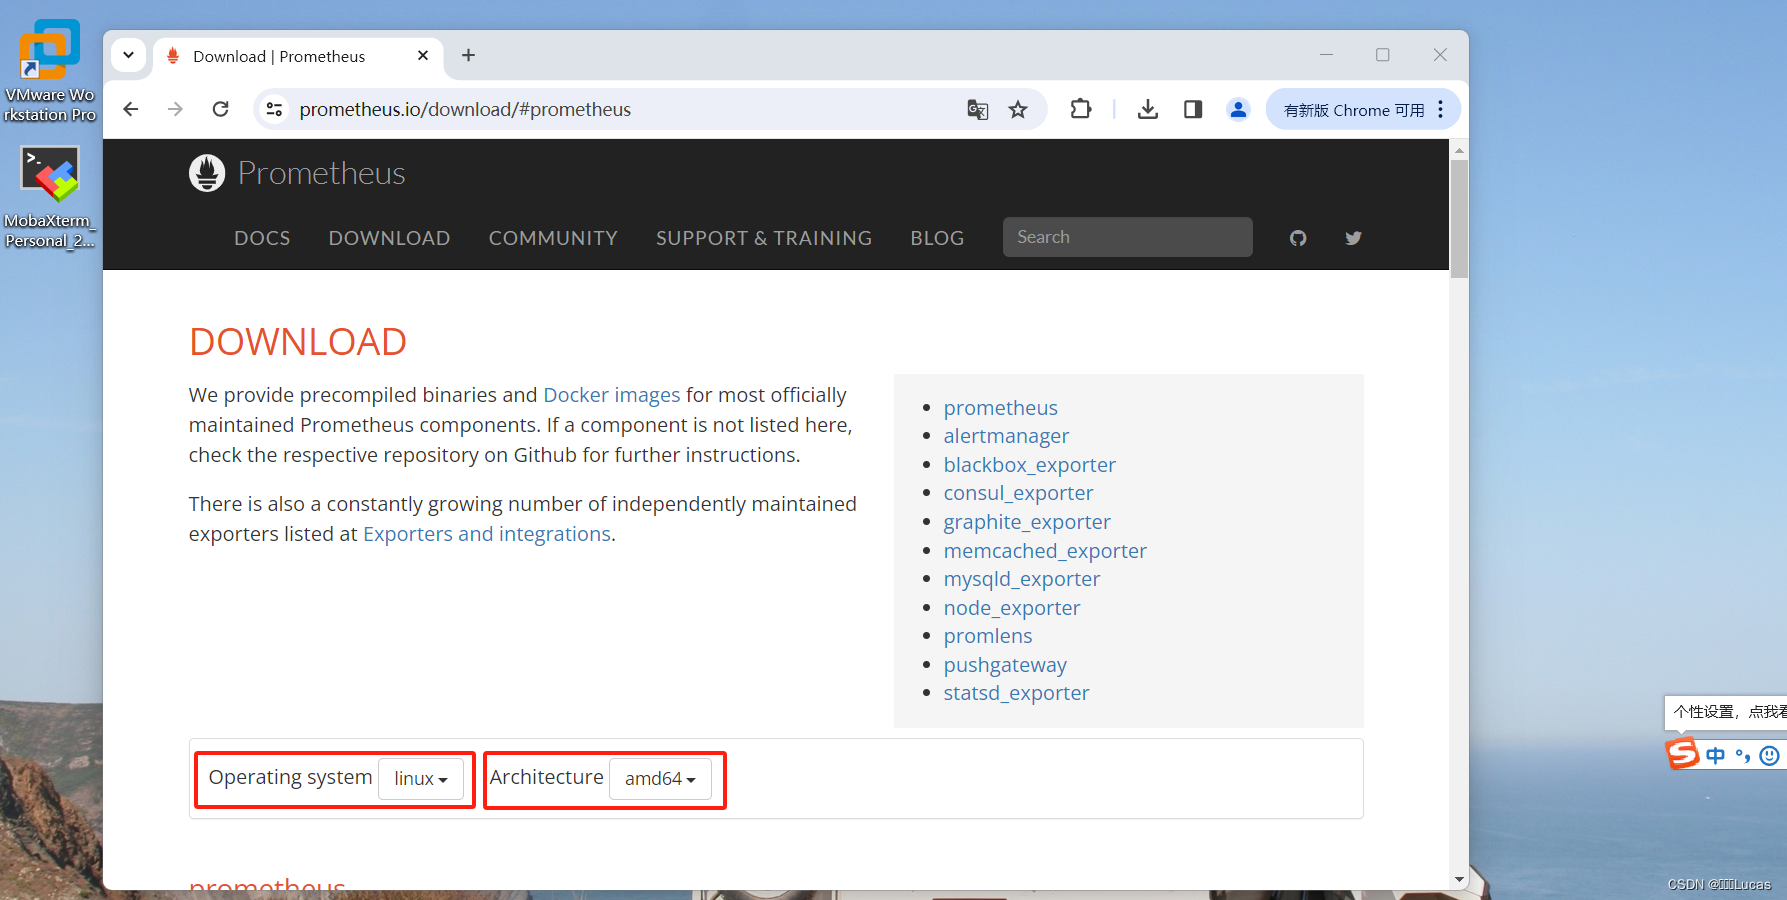
1、官网下载地址
链接:https://prometheus.io/download/

2、筛选“linux",“amd64”
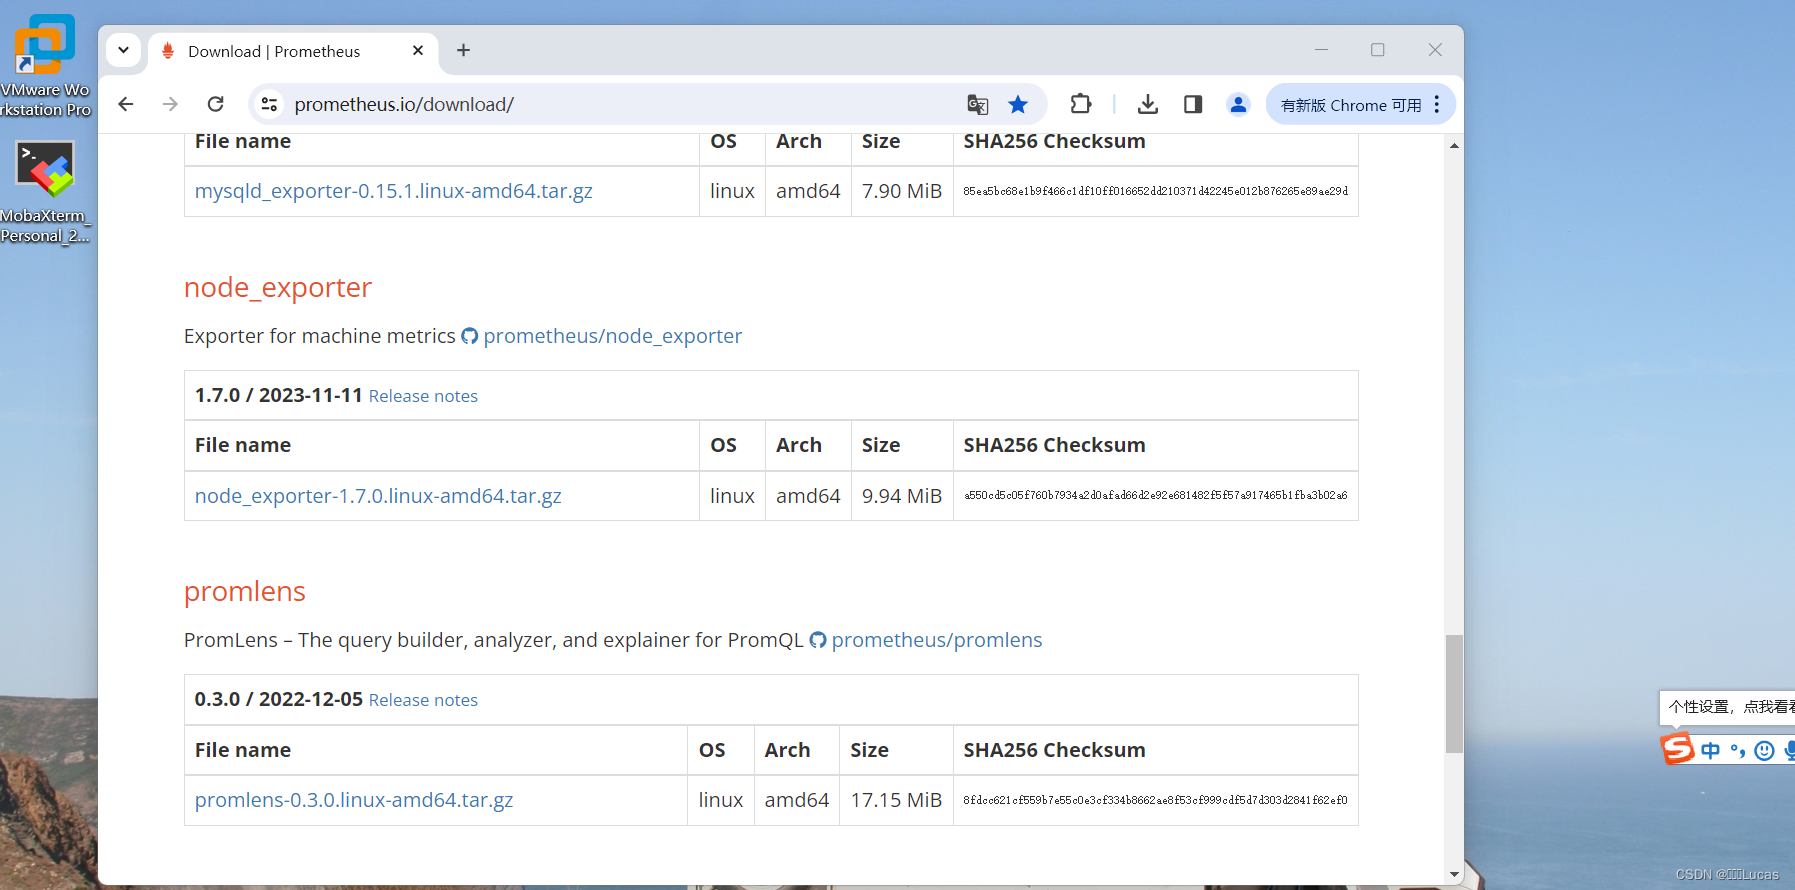
3、向下拖动至“node_exporter”,点击下载“最新安装包”
3、上传至root目录下
教程链接:SFTP文件上传/下载
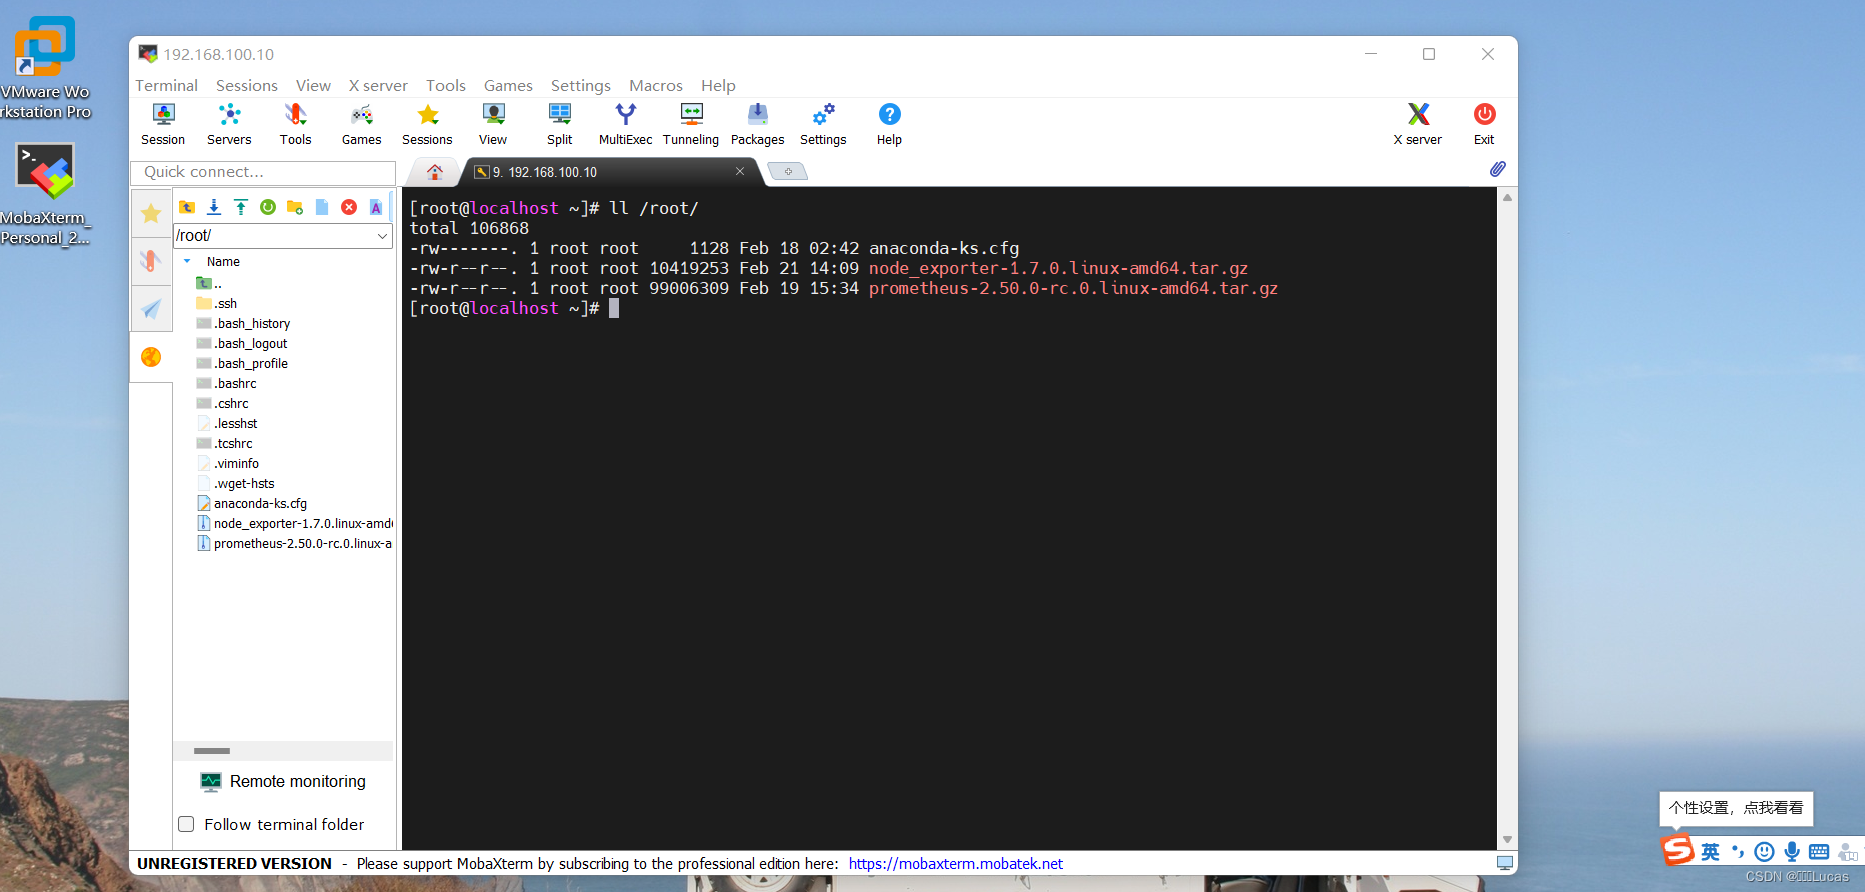
4、查看目录/root/下的文件,确认是否已上传
[root@localhost ~]# ll /root/
教程链接:Rocky Linux 运维工具 ls
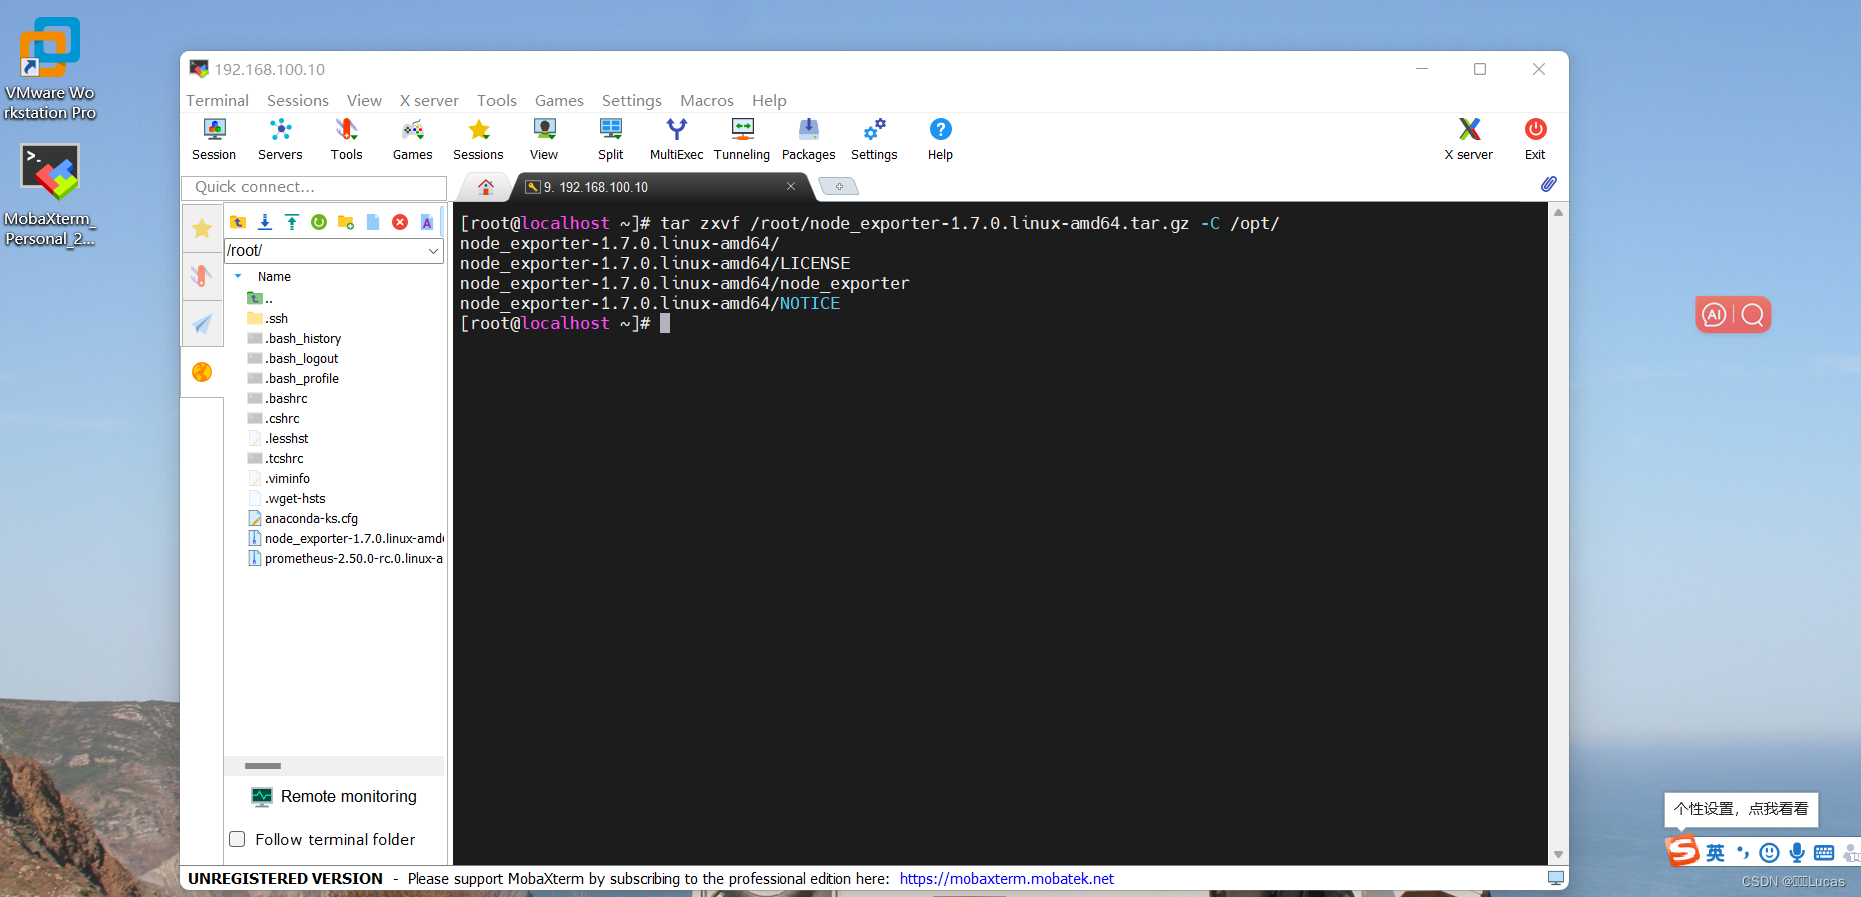
5、解压/root/目录下的node_exporter至/opt/目录
[root@localhost ~]# tar zxvf /root/node_exporter-1.7.0.linux-amd64.tar.gz -C /opt/
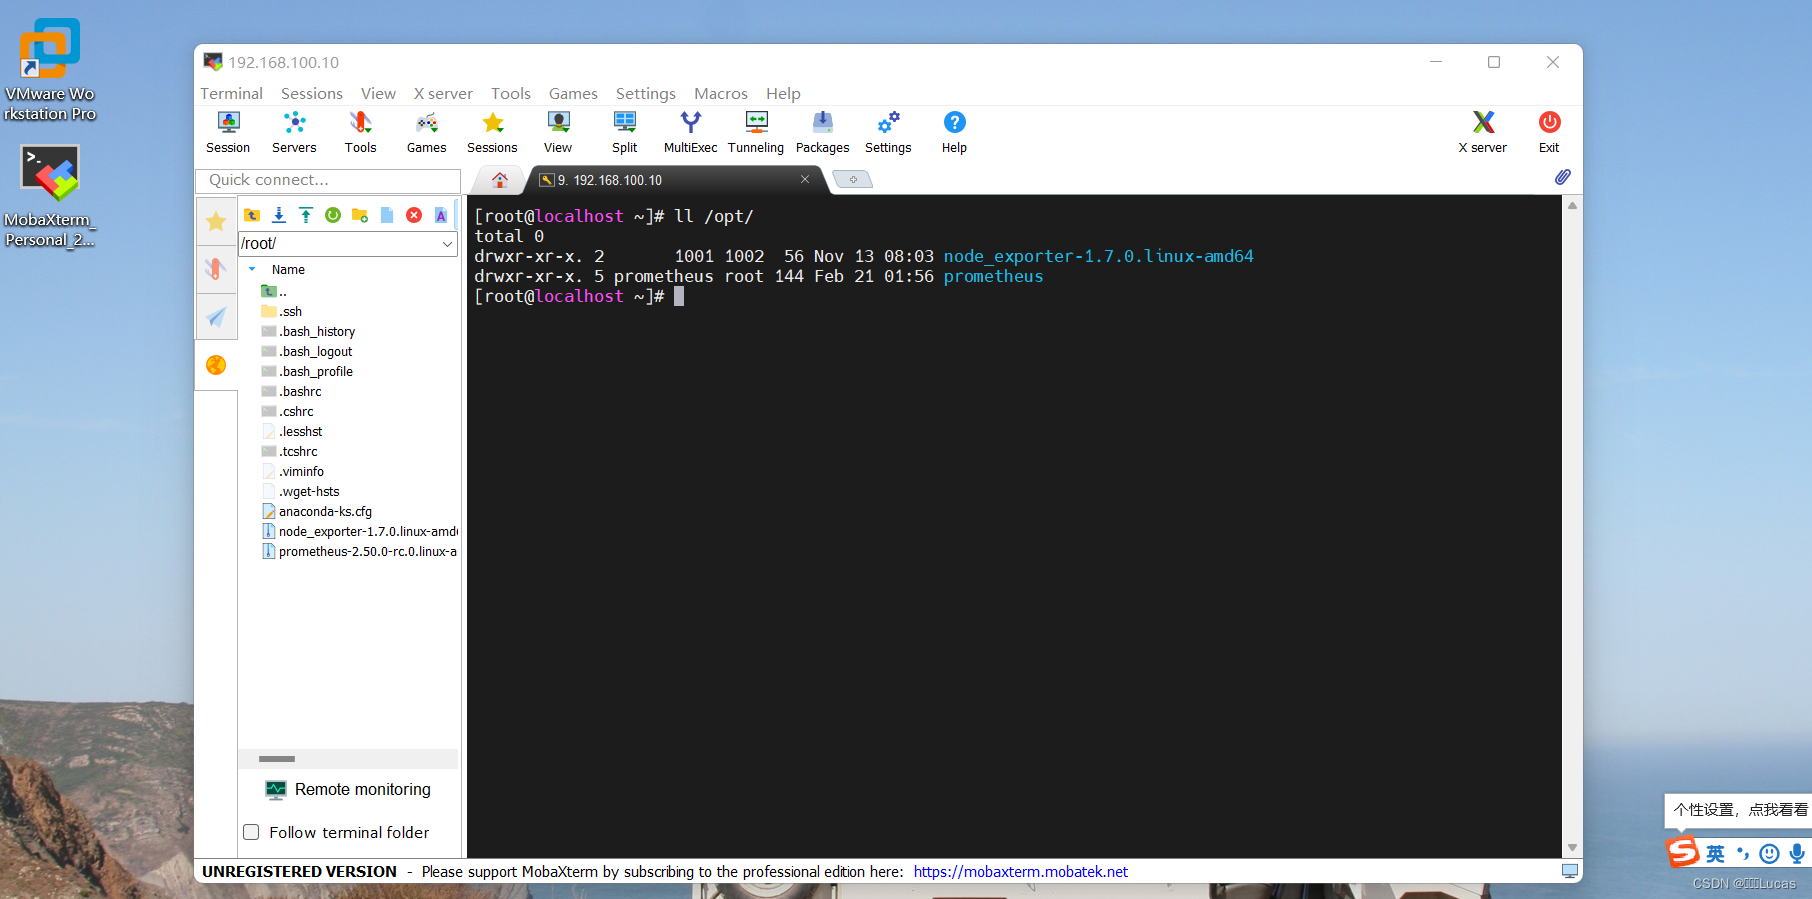
6、查看/opt/目录下的文件
[root@localhost ~]# ll /opt/
教程链接:Rocky Linux 运维工具 ls
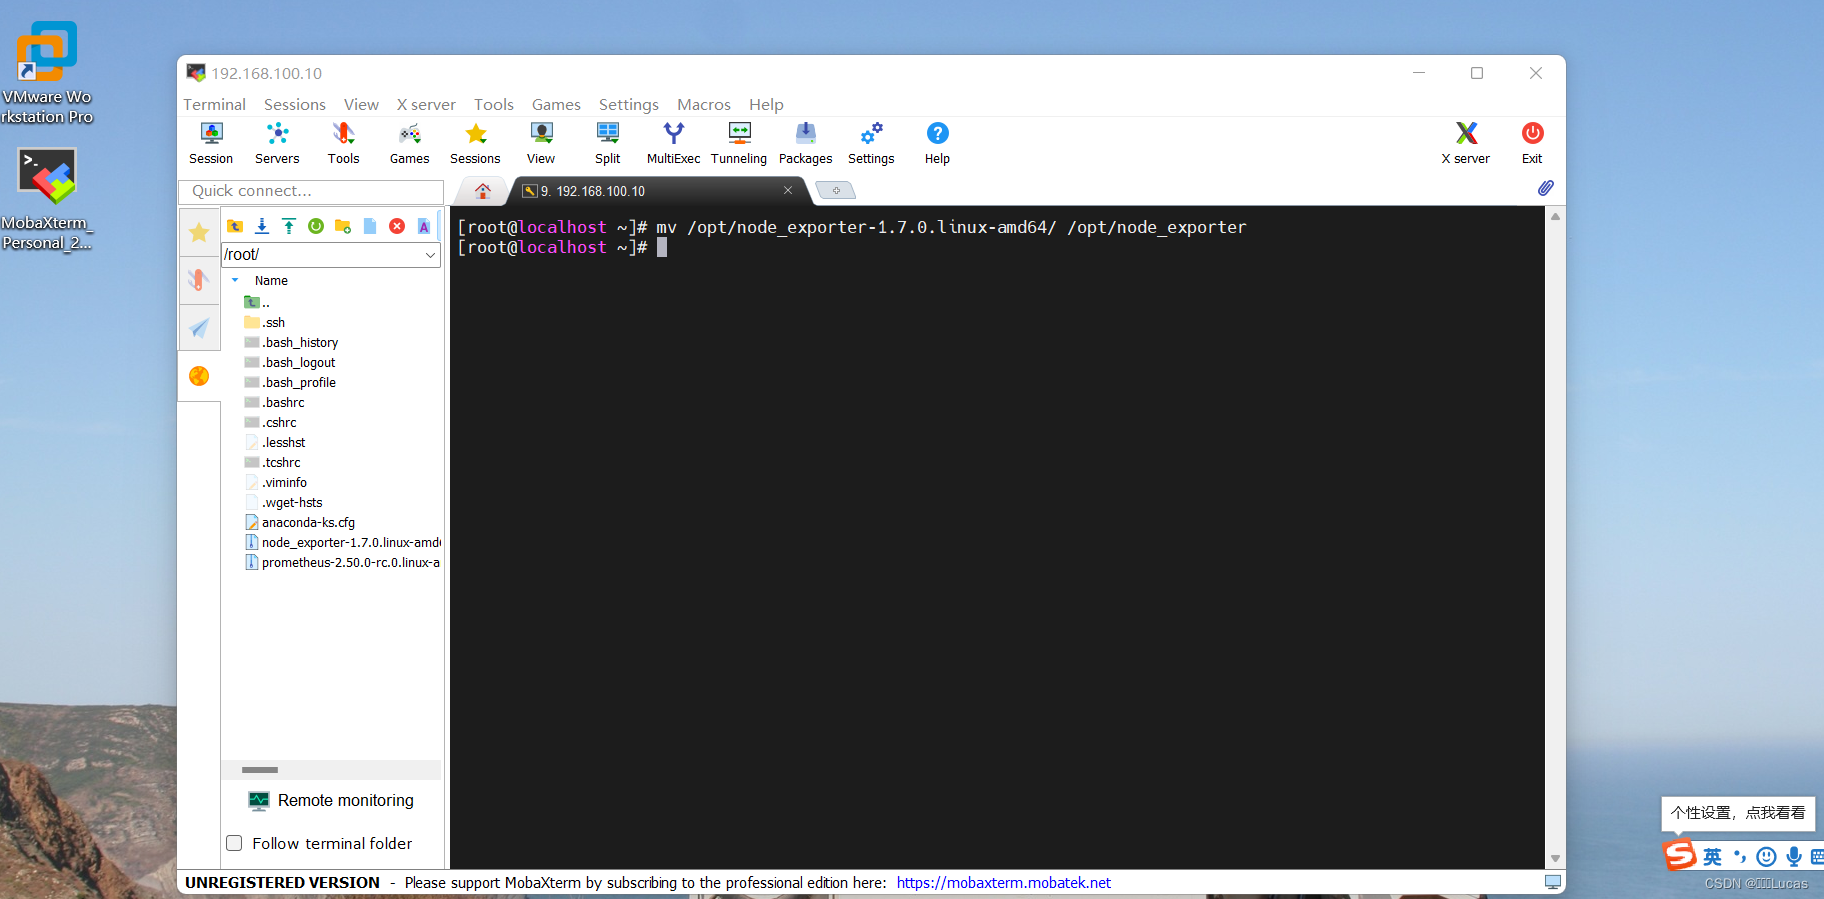
7、重命名node_exporter
[root@localhost ~]# mv /opt/node_exporter-1.7.0.linux-amd64/ /opt/node_exporter
教程链接:Rocky Linux 运维工具 mv
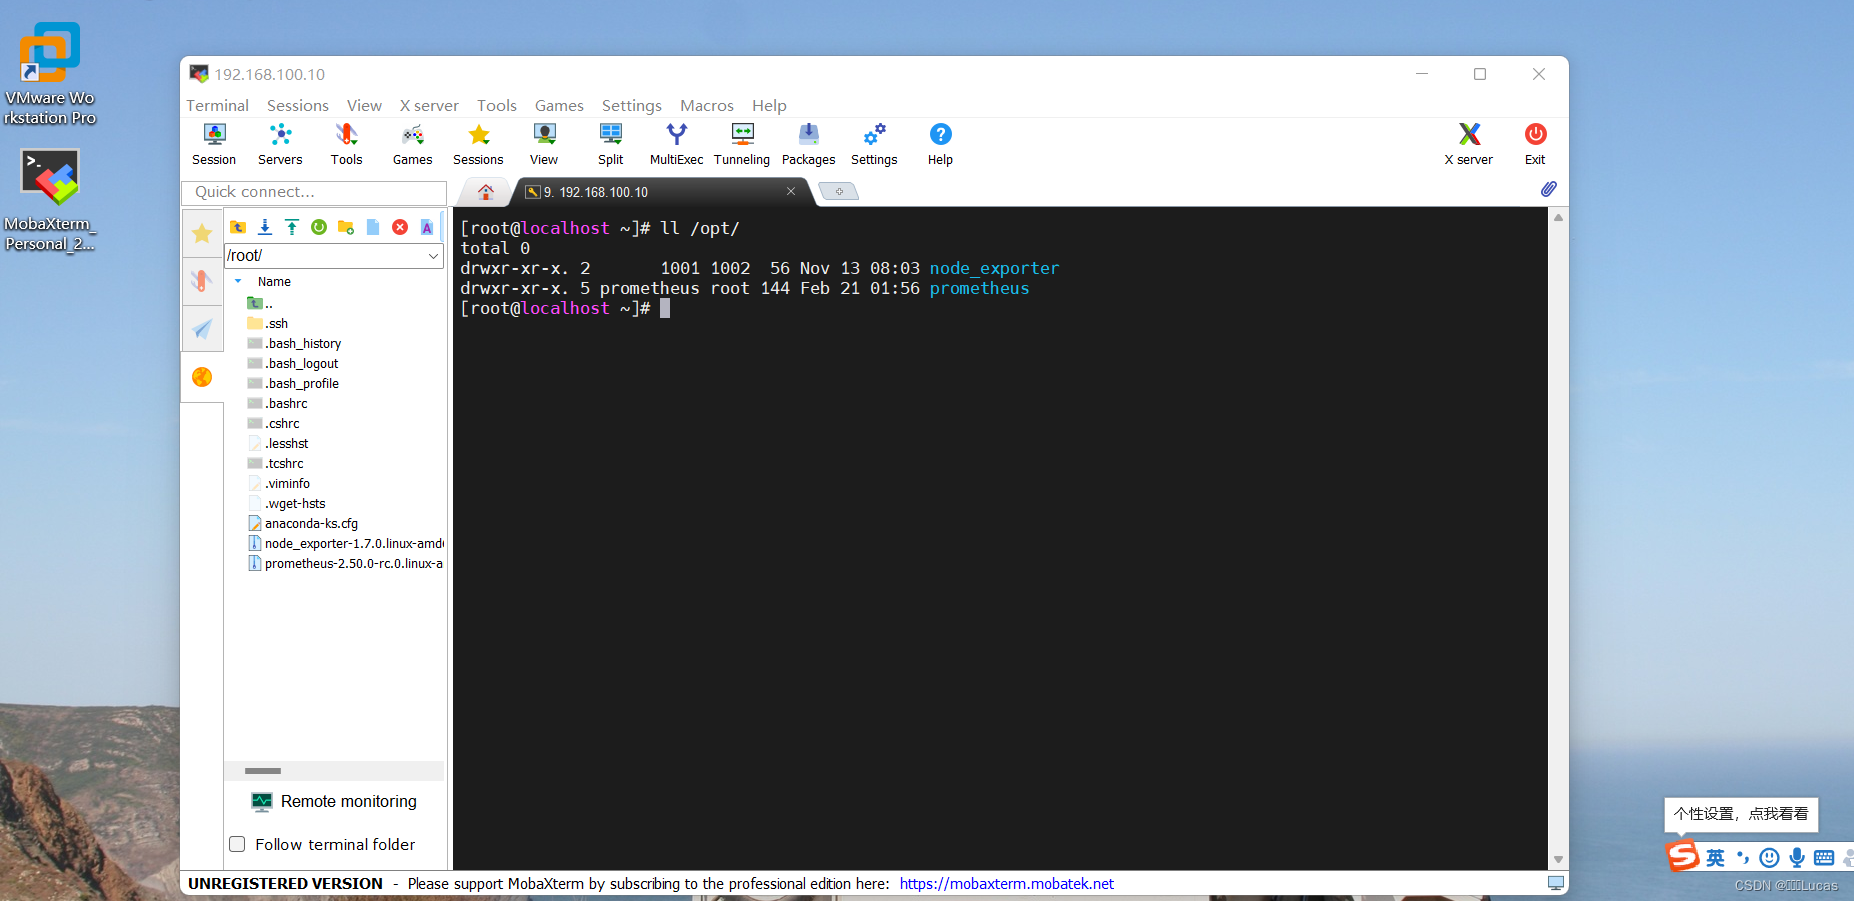
8、查看/opt/下的文件
[root@localhost ~]# ll /opt/
教程链接:Rocky Linux 运维工具 ls
9、创建node_exporter服务
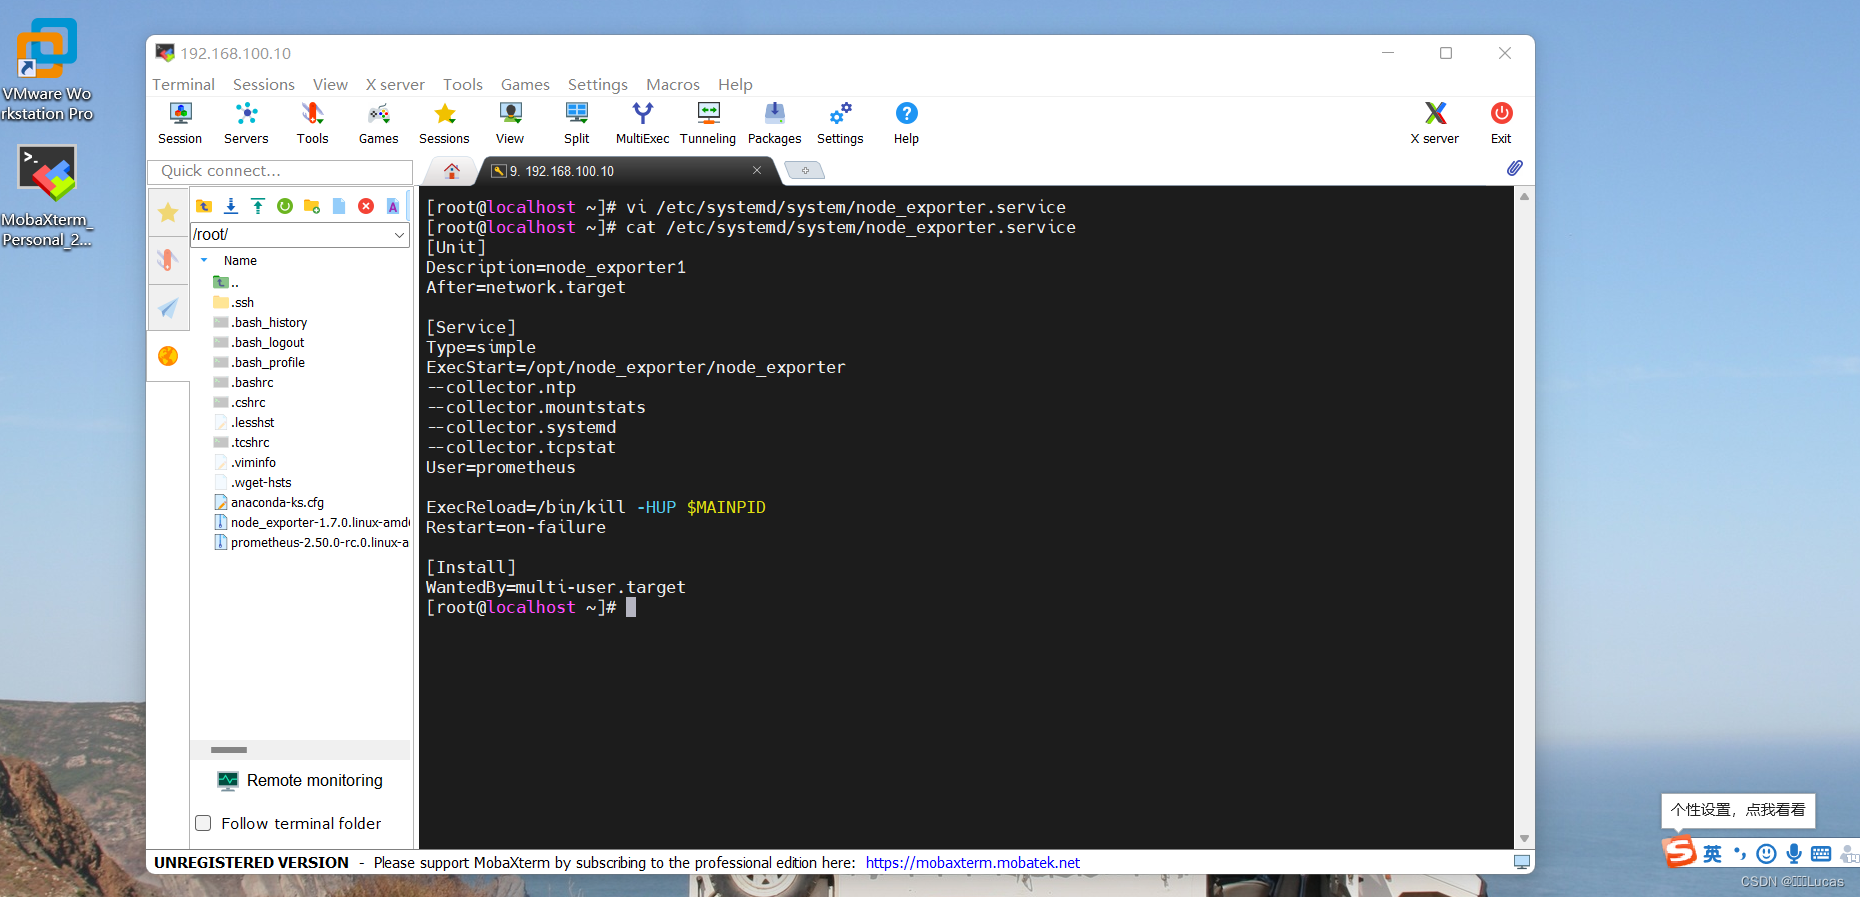
[root@localhost ~]# vi /etc/systemd/system/node_exporter.service
[Unit]
Description=node_exporter1
After=network.target

[Service]
Type=simple
ExecStart=/opt/node_exporter/node_exporter
--collector.ntp
--collector.mountstats
--collector.systemd
--collector.tcpstat
User=prometheus

ExecReload=/bin/kill -HUP $MAINPID
Restart=on-failure

[Install]
WantedBy=multi-user.target
[root@localhost ~]# cat /etc/systemd/system/node_exporter.service
教程链接:Rocky Linux 运维工具 vim
教程链接:Rocky Linux 运维工具 cat
10、目录授权
[root@localhost ~]# chown prometheus:root -R /opt/prometheus
教程链接:Rocky Linux 运维工具 chown

11、查看目录权限
[root@localhost ~]# ll /opt/
教程链接:Rocky Linux 运维工具 ls

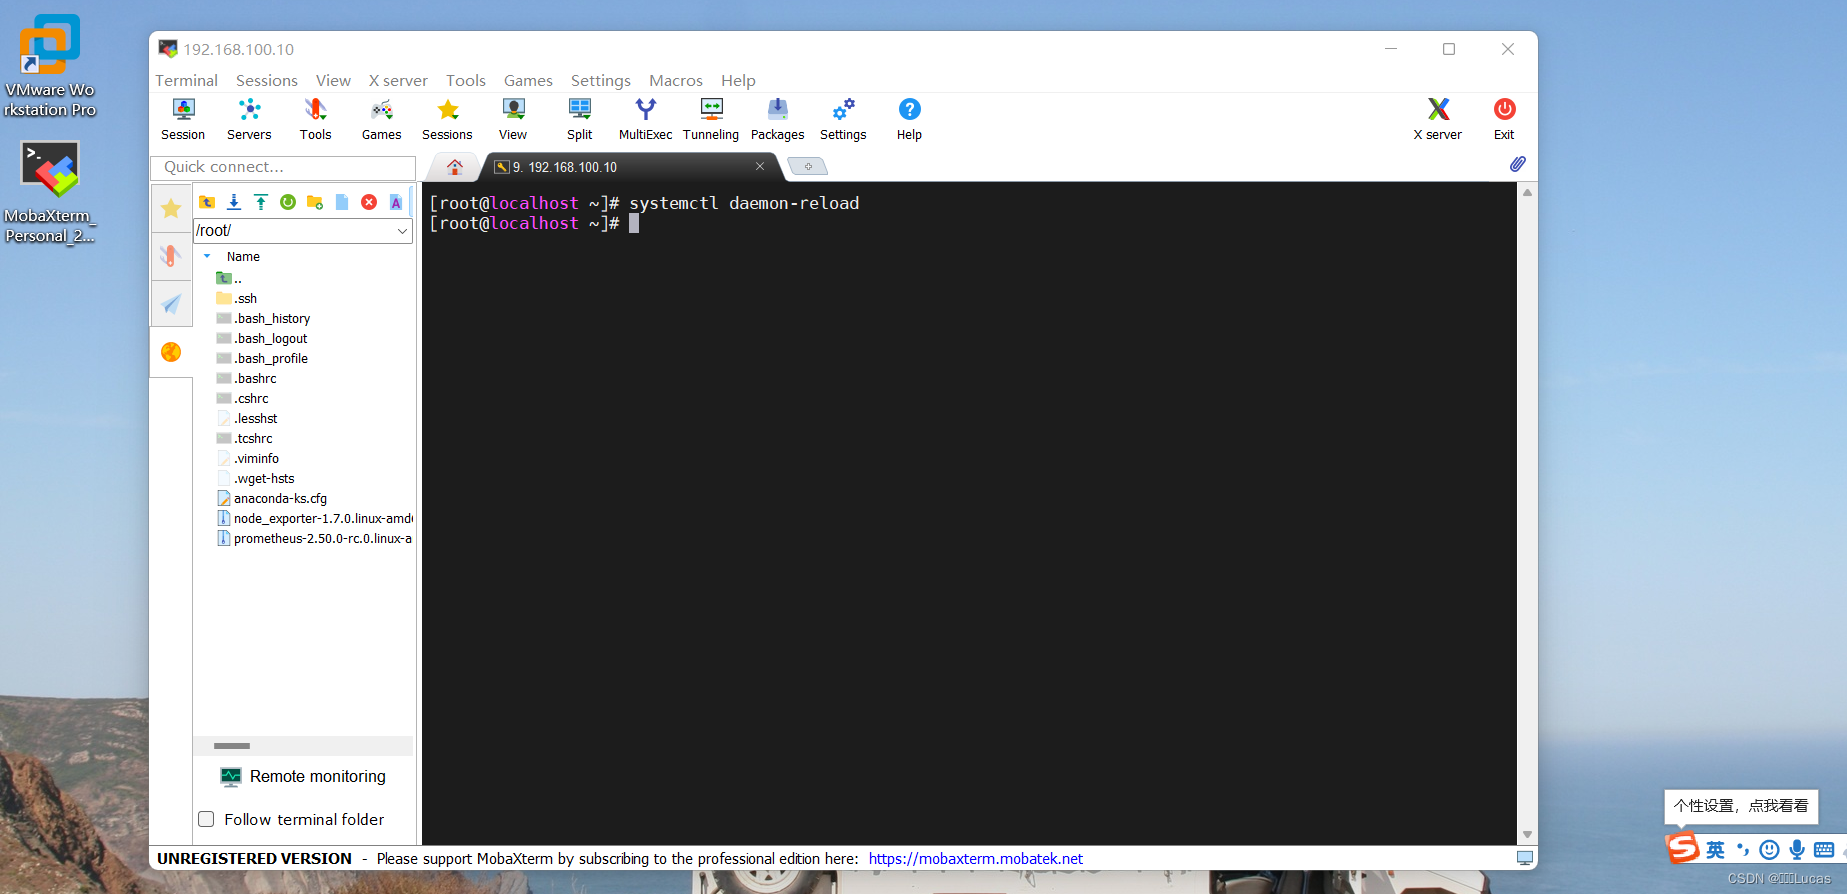
12、加载服务
[root@localhost ~]# systemctl daemon-reload
教程链接:Rocky Linux 运维工具 systemctl
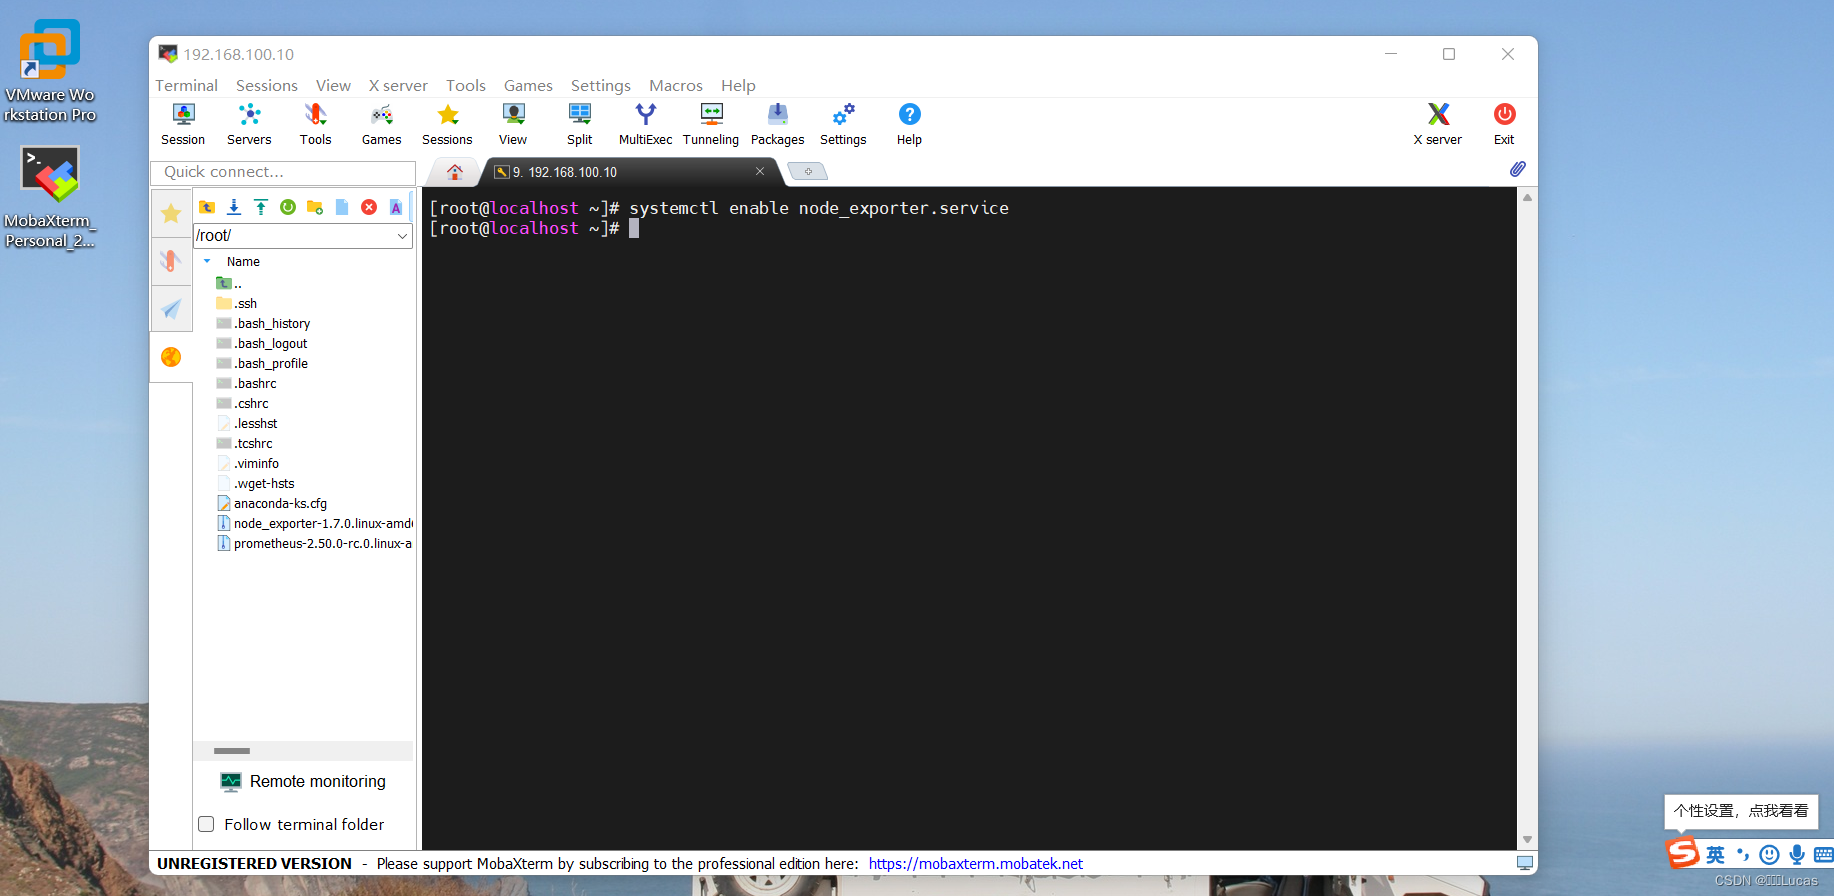
13、设置node_exporter服务开机启动
[root@localhost ~]# systemctl enable node_exporter.service
教程链接:Rocky Linux 运维工具 systemctl
14、启动node_exporter服务
[root@localhost ~]# systemctl start node_exporter.service
教程链接:Rocky Linux 运维工具 systemctl

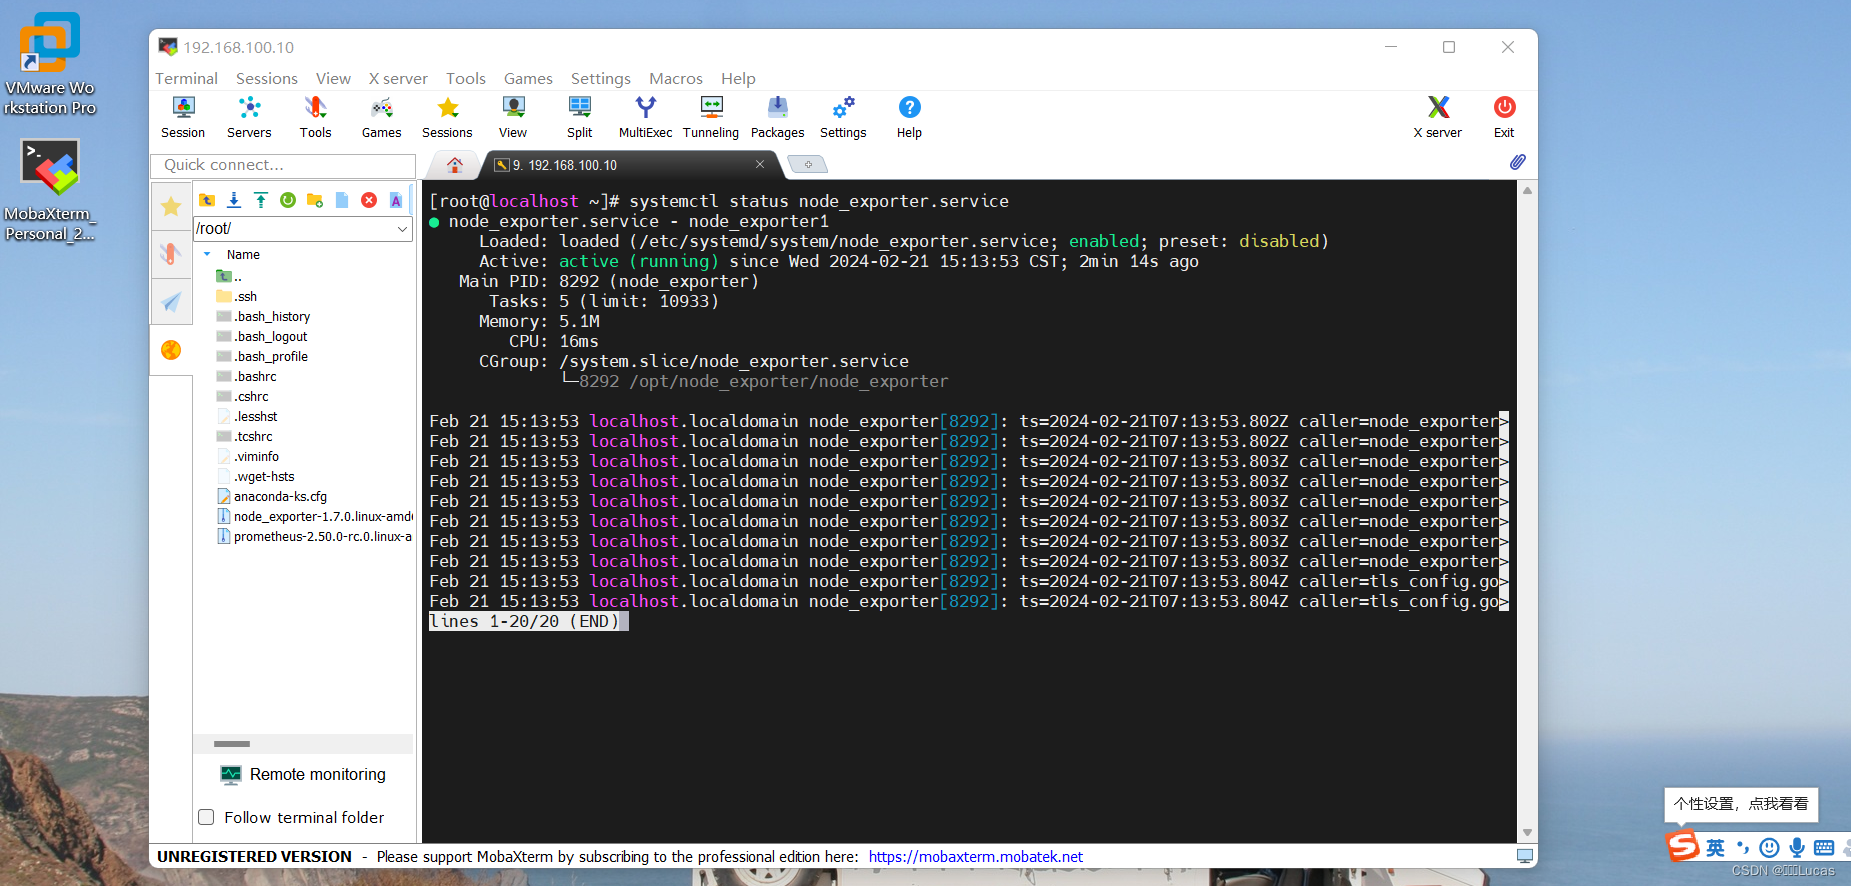
15、查看node_exporter服务状态
[root@localhost ~]# systemctl status node_exporter.service
教程链接:Rocky Linux 运维工具 systemctl
16、防火墙放行端口9100
[root@localhost ~]# firewall-cmd --zone=public --add-port=9100/tcp --permanent
教程链接:Rocky Linux 运维工具 firewall-cmd

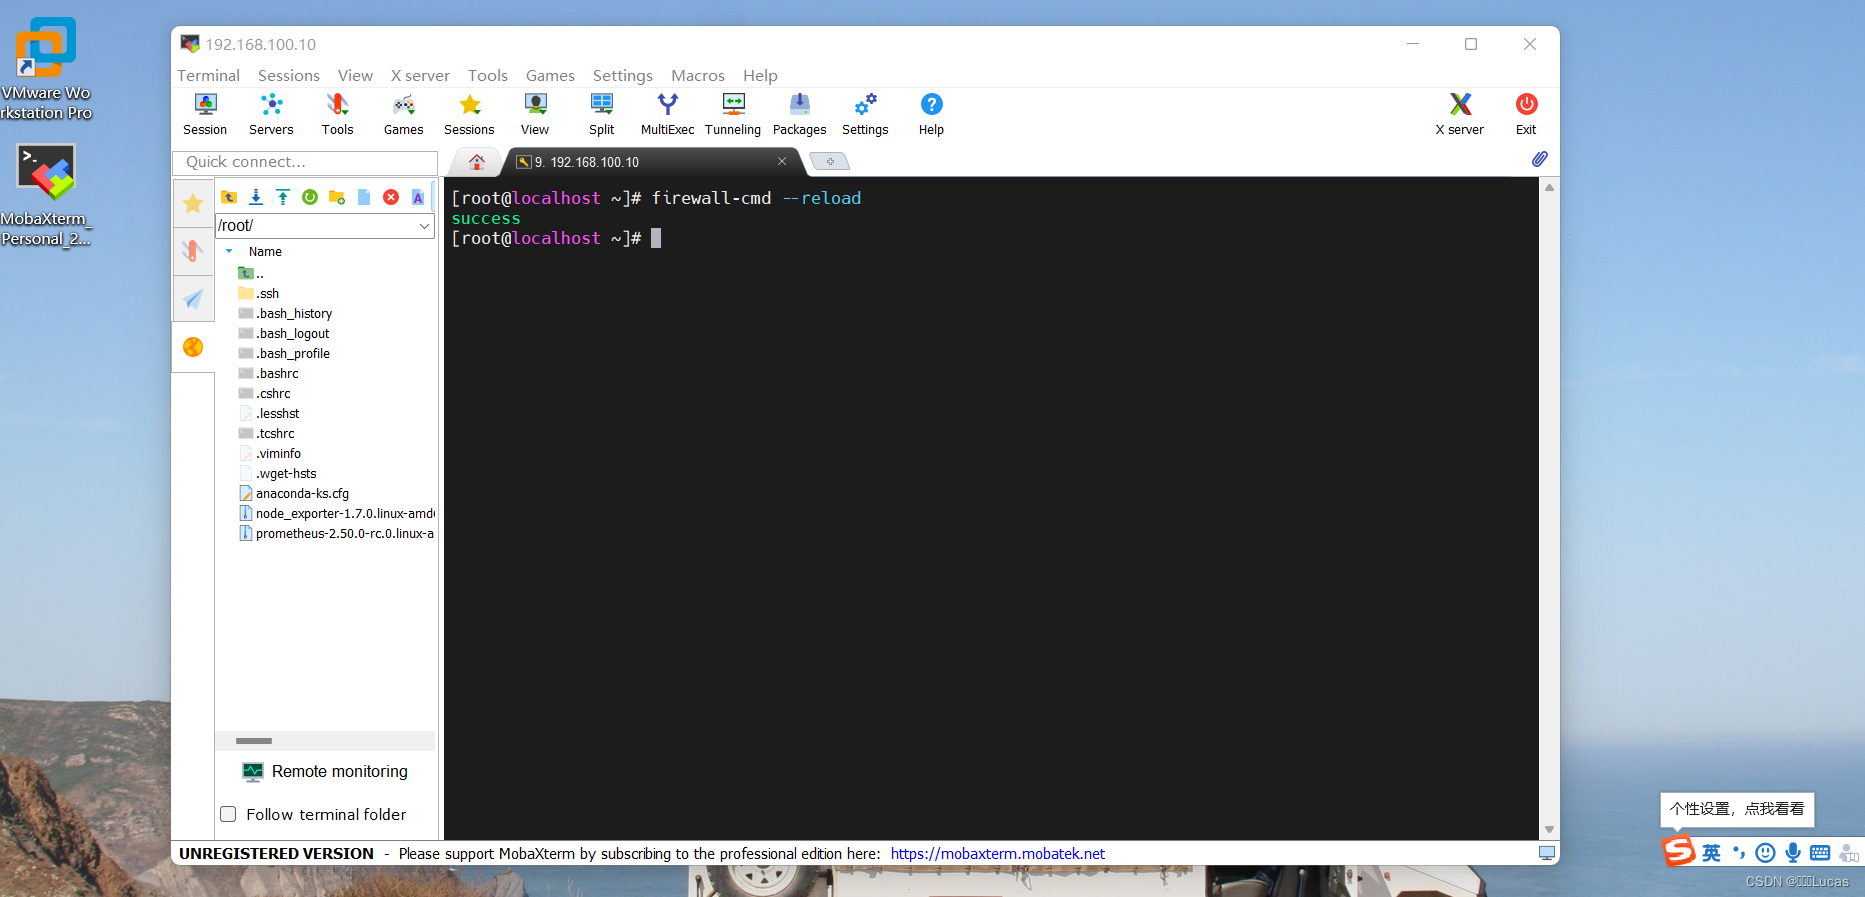
17、防火墙重新加载策略
[root@localhost ~]# firewall-cmd --reload
教程链接:Rocky Linux 运维工具 firewall-cmd
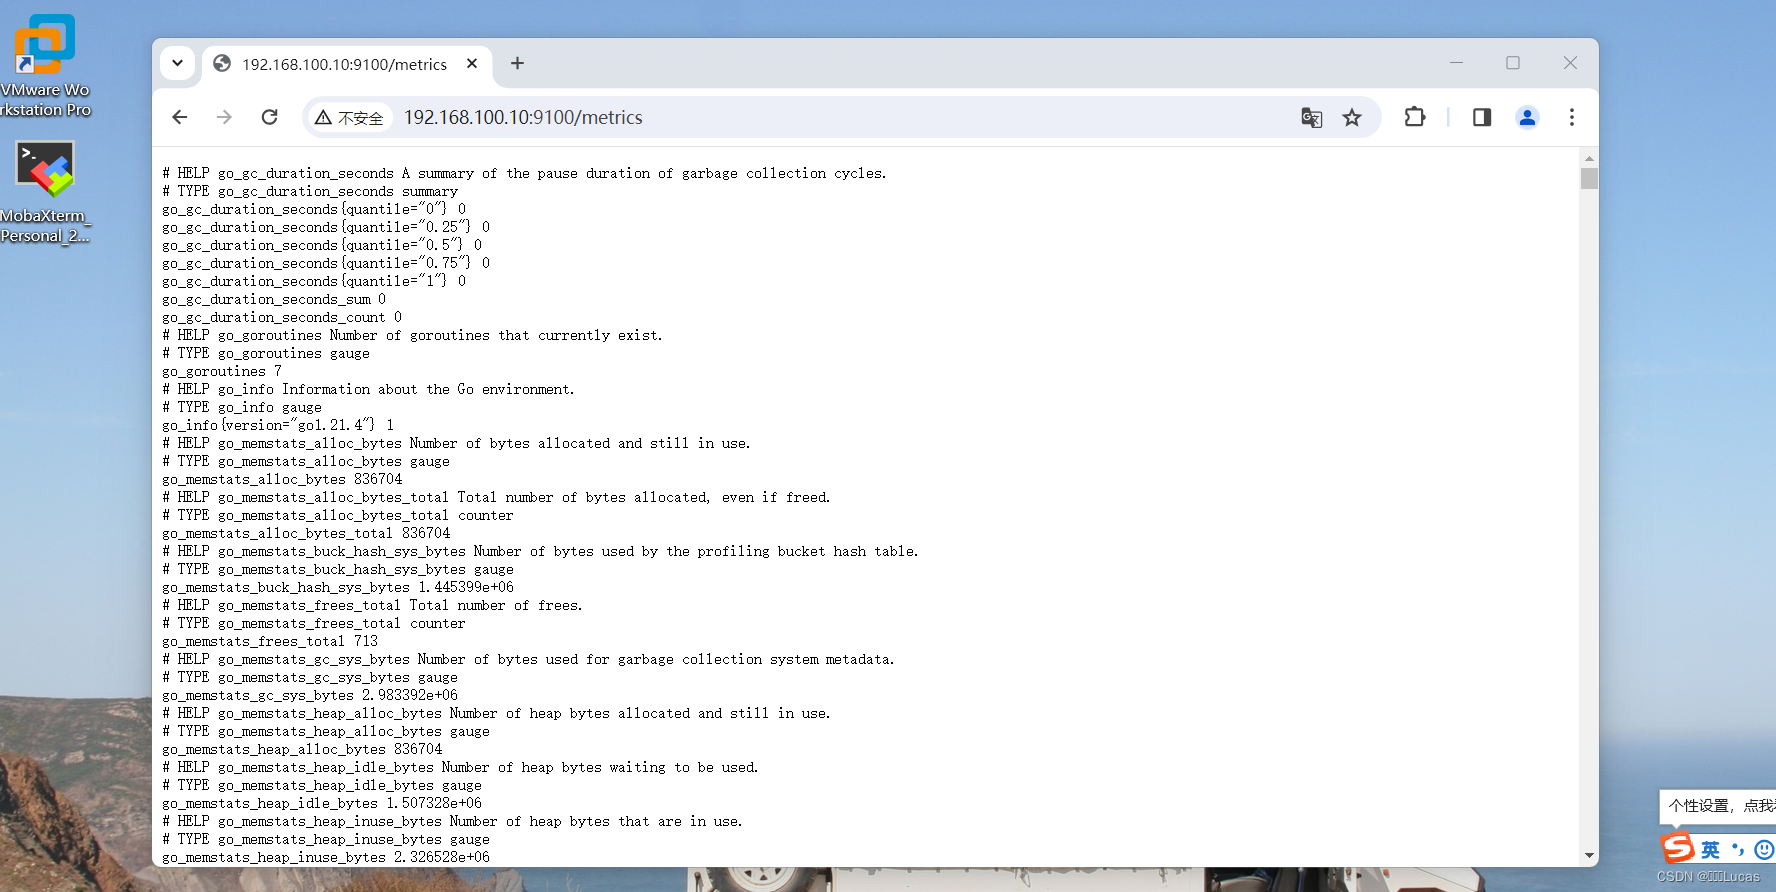
18、访问192.168.100.10:9100/metrics 显示有数据
19、配置文件添加监控点位
[root@localhost ~]# vi /opt/prometheus/prometheus.yml
  - job_name: 'nodes'
    static_configs:
    - targets: ['192.168.100.10:9100']
教程链接:Rocky Linux 运维工具 vim

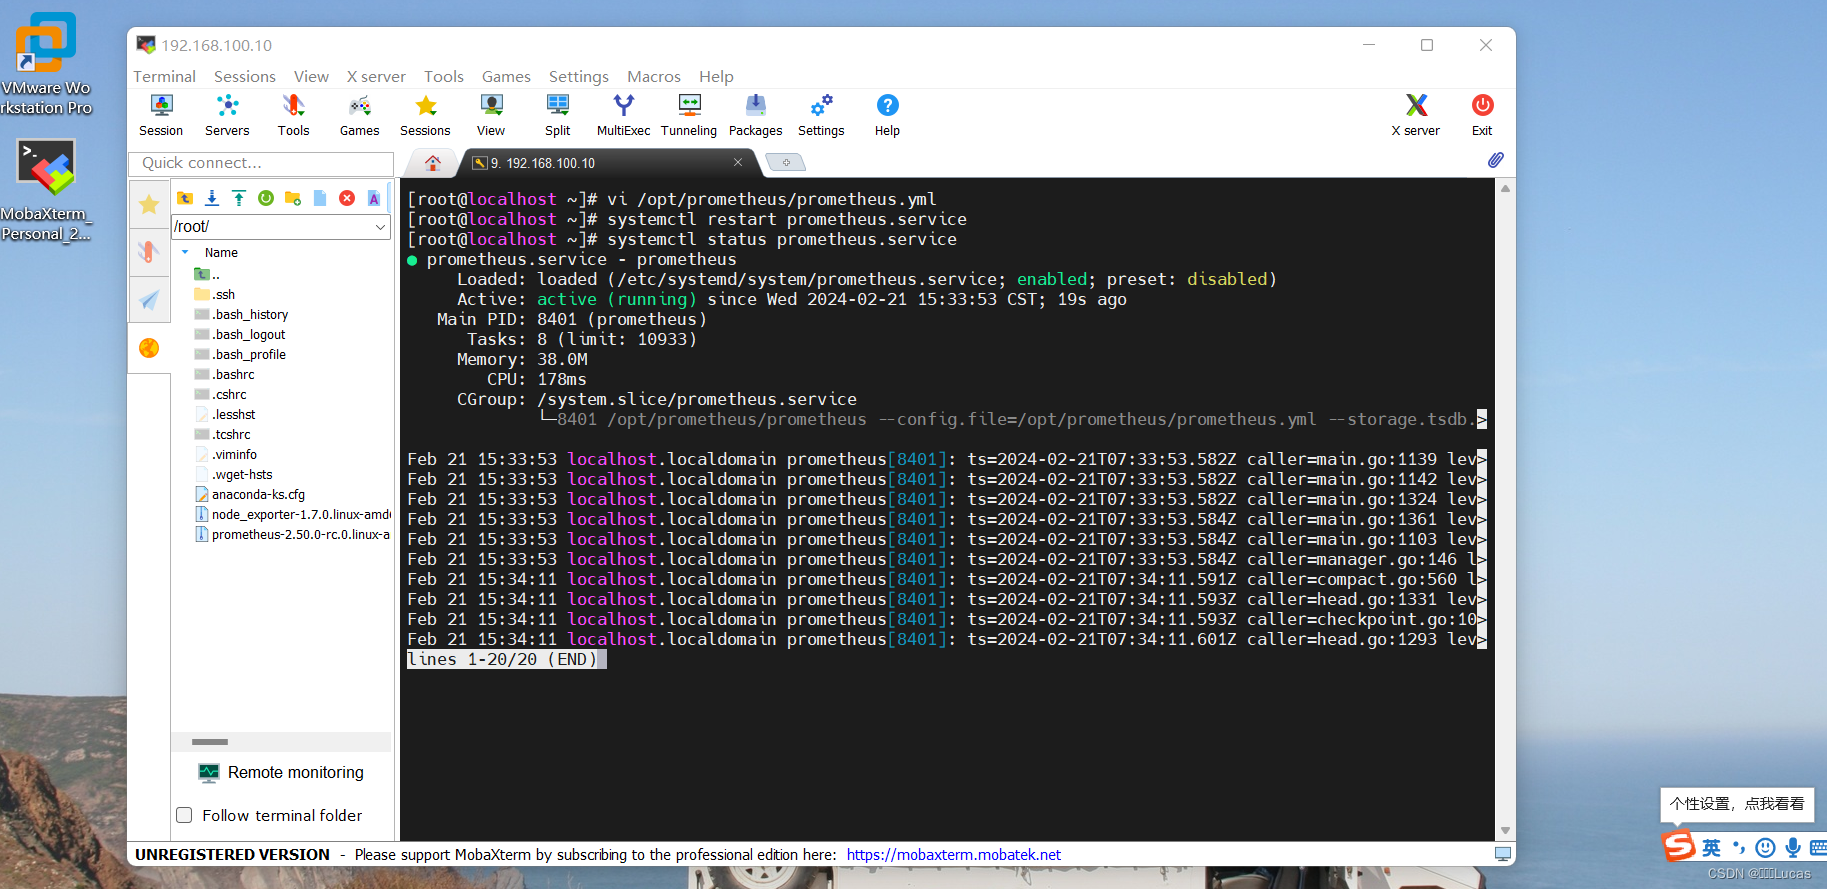
20.重启prometheus,查看服务运行状态
[root@localhost ~]# systemctl restart prometheus.service
[root@localhost ~]# systemctl status prometheus.service
教程链接:Rocky Linux 运维工具 systemctl
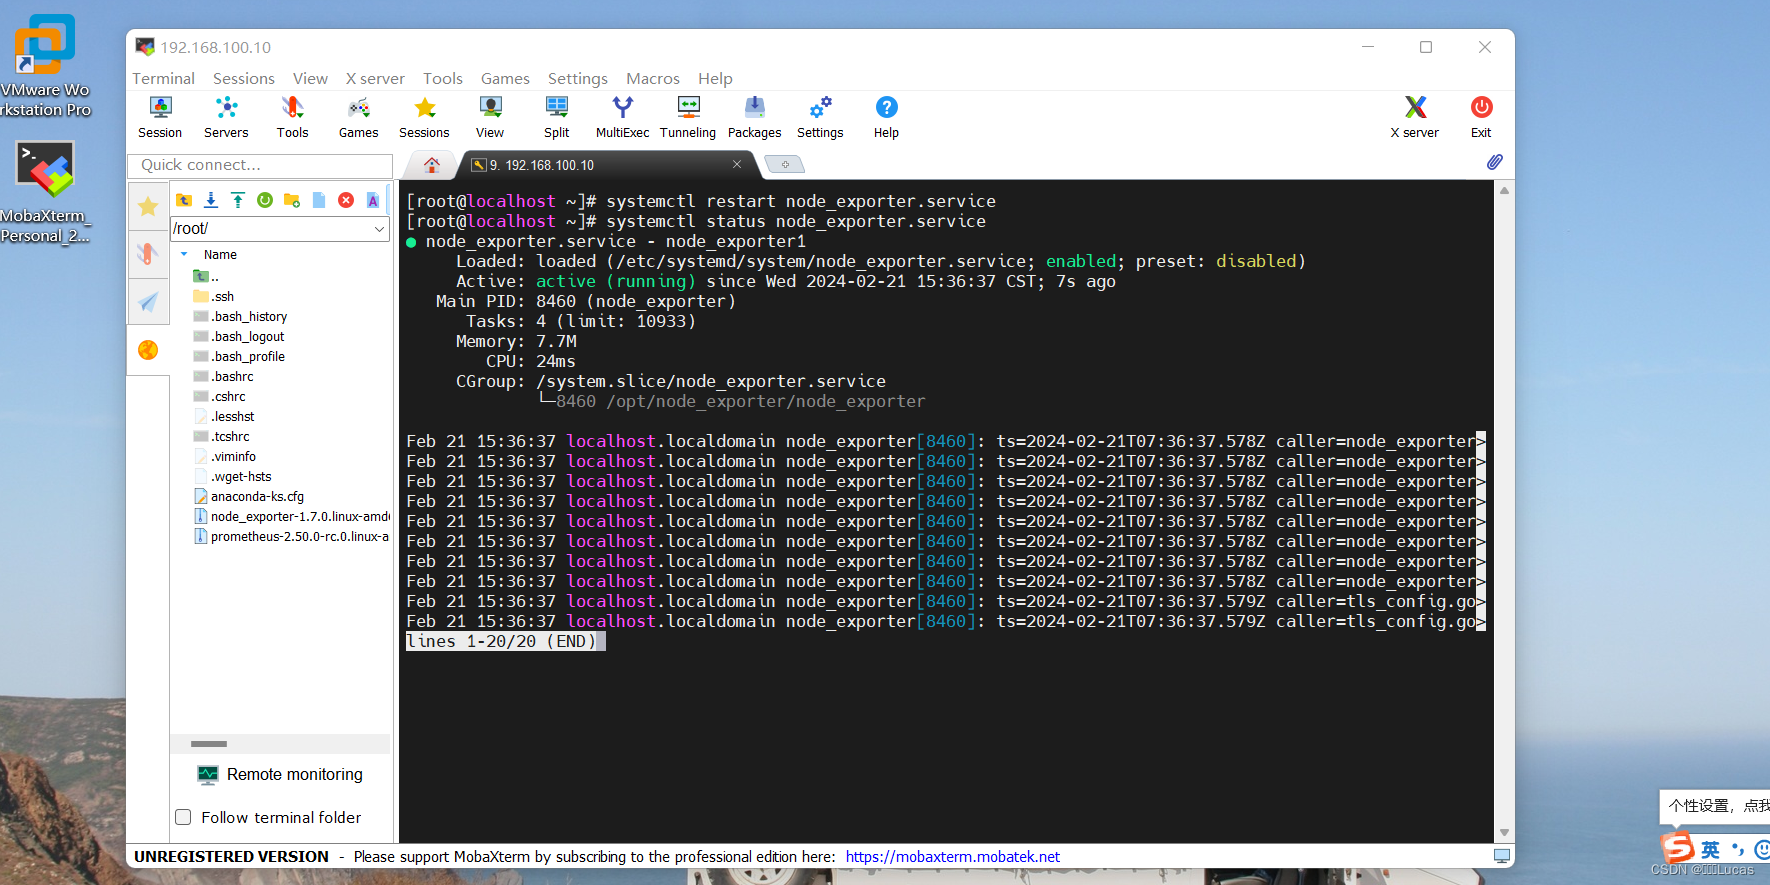
21、重启node_exporter,查看服务运行状态
[root@localhost ~]# systemctl restart node_exporter.service
[root@localhost ~]# systemctl status node_exporter.service
教程链接:Rocky Linux 运维工具 systemctl
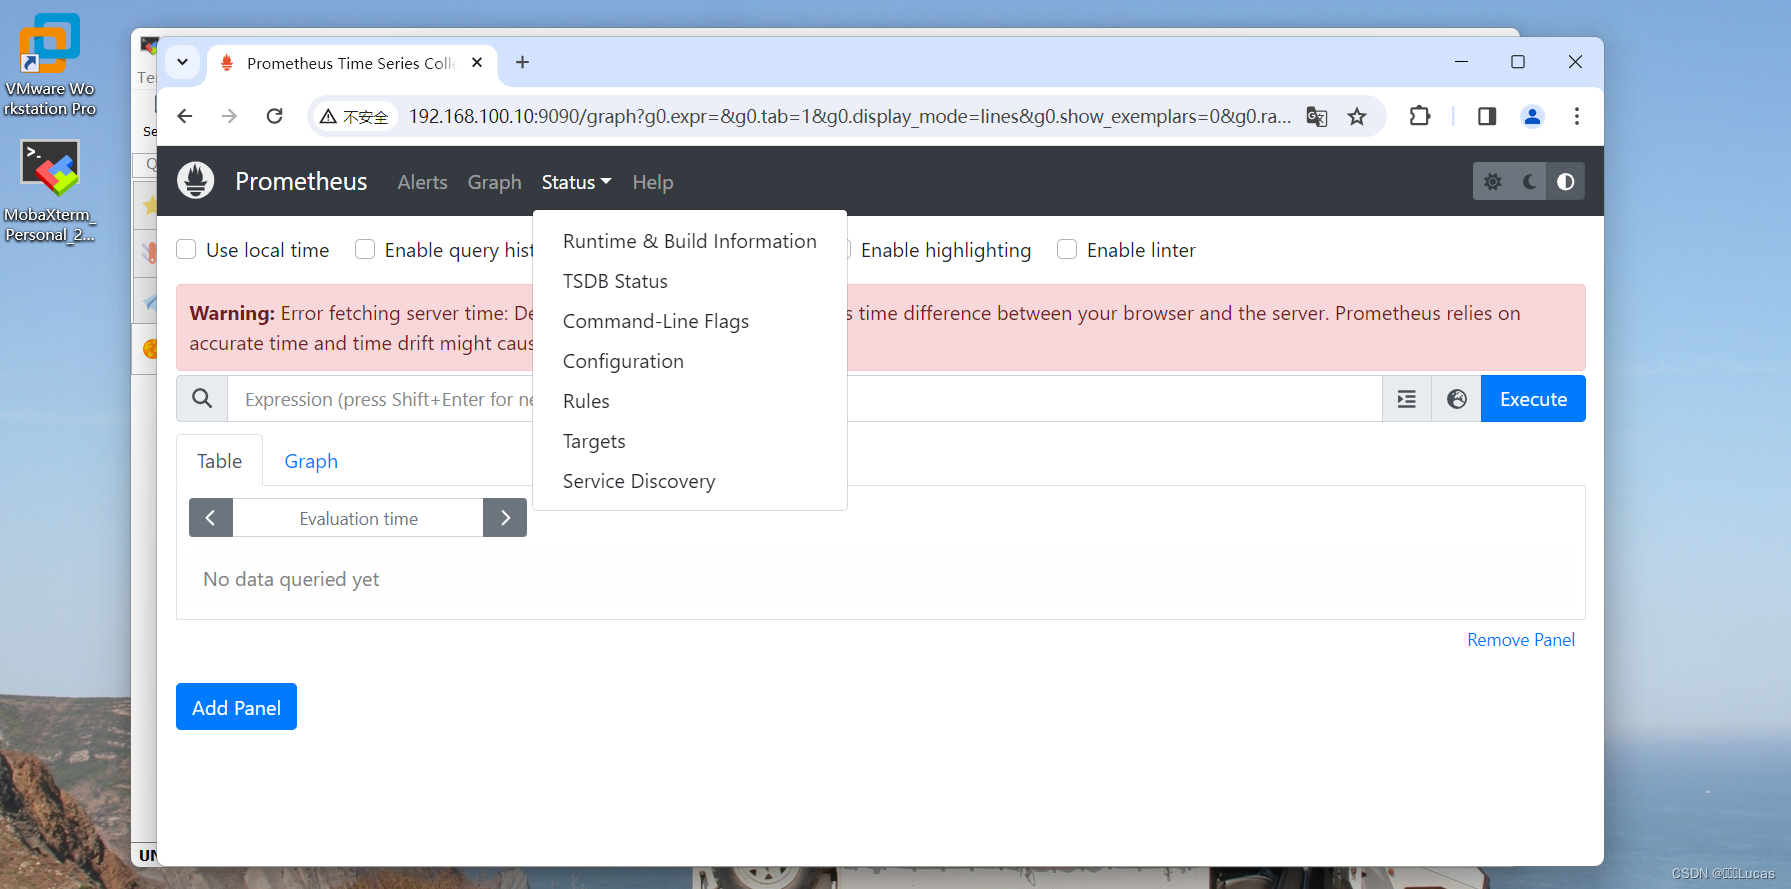
22、打开 http://192.168.110.10:9090,点击“Status”,点击“Target”
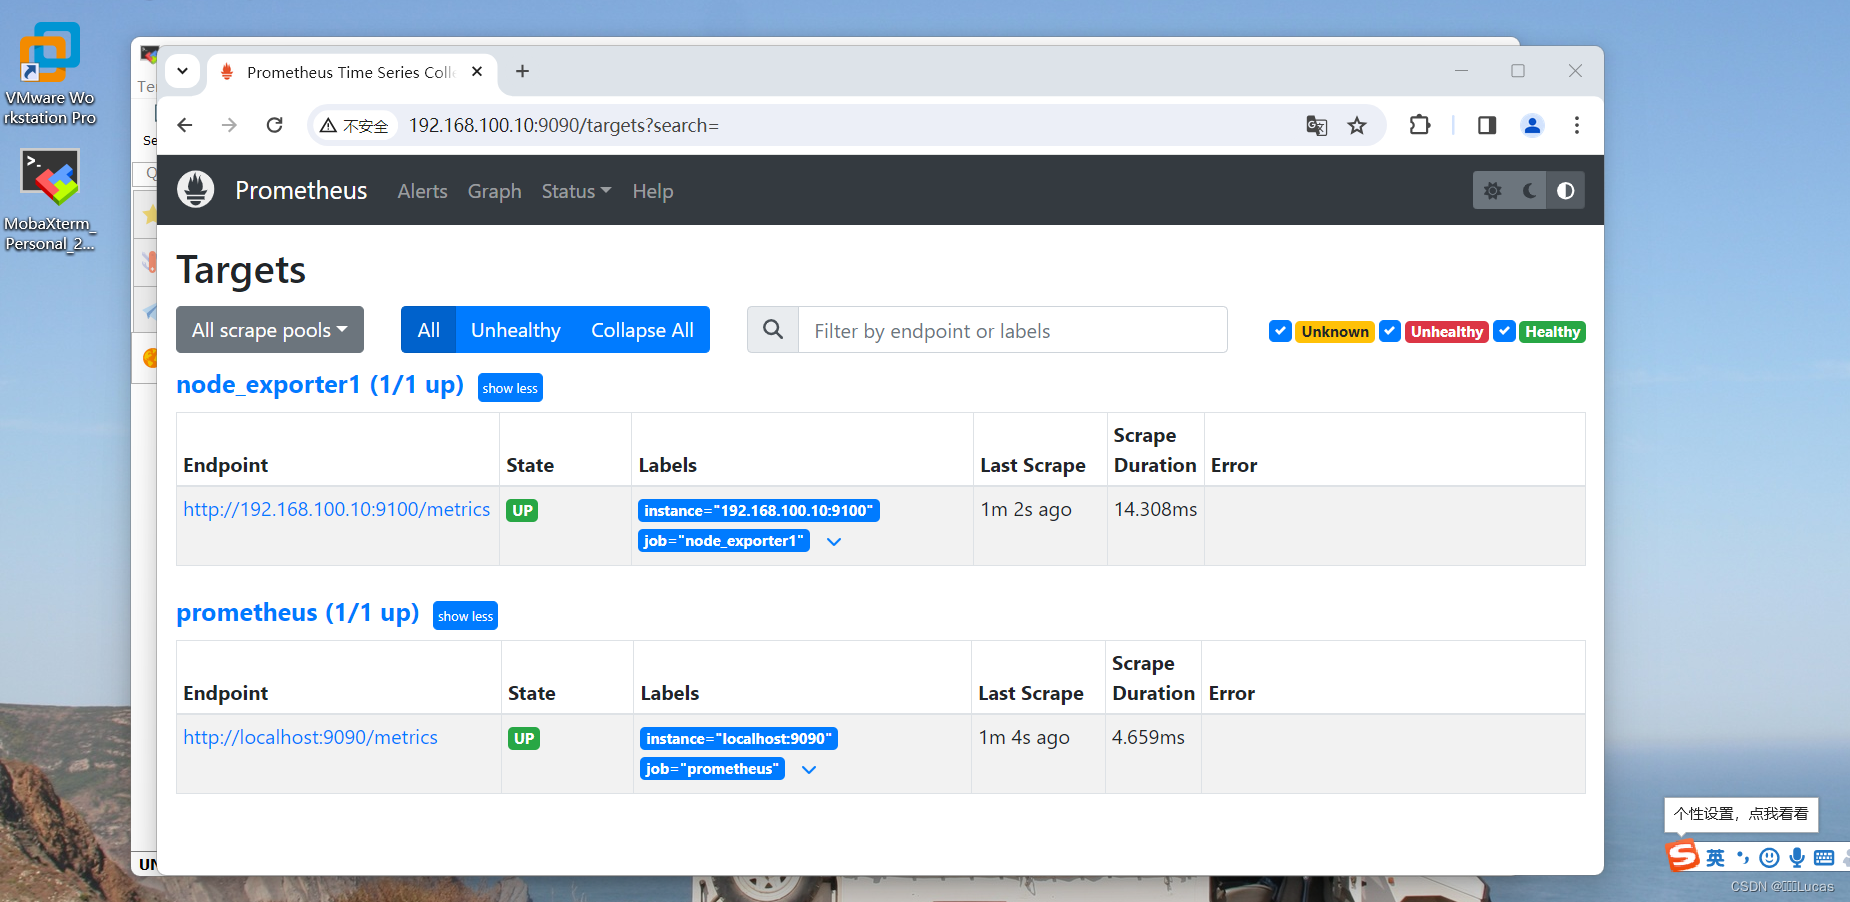
23、查看node_exporter运行状态
四、扩展
链接:Rocky Linux安装部署Prometheus


 532
532


 被折叠的 条评论
为什么被折叠?
被折叠的 条评论
为什么被折叠?
 到【灌水乐园】发言


