


1.labelme 的使用
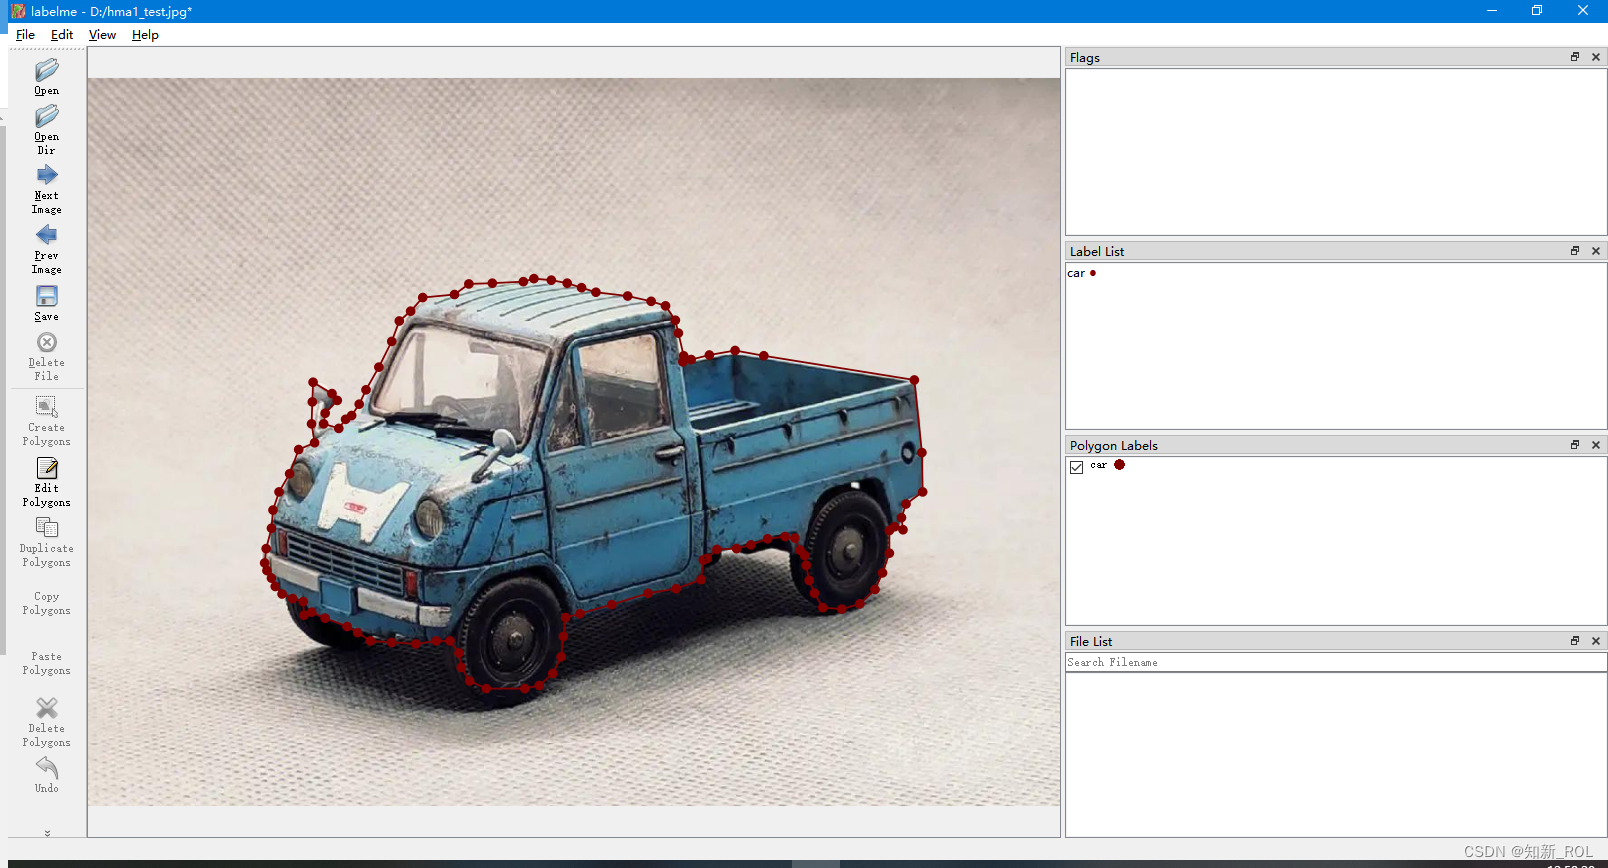
每张图片会对应生成一个:
![]()
以上已经画好所有的数据集(!!)
2.这里介绍一下如果都是没有变化的数据集,标签的位置都一样,如何批量生成这个数据集
我们先将第一个数据集复制2275个,
import shutil

# 设置源文件和目标文件夹路径
source_file = 'E:\\data_seg\\quanjingCameraPicture\\segdata0001.json'
target_folder = 'E:\\data_seg\\quanjingCameraPicture\\'

# 循环从2到2275
for i in range(2, 2276):
    # 创建目标文件名
    target_file = target_folder + 'segdata' + str(i).zfill(4) + '.json'
    # 复制源文件到目标文件
    shutil.copyfile(source_file, target_file)
修改相应的路径就能生成下面的数据集
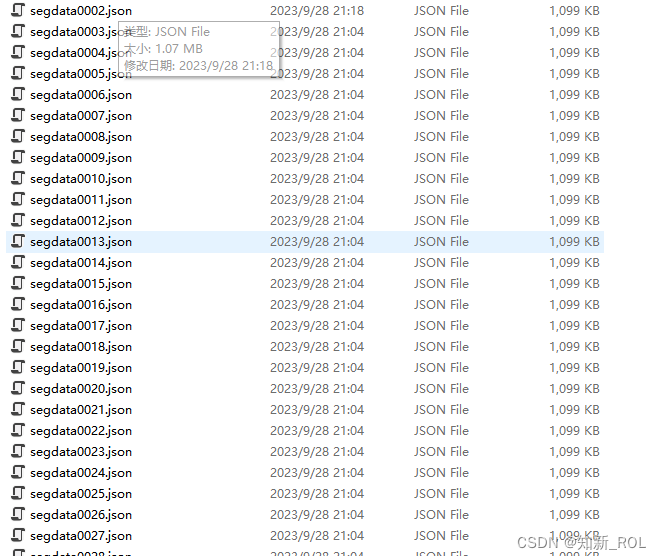
打开生成的数据集可以发现:

由于是直接复制第一张图片生成的json ,所以,其中的字典值
imagePath 和imageData 需要做出相应的替换。
下面是替换的代码:
1.修改 imagePath ---的相对应的图片名称
import json
import os

# 设置文件夹路径
folder_path = 'E:\\data_seg\\quanjingCameraPicture\\'

# 循环从2到2275
for i in range(2, 2276):
    # 创建文件名
    file_name = 'segdata' + str(i).zfill(4) + '.json'
    file_path = os.path.join(folder_path, file_name)

    # 读取文件
    with open(file_path, 'r') as json_file:
        data = json.load(json_file)

    # 修改参数
    data['imagePath'] = 'segdata' + str(i).zfill(4) + '.jpg'

    # 重新写入文件
    with open(file_path, 'w') as json_file:
        json.dump(data, json_file, indent=4)
2.修改 imageData ---的相对应的图片的字节流时的信息,
import json
import os
import base64
from PIL import Image
import io

# 设置文件夹路径
folder_path = 'E:\\data_seg\\quanjingCameraPicture\\'

# 循环从2到2275
for i in range(2, 2276):
    # 创建文件名
    json_file_name = 'segdata' + str(i).zfill(4) + '.json'
    img_file_name = 'segdata' + str(i).zfill(4) + '.jpg'

    json_file_path = os.path.join(folder_path, json_file_name)
    img_file_path = os.path.join(folder_path, img_file_name)

    # 将图像转换为Base64编码的字节流
    with Image.open(img_file_path) as img:
        buf = io.BytesIO()
        img.save(buf, format='JPEG')
        base64_data = base64.b64encode(buf.getvalue()).decode()

    # 读取JSON文件
    with open(json_file_path, 'r') as json_file:
        data = json.load(json_file)

    # 修改参数
    data['imageData'] = base64_data

    # 重新写入文件
    with open(json_file_path, 'w') as json_file:
json.dump(data, json_file, indent=4) 
以上是完成了所有的生成,我们把它新建一个文件夹放在里面,接下来进行数据类型的转换
3. Labelme格式数据转为COCO格式
这部分,首先需要将Labelme标注的数据(Json格式数据)转换为COCO格式数据(将所有的Labelme标注的Json数据合并到一个COCO json文件中)。废话不多说,直接上代码labelme2coco.py:
# Labelme格式数据转为COCO格式
# !/usr/bin/env python

import argparse
import collections
import datetime
import glob
import json
import os
import os.path as osp
import sys
import uuid

import imgviz
import numpy as np

import labelme

try:
    import pycocotools.mask
except ImportError:
    print("Please install pycocotools:\n\n    pip install pycocotools\n")
    sys.exit(1)


def main():
    parser = argparse.ArgumentParser(
        formatter_class=argparse.ArgumentDefaultsHelpFormatter
    )
    # --input_dir为存放labelme标注json文件所在的文件夹
    parser.add_argument("--input_dir", type=str, default="E:/data_seg/quanjingCameraPicture",
                        help="input annotated directory")
    # --output_dir为输出COCO格式的json文件的文件夹
    parser.add_argument("--output_dir", type=str,
                        default="E:/data_seg/quanjingCameraPicture/coco_json",
                        help="output dataset directory")
    # --labels参数为一个txt文本文件,其中包含标注的所有类别,按行分开
    parser.add_argument("--labels", type=str, default="E:/data_seg/quanjingCameraPicture/labels.txt", help="labels file")
    parser.add_argument(
        "--noviz", help="no visualization", action="store_true"
    )
    args = parser.parse_args()

    if osp.exists(args.output_dir):
        print("Output directory already exists:", args.output_dir)
        sys.exit(1)
    os.makedirs(args.output_dir)
    os.makedirs(osp.join(args.output_dir, "JPEGImages"))
    if not args.noviz:
        os.makedirs(osp.join(args.output_dir, "Visualization"))
    print("Creating dataset:", args.output_dir)

    now = datetime.datetime.now()

    data = dict(
        info=dict(
            description=None,
            url=None,
            version=None,
            year=now.year,
            contributor=None,
            date_created=now.strftime("%Y-%m-%d %H:%M:%S.%f"),
        ),
        licenses=[
            dict(
                url=None,
                id=0,
                name=None,
            )
        ],
        images=[
            # license, url, file_name, height, width, date_captured, id
        ],
        type="instances",
        annotations=[
            # segmentation, area, iscrowd, image_id, bbox, category_id, id
        ],
        categories=[
            # supercategory, id, name
        ],
    )
    errcnt = 0
    class_name_to_id = {}
    for i, line in enumerate(open(args.labels).readlines()):
        class_id = i  # starts with -1
        class_name = line.strip()
        if class_id == -1:
            assert class_name == "__ignore__"
            continue
        class_name_to_id[class_name] = class_id
        data["categories"].append(
            dict(
                supercategory=None,
                id=class_id,
                name=class_name,
            )
        )

    out_ann_file = osp.join(args.output_dir, "annotations.json")
    label_files = glob.glob(osp.join(args.input_dir, "*.json"))
    # label_files = label_files1[1500:]
    # print(type(label_files))
    # print(label_files)

    for image_id, filename in enumerate(label_files):
        print("Generating dataset from:", filename)
        try:
            label_file = labelme.LabelFile(filename=filename)
        except:
            errcnt += 1
            print("出现异常")
            continue

        base = osp.splitext(osp.basename(filename))[0]
        out_img_file = osp.join(args.output_dir, "JPEGImages", base + ".jpg")

        img = labelme.utils.img_data_to_arr(label_file.imageData)
        imgviz.io.imsave(out_img_file, img)
        data["images"].append(
            dict(
                license=0,
                url=None,
                file_name=osp.relpath(out_img_file, osp.dirname(out_ann_file)),
                height=img.shape[0],
                width=img.shape[1],
                date_captured=None,
                id=image_id,
            )
        )

        masks = {}  # for area
        segmentations = collections.defaultdict(list)  # for segmentation
        for shape in label_file.shapes:
            points = shape["points"]
            label = shape["label"]
            group_id = shape.get("group_id")
            shape_type = shape.get("shape_type", "polygon")
            mask = labelme.utils.shape_to_mask(
                img.shape[:2], points, shape_type
            )

            if group_id is None:
                group_id = uuid.uuid1()

            instance = (label, group_id)

            if instance in masks:
                masks[instance] = masks[instance] | mask
            else:
                masks[instance] = mask

            if shape_type == "rectangle":
                (x1, y1), (x2, y2) = points
                x1, x2 = sorted([x1, x2])
                y1, y2 = sorted([y1, y2])
                points = [x1, y1, x2, y1, x2, y2, x1, y2]
            if shape_type == "circle":
                (x1, y1), (x2, y2) = points
                r = np.linalg.norm([x2 - x1, y2 - y1])
                # r(1-cos(a/2))<x, a=2*pi/N => N>pi/arccos(1-x/r)
                # x: tolerance of the gap between the arc and the line segment
                n_points_circle = max(int(np.pi / np.arccos(1 - 1 / r)), 12)
                i = np.arange(n_points_circle)
                x = x1 + r * np.sin(2 * np.pi / n_points_circle * i)
                y = y1 + r * np.cos(2 * np.pi / n_points_circle * i)
                points = np.stack((x, y), axis=1).flatten().tolist()
            else:
                points = np.asarray(points).flatten().tolist()

            segmentations[instance].append(points)
        segmentations = dict(segmentations)

        for instance, mask in masks.items():
            cls_name, group_id = instance
            if cls_name not in class_name_to_id:
                continue
            cls_id = class_name_to_id[cls_name]

            mask = np.asfortranarray(mask.astype(np.uint8))
            mask = pycocotools.mask.encode(mask)
            area = float(pycocotools.mask.area(mask))
            bbox = pycocotools.mask.toBbox(mask).flatten().tolist()

            data["annotations"].append(
                dict(
                    id=len(data["annotations"]),
                    image_id=image_id,
                    category_id=cls_id,
                    segmentation=segmentations[instance],
                    area=area,
                    bbox=bbox,
                    iscrowd=0,
                )
            )

        if not args.noviz:
            viz = img
            if masks:
                labels, captions, masks = zip(
                    *[
                        (class_name_to_id[cnm], cnm, msk)
                        for (cnm, gid), msk in masks.items()
                        if cnm in class_name_to_id
                    ]
                )
                viz = imgviz.instances2rgb(
                    image=img,
                    labels=labels,
                    masks=masks,
                    captions=captions,
                    font_size=15,
                    line_width=2,
                )
            out_viz_file = osp.join(
                args.output_dir, "Visualization", base + ".jpg"
            )
            imgviz.io.imsave(out_viz_file, viz)

    with open(out_ann_file, "w") as f:
        json.dump(data, f)
    print(errcnt)


if __name__ == "__main__":
    main()
生成后的数据集如下:
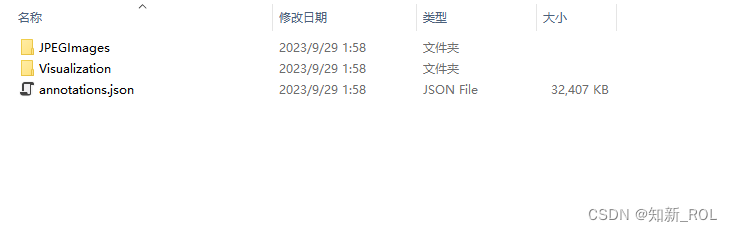
分割好的数据集如上所示,我们还需要将COCO数据集转化为yolo数据集的格式:
4.COCO数据集转化为yolo数据集的格式:
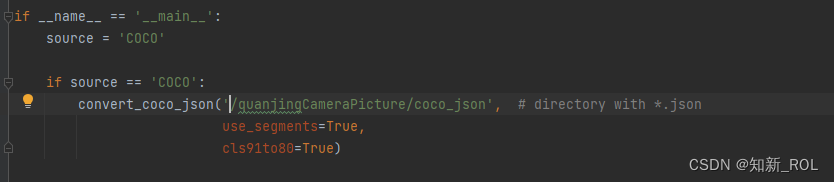
【1】修改general_json2yolo.py中的COCO格式json文件所在的文件夹路径(注意:是文件夹路径,不要直接写文件路径)。
https://github.com/ultralytics/JSON2YOLO
general_json2yolo.py第一处修改
general_json2yolo.py 第二处修改
原来的:

修改后的:
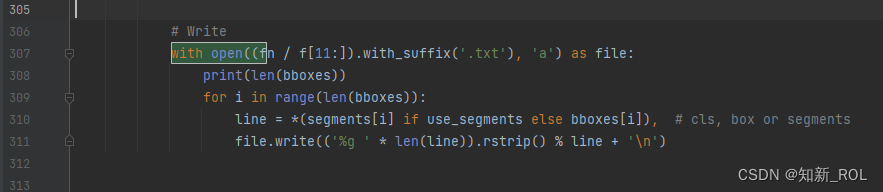
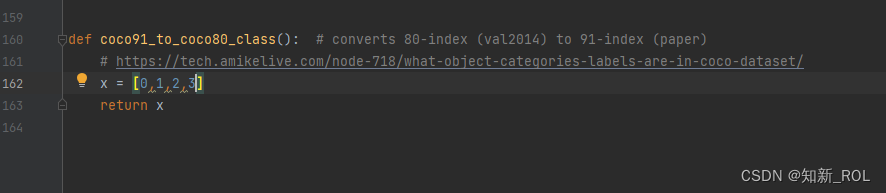
还需要修改的是utils.py 中需要修改
这里有几个类别就替换成自己的类别
修改完这几个之后就可以运行代码general_json2yolo,.py
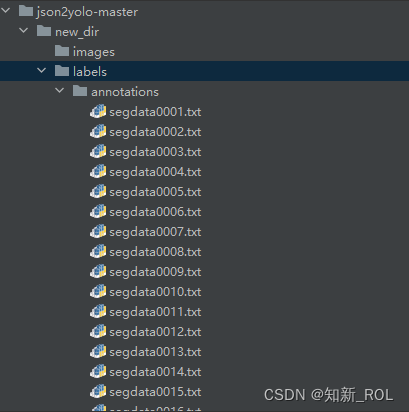
就生成对应的txt标签啦:
4.对标签进行划分
import glob
import shutil
import random
import os


def split_dataset():
    # txt_path 路径存放的是图片和txt标注数据混合的文件夹路径
    txt_path = r"E://yolov5-6.0//json2yolo-master//new_dir//images"
    txt_files = glob.glob(txt_path + "/*.txt")
    # 输出训练集和验证集图片的文件夹
    images_base_dir = r"E://yolov5-6.0//json2yolo-master//new_dir//outputs//images"
    # 输出训练集和验证集标注txt的文件夹
    labels_base_dir = r"E://yolov5-6.0//json2yolo-master//new_dir//outputs//labels"

    # 训练集图片文件夹
    images_train_dir = os.path.join(images_base_dir, "train")
    # 训练集标注文件夹
    labels_train_dir = os.path.join(labels_base_dir, "train")
    # 验证集图片文件夹
    images_val_dir = os.path.join(images_base_dir, "val")
    # 验证集标注文件夹
    labels_val_dir = os.path.join(labels_base_dir, "val")
    # 生成所需4个文件夹
    [os.mkdir(dir_path) for dir_path in [images_train_dir, labels_train_dir, images_val_dir, labels_val_dir]]
    # 验证集数据的比例,可以自定义成任何你所需要的比例
    val_rate = 0.2
    for txt_ori_path in txt_files:
        fpath, fname = os.path.split(txt_ori_path)  # 分离文件名和路径
        if random.randint(1, 5) == 10 * val_rate:
            # 验证集数据
            txt_dst_path = os.path.join(labels_val_dir, fname)
            img_dst_path = os.path.join(images_val_dir, fname.replace(".txt", ".jpg"))
        else:
            # 训练集
            txt_dst_path = os.path.join(labels_train_dir, fname)
            img_dst_path = os.path.join(images_train_dir, fname.replace(".txt", ".jpg"))
        # 执行复制
        # 图片都是jpg,且和原始txt文件在同一个目录,所以可以这么写
        img_ori_path = txt_ori_path.replace(".txt", ".jpg")
        # 移动标注文件
        shutil.copy(txt_ori_path, txt_dst_path)
        # 移动图片文件
        shutil.copy(img_ori_path, img_dst_path)


if __name__ == "__main__":
    split_dataset()
后续更新在qt 中如何使用。


 597
597


 被折叠的 条评论
为什么被折叠?
被折叠的 条评论
为什么被折叠?
 到【灌水乐园】发言


