


❤ React的安装和使用
1、环境检测和准备
环境要求
要求:Node>=8.10 并且 npm>=5.6
建议:Node>=10.14.2,否则会报错:error babel-jest@26.6.3: The engine “node” is incompatible with this module. Expected version “>= 10.14.2”. Got “10.13.0”
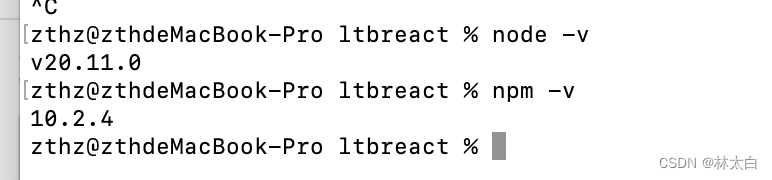
查看本机器的node环境和npm环境
我本地直接用的比较新的
node -v  //v20.11.0
npm -v. //10.2.4
2、React的安装和使用
主要安装react和react-dom这两个
npm i react react-dom
reactJs警告提示:
This version of tar is no longer supported, and will not receive security updates. Please upgrade asap
翻译:tar@2.2.2:此版本的tar不再受支持,将不会收到安全更新。请尽快升级。
简而言之:tar@2.2.2过期
运行:npm install -g tar
tar的版本更新到最新
检查React版本是否安装:
create-react-app -V

显示我的版本已经安装成功,猜测可能是安装成功再次安装给的提示!
3、创建项目并运行
1、 创建 react 项目


2、进入到项目里
cd my-app

3、安装 less 及 loader
yarn add -D less less-loader

4、将 webpack 配置暴露出来
yarn eject

5、打开 /config/webpack.config.js
全局搜索 style files regexes 找到如下代码位置

// style files regexes
const cssRegex = /\.css$/
const cssModuleRegex = /\.module\.css$/
const sassRegex = /\.(scss|sass)$/
const sassModuleRegex = /\.module\.(scss|sass)$/


6、在这个代码的下边添加两行 less 的配置
// style files regexes
const cssRegex = /\.css$/
const cssModuleRegex = /\.module\.css$/
const sassRegex = /\.(scss|sass)$/
const sassModuleRegex = /\.module\.(scss|sass)$/

const lessRegex = /\.less$/ // 新添加的
const lessModuleRegex = /\.module\.less$/ // 新添加的


7、全局搜索 test: sassModuleRegex,找到如下代码位置:
            // Adds support for CSS Modules, but using SASS
            // using the extension .module.scss or .module.sass
            {
              test: sassModuleRegex,
              use: getStyleLoaders(
                {
                  importLoaders: 3,
                  sourceMap: isEnvProduction
                    ? shouldUseSourceMap
                    : isEnvDevelopment,
                  modules: {
                    mode: 'local',
                    getLocalIdent: getCSSModuleLocalIdent,
                  },
                },
                'sass-loader'
              ),
            },
            // "file" loader makes sure those assets get served by WebpackDevServer.
            // When you `import` an asset, you get its (virtual) filename.
            // In production, they would get copied to the `build` folder.
            // This loader doesn't use a "test" so it will catch all modules
            // that fall through the other loaders.
            {
              // Exclude `js` files to keep "css" loader working as it injects
              // its runtime that would otherwise be processed through "file" loader.
              // Also exclude `html` and `json` extensions so they get processed
              // by webpacks internal loaders.
              exclude: [/^$/, /\.(js|mjs|jsx|ts|tsx)$/, /\.html$/, /\.json$/],
              type: 'asset/resource',
            },

9、添加 less 的 loader 就完成了

            // Adds support for CSS Modules, but using SASS
            // using the extension .module.scss or .module.sass
            {
              test: sassModuleRegex,
              use: getStyleLoaders(
                {
                  importLoaders: 3,
                  sourceMap: isEnvProduction
                    ? shouldUseSourceMap
                    : isEnvDevelopment,
                  modules: {
                    mode: 'local',
                    getLocalIdent: getCSSModuleLocalIdent,
                  },
                },
                'sass-loader'
              ),
            },

            // ------------- 从这里往下都是添加的行
            {
              test: lessRegex,
              exclude: lessModuleRegex,
              use: getStyleLoaders(
                {
                  importLoaders: 2,
                  sourceMap: isEnvProduction
                    ? shouldUseSourceMap
                    : isEnvDevelopment,
                },
                'less-loader'
              ),
              // Don't consider CSS imports dead code even if the
              // containing package claims to have no side effects.
              // Remove this when webpack adds a warning or an error for this.
              // See https://github.com/webpack/webpack/issues/6571
              sideEffects: true,
            },

            {
              test: lessModuleRegex,
              use: getStyleLoaders(
                {
                  importLoaders: 2,
                  sourceMap: isEnvProduction && shouldUseSourceMap,
                  modules: {
                    getLocalIdent: getCSSModuleLocalIdent,
                  },
                },
                'less-loader'
              ),
            },
            // ------------- 从这里往上都是添加的行

            // "file" loader makes sure those assets get served by WebpackDevServer.
            // When you `import` an asset, you get its (virtual) filename.
            // In production, they would get copied to the `build` folder.
            // This loader doesn't use a "test" so it will catch all modules
            // that fall through the other loaders.
            {
              // Exclude `js` files to keep "css" loader working as it injects
              // its runtime that would otherwise be processed through "file" loader.
              // Also exclude `html` and `json` extensions so they get processed
              // by webpacks internal loaders.
              exclude: [/^$/, /\.(js|mjs|jsx|ts|tsx)$/, /\.html$/, /\.json$/],
              type: 'asset/resource',
            },


10、配置结束
直接在项目里引入一个 less 文件,就可以正常的使用了
4、❤ 单页面HTML引用React 和 Ant Design使用
(1)引入React 和 Ant Design
第一步:引用React
第二步:引用antd和相关依赖库
第三步:使用antd组件,antd.components
<!DOCTYPE html>
<html>

<head>
    <meta charset="utf-8" />
    <title>antd</title>
    <!-- 1 引用React -->
    <script crossorigin src="https://unpkg.com/react@16/umd/react.development.js"></script>
    <script crossorigin src="https://unpkg.com/react-dom@16/umd/react-dom.development.js"></script>

    <!-- 2 引用babel转化React-->
    <script src="https://cdn.bootcss.com/babel-standalone/6.26.0/babel.min.js"></script>

    <!-- 3 引用moment React-->
    <script src="https://cdnjs.cloudflare.com/ajax/libs/moment.js/2.20.1/moment.min.js"></script>

    <!-- 4 引用antd-->
    <script src="https://unpkg.com/antd@3.9.3/dist/antd.min.js"></script>
    <link rel="https://unpkg.com/antd@3.9.3/dist/antd.min.css" />
</head>

<body>
    <script type="text/babel">
    ReactDOM.render(
      <div>
      Hello antd
      <br/>
      <antd.Button type="primary">Primary</antd.Button>
      </div>,
      document.getElementById("app")
      )
    </script>
    <div id="app">
    	<antd.Button type="primary">Primary</antd.Button>
    </div>
</body>

</html>
(2)引入生厂环境和开发环境cdn
// 适用于开发环境:
<script crossorigin src="https://unpkg.com/react@16/umd/react.development.js"></script>
<script crossorigin src="https://unpkg.com/react-dom@16/umd/react-dom.development.js"></script>


// 适用于生产环境:
<script crossorigin src="https://unpkg.com/react@16/umd/react.production.min.js"></script>
<script crossorigin src="https://unpkg.com/react-dom@16/umd/react-dom.production.min.js"></script>


// babel  v6或稳定版
<!-- v6 <script src="https://unpkg.com/babel-standalone@6/babel.min.js"></script> -->
<script src="https://unpkg.com/@babel/standalone/babel.min.js"></script>
(3)报错
报错:Uncaught TypeError: Wf(…) is not a function和Uncaught ReferenceError: antd is not defined
原因:antd有个依赖库moment.js没有被引入,所以antd对象不能生成。
解决:把moment.js引入即可,


 863
863


 被折叠的 条评论
为什么被折叠?
被折叠的 条评论
为什么被折叠?
 到【灌水乐园】发言


