


第二章 前端页面的布局和数据结构的定义
前言
此文章来源于我的CSDN。
前面一篇文章介绍了聊天用到的的核心工具Socket.IO和本项目的使用方案,没看过的建议先看看
从零开始使用Socket.IO加Node搭建聊天室【第一篇】
这一篇文章主要讲述项目的前端页面和聊天需要用到的字段,方便后续加入更复杂的功能。
一、聊天字段定义
字段分为聊天信息的字段和
聊天消息的定义字段和Websocket消息类型字段,下面介绍一些主要用到的字段接口
聊天消息的定义字段
  // 当前的所有消息
  messagesList: ChatMessagesInterface[] | any[] = [];
  // 消息类型枚举
  chatMessagesType = ChatMessagesTypeEnum;
  // 当前用户信息
  userInfo: User;
  // 当前房间频道信息
  roomChannel: ChatChannelRoomInterface;
  // 在线用户列表
  onlineUserList: ChatChannelRoomUserInterface[] = [];
  // 发送用的消息体
  message: ChatMessagesInterface = new ChatMessagesModal();
/**
 * 消息接口
 */
export interface ChatMessagesInterface {
  // 附件
  attachments: any[];
  // 作者
  author: {
    // 头像
    avatar: string;
    // 头像描述
    avatar_decoration: string;
    // 鉴别器
    discriminator: string;
    // 全局名称
    global_name: string;
    // id
    id: number;
    // 公共标签
    public_flags: number;
    // 用户名
    username: string;
  };
  // 频道id
  channel_id: string;
  // 组件
  components: any[];
  // 消息内容
  content: string;
  // 编辑消息的时间
  edited_timestamp: string;
  // 反应
  reaction: {
    emoji: string,
    count: number,
    user: number[]
  }[];
  // 标志
  flags: number;
  // id
  id: number;
  // 提及的人
  mention_everyone: boolean;
  // 提及的角色
  mention_roles: any[];
  // 提及的人名称信息
  mentions: ChatChannelRoomUserInterface;
  // 留言参考
  message_reference: any[];
  // 参考消息
  referenced_message: any[];
  // 固定
  pinned: boolean;
  // 时间
  timestamp: string;
  // 文本转语音
  tts: boolean;
  // 消息类型 用于前端展示判断
  type: ChatMessagesTypeEnum;
  // 系统消息类型枚举
  systemStates?: SystemMessagesEnum;
  // 消息发送状态
  states?: ChatChannelsMessageStatesEnum;
}
主要的字段是:
author:消息来源人发消息的用户信息
content:消息体
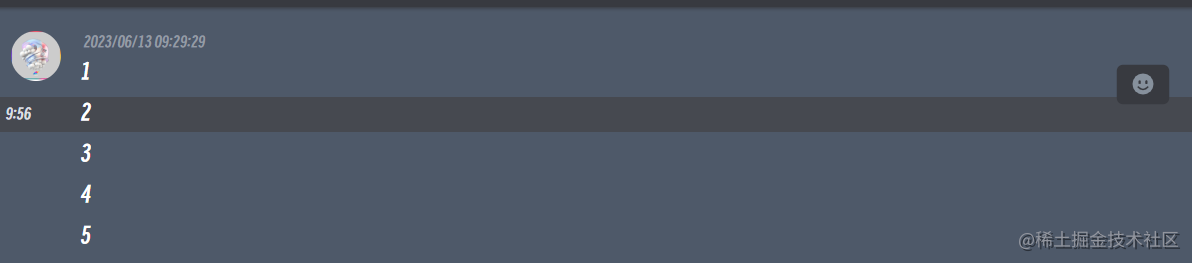
type:消息类型分为了一般消息;
连续消息:一个用户连续发的消息,不用每次都展示头像;
系统消息:用来强调提示其中一些字段是为了后期扩展功能用的字段,比如
attachments:附件,edited_timestamp:消息编辑
type连续发言只显示一次头像,其余消息的发送时间在左侧hover显示:
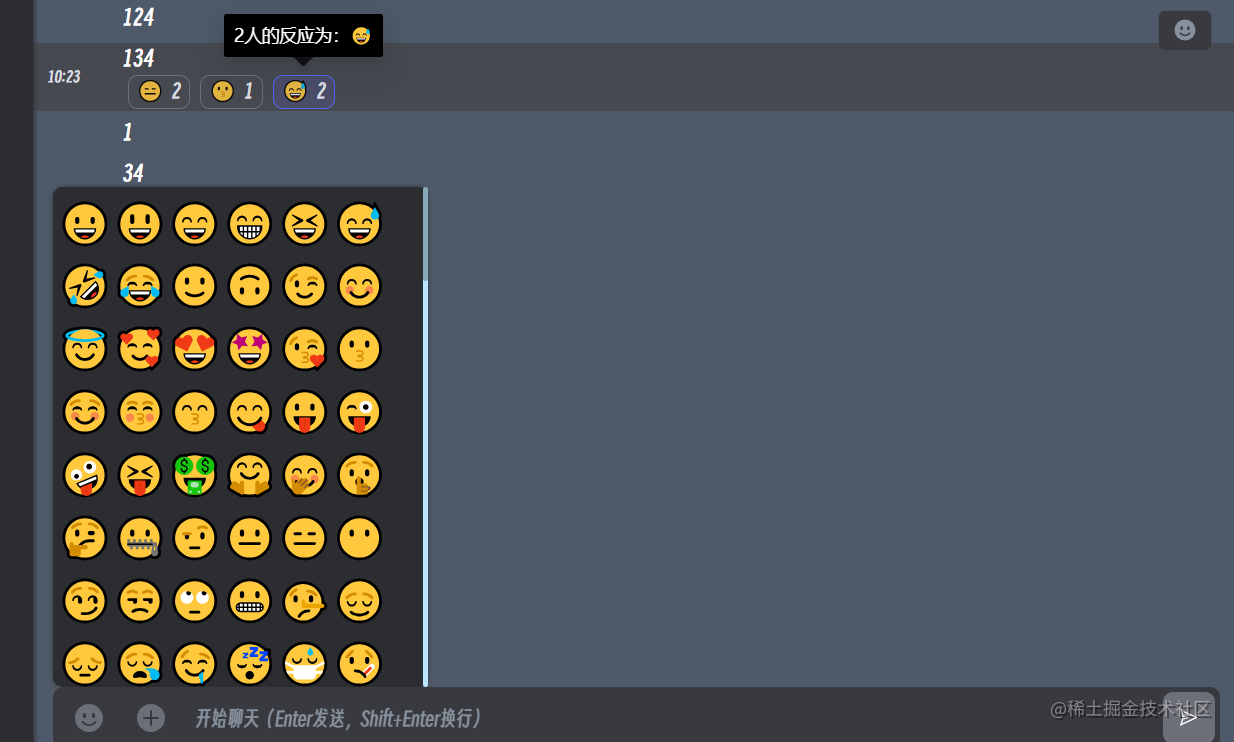
reaction反应字段可以选择一条消息添加你的反应表情:

Websocket消息类型字段
/**
 * 聊天频道订阅接口
 */
export interface ChatChannelSubscribeInterface {
  // 消息类型
  type: ChatChannelsMessageTypeEnum;
  // 消息体
  msg: ChatChannelRoomInterface | ChatChannelSystemStatesUserInterface | any;
}

/**
 * 聊天频道聊天频道房间接口
 */
export interface ChatChannelRoomInterface {
  // 消息类型
  systemStates: SystemMessagesEnum;
  // 房间ID
  roomId: string;
  // 房间名称
  roomName: string;
  // 用户信息
  users: ChatChannelRoomUserInterface[];
}

/**
 * 聊天频道聊天频道在线用户接口
 */
export interface ChatChannelRoomUserInterface {
  // id
  id: number;
  // socketId
  socketId: string;
  // 名称
  userName: string;
  // 头像
  avatar: string;
  // 备注
  remarks: string;
  // 角色
  role: string;
  // 角色名称
  roleName: string;
}
userName在线用户名称,remarks名称下方的备注,avatar头像:
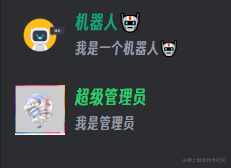
核心宗旨是用来接收消息之后根据字段给前端用来展示
二、前端聊天室的布局
既然是模仿
discord的聊天社区来做的功能,先看看discord的聊天布局是什么样的
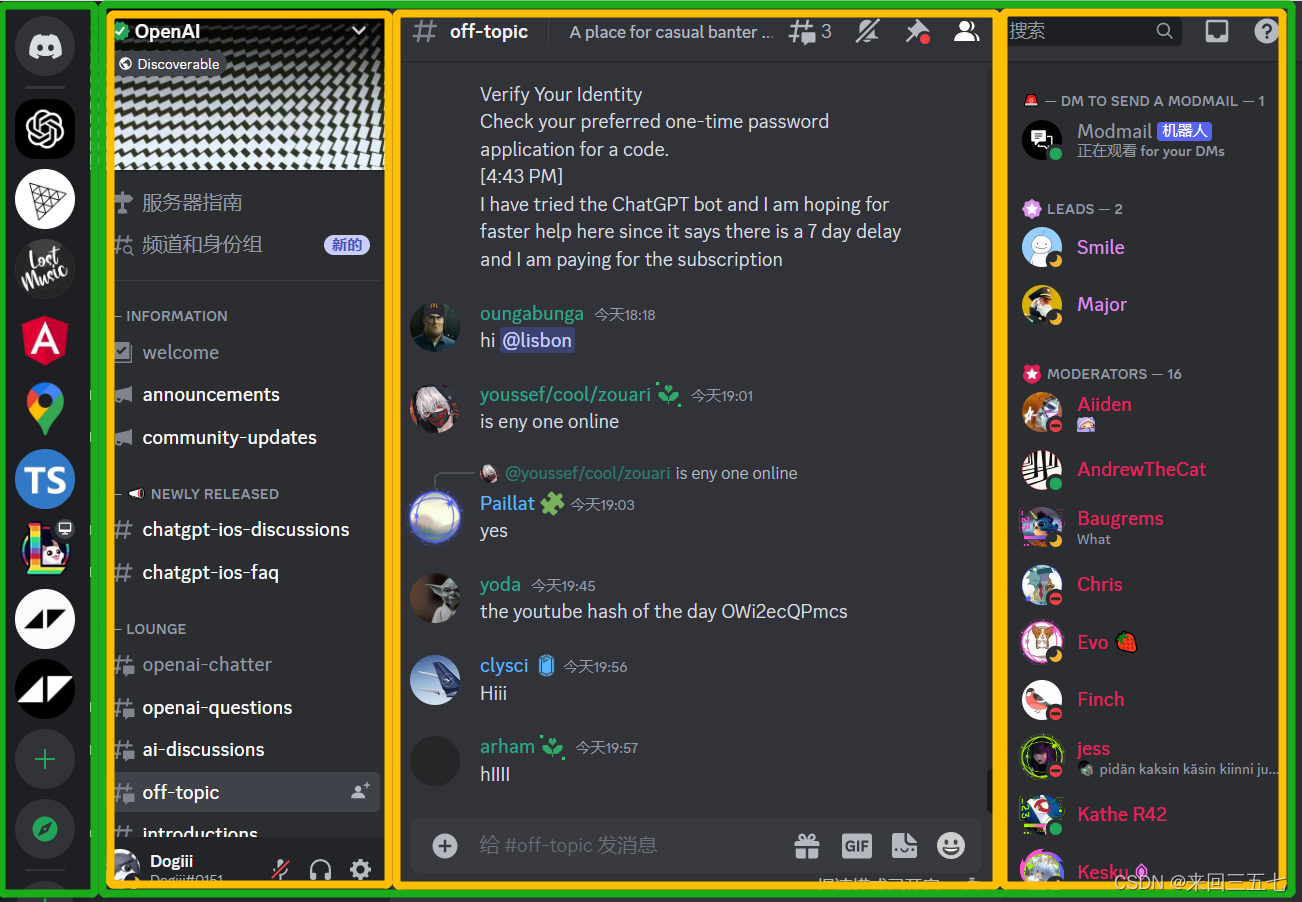
看完他的布局我想大家都有思路了吧,就使用
display:flex布局。
当然我们一开始可以做一些简单的界面,就把第三个黄色框的在线用户移到第一个黄色的位置。
先看一下最终的效果吧:

和官方的界面比起来还是比较简陋的,不过实现功能是足够了
我把界面分为了两个组件(component)
ChatSidebarComponent,最左侧的房间列表
ChatBaseComponent,房间的用户列表和聊天界面
CSS样式在源码里面,不占用过多的篇幅,代码都在前端源码地址
ChatSidebarComponent(房间列表):
li标签后期可以用来循环当前用户的房间列表
<div class="wrapper">
<div class="option-tree">
<!--固定的公共频道-->
<div class="avatar" nzTooltipTitle="闲聊频道" nzTooltipPlacement="right" nz-tooltip>
<img src="https://www.evziyi.top/data/avatar/processing_or_loading_data.gif" alt="avatar">
</div>
<ul class="tree-ul">
<!--循环该用户有的频道-->
<li class="tree-li"></li>
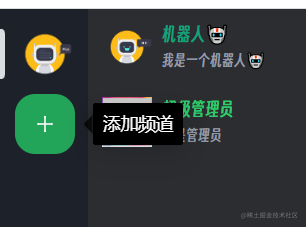
<!--添加频道-->
<li class="add-chat" (click)="createChannel()"
nzTooltipTitle="添加频道" nzTooltipPlacement="right" nz-tooltip>
<span nz-icon nzType="plus" nzTheme="outline"></span>
</li>
</ul>
</div>
</div>
<!--创建频道模板-->
<ng-template #createChannelTemp>
<app-create-channel></app-create-channel>
</ng-template>
每一个li标签都是一个频道,新增频道功能正在开发中:
ChatBaseComponent(用户、聊天界面):
<div class="container">
  <!--左侧导航-->
  <div class="sidebar isHidden" [ngClass]="{'sidebar-collapsed':isCollapsed}">
    <!--用户列-->
    <ol class="scrollerInner" aria-label="用户" role="list" tabindex="0">
      <!--每一个在线用户-->
      <li class="onlineUserList" aria-setsize="-1" *ngFor="let item of onlineUserList;index as idx">
        <div class="user-item" (contextmenu)="contextMenu($event, menu)">
          <!--头像-->
          <ng-container *ngIf="!item.avatar;else avatar">
            <nz-avatar
              [nzGap]="1"
              [ngStyle]="{ 'background-color': '#ffbf00' }"
              [nzText]="item.userName"
              nzSize="large"
              style="vertical-align: middle;"
              class="user-avatar"
            ></nz-avatar>
          </ng-container>
          <ng-template #avatar>
            <img [src]="item.avatar | avatarConversion" alt="头像" class="user-avatar">
          </ng-template>
          <!--名称-->
          <p class="user-title">
            {{item.userName}}
          </p>
          <!--备注-->
          <p class="user-remarks">
            {{item.remarks}}
          </p>
        </div>
          <!--右键功能-->
        <nz-dropdown-menu #menu="nzDropdownMenu">
          <ul nz-menu>
            <li nz-menu-item (click)="mention(item)">@提及</li>
          </ul>
        </nz-dropdown-menu>
      </li>
    </ol>
  </div>
  <!--中间和右侧房间信息-->
  <div class="chat">
    <div class="content">
      <!--置顶-->
      <div class="top-info">
        <div class="info-txt">
          欢迎来到公共聊天频道!
        </div>
        <div class="operation-group">
          <span class="operation hidden-user-list" title="在线用户" nz-icon nzType="team" nzTheme="outline"
                (click)="hiddenOnlineUser()"></span>
          <span class="operation quit" title="退出" nz-icon nzType="poweroff" nzTheme="outline"
                (click)="quit()"></span>
        </div>
      </div>
      <!--主体框-->
      <div class="messagesWrapper">
        <div #scrollerBase class="scrollerBase">
          <!--消息列-->
          <ol class="scrollerInner" aria-label="消息" role="list" tabindex="0">
            <!--每一条消息-->
            <li class="messageListItem" aria-setsize="-1" *ngFor="let item of messagesList;index as idx">
              <ng-container [ngSwitch]="item.type">
                <!--一般消息-->
                <ng-container *ngSwitchCase="chatMessagesType.general">
                  <div class="message" role="article" tabindex="-1" aria-setsize="-1" aria-roledescription="消息"
                       aria-labelledby="message-username">
                    <div class="contents">
                      <!--头像-->
                      <img [src]="item.author.avatar" aria-hidden="true" class="avatar" alt="头像">
                      <!--消息头-->
                      <h3 class="header" aria-labelledby="message-username">
                    <span class="headerText">
                      <!--用户名-->
                      <span class="username" aria-expanded="false" role="button"
                            tabindex="0">{{item.author.username}}</span>
                      <span class="timestamp" role="button" tabindex="0">
                        <!--时间-->
                        <time aria-label="{{item.timestamp | date:'yyyy/MM/dd HH:mm:ss' | dateConversion}}"
                              datetime="{{item.timestamp}}">
                          {{item.timestamp | date:'yyyy/MM/dd HH:mm:ss' | dateConversion}}
                        </time>
                      </span>
                    </span>
                      </h3>
                      <!--文字消息-->
                      <div class="markupMessage">{{item.content}}</div>
                    </div>
                  </div>
                </ng-container>
                <!--连续发言-->
                <ng-container *ngSwitchCase="chatMessagesType.continuous">
                  <div class="message continuous">
                    <div class="timestamp timeHidden">
                      <time aria-label="{{item.timestamp | date:'yyyy/MM/dd HH:mm:ss' | timeConversion}}"
                            datetime="{{item.timestamp}}">
                        {{item.timestamp | date:'yyyy/MM/dd HH:mm:ss' | timeConversion}}
                      </time>
                    </div>
                    <!--文字消息-->
                    <div class="markupMessage">{{item.content}}</div>
                  </div>
                </ng-container>
                <!--系统消息-->
                <ng-container *ngSwitchCase="chatMessagesType.system">
                  <div class="system">
                    <div class="timestamp timeHidden">
                      <time aria-label="{{item.timestamp | date:'yyyy/MM/dd HH:mm:ss' | timeConversion}}"
                            datetime="{{item.timestamp}}">
                        {{item.timestamp | date:'yyyy/MM/dd HH:mm:ss' | timeConversion}}
                      </time>
                    </div>
                    <ng-container *ngIf="item.systemStates === 'userJoin'">
                      <span class="user-join">{{item.userName}}</span>
                      <span>进入频道</span>
                    </ng-container>
                    <ng-container *ngIf="item.systemStates === 'userlLeft'">
                      <span class="user-join">{{item.userName}}</span>
                      <span>离开频道</span>
                    </ng-container>
                  </div>
                </ng-container>
              </ng-container>
            </li>
          </ol>
        </div>
      </div>
      <!--输入框-->
      <div class="channelTextArea">
        <div class="formArea">
          <div class="textArea">
            <!--placeholder-->
            <div class="placeholder" aria-hidden="true" *ngIf="textValue === ''">开始聊天</div>
            <!--输入框-->
            <div #textBox role="textbox" class="markup" spellcheck="true" aria-haspopup="listbox" aria-invalid="false"
                 aria-autocomplete="list" contenteditable="true" (keydown)="textBoxKeydown($event)"
                 (input)="textBoxChange($event.target.innerHTML)">
            </div>
            <!--发送按钮-->
            <div class="buttonArea">
              <button type="submit" nz-button nzType="primary" class="send-button" title="send" (click)="send()">
                <span nz-icon nzType="send" nzTheme="outline"></span>
              </button>
            </div>
          </div>
        </div>
      </div>
    </div>
  </div>
</div>
截至目前的预览效果为:

这里有几个需要注意的点
1. 聊天输入框并未使用input,而是使用Dom属性contenteditable=true,可以更自由地展示文字
- 因BUG太多,后续开发已经不再使用
contenteditable=true属性,改为textarea,可查看源码更改- 使用了angular的Dom属性
ngSwitch来判断消息类型来展示消息- 每一条消息都是一个
li标签,学习了discord的聊天机制,用户的连续发言无需多次显示头像等数据
总结
这一篇定义了主要的一些字段和根据字段在前端页面的判断展示,核心点如下:
- 学习
discord的聊天机制,同一个用户连续的消息只显示一次头像
2. 输入框使用contenteditable=true,可以扩展更多的功能 - 定义多元化字段,方便后续添加功能
- 定义多种消息类型,展示多种消息类型
下一篇会介绍到客户端(前端)的消息处理和服务端(后端)的消息处理还有最终的效果。


 822
822


 被折叠的 条评论
为什么被折叠?
被折叠的 条评论
为什么被折叠?
 到【灌水乐园】发言


