


配置基础环境
关闭防火墙
[root@VM-20-14-centos ~]# systemctl stop firewalld && systemctl disable firewalld
关闭selinux
[root@VM-20-14-centos ~]# setenforce 0 && sed -i "s/SELINUX=enforcing/SELINUX=disabled/g" /etc/selinux/config
禁止swap分区
[root@VM-20-14-centos ~]# swapoff -a
修改内核参数和模块
[root@VM-20-14-centos ~]# cat <<EOF > /etc/sysctl.d/k8s.conf
net.bridge.bridge-nf-call-ip6tables = 1
net.bridge.bridge-nf-call-iptables = 1
EOF
使内核参数配置生效
[root@VM-20-14-centos ~]# sysctl --system
[root@VM-20-14-centos ~]# modprobe br_netfilter
[root@VM-20-14-centos ~]# lsmod | grep br_netfilter
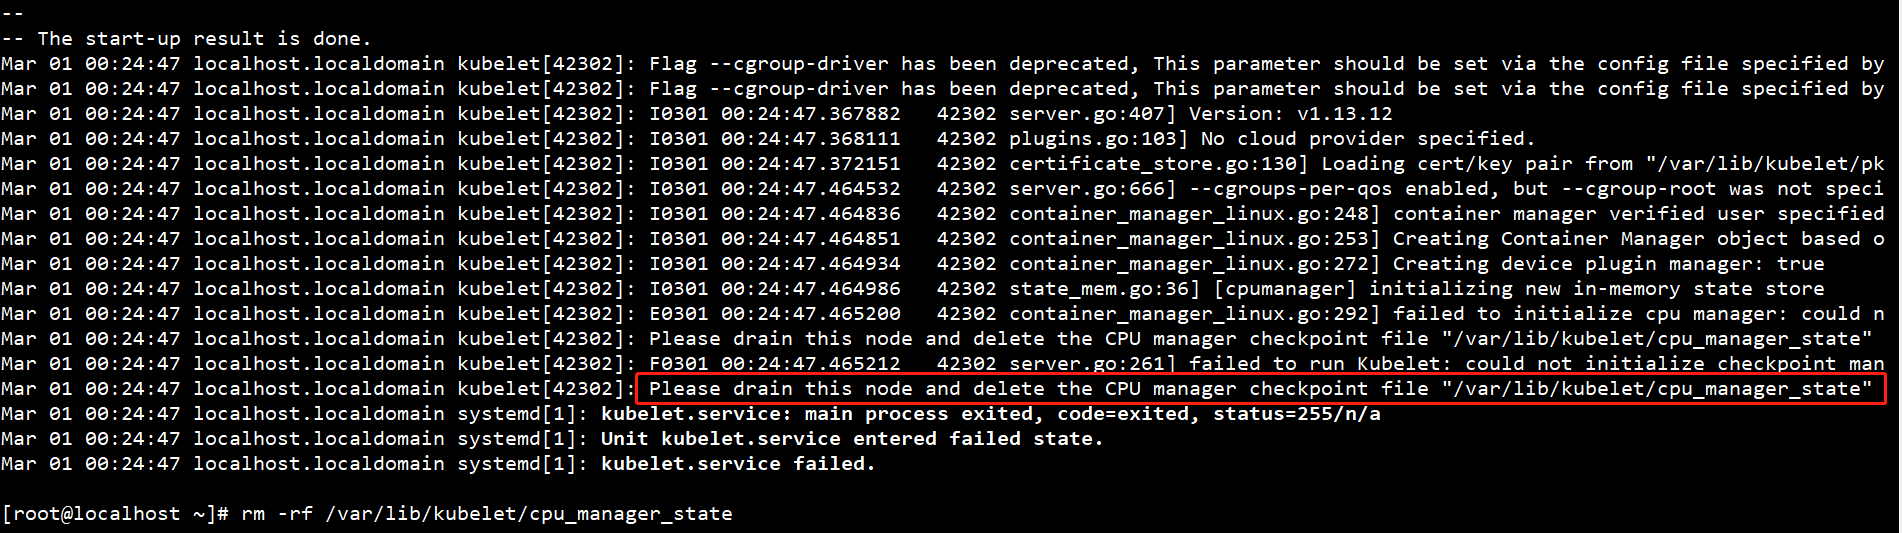
关闭交换内存,如果不关闭,kubelet服务将无法启动
[root@VM-20-14-centos ~]# swapoff -a && sed -i '/ swap / s/^(.*)$/#\1/g' /etc/fstab
安装docker、建议改成国内的源,速度比较快
[root@VM-20-14-centos ~]# yum -y install yum-utils device-mapper-persistent-data lvm2
[root@VM-20-14-centos ~]# yum-config-manager -y --add-repo https://download.docker.com/linux/centos/docker-ce.repo
[root@VM-20-14-centos ~]# yum -y install docker-ce-18.06.3.ce-3.el7 docker-ce-cli-18.06.3.ce-3.el7 containerd.io
[root@VM-20-14-centos ~]# systemctl start docker && systemctl enable docker
设置国内docker仓库
[root@VM-20-14-centos ~]# cat <<EOF > /etc/docker/daemon.json
{
"registry-mirrors": [
"https://3laho3y3.mirror.aliyuncs.com"
]
}
EOF
[root@VM-20-14-centos ~]# systemctl restart docker
配置k8s yum源
[root@VM-20-14-centos ~]# cat <<EOF > /etc/yum.repos.d/kubernetes.repo
[kubernetes]
name=Kubernetes
baseurl=https://mirrors.aliyun.com/kubernetes/yum/repos/kubernetes-el7-x86_64/
enabled=1
gpgcheck=1
repo_gpgcheck=1
gpgkey=https://mirrors.aliyun.com/kubernetes/yum/doc/yum-key.gpg https://mirrors.aliyun.com/kubernetes/yum/doc/rpm-package-key.gpg
EOF
安装Kubernetes基础服务及工具
[root@VM-20-14-centos ~]# yum -y install kubelet-1.13* kubeadm-1.13* kubectl-1.13*
[root@VM-20-14-centos ~]# systemctl start kubelet
[root@VM-20-14-centos ~]# systemctl enable kubelet.service
下载k8s相关镜像并打标签
# 查看需要镜像
[root@VM-20-14-centos ~]# kubeadm config images list

[root@VM-20-14-centos ~]# for i in `kubeadm config images list`; do
imageName=${i#k8s.gcr.io/}
docker pull registry.aliyuncs.com/google_containers/$imageName
docker tag registry.aliyuncs.com/google_containers/$imageName k8s.gcr.io/$imageName
docker rmi registry.aliyuncs.com/google_containers/$imageName
done;
初始化k8s和网络
[root@VM-20-14-centos ~]# kubeadm init --kubernetes-version="v1.13.12" --pod-network-cidr=10.122.0.0/16
–image-repository 因为是从阿里云拉取的docker镜像,需要指定仓库来启动
–pod-network-cidr 指定pod内部的tcp网络
–apiserver-advertise-address 本机绑定的IP地址
安装成功标志
Your Kubernetes master has initialized successfully!
开机启动 && 启动服务
[root@VM-20-14-centos ~]# systemctl enable kubelet && systemctl start kubelet
初始化kubectl配置
[root@VM-20-14-centos ~]# mkdir -p $HOME/.kube
[root@VM-20-14-centos ~]# cp -i /etc/kubernetes/admin.conf $HOME/.kube/config
[root@VM-20-14-centos ~]# chown $(id -u):$(id -g) $HOME/.kube/config
[root@VM-20-14-centos ~]# kubectl apply -f https://cloud.weave.works/k8s/net?k8s-version=$(kubectl version | base64 | tr -d '\n')
默认k8s的master节点是不能跑pod的业务,需要执行以下命令解除限制
[root@VM-20-14-centos ~]# kubectl taint nodes --all node-role.kubernetes.io/master-
#如果不允许调度
[root@VM-20-14-centos ~]# kubectl taint nodes master1 node-role.kubernetes.io/master=:NoSchedule
#污点可选参数
NoSchedule: 一定不能被调度
PreferNoSchedule: 尽量不要调度
NoExecute: 不仅不会调度, 还会驱逐Node上已有的Pod
查看主节点运行 Pod 的状态
[root@VM-20-14-centos ~]# kubectl get pods --all-namespaces -o wide
master节点部署web页面
部署:kubernetes-dashboard
获取资源配置文件
[root@VM-20-14-centos ~]# wget https://raw.githubusercontent.com/kubernetes/dashboard/v2.0.0-rc5/aio/deploy/recommended.yaml–no-check-certificate
[root@VM-20-14-centos ~]# vim recommended.yaml
#定位到39行,修改其提供的service资源
spec:
type: NodePort
ports:
- port: 443
targetPort: 8443
nodePort: 31000
selector:
k8s-app: kubernetes-dashboard
部署pod应用
[root@VM-20-14-centos ~]# kubectl apply -f recommended.yaml
Token 方式认证登录
创建admin-user账户及授权的资源配置文件
[root@VM-20-14-centos ~]# vim dashboard-adminuser.yml
apiVersion: v1
kind: ServiceAccount
metadata:
    name: admin-user
    namespace: kube-system
---
apiVersion: rbac.authorization.k8s.io/v1
kind: ClusterRoleBinding
metadata:
    name: admin-user
roleRef:
    apiGroup: rbac.authorization.k8s.io
    kind: ClusterRole
    name: cluster-admin
subjects:
-   kind: ServiceAccount
    name: admin-user
    namespace: kube-system
创建资源实例
[root@VM-20-14-centos ~]# kubectl create -f dashboard-adminuser.yml
获取账户admin-user的Token用于登录
[root@VM-20-14-centos ~]# kubectl -n kube-system describe secret $(kubectl -n kube-system get secret | grep admin-user | awk '{print $1}')
登录验证
https://192.168.47.132:31000/#/login
1、初始化报错:


 3185
3185

 被折叠的 条评论
为什么被折叠?
被折叠的 条评论
为什么被折叠?
 到【灌水乐园】发言


