


springboot+vue+Nginx实现消息实时推送
业务场景是这样的,公司要将业务员的业绩实时公布在大屏上,于是我就做了一套大屏页面,现在只剩实时更新数据了;vue前端也可以不断轮询请求数据,但是这样你打开F12会发现很多网络请求,很不好看,也不安全,于是我选择了websocket来实时推送
引入websocket的依赖
		<!--websocket-->
        <dependency>
            <groupId>org.springframework.boot</groupId>
            <artifactId>spring-boot-starter-websocket</artifactId>
        </dependency>
向spring注入websocket的bean
import org.springframework.context.annotation.Bean;
import org.springframework.context.annotation.Configuration;
import org.springframework.web.socket.config.annotation.EnableWebSocket;
import org.springframework.web.socket.server.standard.ServerEndpointExporter;
//注意注解
@EnableWebSocket
@Configuration
public class WebSocketConfig {
    @Bean
    public ServerEndpointExporter serverEndpointExporter() {
        return new ServerEndpointExporter();
    }
}
开始写websocket的接收推送消息的方法就行了
import com.alibaba.fastjson.JSONArray;
import com.zbkj.crmeb.tool.service.DateScricpService;
import org.springframework.beans.factory.annotation.Autowired;
import org.springframework.stereotype.Controller;
import javax.websocket.OnClose;
import javax.websocket.OnMessage;
import javax.websocket.OnOpen;
import javax.websocket.Session;
import javax.websocket.server.PathParam;
import javax.websocket.server.ServerEndpoint;
import java.util.ArrayList;
import java.util.HashMap;
import java.util.List;
import java.util.Map;
import java.util.concurrent.CopyOnWriteArraySet;

/**
 * @author zihao
 *
 * @date 2022-02-20
 */
@Controller
@ServerEndpoint("/websocket/{tableId}")
public class WebSocket {

    @Autowired
    private DateScricpService dateScricpService;

    private Session session;
    private String uid;
    public static CopyOnWriteArraySet<WebSocket> webSockets =new CopyOnWriteArraySet<>();
    private static Map<String,Session> sessionPool = new HashMap<String,Session>();
    //session集合
    private static List<Map<String,Object>> sessionList = new ArrayList<>();
    //信息集合
    private static List<Map<String,String>> MessageList = new ArrayList<>();

    @OnOpen
    public void onOpen(Session session, @PathParam(value="tableId")String code) {
        Map<String,Object> map = new HashMap<String,Object>();
        this.session = session;
        this.uid = code;
        webSockets.add(this);
        sessionPool.put(code, session);
        map.put("uid", code);
        map.put("session", session);
        sessionList.add(map);
        // Constants.WEBSOCKET = true;//定义常量  是否开启websocket连接
        System.out.println("【websocket消息】有新的连接,总数为:"+webSockets.size());
    }

    @OnClose
    public void onClose() {
        webSockets.remove(this);
        //Constants.WEBSOCKET = false;
        System.out.println("【websocket消息】连接断开,总数为:"+webSockets.size());
        for (int i = 0; i < MessageList.size(); i++) {
            if(this.uid.equals(MessageList.get(i).get("uid"))){
                MessageList.remove(i);
                break;
            }
        }
        for (int i = 0; i < sessionList.size(); i++) {
            if(this.uid.equals(sessionList.get(i).get("uid"))){
                sessionList.remove(i);
                break;
            }
        }

    }

    @OnMessage
    public void onMessage(String message) {
        System.out.println("【websocket消息】收到客户端消息:"+message);
        if(MessageList != null && MessageList.size() > 0){
            for (Map<String, String> messageMap : MessageList) {
                if(this.uid.equals(messageMap.get("uid"))){
                    messageMap.put("message",message);
                    return;
                }
            }
        }
        Map<String,String> map = new HashMap<String,String>();
        map.put("message",message);
        map.put("uid",this.uid);
        MessageList.add(map);
    }

    // 此为广播消息
    public void sendAllMessage(String message) {
        for(WebSocket webSocket : webSockets) {
            try {
                webSocket.session.getAsyncRemote().sendText(message);
            } catch (Exception e) {
                e.printStackTrace();
            }
        }
    }

    // 此为单点消息
    public void sendOneMessage(String code, String message) {
        Session session = sessionPool.get(code);
        /*在发送数据之前先确认 session是否已经打开 使用session.isOpen() 为true 则发送消息
         * 不然会报错:The WebSocket session [0] has been closed and no method (apart from close()) may be called on a closed session */
        if (session != null && session.isOpen()) {
            try {
                session.getAsyncRemote().sendText(message);
            } catch (Exception e) {
                e.printStackTrace();
            }
        }
    }

    // 此为对应的广播消息
    public void sendAllMessageBySelf() {
        //查询大屏的基础数据
        Map<String, String> TotalDate = dateScricpService.selectTotalDate();
        //查询客户概况的基础数据
        Map<String, Object> customerDate = dateScricpService.selectCustomerDate();
        //查询收入概况的基础数据
        Map<String, Object> receiveDate = dateScricpService.selectReceiveDate();
        //查询月收入概况的基础数据
        Map<String, Object> monthReceiveMoneyY = dateScricpService.selectMonthReceiveMoneyY();
        //查询业务分配数据
        Map<String, Object> businessDistribute = dateScricpService.selectBusinessDistribute();
        if(MessageList != null && MessageList.size() > 0){
            for (Map<String, String> messageMap : MessageList) {
                if(sessionList != null && sessionList.size() > 0){
                    for (Map<String, Object> sessionMap : sessionList) {
                        if(String.valueOf(sessionMap.get("uid")).equals(messageMap.get("uid"))){
                            Map<String,Object>  message = (Map<String, Object>)JSONArray.parse(messageMap.get("message"));
                            int employeeNum = Integer.parseInt(String.valueOf(message.get("employeeNum")));
                            //查询员工概况的基础数据
                            List<Map<String, String>> employeeDateList = dateScricpService.selectEmployeeDate(String.valueOf(employeeNum));
                            //查询月平均贡献数据
                            Map<String, Object> avageMonth = dateScricpService.selectAverageMonthReceiveMoneyY(String.valueOf(message.get("avageMonth")));
                            //查询业务员分配数据
                            Map<String, Object> EmployeeInfo = dateScricpService.selectEmployeeInfo(String.valueOf(message.get("employeeDate")));
                            //返回的数据
                            Map<String,Object> returnDate = new HashMap<>();
                            returnDate.put("TotalDate",TotalDate);
                            returnDate.put("customerDate",customerDate);
                            returnDate.put("receiveDate",receiveDate);
                            returnDate.put("monthReceiveMoneyY",monthReceiveMoneyY);
                            returnDate.put("businessDistribute",businessDistribute);
                            returnDate.put("employeeDateList",employeeDateList);
                            returnDate.put("avageMonth",avageMonth);
                            returnDate.put("EmployeeInfo",EmployeeInfo);
                            String returnStr = JSONArray.toJSONString(returnDate);
                            //向指定客户端推送信息
                            Session session = (Session)sessionMap.get("session");
                            session.getAsyncRemote().sendText(returnStr);
                        }
                    }
                }
            }
        }
    }
}
这里的sendAllMessageBySelf方法是我混合业务写的特定推送消息,借鉴即可。具体思路是每个客户端通过onOpen方法进来,这时候我同uid和session来存取对应客户端的标志和session对象,然后将这两个参数放到map对象里再放到客户端集合sessionList里,方便群发针对性的消息;MessageList是存放对应客户端的消息集合,具体看onMessage方法即可,写完之后我们就可以测试一下是否连通。让后端多久推送一次,自己写个定时任务就行。
import com.utils.DateUtil;
import com.zbkj.crmeb.tool.service.DateScricpService;
import com.zbkj.crmeb.tool.utils.WebSocket;
import org.slf4j.Logger;
import org.slf4j.LoggerFactory;
import org.springframework.beans.factory.annotation.Autowired;
import org.springframework.context.annotation.Configuration;
import org.springframework.scheduling.annotation.EnableScheduling;
import org.springframework.scheduling.annotation.Scheduled;
import org.springframework.stereotype.Component;

/**
 * websocket的定时推送
 *
 * @author zihao
 *
 * @date 2022-02-20
 */
@Component
@Configuration //读取配置
@EnableScheduling // 2.开启定时任务
public class WebsocketTask {
    //日志
    private static final Logger logger = LoggerFactory.getLogger(WebsocketTask.class);

    @Autowired
    private DateScricpService dateScricpService;
    @Autowired
    private WebSocket webSocket;

    @Scheduled(fixedDelay = 1000 * 5L) //5秒钟同步一次数据
    public void init(){
        logger.info("---开始推送数据 - {}", DateUtil.nowDateTime());
        try {
            //调用websocket对应客户端推送数据推送消息
            webSocket.sendAllMessageBySelf();
        }catch (Exception e){
            e.printStackTrace();
            logger.error("websocket.task" + " | msg : " + e.getMessage());
        }

    }
}
测试本地websocket是否连通
用http://ws.douqq.com/地址测一下就行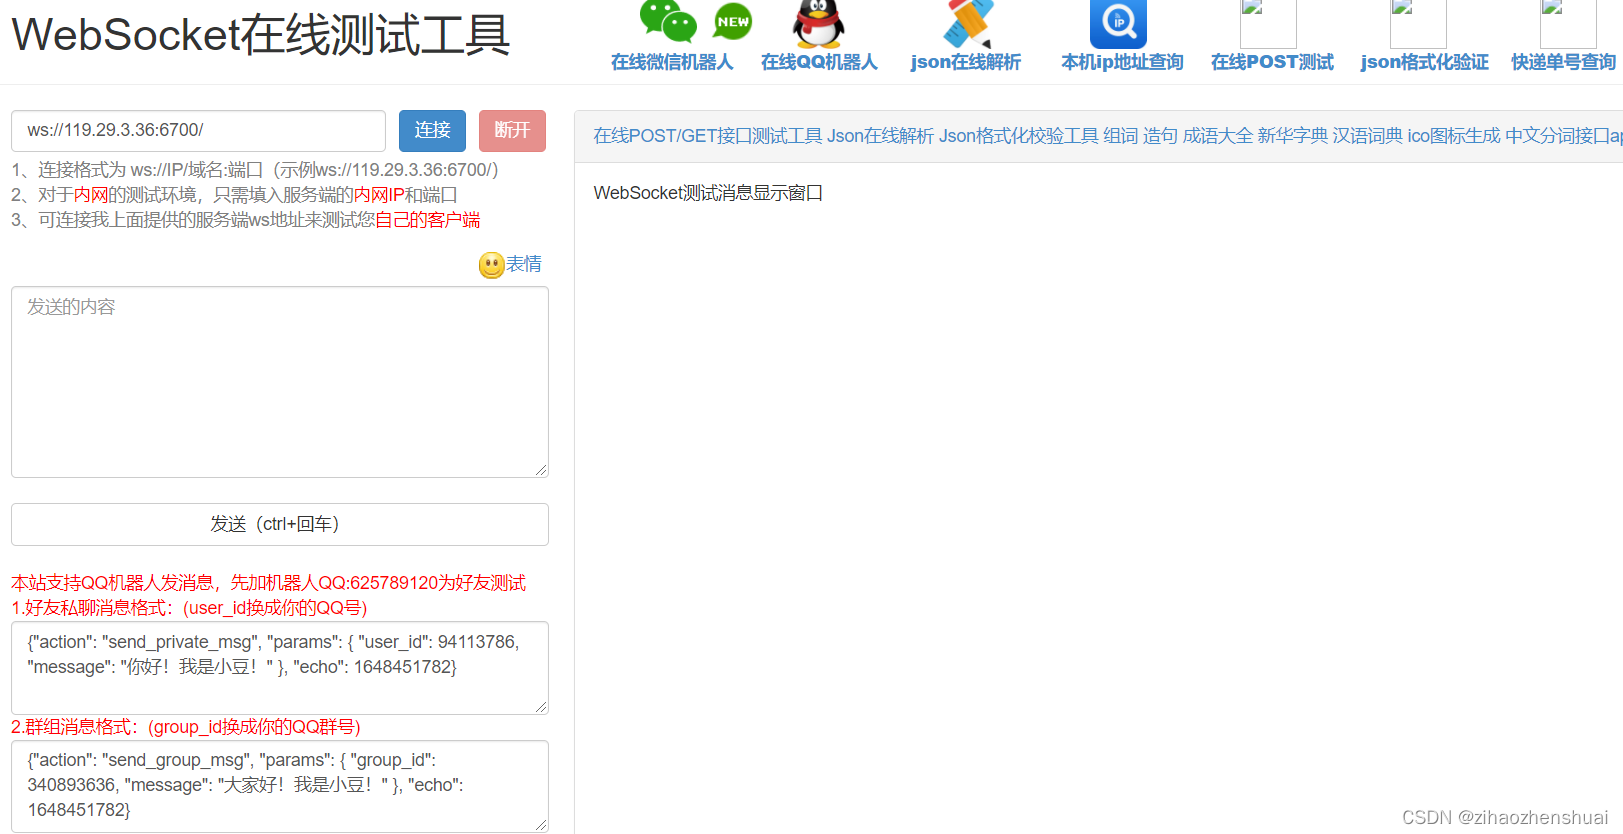
没问题了我们就可以配置Nginx了,毕竟还是要发到服务器上的
map $http_upgrade $connection_upgrade {
	 default upgrade;
	 '' close;
	}

server {
        listen       888 ssl;
        server_name  域名;

		ssl_certificate      证书路径;
        ssl_certificate_key  证书路径;

        ssl_session_cache    shared:SSL:1m;
        ssl_session_timeout  5m;

        ssl_ciphers  HIGH:!aNULL:!MD5;
        ssl_prefer_server_ciphers  on;

		location ~/websocket/ {
			proxy_pass https://127.0.0.1:8081;
			proxy_set_header Host $host;
			proxy_set_header X-Real-IP $remote_addr;
			proxy_set_header X-Forwarded-For
			$proxy_add_x_forwarded_for;
			proxy_http_version 1.1;
			proxy_set_header Upgrade $http_upgrade;
			proxy_set_header Connection $connection_upgrade;
       }

        error_page   500 502 503 504  /50x.html;
        location = /50x.html {
            root   html;
        }
    }
友情提示不要忘了在服务器上把888端口放开,配完了再用刚才那个地址测一下,测通了我们就开始写前端了
前端vue
created(){
    this.initWebSocket();
},
destroyed() {
    this.websocketclose();
},
methods: {
	//初始化websocket
    initWebSocket() {
      var uid = (((1+Math.random())*0x10000)|0).toString(16);
      var uid1 = (((1+Math.random())*0x10000)|0).toString(16);
      var uid2 = (((1+Math.random())*0x10000)|0).toString(16);
      this.uid = uid+uid1+uid2;
      //debugger;
      // WebSocket与普通的请求所用协议有所不同,ws等同于http,wss等同于https   key你自定义的key
      //var host = window.location.host
      // this.websock = new WebSocket("wss://ip:888/websocket/"+this.uid);
      this.websock = new WebSocket("ws://127.0.0.1:8081/websocket/"+this.uid);
      this.websock.onopen = this.websocketonopen;
      this.websock.onerror = this.websocketonerror;
      this.websock.onmessage = this.websocketonmessage;
      this.websock.onclose = this.websocketclose;
    },
    websocketonopen() {
      this.websocketsend();
    },
    websocketonerror(e) {
      console.log("error")
      console.log(e)
    },
    websocketonmessage(e) {
      //JSON.parse(e.data); //这个是收到后端主动推送的值
      var receiveMessage = JSON.parse(e.data);
      console.log("message")
      console.log(receiveMessage)
    },
    websocketsend(){
      let data = {employeeNum: this.subTabIndex,employeeDate: this.monthDate,avageMonth: this.subTabMonthIndex};
      //数据发送
      this.websock.send(JSON.stringify(data));
    },
    websocketclose(e) {
      console.log("close")
      console.log(e)
    },
}
如果是https就用wss来链接websocket,我服务器是https,所以配的证书用的wss。到这已经基本搞完了,看看成果吧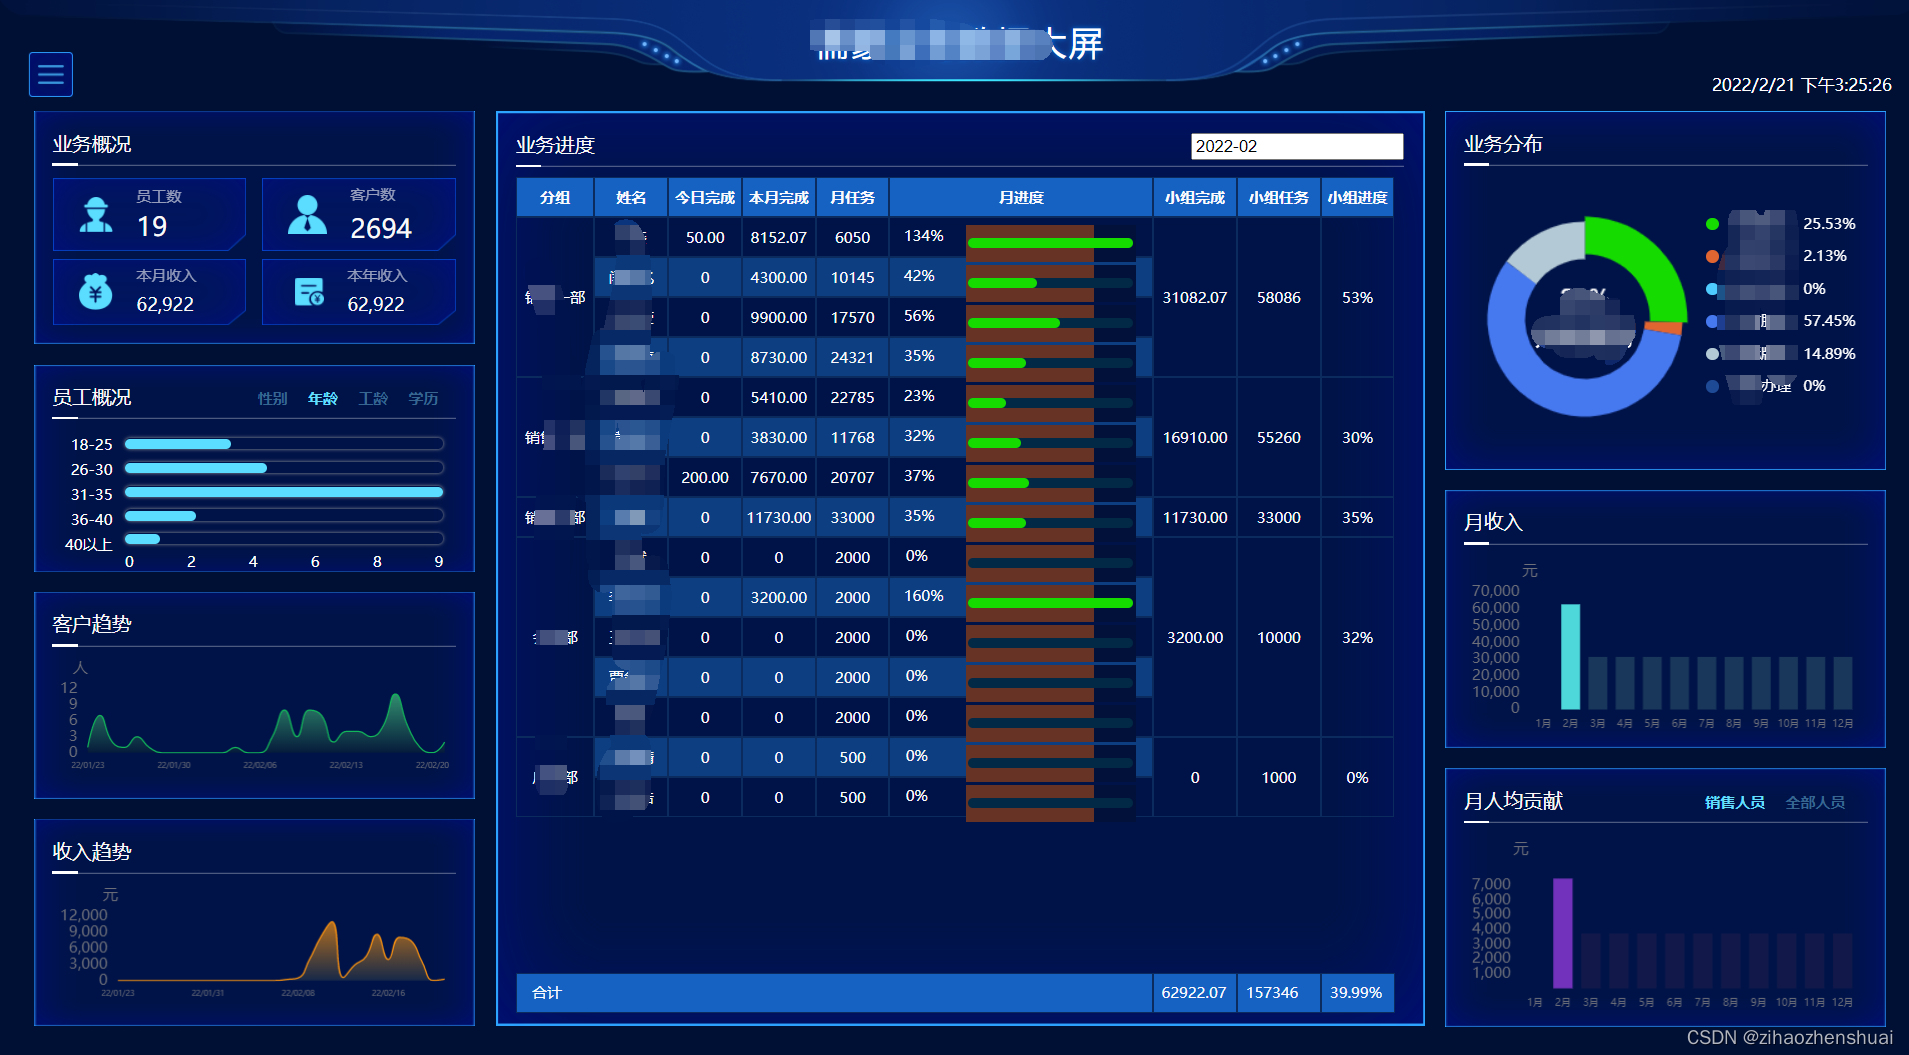

从图上可以看出来,那个50,我后台录入了200的订单,已经实时更新成250了,成功了


 270
270


 被折叠的 条评论
为什么被折叠?
被折叠的 条评论
为什么被折叠?
 到【灌水乐园】发言


