- 画线:使用包
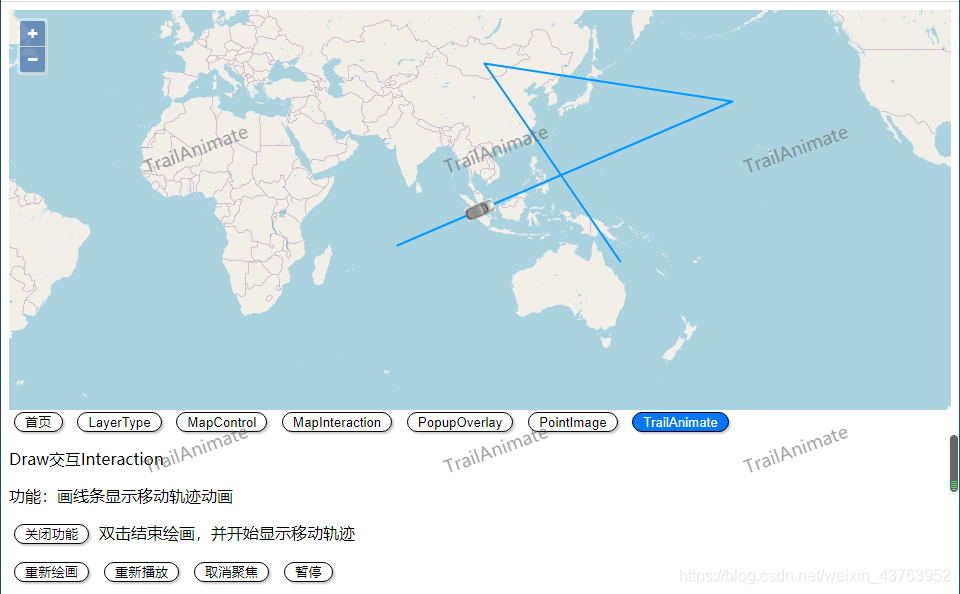
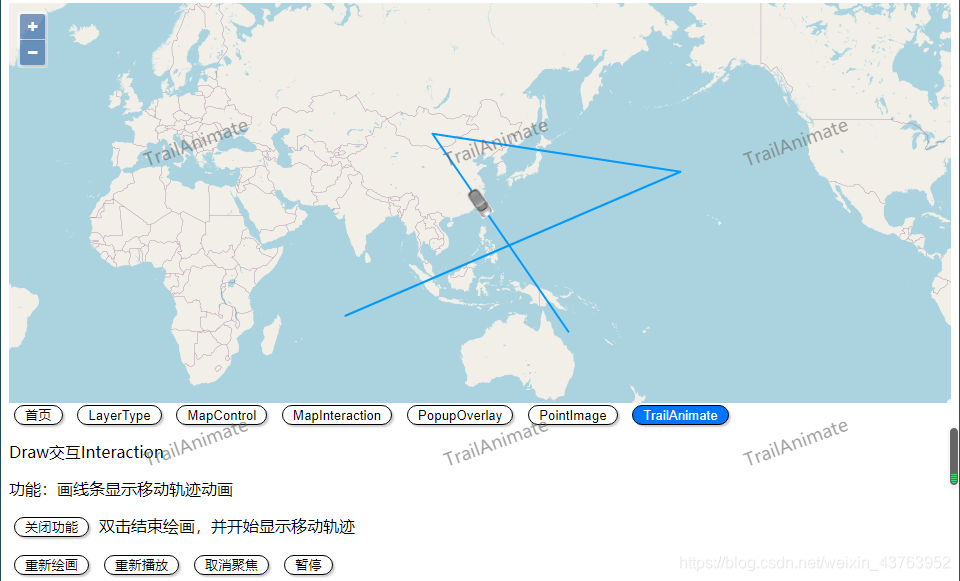
ol/interaction/Draw - 显示移动轨迹:通过定时器不停的移动元素feature,在拐角的地方转动图片的角度(只要设置的时间够短,就不会卡顿),位移的距离和转动的角度根据点与点之间的像素来计算(不推荐用他们的经纬度计算,因为地球是圆的,画的线是直的)。
- 步骤如下:
- 使用的包和全局变量
- 创建图层
- 增加交互
- 开始移动
- 小结
- 后面有源码
- 示例图
1、使用的包和全局变量
import VectorLayer from 'ol/layer/Vector';
import VectorSource from 'ol/source/Vector';
import Feature from 'ol/Feature';
import { Draw } from 'ol/interaction';
import { Style, Fill, Stroke, Circle, Icon } from 'ol/style';
import { transform, fromLonLat, toLonLat } from 'ol/proj';
import { Point } from 'ol/geom';
import CAR from '@/static/car.png';
- 为了方便变量的全局使用,在data中定义变量,后面的this都指向其中的变量(学过vue的都知道-_-!)
- coors存放的是你在画线时的点的经纬度,即路的转折点
- carPoint是小车的轨迹点,用来存放计算小车的下一个位置
data() {
return {
map: this.$route.params.map,
layer: null,
interaction: null,
source: null,
feature: null,
coors: [],
carPoint: [],
index: 0,
timer: null,
follow: true,
}
},
2、创建图层
- 创建地图进来的应该都会,不会的看官网例子,就不啰嗦了
this.source = new VectorSource({ wrapX: false });
this.layer = new VectorLayer({
  source: this.source,
  style: new Style({
    stroke: new Stroke({
      color: '#0099ff',
      width: 2,
    }),
    image: new Circle({
      radius: 7,
      fill: new Fill({
        color: '#0099ff'
      })
    })
  }),
});
3、增加交互
this.interaction = new Draw({
source: this.source,
type: 'LineString',
});
this.map.addInteraction(this.interaction);
this.interaction.on('drawend', e => {
e.stopPropagation();
let line = e.feature.getGeometry();
this.coors = line.getCoordinates().map(item => {
return transform(
item,
'EPSG:3857',
'EPSG:4326',
);
});
this.interaction.setActive(false);
this.moveStart();
});
4、开始移动
moveStart() {
if(this.feature) {
this.layer.getSource().removeFeature(this.feature);
this.feature = null;
clearInterval(this.timer);
this.timer = null;
}
this.index = 0;
this.carPoint = JSON.parse(JSON.stringify(this.coors));
this.feature = new Feature({
geometry: new Point(fromLonLat(this.carPoint[0])),
})
this.feature.setStyle(new Style({
image: new Icon({
src: CAR,
anchor: [0.5, 0.5],
rotation: this.countRotate(),
})
}));
this.layer.getSource().addFeature(this.feature);
this.timeStart();
},
timeStart() {
this.timer = setInterval(() => {
if(this.index + 1 >= this.carPoint.length) {
this.index++;
clearInterval(this.timer);
this.timer = null;
return ;
}
if(this.nextPoint() === this.carPoint[this.index + 1]) {
this.index++;
this.feature.getStyle().getImage()
.setRotation(this.countRotate());
}
this.feature.getGeometry().setCoordinates(fromLonLat(this.carPoint[this.index]));
if(this.follow) {
this.map.getView().setCenter(fromLonLat(this.carPoint[this.index]))
}
}, 10);
},
countRotate() {
  let i= this.index, j = i + 1;
  if(j === this.carPoint.length) {
    i--;
    j--;
  }
  let p1 = this.map.getPixelFromCoordinate(fromLonLat(this.coors[i]));
  let p2 = this.map.getPixelFromCoordinate(fromLonLat(this.coors[j]));
  return Math.atan2(p2[1] - p1[1], p2[0] - p1[0]);
},
nextPoint() {
 let index = this.index;
 let p1 = this.map.getPixelFromCoordinate(fromLonLat(this.carPoint[index]));
 let p2 = this.map.getPixelFromCoordinate(fromLonLat(this.carPoint[index + 1]));
 let dx = p2[0] - p1[0];
 let dy = p2[1] - p1[1];
 let distance = Math.sqrt(dx * dx + dy * dy)
 if(distance <= 1) {
   return this.carPoint[index + 1];
 } else {
   let x = p1[0] + dx / distance;
   let y = p1[1] + dy / distance;
   let coor = transform(
     this.map.getCoordinateFromPixel([x, y]),
     'EPSG:3857',
     'EPSG:4326'
   );
   this.carPoint[index] = coor;
   return this.carPoint[index];
 }
},
5、小结
- 之前我计算转折点和下一个点的位置的时候,使用的是点的经纬度进行计算,结果出来的画面有如下缺点:
- 高纬度旋转的角度不对
- 高纬度的速度过快
- 小车不沿着直线行走(应该是因为地球是球状的缘故)
- 后来了解到有
getPixelFromCoordinate和getCoordinateFromPixel这两个接口可以让经纬度和像素之间转换,这里的转化需要转换成EPSG:3857坐标系,至于为什么用transfrom而不用toLonLat 的原因可以看我这篇博客 openlayer提供的tranform与fromLonLat、toLonLat的区别
源码


 2509
2509

 被折叠的 条评论
为什么被折叠?
被折叠的 条评论
为什么被折叠?
 到【灌水乐园】发言


