


1.十分感谢虹软开放的平台算法库引擎库,本篇主要利用Java做的web后台对比人脸并加以识别。
2.首先来到虹软官网注册用户

3.本文主要是pc端Java人脸识别,但我研究了一天发现虹软目前对手机端支持,而且demo也是Android的,所以此处研究了一下Android端的Java代码,终于找到了接口:我目前做的功能主要是通过图片对比来实现人脸确认。
4.废话说了很多下面正式开始介绍我的功能:首先在前台写一个video,和canvas,做人脸识别大家应该知道控制前台摄像头;其次利用setInterval()的js函数定时获取video对象,并将其转化为Base64格式字符串;并且前后台初始使用Ajax交互后来发现必须跳转页面啊,就换成了利用from表单提交,下面是js和HTML的代码
//HTML代码如下
这里是引用< p align=“center”>
`<button  id="open">开启摄像头</button>`

<button id="close">关闭摄像头</button>
<form id="submitfacelogin" method="post" action="<%=request.getContextPath() %>/faceLogin/face">
<table><tr style="display:none;"><td><input type="text" name="img" id="imageLogin"></td></tr></table>
</form>
</p>
<div align="center" style="float: left;"><!-- video摄像头以及canvas转化图片的工具类 -->
<video id="video" width="300px" height="300px" autoplay></video>
<canvas hidden="hidden" id="canvas" width="626" height="800"></canvas>
<div id="tip"></div>
</div>
//下面是js代码
var video;//视频流对象
var context;//绘制对象
var canvas;//画布对象
var message="${message}";//提示信息
if(message!==null&&message!==""){alert(message)}
    var flag = false;
    //开启摄像头
    $("#open").click(function() {
        //判断摄像头是否打开
        if (!flag) {
            //调用摄像头初始化
            open();
            flag = true;
            var a=0;
            var facelogin=setInterval(function () {
            	context.drawImage(video, 0, 0, 330, 250);
                var img = getBase64();
                $("#imageLogin").val(img);
                startTrack();
                alive_eye();
                if(testface===1){
                	$("#submitfacelogin").submit();
                	a++;
                	if(a>5){//设置25秒识别失败的话就停止识别并给出提示
                    	alert("不存在此用户!请用用户名密码登陆!或刷新重试");
                   		clearInterval(facelogin);
                	}
                }
            },5000);
        }
    });
    //关闭摄像头
    $("#close").click(function() {
        //判断摄像头是否打开
        if (flag) {
            video.srcObject.getTracks()[0].stop();
            flag = false;
        }
    });
//开启摄像头
function open() {
    //获取摄像头对象
    canvas = document.getElementById("canvas");
    context = canvas.getContext("2d");
    //获取视频流
    video = document.getElementById("video");
    var videoObj = {
        "video" : true
    }, errBack = function(error) {
        console.log("Video capture error: ", error.code);
    };
    context.drawImage(video, 0, 0, 330, 250);
    //初始化摄像头参数
    if (navigator.getUserMedia || navigator.webkitGetUserMedia
        || navigator.mozGetUserMedia) {
        navigator.getUserMedia = navigator.getUserMedia
            || navigator.webkitGetUserMedia
            || navigator.mozGetUserMedia;
        navigator.getUserMedia(videoObj, function(stream) {
            video.srcObject = stream;
            video.play();
        }, errBack);
    }
}
 //将摄像头拍取的图片转换为Base64格式字符串
function getBase64() {//获取当前图像并转换为Base64的字符串
    var imgByte = canvas.toDataURL("image/png");
    return imgByte.substring(22);//截取字符串
}
//-----------------------------------------------------------------------------------纯js活体检测 活体数据下一篇写
5.js部分在上面写的很清楚了下面是后台简单逻辑
@RequestMapping(value="/face",method=RequestMethod.POST,produces="application/json")
public synchronized ModelAndView facelogin(@RequestParam("img")String img) {
	ModelAndView modelAndView=new ModelAndView();
	FileOutputStream fileOutputStream=null;
	String aString="";

	Decoder decoder=Base64.getDecoder();//这里时后台Java对64位字符串做解析
	byte[] bytes=decoder.decode(img);

	try {//在这里我想把从前台得到的照片简单储存一下
		fileOutputStream=new FileOutputStream(new File("E:\\electorder\\newimages\\"+"start1.jpg"));
		fileOutputStream.write(bytes);
		fileOutputStream.flush();
	} catch (FileNotFoundException e1) {
		e1.printStackTrace();
	} catch (IOException e) {
		// TODO Auto-generated catch block
		e.printStackTrace();
	}finally {
		try {
			fileOutputStream.close();
		} catch (IOException e) {
			e.printStackTrace();
		}
	}

	String aInteger="";
	aInteger=FaceEngineTest.getInstance().allImageFind(bytes);//这里是我简单调用的自己把虹软给出的demo做简单修改后的单例工具类
	if(aInteger!=null&&aInteger!="") {
    	System.out.println("登录成功含有此用户!");
    	aString="登录成功含有此用户!";
    	System.out.println(aInteger);
    	String name;
		try {
			name = testService.selectuserbypicture(aInteger);
			modelAndView.setViewName("totalpage");
        	modelAndView.addObject("name", name);
		} catch (Exception e) {
			e.printStackTrace();
		}
    }else {
    	System.out.println("未查到相关用户!");
    	aString="未查到相关用户";
    	modelAndView.setViewName("facelogin");
    }
	modelAndView.addObject("message", aString);
	return modelAndView;
}
///下面是我改装的工具类-------------------------------------------------------------------------------
public class FaceEngineTest {
private static String appId = "NNNNN";//激活一次就可以
private static String sdkKey = "NNNNNNNNNNN";这两个一个是你申请的产品后可以得到
private static FaceEngine faceEngine=new FaceEngine("E:\\VVVVVV");//这里就是我们要配置的算法库引擎库绝对路径dll文件
private FaceEngineTest() {
	startFace();
}

private static class FACEENG{//简单写的单例模式
	private final static FaceEngineTest faceenginetest=new FaceEngineTest();
}

public static FaceEngineTest getInstance() {
	return FACEENG.faceenginetest;
}

//初始化加载
private static void startFace() {
	//激活引擎
    int activeCode = faceEngine.activeOnline(appId, sdkKey);

    if (activeCode != ErrorInfo.MOK.getValue() && activeCode != ErrorInfo.MERR_ASF_ALREADY_ACTIVATED.getValue()) {
        System.out.println("引擎激活失败");
    }else {
    	System.out.println("引擎激活成功");
    }
    //引擎配置
    EngineConfiguration engineConfiguration = new EngineConfiguration();
    engineConfiguration.setDetectMode(DetectMode.ASF_DETECT_MODE_IMAGE);
    engineConfiguration.setDetectFaceOrientPriority(DetectOrient.ASF_OP_0_ONLY);
    //功能配置
    FunctionConfiguration functionConfiguration = new FunctionConfiguration();
    functionConfiguration.setSupportAge(true);
    functionConfiguration.setSupportFace3dAngle(true);
    functionConfiguration.setSupportFaceDetect(true);
    functionConfiguration.setSupportFaceRecognition(true);
    functionConfiguration.setSupportGender(true);
    functionConfiguration.setSupportLiveness(true);
    functionConfiguration.setSupportIRLiveness(true);
    engineConfiguration.setFunctionConfiguration(functionConfiguration);
    //初始化引擎
    int initCode = faceEngine.init(engineConfiguration);

    if (initCode != ErrorInfo.MOK.getValue()) {
        System.out.println("初始化引擎失败");
    }else {
    	System.out.println("初始化引擎成功");
    }
}
/**
 * 判断是否是用户进行登陆
 * @param filenew
 * @return
 */
public String allImageFind(byte[] filenew) {//它的接口很好及支持识别byte数组又支持识别图片文件filenew是我直接把前端传过来的字节组作为分析基本
	String a="";//判断是否含有相同特征的人
	ImageInfo imageInfonew=getRGBData(filenew);//传入的图像数据
	List<FaceInfo> faceInfosnew=new ArrayList<>();
	faceEngine.detectFaces(imageInfonew.getImageData(), imageInfonew.getWidth(), imageInfonew.getHeight(), ImageFormat.CP_PAF_BGR24, faceInfosnew);
	FaceFeature faceFeature=new FaceFeature();
	faceEngine.extractFaceFeature(imageInfonew.getImageData(), imageInfonew.getWidth(), imageInfonew.getHeight(), ImageFormat.CP_PAF_BGR24, faceInfosnew.get(0), faceFeature);
	FaceSimilar faceSimilar=new FaceSimilar();//相似度

	File file=new File("E:\\electorder\\image");//固有的图片集合这里是固定读取某个文件夹下的所有已存在的图片
	File[] files=file.listFiles();//获取文件夹列表
	for(int i=0;i<files.length;i++) {
		if(files[i].isFile()) {//判断是否为文件
			float judge=0.0F;//初始化判断的值
			ImageInfo imageInfo=getRGBData(files[i]);//这里我直接接受的文件image
			List<FaceInfo> faceInfos=new ArrayList<>();
			faceEngine.detectFaces(imageInfo.getImageData(), imageInfo.getWidth(), imageInfo.getHeight(), ImageFormat.CP_PAF_BGR24, faceInfos);
			FaceFeature feature=new FaceFeature();//特征
			faceEngine.extractFaceFeature(imageInfo.getImageData(), imageInfo.getWidth(), imageInfo.getHeight(), ImageFormat.CP_PAF_BGR24, faceInfos.get(0), feature);
			faceEngine.compareFaceFeature(faceFeature, feature, faceSimilar);//作比较
			judge=faceSimilar.getScore();//相似度大小
			if(judge>0.8) {
				a=files[i].getName();
				break;
			}
			if(i==files.length) {
				a="";
				break;
			}
		}
	}
	closeFace();
	return a;
}
/**
 * 关闭引擎
 */
public static void closeFace() {//获取激活文件信息
    ActiveFileInfo activeFileInfo = new ActiveFileInfo();
    faceEngine.getActiveFileInfo(activeFileInfo);
    //引擎卸载
    faceEngine.unInit();
}
//----------------------------------------------------------------------------------------------------------------
注我再告诉大家一下你们要找还有一些的在下面
6.这里是我们key和id获取的地方

7.这里是我下载sdk的地方你要先注册好个人认证很快的
兄弟们注意了又一波重点来了
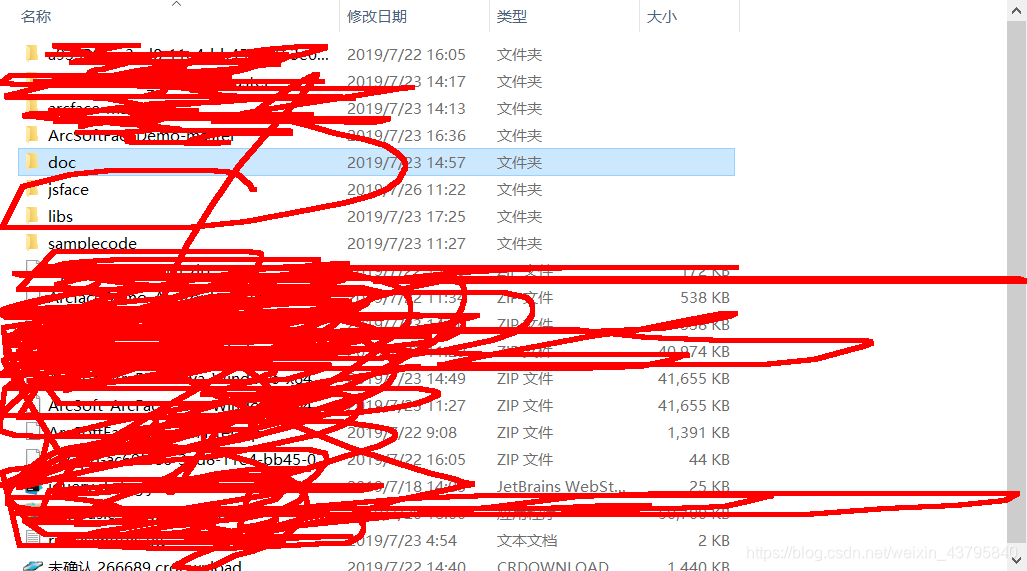
(1)下载后解压获得这三个重要的文件夹其一libs里面有个win(因为我的是Windows版本,其他版本官网查询)其中一个是jar包很重要放在自己项目的lib里,其他三个文件就是算法和引擎库我们那个工具类需要的
(2)sample code是我学习的一些接口方法的demo很重要自己可以去看哈哈
(3)doc是开发文档自行观看。
本人是刚入行Java不久有问题大家一起交流哈


 428
428


 被折叠的 条评论
为什么被折叠?
被折叠的 条评论
为什么被折叠?
 到【灌水乐园】发言


