


提示:本篇文章仅供学习,请勿用于非法用途!
前言
本篇文章涉及两部分内容。
1.基于开源验证码生成库生成训练集、验证集(训练前准备)
2.结合 CNN 和 RNN 算法代码
关于cnn算法的介绍
本代码来源
一、常见开源验证码生成库合集
| 语言 | 验证码库名称 | 链接 | 样例 |
|---|---|---|---|
| Java | JCaptcha | 示例 |  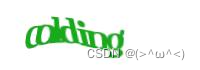  |
| Java | JCaptcha4Struts2 | 示例 |  |
| Java | SimpleCaptcha | 示例 | 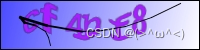 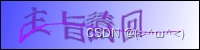 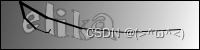 |
| Java | kaptcha | 示例 | 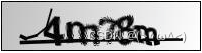 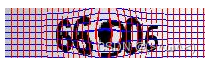 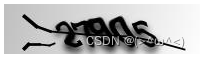 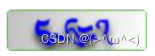 |
| python | kaptcha | 示例 | 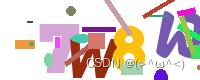  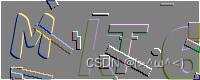  |
| java | patchca | 示例 |  |
| java | imageRandom | 示例 | 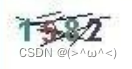 |
| java | iCaptcha | 示例 | 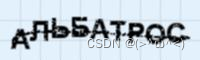 |
| java | SkewPassImage | 示例 | 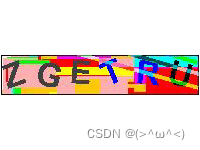 |
| java | Cage | 示例 | 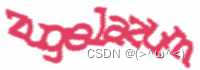 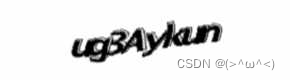 |
| Python | captcha | 示例 |  |
| Python | pycapt | 示例 |  |
| PHP | Gregwar/Captcha | 示例 |  |
| PHP | mewebstudio/captcha | 示例 |  |
二、tensorflow库安装
python版本:3.7.4该版本下可以直接使用pip进行安装
pip install tensorflow-cpu
pip install tensorflow
三、源代码
代码来源keras官网示例
https://keras.io/examples/vision/captcha_ocr/
import os

import cv2
import numpy as np
import matplotlib.pyplot as plt

from pathlib import Path
from collections import Counter

import tensorflow as tf
from tensorflow import keras
from tensorflow.keras import layers
from keras.models import load_model
import time
import random

# 定义层结构
class CTCLayer(layers.Layer):
    def __init__(self, name=None):
        super().__init__(name=name)
        self.loss_fn = keras.backend.ctc_batch_cost

    def call(self, y_true, y_pred):
        # Compute the training-time loss value and add it
        # to the layer using `self.add_loss()`.
        batch_len = tf.cast(tf.shape(y_true)[0], dtype="int64")
        input_length = tf.cast(tf.shape(y_pred)[1], dtype="int64")
        label_length = tf.cast(tf.shape(y_true)[1], dtype="int64")

        input_length = input_length * tf.ones(shape=(batch_len, 1), dtype="int64")
        label_length = label_length * tf.ones(shape=(batch_len, 1), dtype="int64")

        loss = self.loss_fn(y_true, y_pred, input_length, label_length)
        self.add_loss(loss)

        # At test time, just return the computed predictions
        return y_pred

class captch():

    def __init__(self):
        # 所有文件
        self.data_dir = self.get_all_image(r"C:\Users\zywtf\Desktop\smile_captch")
        # 所有图片名
        # self.images = sorted(list(map(str, list(self.data_dir.glob("*.png")))))
        # # 所有标签
        # self.labels = [img.split(os.path.sep)[-1].split(".png")[0] for img in self.images]
        self.images = sorted(list(map(str, list(self.data_dir.glob("*.jpg")))))
        random.shuffle(self.images)
        self.labels = [img.split(os.path.sep)[-1].split(".jpg")[0].split('_')[0] for img in self.images]
        print(self.images[:10])
        print(self.labels[:10])
        self.characters = set(char for label in self.labels for char in label)
        # 提取验证码中所有种类的字母
        self.characters = sorted(list(self.characters))
        print(self.characters)

        # 批量训练,验证大小
        self.batch_size = 16
        # 图片宽高
        self.img_width = 110
        self.img_height = 40
        # 图片最大字符个数
        self.max_length = 4
        # 将字符映射为整数
        self.char_to_num = layers.StringLookup(
            vocabulary=list(self.characters), mask_token=None
        )
        # 将整数映射为字符
        self.num_to_char = layers.StringLookup(
            vocabulary=self.char_to_num.get_vocabulary(), mask_token=None, invert=True
        )

    # 分割数据集,将全部数据分割成,训练集,验证集
    def split_data(self,images, labels, train_size=0.9, shuffle=True):
        # 1. Get the total size of the dataset
        size = len(images)
        # 2. Make an indices array and shuffle it, if required
        indices = np.arange(size)
        if shuffle:
            np.random.shuffle(indices)
        # 3. Get the size of training samples
        train_samples = int(size * train_size)
        # 4. Split data into training and validation sets
        x_train, y_train = images[indices[:train_samples]], labels[indices[:train_samples]]
        x_valid, y_valid = images[indices[train_samples:]], labels[indices[train_samples:]]
        return x_train, x_valid, y_train, y_valid

    # 开始训练
    def train(self):
        # 此时图片还是,路径的形式
        x_train, x_valid, y_train, y_valid = self.split_data(np.array(self.images), np.array(self.labels))
        # 对数据进行处理,转化为矩阵,在tensorflow里称为张量
        train_dataset = tf.data.Dataset.from_tensor_slices((x_train, y_train))
        train_dataset = (
            train_dataset.map(
                self.encode_single_sample, num_parallel_calls=tf.data.AUTOTUNE
            )
            .batch(self.batch_size)
            .prefetch(buffer_size=tf.data.AUTOTUNE)
        )
        validation_dataset = tf.data.Dataset.from_tensor_slices((x_valid, y_valid))
        validation_dataset = (
            validation_dataset.map(
                self.encode_single_sample, num_parallel_calls=tf.data.AUTOTUNE
            )
            .batch(self.batch_size)
            .prefetch(buffer_size=tf.data.AUTOTUNE)
        )
        # 查看训练集
        # self.show(train_dataset)
        # 新构建模型
        # model = self.build_model()
        model = load_model(r"C:\Users\zywtf\Desktop\110_model")
        # 输出模型信息
        model.summary()
        epochs = 30
        early_stopping_patience = 10
        # Add early stopping
        callbacks_list = [
            # 目标指标不再有改善了,就可以提前终止
            keras.callbacks.EarlyStopping(
                monitor="val_loss", patience=early_stopping_patience, restore_best_weights=True
            ),
            # 保存模型
            keras.callbacks.ModelCheckpoint(
                filepath=r"C:\Users\zywtf\Desktop\110_model",  # 文件路径
                monitor='val_loss',  # 如果val_loss 没有改善就不覆盖
                save_best_only=True)  # 保持最佳模型
        ]

        history = model.fit(
            train_dataset,
            validation_data=validation_dataset,
            epochs=epochs,
            callbacks=callbacks_list,
        )
        # 保存模型
        model.save(r"C:\Users\zywtf\Desktop\100_model")

    # 开始验证
    def predict(self):
        load_options = tf.saved_model.LoadOptions(experimental_io_device="/job:localhost")
        # 加载模型
        model = load_model(r"C:\Users\zywtf\Desktop\fmodel",options=load_options)
        prediction_model = keras.models.Model(
            model.get_layer(name="image").input, model.get_layer(name="dense2").output
        )
        # 读取图片,img类型为byte
        dir_list = r'C:\Users\zywtf\Desktop\验证码存放'
        image_list = os.listdir(dir_list)
        x_predict = []
        y_predict = []
        for i in image_list:
            if "jpg" in i:
                x_predict.append(dir_list + '\\' + i)
                # 对应 labels 验证时可以随便填写
                y_predict.append("abs2")

        test_set = tf.data.Dataset.from_tensor_slices((x_predict, y_predict))
        test_set = (
            test_set.map(
                self.encode_single_sample, num_parallel_calls=tf.data.AUTOTUNE
            )
            .batch(self.batch_size)
            .prefetch(buffer_size=tf.data.AUTOTUNE)
        )
        # 批量验证test_set中的所有图片,并使用plt打印出来
        for batch in test_set:
            batch_images = batch["image"]
            batch_labels = batch["label"]
            print(batch_images.shape)
            print(len(batch_images))
            # 调用模型进行验证
            preds = prediction_model.predict(batch_images)
            # 解码成对应的字符
            pred_texts = self.decode_batch_predictions(preds)

            # 使用plt打印出来
            orig_texts = []
            for label in batch_labels:
                label = tf.strings.reduce_join(self.num_to_char(label)).numpy().decode("utf-8")
                orig_texts.append(label)

            _, ax = plt.subplots(4, 4, figsize=(15, 5))
            for i in range(len(pred_texts)):
                img = (batch_images[i, :, :, 0] * 255).numpy().astype(np.uint8)
                img = img.T
                title = f"Prediction: {pred_texts[i]}"
                ax[i // 4, i % 4].imshow(img, cmap="gray")
                ax[i // 4, i % 4].set_title(title)
                ax[i // 4, i % 4].axis("off")

            plt.show()


    # 读取所有训练集、测试集图片
    def get_all_image(self,dir_path):
        data_dir = Path(dir_path)
        return data_dir

    # 将图片由路径读取成byte编码,然后转化为张量
    def encode_single_sample(self,img_path, label):
        # 1. Read image
        img = tf.io.read_file(img_path)
        # print((img))
        # 2. Decode and convert to grayscale
        img = tf.io.decode_png(img, channels=1)
        # 3. Convert to float32 in [0, 1] range
        img = tf.image.convert_image_dtype(img, tf.float32)
        # 4. Resize to the desired size
        img = tf.image.resize(img, [self.img_height, self.img_width])
        # 5. Transpose the image because we want the time
        # dimension to correspond to the width of the image.
        img = tf.transpose(img, perm=[1, 0, 2])
        # 6. Map the characters in label to numbers
        label = self.char_to_num(tf.strings.unicode_split(label, input_encoding="UTF-8"))
        # 7. Return a dict as our model is expecting two inputs
        return {"image": img, "label": label}

    # 展示
    def show(self,train_dataset):
        _, ax = plt.subplots(4, 4, figsize=(10, 5))
        for batch in train_dataset.take(1):
            images = batch["image"]
            labels = batch["label"]
            for i in range(24):
                img = (images[i] * 255).numpy().astype("uint8")
                label = tf.strings.reduce_join(self.num_to_char(labels[i])).numpy().decode("utf-8")
                ax[i // 4, i % 4].imshow(img[:, :, 0].T, cmap="gray")
                ax[i // 4, i % 4].set_title(label)
                ax[i // 4, i % 4].axis("off")
        plt.show()

    # 构建模型
    def build_model(self,):
        # Inputs to the model
        input_img = layers.Input(
            shape=(self.img_width, self.img_height, 1), name="image", dtype="float32"
        )
        labels = layers.Input(name="label", shape=(None,), dtype="float32")

        # First conv block
        x = layers.Conv2D(
            32,
            (3, 3),
            activation="relu",
            kernel_initializer="he_normal",
            padding="same",
            name="Conv1",
        )(input_img)
        x = layers.MaxPooling2D((2, 2), name="pool1")(x)

        # Second conv block
        x = layers.Conv2D(
            64,
            (3, 3),
            activation="relu",
            kernel_initializer="he_normal",
            padding="same",
            name="Conv2",
        )(x)
        x = layers.MaxPooling2D((2, 2), name="pool2")(x)

        # We have used two max pool with pool size and strides 2.
        # Hence, downsampled feature maps are 4x smaller. The number of
        # filters in the last layer is 64. Reshape accordingly before
        # passing the output to the RNN part of the model
        new_shape = ((self.img_width // 4), (self.img_height // 4) * 64)
        x = layers.Reshape(target_shape=new_shape, name="reshape")(x)
        x = layers.Dense(64, activation="relu", name="dense1")(x)
        x = layers.Dropout(0.2)(x)

        # RNNs
        x = layers.Bidirectional(layers.LSTM(128, return_sequences=True, dropout=0.25))(x)
        x = layers.Bidirectional(layers.LSTM(64, return_sequences=True, dropout=0.25))(x)

        # Output layer
        x = layers.Dense(
            len(self.char_to_num.get_vocabulary()) + 1, activation="softmax", name="dense2"
        )(x)

        # Add CTC layer for calculating CTC loss at each step
        output = CTCLayer(name="ctc_loss")(labels, x)

        # Define the model
        model = keras.models.Model(
            inputs=[input_img, labels], outputs=output, name="ocr_model_v1"
        )
        # Optimizer
        opt = keras.optimizers.Adam()
        # Compile the model and return
        model.compile(optimizer=opt)
        return model

    def decode_batch_predictions(self,pred):
        input_len = np.ones(pred.shape[0]) * pred.shape[1]
        # Use greedy search. For complex tasks, you can use beam search
        results = keras.backend.ctc_decode(pred, input_length=input_len, greedy=True)[0][0][
                  :, :self.max_length
                  ]
        # Iterate over the results and get back the text
        output_text = []
        for res in results:
            res = tf.strings.reduce_join(self.num_to_char(res)).numpy().decode("utf-8")
            output_text.append(res)
        return output_text

c = captch()
# c.train()
c.predict()


 204
204


 被折叠的 条评论
为什么被折叠?
被折叠的 条评论
为什么被折叠?
 到【灌水乐园】发言


