


黑马程序员JavaWeb开发教程
根据资料中提供的《tlias智能学习辅助系统》页面原型及需求,完成员工管理的需求开发
一、环境准备
1、准备数据库表emp
- 创建表的sql语句
use mybatis;
-- 部门管理
create table dept(
    id int unsigned primary key auto_increment comment'ID,无符号整数,主键,自增长',
    name varchar(20) not null unique comment'部门名称,非空,唯一',
    create_time datetime not null comment'创建时间,非空',
    update_time datetime not null comment'修改时间,非空'
)comment '部门表';

insert into dept (id, name, create_time, update_time)
values  (1,'学工部',now(),now()),
        (2,'教研部',now(),now()),
        (3,'咨询部',now(),now()),
        (4,'就业部',now(),now()),
        (5,'人事部',now(),now());

select * from dept;

-- 员工管理
create table emp(
    id int unsigned primary key auto_increment comment'ID,无符号整数,主键,自增长',
    username varchar(20) not null unique comment'用户名,非空,唯一',
    password varchar(32) default '123456' comment'密码,默认123456',
    name varchar(10) not null comment'姓名,非空',
    gender tinyint unsigned not null comment '性别,无符号整数,,非空,1男,2女',
    image varchar(300) comment'图像',
    job tinyint unsigned comment'工作,无符号整数,1 班主任,2 讲师,3 学工主管, 4 教研主管,5 咨询师',
    entrydate date comment'入职时间',
    dept_id int unsigned comment'部门ID',
    create_time datetime not null comment'创建时间',
    update_time datetime not null comment'修改时间'
)comment'员工表';

INSERT INTO emp(id, username, password, name, gender, image, job, entrydate,dept_id, create_time, update_time)
VALUES  (1,'jinyong','123456','金庸',1,'1.jpg',4,'2000-01-01',2,now(),now()),
        (2,'zhangwuji','123456','张无忌',1,'2.jpg',2,'2015-01-01',2,now(),now()),
        (3,'yangxiao','123456','杨逍',1,'3.jpg',2,'2008-05-01',2,now(),now()),
        (4,'weiyixiao','123456','韦一笑',1,'4.jpg',2,'2007-01-01',2,now(),now()),
        (5,'changyuchun','123456','常遇春',1,'5.jpg',2,'2012-12-05',2,now(),now()),
        (6,'xiaozhao','123456','小昭',2,'6.jpg',3,'2013-09-05',1,now(),now()),
        (7,'jixiaofu','123456','纪晓芙',2,'7.jpg',1,'2005-08-01',1,now(),now()),
        (8,'zhouzhiruo','123456','周芷若',2,'8.jpg',1,'2014-11-09',1,now(),now()),
        (9,'dingminjun','123456','丁敏君',2,'9.jpg',1,'2011-03-11',1,now(),now()),
        (10,'zhaomin','123456','赵敏',2,'10.jpg',1,'2013-09-05',1,now(),now()),
        (11,'luzhangke','123456','鹿杖客',1,'11.jpg',5,'2007-02-01',3,now(),now()),
        (12,'hebiweng','123456','鹤笔翁',1,'12.jpg',5,'2008-08-18',3,now(),now()),
        (13,'fangdongbai','123456','方东白',1,'13.jpg',5,'2012-11-01',3,now(),now()),
        (14,'zhangsanfeng','123456','张三丰',1,'14.jpg',2,'2002-08-01',2,now(),now()),
        (15,'yulianzhou','123456','俞莲舟',1,'15.jpg',2,'2011-05-01',2,now(),now()),
        (16,'songyuanqiao','123456','宋远桥',1,'16.jpg',2,'2010-01-01',2,now(),now()),
        (17,'chenyouliang','123456','陈友谅',1,'17.jpg',NULL,'2015-03-21',NULL,now(),now());

select * from emp;
2、创建一个新的springboot工程,选择引入对应的起步依赖(mybatis、mysql驱动、lombok)

3、application.properties中引入数据库连接信息
-
打开src.main.resources.application.properties,在其中填入配置数据库的信息

-
配置数据库的信息
# 配置数据库四要素

#驱动类名称
spring.datasource.driver-class-name=com.mysql.cj.jdbc.Driver
#数据库连接的url(将数据库的名字mybatis修改成自己的数据库的名字)
spring.datasource.url=jdbc:mysql://localhost:3306/mybatis
#连接数据库的用户名(将用户名root修改成自己数据库的用户名)
spring.datasource.username=root
#连接数据库的密码(将密码123456修改成自己数据库的密码)
spring.datasource.password=123456
4、创建对应的实体类Emp(实体类属性采用驼峰命名)
-
在src.main.java.com.itheima 包下新建包pojo,并在pojo下新建类Emp
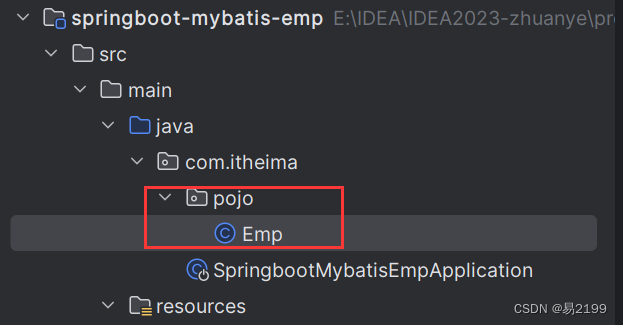
-
实体类属性和数据库中表的属性要同名,表中属性有下划线,实体类中使用驼峰命名即可
package com.itheima.pojo;

import lombok.AllArgsConstructor;
import lombok.Data;
import lombok.NoArgsConstructor;

import java.time.LocalDate;
import java.time.LocalDateTime;

@Data
@AllArgsConstructor
@NoArgsConstructor
public class Emp {
    private Integer id; // ID
    private String username; // 用户名
    private String password; // 密码
    private String name; // 姓名
    private Short gender; // 性别,1 男,2 女
    private String image; // 图像url
    private Short job; // 职位,说明:1 班主任,2 讲师,3 学工主管,4 教研主管,5 咨询师
    private LocalDate entrydate; // 入职日期
    private Integer deptId; // 部门id
    private LocalDateTime createTime; // 创建时间
    private LocalDateTime updateTime; // 修改时间
}
5、准备Mapper接口EmpMApper
-
在src.main.java.com.itheima 包下新建包mapper,并在mapper下新建接口EmpMapper并加入@Mapper注解
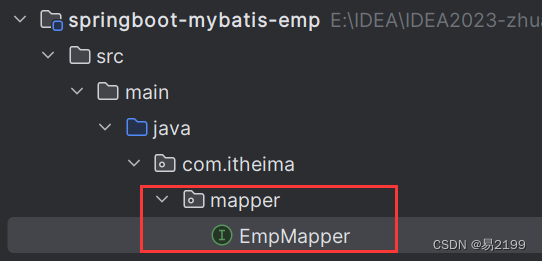
-
EmpMapper接口中的代码
package com.itheima.mapper;

import org.apache.ibatis.annotations.Mapper;

@Mapper
public interface EmpMapper {
}
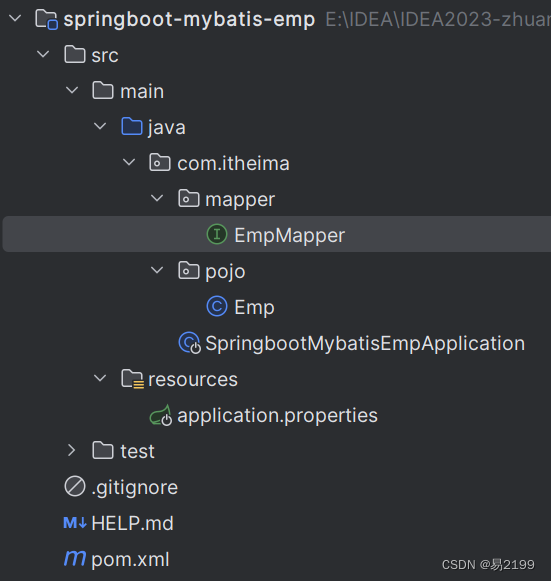
6、准备好的基础工程框架
二、基础操作-删除
1、根据主键ID删除
- 接口 EmpMapper 中的代码
package com.itheima.mapper;

import org.apache.ibatis.annotations.Delete;
import org.apache.ibatis.annotations.Mapper;

@Mapper // 程序在运行时会自动创建改接口的代理对象,并且会将该代理对象放到IOC当中
public interface EmpMapper {

    //根据ID删除(一般都不需要返回值)
    @Delete("delete from emp where id=#{id}")
    public void deleteById(Integer id);
}
- 测试类中的代码(src.test.java.com.itheima.SpringbootMybatisEmpApplicationTests)
package com.itheima;

import com.itheima.mapper.EmpMapper;
import org.junit.jupiter.api.Test;
import org.springframework.beans.factory.annotation.Autowired;
import org.springframework.boot.test.context.SpringBootTest;

@SpringBootTest
class SpringbootMybatisEmpApplicationTests {
    @Autowired
    private EmpMapper empMapper;

    @Test
    public void deleteById() {
        empMapper.deleteById(17);
    }

}
- 注意事项:如果mapper接口方法形参只要有一个普通类型的参数,#{…}里面的属性名可以随便写,如:#{id}、#{value},但是为了增强可读性还是建议和参数名一样
2、根据主键ID批量删除
三、基础操作-新增
(1)SQL语句
- 正式开始之前,现根据要求将SQL语句写出来,插入的SQL语句如下
insert into emp(username,name,gender,image,job,entrydate,dept_id,create_time,update_time)
values('Tom','汤姆',1,'1.jpg',1,'2005-01-01',1,now(),now());
(2)Mapper接口
- 在EmpMapper接口中新增一个insert方法,使用 @Insert 注解将SQL语句传入,代码如下
//新增员工
    @Insert("insert into emp(username,name,gender,image,job,entrydate,dept_id,create_time,update_time)" +
            "values(#{username},#{name},#{gender},#{image},#{job},#{entrydate},#{deptId},#{createTime},#{updateTime})")
    public void insert(Emp emp);
(3)测试
- 在测试类中编写测试代码(src.test.java.com.itheima.SpringbootMybatisEmpApplicationTests)给Emp中的每个属性赋值
@Test
    public void testInsert() {
        // 构造员工对象
        Emp emp = new Emp();
        // 给员工对象赋值
        emp.setUsername("Tom");
        emp.setName("汤姆");
        emp.setImage("1.jpg");
        emp.setGender((short) 1);
        emp.setJob((short) 1);
        emp.setEntrydate(LocalDate.of(2000, 1, 1));
        emp.setCreateTime(LocalDateTime.now());
        emp.setUpdateTime(LocalDateTime.now());
        emp.setDeptId(1);
        // 测试
        empMapper.insert(emp);
    }
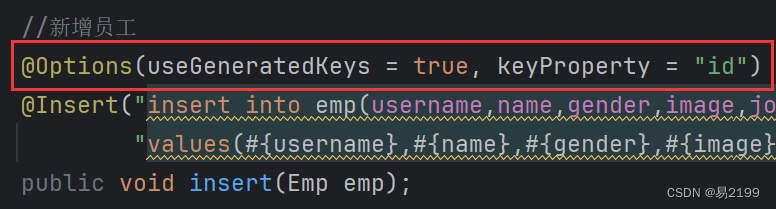
(4)主键返回
-
描述:在数据添加成功后,需要获取插入数据库数据的主键
-
实现:@Options(useGeneratedKeys = true, keyProperty = “id”)
四、基础操作-更新
(1)SQL语句
- 根据要求编写用于更新的SQL语句
update emp set username='',name='',gender='',image='',job='',entrydate='',dept_id='',update_time='' where id=1;
(2)Mapper接口
- 新增一个修改员工信息的方法,并使用@Update注解将SQL语句传入
//修改员工信息
    @Update("update emp set username = #{username},name = #{name},gender = #{gender},image = #{image},job = #{job},entrydate = #{entrydate},dept_id = #{deptId},update_time = #{updateTime} where id = #{id}")
    public void update(Emp emp);
(3)测试
 //测试修改员工信息
    @Test
    public void testUpdate() {
        // 构造员工对象
        Emp emp = new Emp();
        // 给员工对象赋值
        emp.setId(18);
        emp.setUsername("newTom");
        emp.setName("新汤姆");
        emp.setImage("1.jpg");
        emp.setGender((short) 1);
        emp.setJob((short) 1);
        emp.setEntrydate(LocalDate.of(2000, 1, 1));
        emp.setUpdateTime(LocalDateTime.now());
        emp.setDeptId(1);

        // 测试
        empMapper.update(emp);
    }
五、基础操作-查询
1、演示根据ID查询
(1)SQL语句
select id, username, password, name, gender, image, job, entrydate, dept_id, create_time, update_time from emp where id=18;
或者
select * from emp where id=18;
(2)Mapper接口
  //根据ID查询员工信息
    @Select("select id, username, password, name, gender, image, job, entrydate, dept_id, create_time, update_time from emp where id=#{id}")
    public Emp getEmpById(Integer id);
(3)测试
 @Test
    public void testGetEmpById(){
        Emp emp = empMapper.getEmpById(18);
        System.out.println(emp);
    }
2、出现问题
- 可以看到返回值如下,其中 deptId=null, createTime=null, updateTime=null
Emp(id=18, username=newTom, password=123456, name=新汤姆, gender=1, image=1.jpg, job=1, entrydate=2000-01-01, deptId=null, createTime=null, updateTime=null)
3、问题原因
- 实体类属性名 和 数据库表查询返回的字段名一致,mybatis会自动封装
- 如果实体类属性名 和 数据库表查询返回的字段名不一致,不能自动封装
4、解决方案
- 方案一:起别名,在SQL语句中,UI不一样的列名其别名,别名和实体类属性名一样
 //方案一:起别名
    @Select("select id, username, password, name, gender, image, job, entrydate, dept_id as deptId, create_time as createTime, update_time as updateTime from emp where id = #{id}")
    public Emp getEmpById(Integer id);
- 方案二:手动结果映射,通过@Results以及@Result进行手动结果映射
@Results({
            @Result(column = "dept_id",property = "deptId"),
            @Result(column = "create_time",property = "createTime"),
            @Result(column = "update_time",property = "updateTime")
    })
    @Select("select id, username, password, name, gender, image, job, entrydate, dept_id, create_time,update_time from emp where id = #{id}")
    public Emp getEmpById(Integer id);
- 方案三:开启驼峰命名,如果字段名与属性名符合驼峰命名规则,mybatis会自动通过驼峰命名规则映射
注意:前提是数据库中的一下划线分割,实体类中是驼峰命名才可以使用这个解决方案,同时这也是推荐的解决方案- 首先在src.main.resources.application.properties配置文件中加入:
# 开启 mybatis驼峰命名的映射
mybatis.configuration.map-underscore-to-camel-case=true
-
- 之后就可以像之前一样直接写
//    方案三
    @Select("select id, username, password, name, gender, image, job, entrydate, dept_id, create_time,update_time from emp where id = #{id}")
    public Emp getEmpById(Integer id);
5、演示根据条件查询

(1)SQL语句
select * from emp where name like'%张%' and gender='' and entrydate between '' and '' order by update_time desc;
(2)Mapper接口
- 不知道为什么使用的是2.X也需要加@Param注解
//条件查询
    @Select("select * from emp where name like concat('%',#{name},'%') and gender=#{gender} and " +
            "entrydate between #{begin}  and #{end}  order by update_time desc")
    public List<Emp> list(@Param("name") String name, @Param("gender") Short gender, @Param("begin") LocalDate begin, @Param("end") LocalDate end);
(3)测试
@Test
public void testList(){
List list = empMapper.list(“张”, (short) 1, LocalDate.of(2010, 1, 1), LocalDate.of(2020, 1, 1));
System.out.println(list);
}


 296
296

 被折叠的 条评论
为什么被折叠?
被折叠的 条评论
为什么被折叠?
 到【灌水乐园】发言


