


 本文详细介绍如何在IDEA中搭建Spark开发环境,包括Maven项目配置、依赖引入、Scala程序编写及打包流程,最后演示如何在Spark集群上运行程序。
工具:IDEA,spark集群
一.安装IDEA
安装及破解过程请参考:https://blog.csdn.net/weixin_43866709/article/details/88593704
二.程序
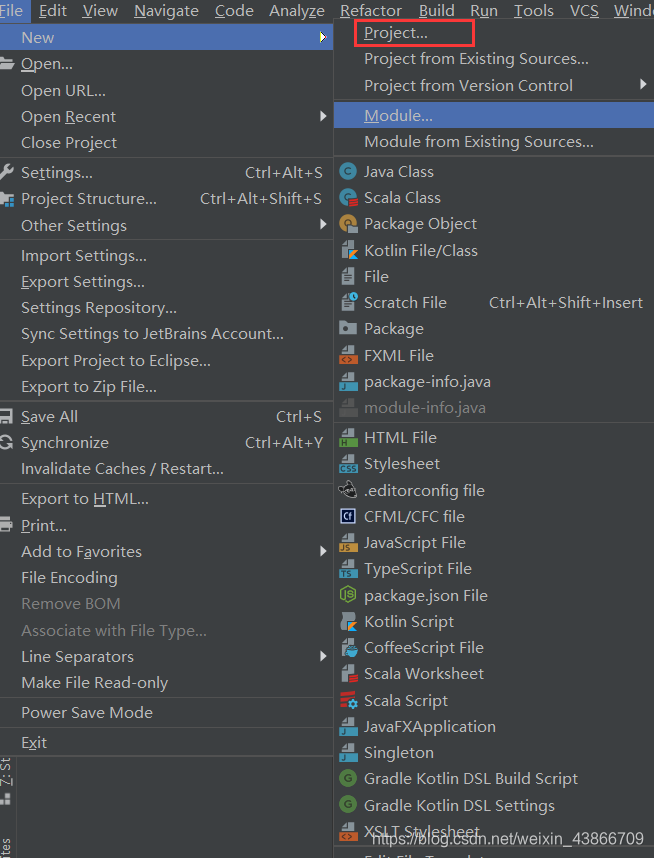
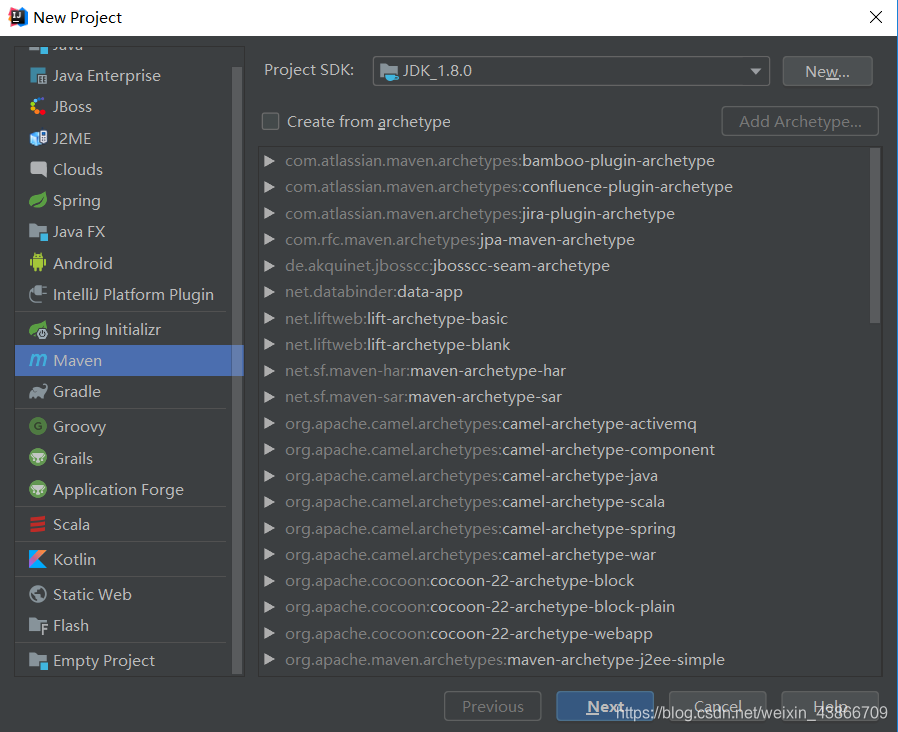
打开IDEA,新建一个maven工程
点击next,继续
填写项目组织名和项目名,点击next继续。。。
组织名例如:com.baidu.spark
项目名例如:SparkTest
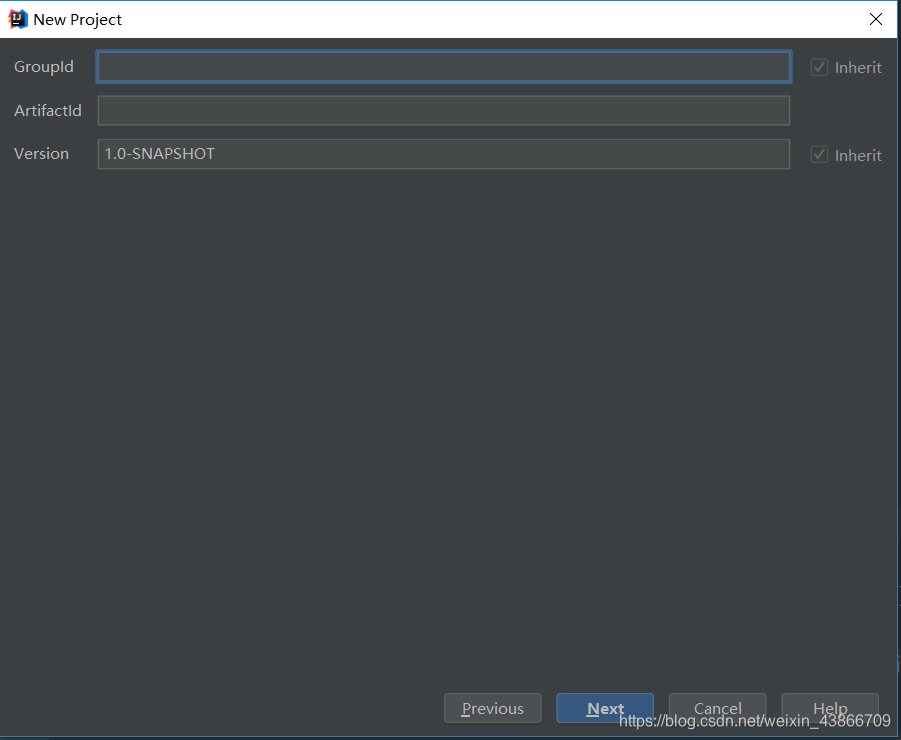
然后点击完成就可以了。
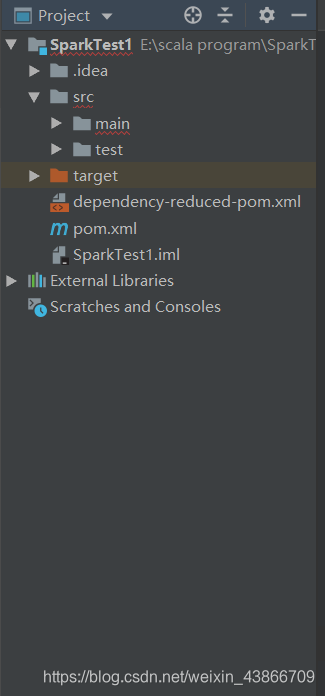
建立完maven项目,左侧栏出现该项目目录结构:
首先打开pom.xml,这个是maven的配置信息,里面可以放插件配置,将下面内容写进这个文件:
<?xml version="1.0" encoding="UTF-8"?>
<project xmlns="http://maven.apache.org/POM/4.0.0"
         xmlns:xsi="http://www.w3.org/2001/XMLSchema-instance"
         xsi:schemaLocation="http://maven.apache.org/POM/4.0.0 http://maven.apache.org/xsd/maven-4.0.0.xsd">
    <modelVersion>4.0.0</modelVersion>

    <groupId>cn.edu360.spark</groupId>
    <artifactId>SparkTest1</artifactId>
    <version>1.0-SNAPSHOT</version>

    <properties>
        <maven.compiler.source>1.8</maven.compiler.source>
        <maven.compiler.target>1.8</maven.compiler.target>
        <!--本机Scala版本-->
        <scala.version>2.11.7</scala.version>
        <!--spark集群版本-->
        <spark.version>2.2.3</spark.version>
        <!--Hadoop集群版本-->
        <hadoop.version>2.7.7</hadoop.version>
        <encoding>UTF-8</encoding>
    </properties>

    <dependencies>
        <!-- 导入scala的依赖 -->
        <dependency>
            <groupId>org.scala-lang</groupId>
            <artifactId>scala-library</artifactId>
            <version>${scala.version}</version>
        </dependency>

        <!-- 导入spark的依赖 -->
        <dependency>
            <groupId>org.apache.spark</groupId>
            <artifactId>spark-core_2.11</artifactId>
            <version>${spark.version}</version>
        </dependency>

        <!-- 指定hadoop-client API的版本 -->
        <dependency>
            <groupId>org.apache.hadoop</groupId>
            <artifactId>hadoop-client</artifactId>
            <version>${hadoop.version}</version>
        </dependency>

    </dependencies>

    <build>
        <pluginManagement>
            <plugins>
                <!-- 编译scala的插件 -->
                <plugin>
                    <groupId>net.alchim31.maven</groupId>
                    <artifactId>scala-maven-plugin</artifactId>
                    <version>3.2.2</version>
                </plugin>
                <!-- 编译java的插件 -->
                <plugin>
                    <groupId>org.apache.maven.plugins</groupId>
                    <artifactId>maven-compiler-plugin</artifactId>
                    <version>3.5.1</version>
                </plugin>
            </plugins>
        </pluginManagement>
        <plugins>
            <plugin>
                <groupId>net.alchim31.maven</groupId>
                <artifactId>scala-maven-plugin</artifactId>
                <executions>
                    <execution>
                        <id>scala-compile-first</id>
                        <phase>process-resources</phase>
                        <goals>
                            <goal>add-source</goal>
                            <goal>compile</goal>
                        </goals>
                    </execution>
                    <execution>
                        <id>scala-test-compile</id>
                        <phase>process-test-resources</phase>
                        <goals>
                            <goal>testCompile</goal>
                        </goals>
                    </execution>
                </executions>
            </plugin>

            <plugin>
                <groupId>org.apache.maven.plugins</groupId>
                <artifactId>maven-compiler-plugin</artifactId>
                <executions>
                    <execution>
                        <phase>compile</phase>
                        <goals>
                            <goal>compile</goal>
                        </goals>
                    </execution>
                </executions>
            </plugin>


            <!-- 打jar插件 -->
            <plugin>
                <groupId>org.apache.maven.plugins</groupId>
                <artifactId>maven-shade-plugin</artifactId>
                <version>2.4.3</version>
                <executions>
                    <execution>
                        <phase>package</phase>
                        <goals>
                            <goal>shade</goal>
                        </goals>
                        <configuration>
                            <filters>
                                <filter>
                                    <artifact>*:*</artifact>
                                    <excludes>
                                        <exclude>META-INF/*.SF</exclude>
                                        <exclude>META-INF/*.DSA</exclude>
                                        <exclude>META-INF/*.RSA</exclude>
                                    </excludes>
                                </filter>
                            </filters>
                        </configuration>
                    </execution>
                </executions>
            </plugin>
        </plugins>
    </build>


</project>
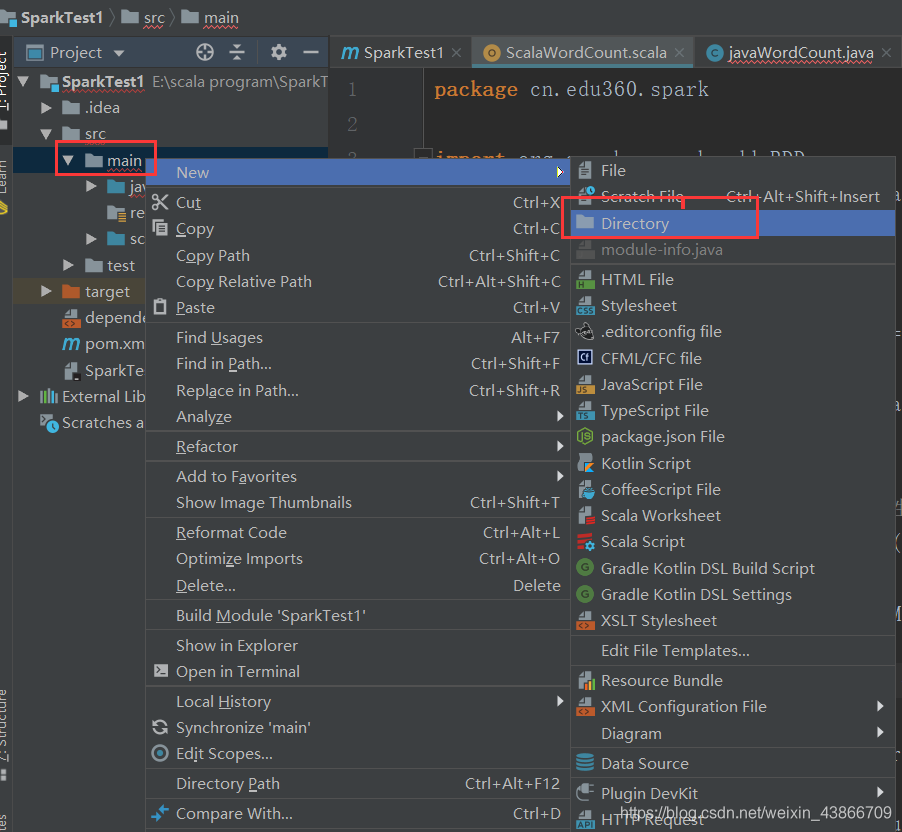
然后右键main–>new–>directory创建一个源文件夹,起名为Scala:
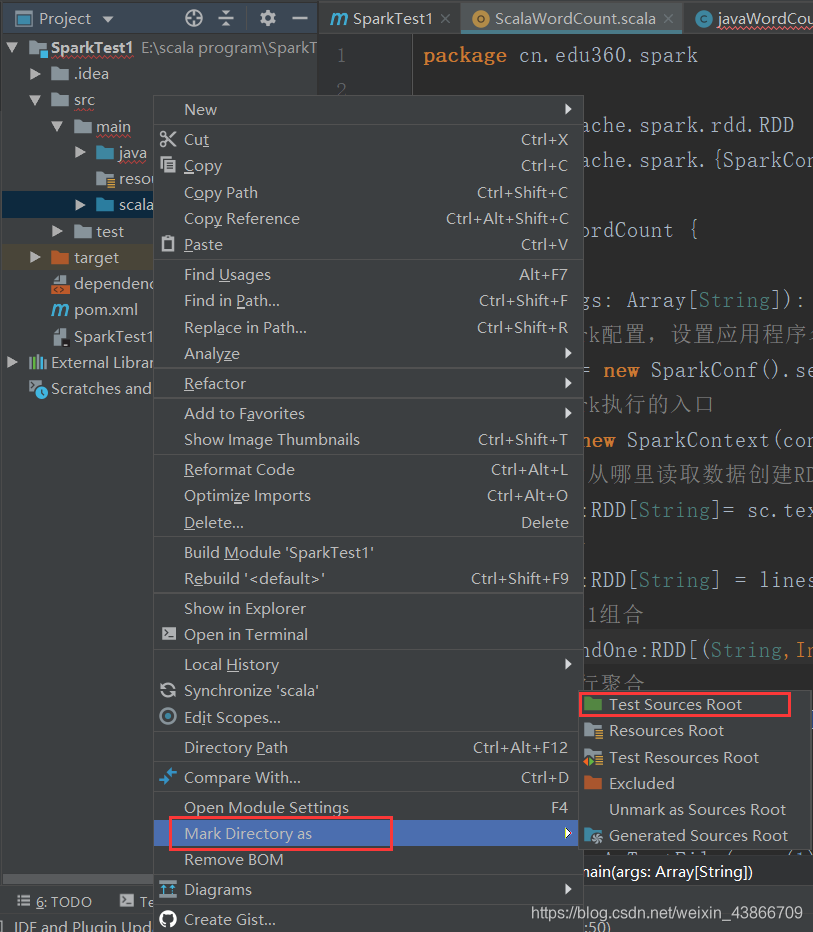
创建完成后,一定要将这个文件夹变成源码包,否则不能new class,右键Scala这个源文件夹,选择make directory as–>Sources root。
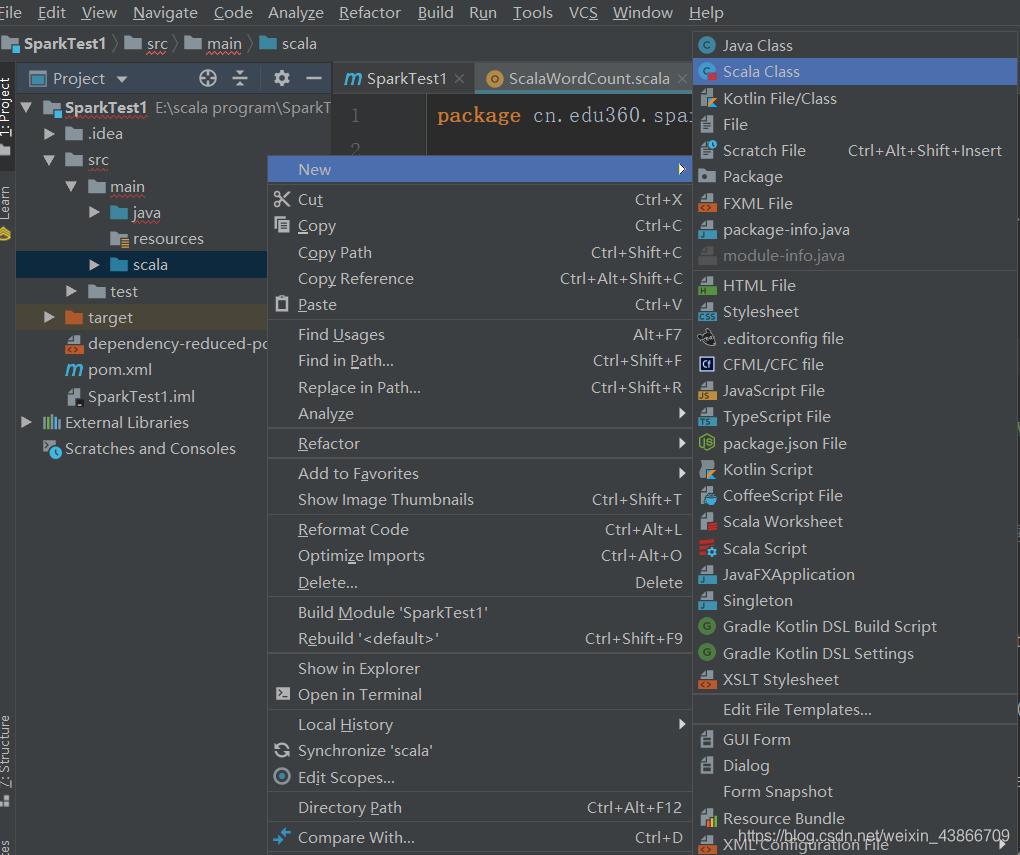
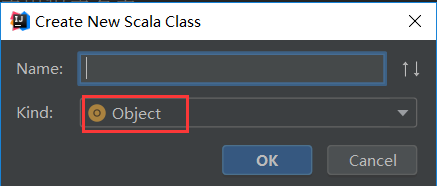
完成之后,右键Scala,选择new scala class,创建一个object,起名为ScalaWordCount,这里要使用绝对路径。
这里要选择object
然后将下面代码粘贴进去:
import org.apache.spark.rdd.RDD
import org.apache.spark.{SparkConf, SparkContext}

object ScalaWordCount {

  def main(args: Array[String]): Unit = {
    //创建spark配置,设置应用程序名字
    val conf = new SparkConf().setAppName("ScalaWordCount")
    //创建spark执行的入口
    val sc = new SparkContext(conf)
    //指定以后从哪里读取数据创建RDD(弹性分布式数据集)
    val lines:RDD[String]= sc.textFile(args(0))
    //切分压平
    val words:RDD[String] = lines.flatMap(_.split(" "))
    //将单词和1组合
    val wordAndOne:RDD[(String,Int)] = words.map((_, 1))
    //按Key进行聚合
    val reduced:RDD[(String,Int)] = wordAndOne.reduceByKey(_+_)
    //排序
    val sorted:RDD[(String,Int)] = reduced.sortBy(_._2,false)
    //将结果保存到HDFS中
    sorted.saveAsTextFile(args(1))
    //释放资源
    sc.stop()
  }

}
这是一个简单的统计单词数的程序。
写完程序后,点击右边的Maven project,将程序打成jar包:

这个package可以直接将程序打成jar包,因为之前我们在pom.xml里面配置打包插件。
打完包后,将程序上传到虚拟机。
然后启动我们的Hadoop集群,和spark集群:
在hdfs中创建好目录,并上传几个用于统计词数的文件。
然后进入到spark目录下的bin目录,执行:
spark-submit //向spark集群提交任务命令
–master spark://L1:7077 // --master指定spark集群上的master主机和端口
–class com.baidu.spark.ScalaWordCount //指定程序的类名(程序执行的入口)
/home/hadoop/original-SparkTest1-1.0-SNAPSHOT.jar //指定jar 包的位置
hdfs://L1:9000/aaa //指定HDFS上namenode 的主机名和端口,以及文件位置
hdfs://L1:9000/aaaout //指定程序运行结果存放位置
运行结束之后,使用命令:hdfs dfs -ls /aaaout查看运行结果,会发现里面有三个文件,分别是:
/aaaout/part-00000
/aaaout/part-00001
/aaaout/part-00002
使用hdfs dfs -cat /aaaout/part-00000就可以查看运行结果了。
到此就结束了。


 995
995

 被折叠的 条评论
为什么被折叠?
被折叠的 条评论
为什么被折叠?
 到【灌水乐园】发言


