


1. 什么是命令模式?
- 命令模式(Command Pattern)是一种数据驱动的设计模式,它属于行为型模式。
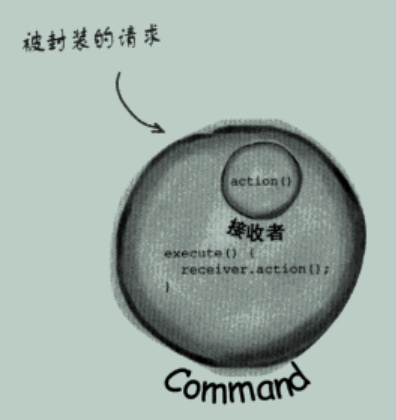
- 请求以命令的形式包裹在对象中,并传给调用对象。调用对象寻找可以处理该命令的合适的对象,并把该命令传给相应的对象,该对象执行命令。
- 命令模式可将“动作的请求者”从“动作的执行者”对象中解耦。
- 命令模式三大对象:命令调用者+命令对象+命令接收者
主要解决:在软件系统中,行为请求者与行为实现者通常是一种紧耦合的关系,但某些场合,比如需要对行为进行记录、撤销或重做、事务等处理时,这种无法抵御变化的紧耦合的设计就不太合适,需要解耦,就需要使用命令模式。
如何解决:通过调用者调用接受者执行命令,顺序:调用者方法→命令execute→接受者方法。
关键代码:定义三个角色:1、received 真正的命令执行对象 2、Command 3、invoker 使用命令对象的入口
优点: 1、降低了系统耦合度。 2、新的命令可以很容易添加到系统中去。
缺点:使用命令模式可能会导致某些系统有过多的具体命令类。
使用场景:认为是命令的地方都可以使用命令模式,比如: 1、GUI 中每一个按钮都是一条命令。 2、模拟 CMD。
注意事项:系统需要支持命令的撤销(Undo)操作和恢复(Redo)操作,也可以考虑使用命令模式。

2. 遥控器案例
案例代码:https://gitee.com/bithachi_admin_admin/mycode/tree/master/%E8%AE%BE%E8%AE%A1%E6%A8%A1%E5%BC%8F/command/remote
案例描述:我们希望制造一个遥控器,遥控器有多个插槽,每个插槽可以控制一个或一组装置。
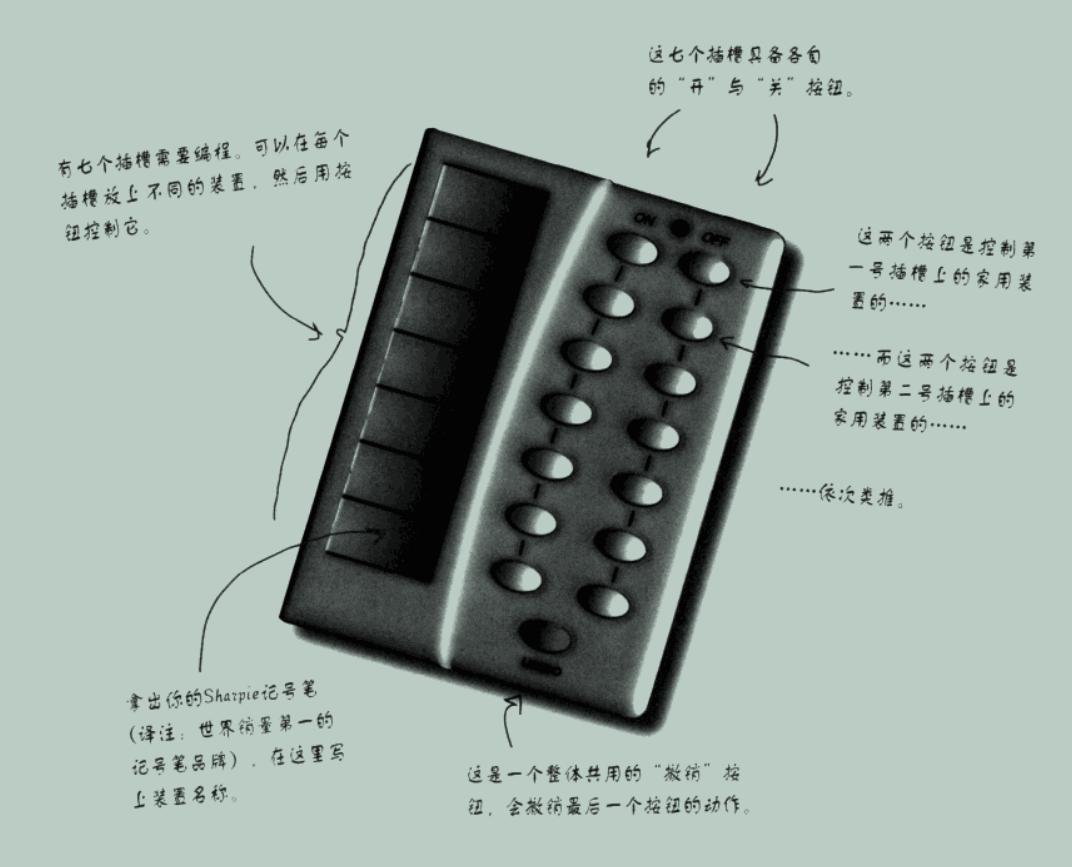
解决思路:可以将遥控器的每个插槽,对应到一个命令这样就让遥控器变成“调用者”。当按下按钮,相应命令对象的execute()方法就会被调用,其结果就是,接收者(例如:电灯、天花板电扇、音响)的相关excute()方法的动作被调用。

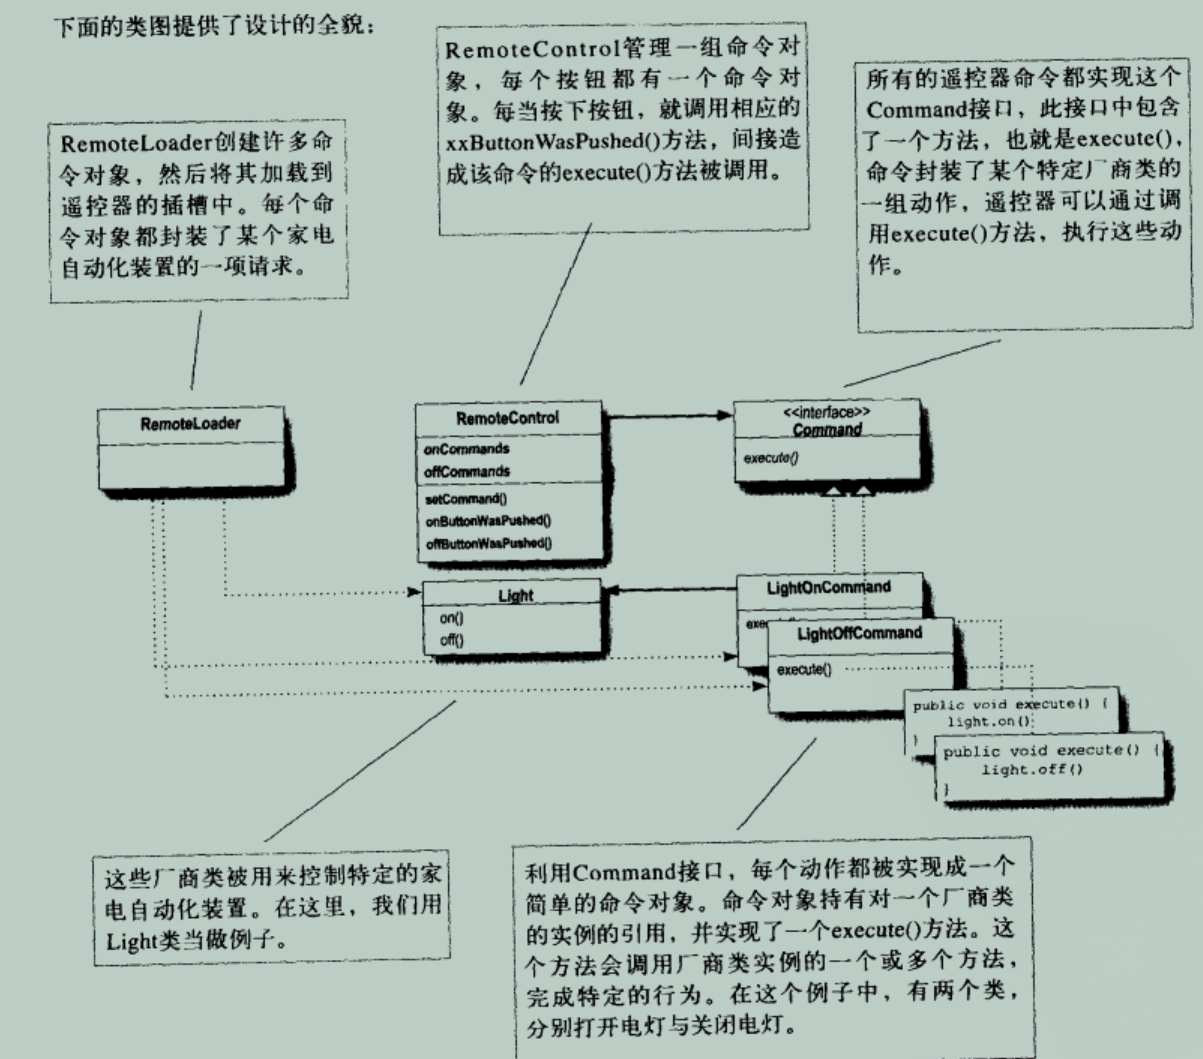
下面是解决方案的UML图,没有公共“撤销“功能,画图的时候忘记看撤销了,其实都差不多的,一个简单的扩展而已,关于撤销详情见链接里的undo文件夹代码。
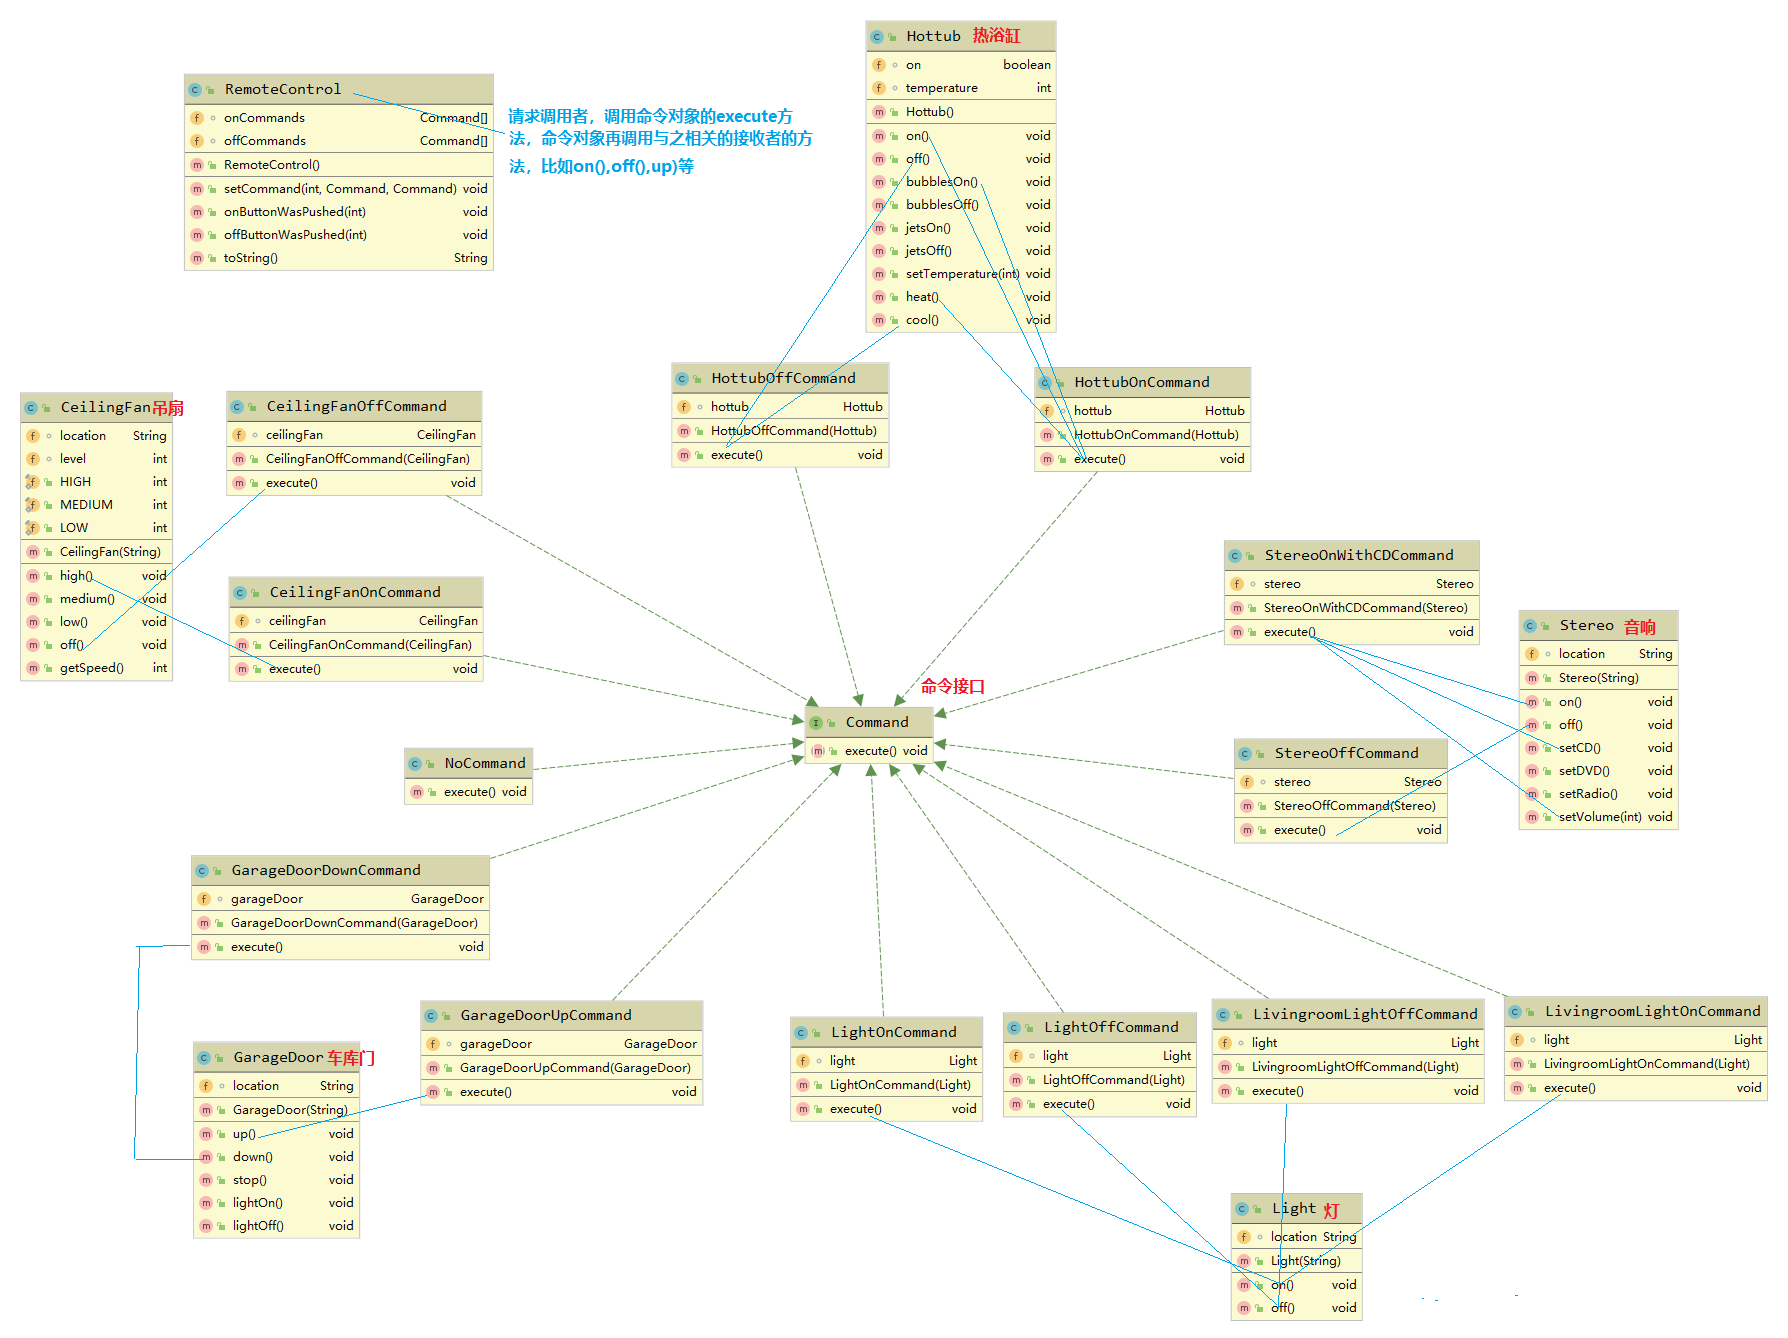
以下只展示部分代码
2.1 实现遥控器-RemoteControl
//
// This is the invoker
// 这是一个方法调用者
//
@SuppressWarnings("all")
public class RemoteControl {
	//7个开与关的命令组
	Command[] onCommands;
	Command[] offCommands;

	public RemoteControl() {
		onCommands = new Command[7];
		offCommands = new Command[7];
 		//初始化,刚开始是没有命令的
		Command noCommand = new NoCommand();
		for (int i = 0; i < 7; i++) {
			onCommands[i] = noCommand;
			offCommands[i] = noCommand;
		}
	}
  	//设置某个插槽位置的开与关命令
	public void setCommand(int slot, Command onCommand, Command offCommand) {
		onCommands[slot] = onCommand;
		offCommands[slot] = offCommand;
	}
 	//按下开关时执行某个插槽的execute方法,实现开与关命令
	public void onButtonWasPushed(int slot) {
		onCommands[slot].execute();
	}
	public void offButtonWasPushed(int slot) {
		offCommands[slot].execute();
	}

	//打印出每个插槽所对应的的命令,开与关
	@Override
	public String toString() {
		StringBuffer stringBuff = new StringBuffer();
		stringBuff.append("\n------ Remote Control -------\n");
		for (int i = 0; i < onCommands.length; i++) {
			stringBuff.append("[slot " + i + "] " + onCommands[i].getClass().getName() + "    " + offCommands[i].getClass().getName() + "\n");
		}
		return stringBuff.toString();
	}
}
2.2 命令接收者- Light
public class Light {
	String location = "";

	public Light(String location) {
		this.location = location;
	}

	public void on() {
		System.out.println(location + " light is on");
	}

	public void off() {
		System.out.println(location + " light is off");
	}
}
2.3 命令开与关对象-LinghtxxxCommand
public class LightOnCommand implements Command {
	Light light;

	public LightOnCommand(Light light) {
		this.light = light;
	}

	@Override
	public void execute() {
		light.on();
	}
}
public class LightOffCommand implements Command {
	Light light;

	public LightOffCommand(Light light) {
		this.light = light;
	}

	@Override
	public void execute() {
		light.off();
	}
}
2.4 测试
public class RemoteLoader {

    public static void main(String[] args) {
        //遥控器(调用者)
        RemoteControl remoteControl = new RemoteControl();

        //房间灯(接收者)
        Light livingRoomLight = new Light("Living Room");
        //厨房灯(接收者)
        Light kitchenLight = new Light("Kitchen");
        //吊扇(接收者)
        CeilingFan ceilingFan = new CeilingFan("Living Room");
        //车库门(接收者)
        GarageDoor garageDoor = new GarageDoor("Garage");
        //音响(接收者)
        Stereo stereo = new Stereo("Living Room");

        //房间灯打开和关闭命令
        LightOnCommand livingRoomLightOn = new LightOnCommand(livingRoomLight);
        LightOffCommand livingRoomLightOff = new LightOffCommand(livingRoomLight);
        //厨房灯打开和关闭命令
        LightOnCommand kitchenLightOn = new LightOnCommand(kitchenLight);
        LightOffCommand kitchenLightOff = new LightOffCommand(kitchenLight);

        //吊扇打开和关闭命令
        CeilingFanOnCommand ceilingFanOn = new CeilingFanOnCommand(ceilingFan);
        CeilingFanOffCommand ceilingFanOff = new CeilingFanOffCommand(ceilingFan);

        //车库门上升和下降命令
        GarageDoorUpCommand garageDoorUp = new GarageDoorUpCommand(garageDoor);
        GarageDoorDownCommand garageDoorDown = new GarageDoorDownCommand(garageDoor);

        //音响打开和关闭命令
        StereoOnWithCDCommand stereoOnWithCD = new StereoOnWithCDCommand(stereo);
        StereoOffCommand stereoOff = new StereoOffCommand(stereo);

        //将各种命令对象插入到遥控器的插槽中
        remoteControl.setCommand(0, livingRoomLightOn, livingRoomLightOff);
        remoteControl.setCommand(1, kitchenLightOn, kitchenLightOff);
        remoteControl.setCommand(2, ceilingFanOn, ceilingFanOff);
        remoteControl.setCommand(3, stereoOnWithCD, stereoOff);

        //打印遥控器的信息
        System.out.println(remoteControl);

        //模拟遥控器的某个按钮动作,进行打开关闭
        remoteControl.onButtonWasPushed(0);
        remoteControl.offButtonWasPushed(0);
        remoteControl.onButtonWasPushed(1);
        remoteControl.offButtonWasPushed(1);
        remoteControl.onButtonWasPushed(2);
        remoteControl.offButtonWasPushed(2);
        remoteControl.onButtonWasPushed(3);
        remoteControl.offButtonWasPushed(3);
    }
}
运行结果:
------ Remote Control -------
[slot 0] headfirst.designpatterns.command.remote.LightOnCommand    headfirst.designpatterns.command.remote.LightOffCommand
[slot 1] headfirst.designpatterns.command.remote.LightOnCommand    headfirst.designpatterns.command.remote.LightOffCommand
[slot 2] headfirst.designpatterns.command.remote.CeilingFanOnCommand    headfirst.designpatterns.command.remote.CeilingFanOffCommand
[slot 3] headfirst.designpatterns.command.remote.StereoOnWithCDCommand    headfirst.designpatterns.command.remote.StereoOffCommand
[slot 4] headfirst.designpatterns.command.remote.NoCommand    headfirst.designpatterns.command.remote.NoCommand
[slot 5] headfirst.designpatterns.command.remote.NoCommand    headfirst.designpatterns.command.remote.NoCommand
[slot 6] headfirst.designpatterns.command.remote.NoCommand    headfirst.designpatterns.command.remote.NoCommand

Living Room light is on
Living Room light is off
Kitchen light is on
Kitchen light is off
Living Room ceiling fan is on high
Living Room ceiling fan is off
Living Room stereo is on
Living Room stereo is set for CD input
Living Room stereo volume set to 11
Living Room stereo is off
3. 命令模式扩展
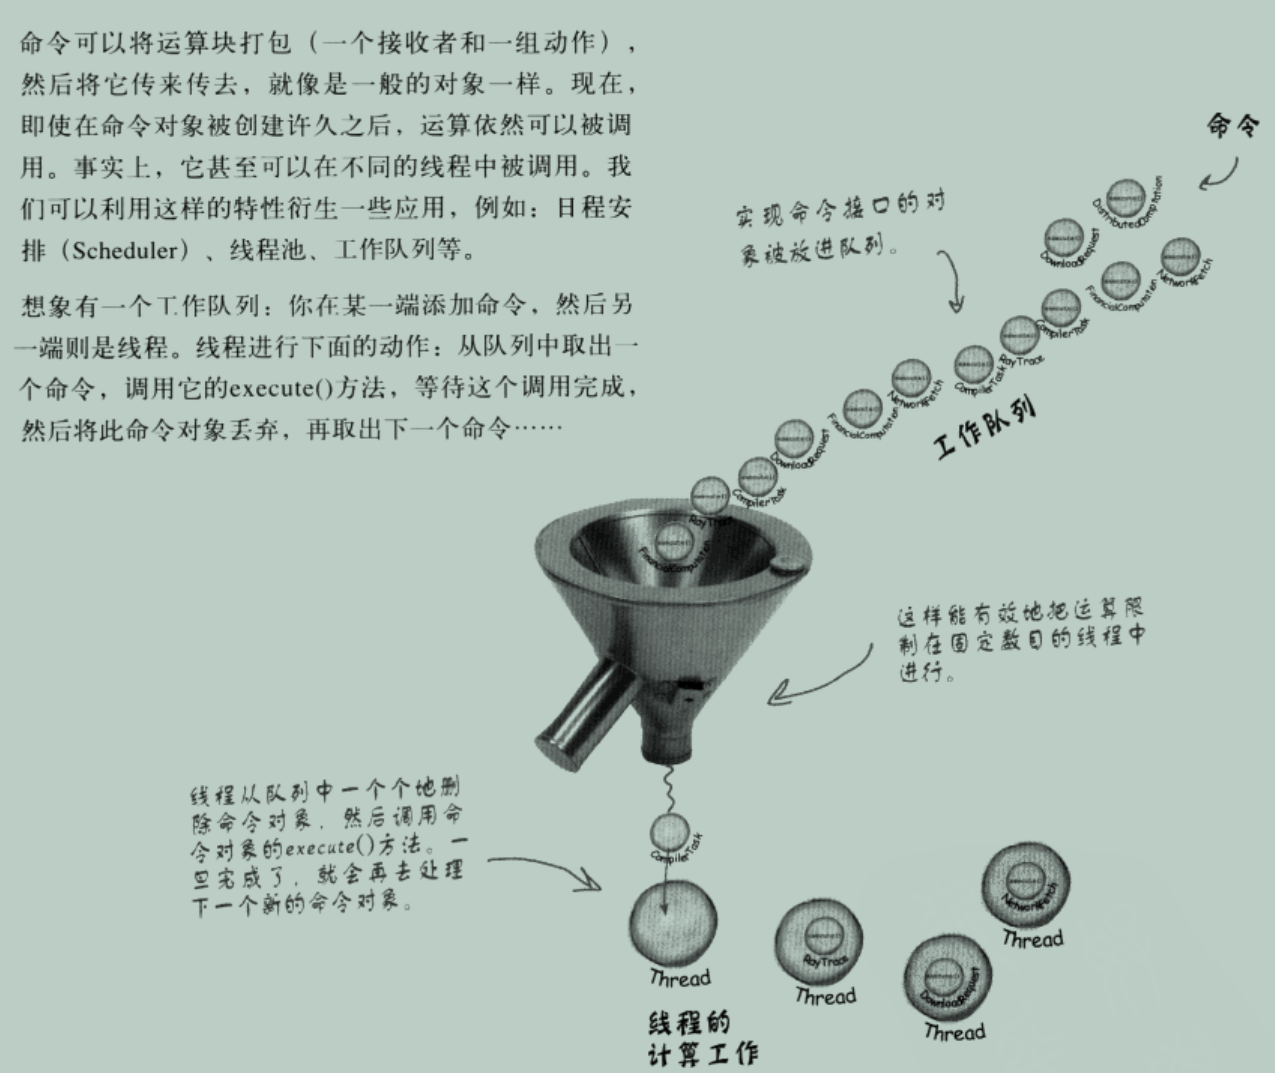
3.1 队列请求
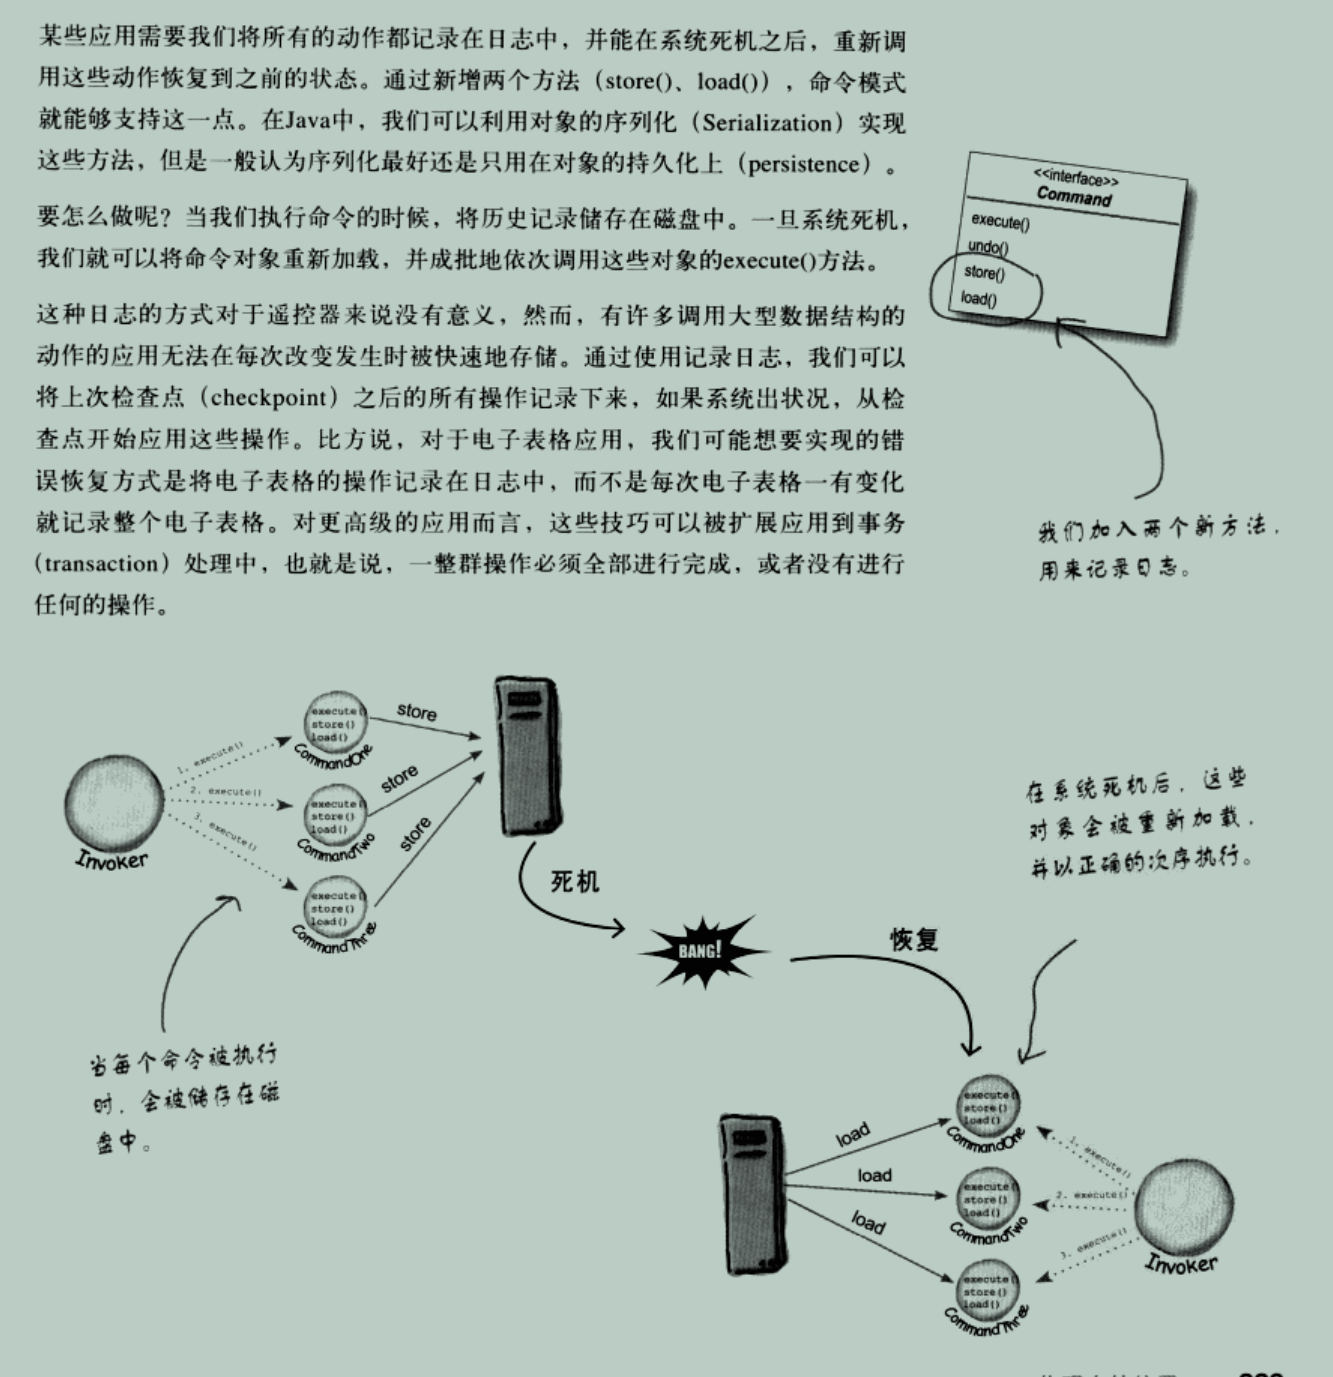
3.2 日志请求


 564
564


 被折叠的 条评论
为什么被折叠?
被折叠的 条评论
为什么被折叠?
 到【灌水乐园】发言


