


21天学Python --- 打卡12:Python执行jar包

1. Subprocess
subprocess 是 Python 2.4 中新增的一个模块
1.1 Method
subprocess.call()
父进程等待子进程完成
import subprocess

a = subprocess.call(['ipconfig','/all'])
print(a)
#执行命令,如果命令结果为0,就正常返回,否则抛异常
getstatusoutput()
接收字符串格式命令,返回元组形式,第1个元素是执行状态,第2个是命令结果
import subprocess

a = subprocess.getstatusoutput("whoami")
print(a)
#输出
(0, 'desktop-xxxx\\admin')
getoutput()
接收字符串格式命令,并返回结果
import subprocess

a = subprocess.getoutput("whoami")
print(a)
#输出
desktop-xxxx\admin
check_output()
执行命令,并返回结果,下例结果返回给a。
import subprocess

a = subprocess.check_output(['ipconfig','/all'])
print(a)
Popen()
在一个新的进程中执行一个子程序
import subprocess

a = subprocess.Popen(['ping','-c','1','www.baidu.com'],shell=True)
a.wait()
1.2 Execure Jar
只能执行main方法,这个也太无语了
import subprocess

def execute_java_jar( ):
    jar_path = "E:\\python_work\\airflow\\xxxxx.jar"
    param = ""
    execute = "java -jar {} '{}'".format(jar_path,param)
    print(execute)
    output = subprocess.Popen(execute, shell=True, stdout=subprocess.PIPE, stderr=subprocess.STDOUT)
    result = output.stdout.read()

    #打印控制台结果,按回车换行切割
    allSplit =result.decode().split("/r/n")
    for x in allSplit:
        print(x)

execute_java_jar()
2. Jpype
- Jpype Introduction: https://github.com/jpype-project/jpype.
2.1 Install
pip install jpype1
2.2 Execute Simple Jar
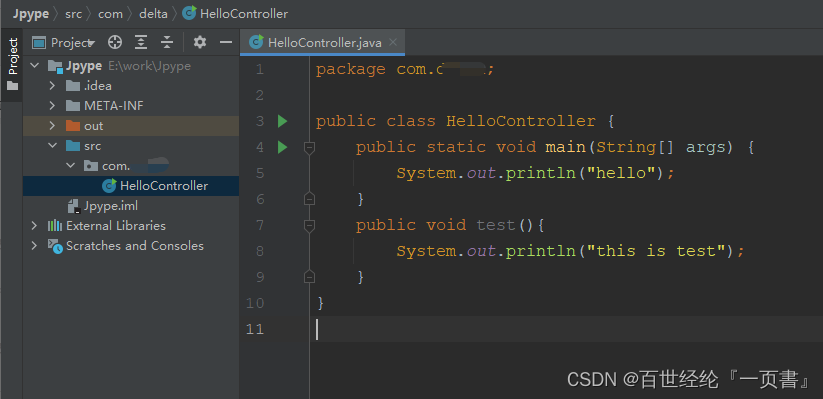
2.2.1 Java Code
- 简单的java代码
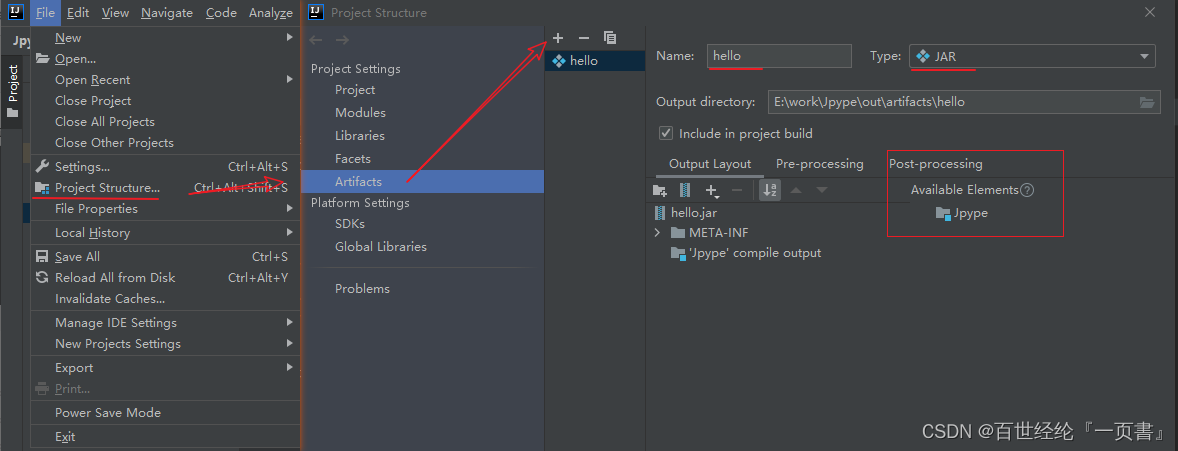
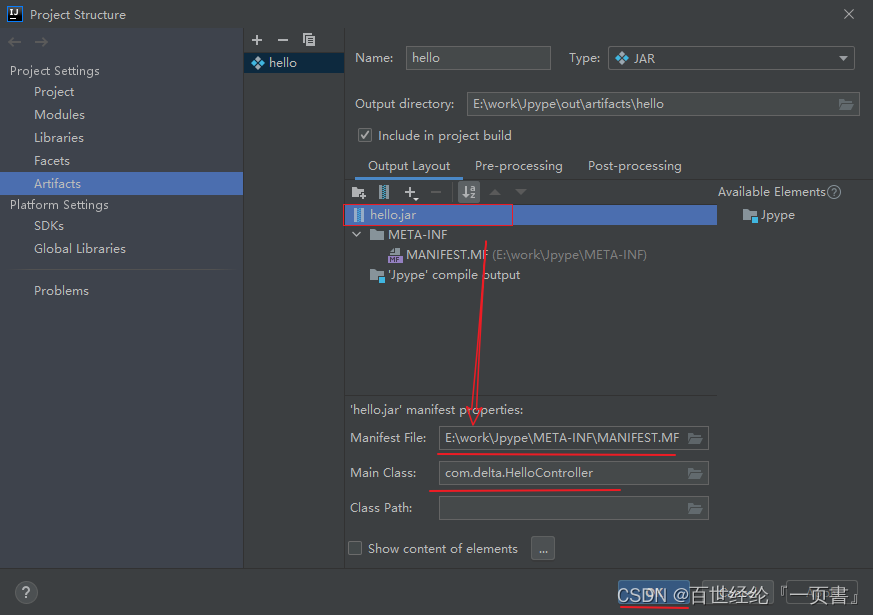
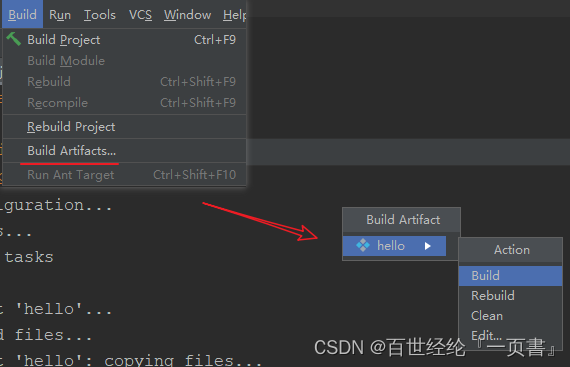
- 打成Jar包,点击"Artifacts" -> 绿色的"+" -> “JAR” -> Empty
输入一个名字
Type选择JAR
Available Elements里双击需要添加到jar包的文件,即可添加到左边的jar包目录下
- 运行程序入口main函数,点击OK。
- 点击菜单中“Build” -> “Build Artifacts”。
2.2.2 Python Code
import jpype
import os
if __name__ == '__main__':
path = 'E:\\python_work\\airflow\execute_jar\\hello.jar'
jar_path = os.path.join(os.path.abspath("."),path)
# 2.获取jvm.dll 的文件路径
jvmPath = jpype.getDefaultJVMPath()
print(jvmPath)
# 启动jvm
jpype.startJVM(jvmPath, "-ea", "-Djava.class.path=%s" % path)
# 3.加载java类(参数是java的长类名)
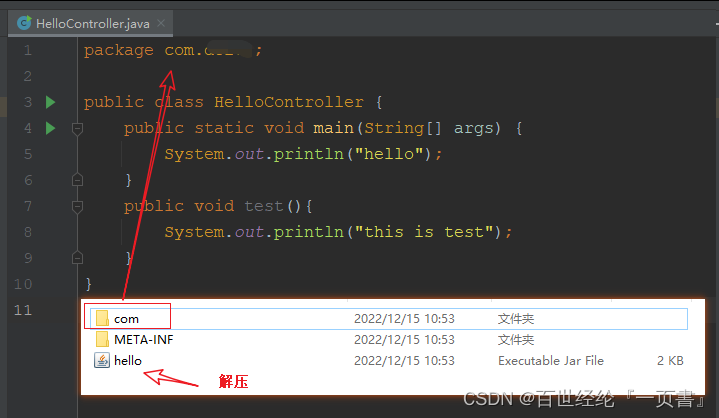
HelloController = jpype.JClass('com.xxx.HelloController')
hello = HelloController()
hello.main(["abc"])
hello.test()
# 4.关闭jvm:jvm随着python程序的退出而结束
jpype.shutdownJVM()
2.2.3 Directory Structure
- 我将jar进行解压,发现结构和项目结构一致,所以python可以直接获取类
jpype.startJVM(jvmPath, “-ea”, “-Djava.class.path=%s” % path)
HelloController = jpype.JClass(‘com.xxxx.HelloController’)- 才可以调用里面的方法
hello.test()
2.3 Execute Maven Jar
- 查看mavne打包文档
Apache Maven Assembly Plugin: https://maven.apache.org/plugins/maven-assembly-plugin/.
2.3.1 Maven Package
<?xml version="1.0" encoding="UTF-8"?>
    。。。。。。
    <build>
        <plugins>
            <!-- 1.8jdk编译 -->
            <plugin>
                <groupId>org.apache.maven.plugins</groupId>
                <artifactId>maven-compiler-plugin</artifactId>
                <version>3.8.1</version>
                <configuration>
                    <source>1.8</source>
                    <target>1.8</target>
                    <encoding>UTF-8</encoding>
                </configuration>
            </plugin>
            <!-- 打包 -->
            <plugin>
                <groupId>org.springframework.boot</groupId>
                <artifactId>spring-boot-maven-plugin</artifactId>
                <version>2.3.7.RELEASE</version>
                <configuration>
                    <mainClass>com.xxxx.DataPipelineConfigServiceApplication</mainClass>
                </configuration>
                <executions>
                    <execution>
                        <id>repackage</id>
                        <goals>
                            <goal>repackage</goal>
                        </goals>
                    </execution>
                </executions>
            </plugin>
             <!-- 跳过测试 -->
            <plugin>
                <groupId>org.apache.maven.plugins</groupId>
                <artifactId>maven-surefire-plugin</artifactId>
                <version>2.18.1</version>
                <configuration>
                    <skipTests>true</skipTests>
                </configuration>
            </plugin>
        </plugins>
    </build>
</project>
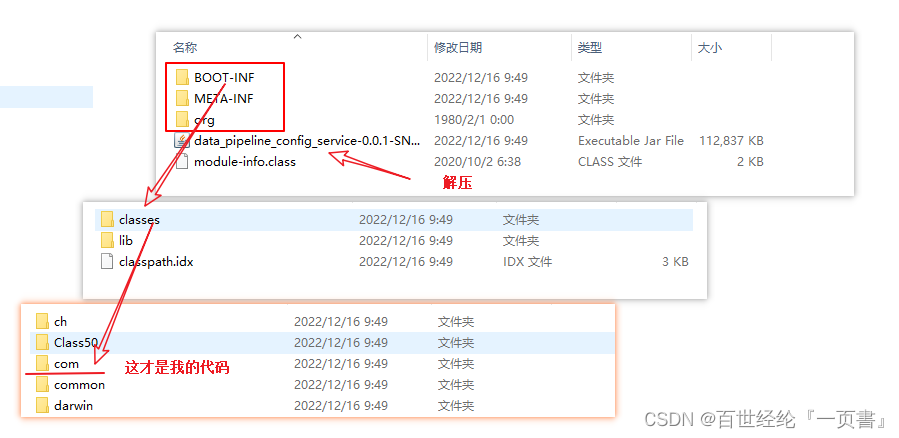
2.3.2 Directory Structure
- python代码同上,一直报错,找不到类,而且百度的时候说还要把包也一起打进来
Class com.xxx.monitorService.controller.HelloController is not found- 我将jar进行解压,发现结构和项目结构不一致
maven打包后,我的代码在 /BOOT-INF/classes/com/xxxxx- python去读类肯定是读不到的
HelloController = jpype.JClass(‘com.xxxx.monitorService.controller.HelloController’)
2.3.3 maven-assembly-plugin
- 修改pom.xml打包方式
spring-boot-maven-plugin将这个注掉,就不会有BOOT-INF
maven-assembly-plugin使用这个模式打包,会把依赖一起打进来
<?xml version="1.0" encoding="UTF-8"?>
    。。。。。。
    <build>
        <plugins>
            <plugin>
                <artifactId>maven-assembly-plugin</artifactId>
                <version>2.6</version>
                <configuration>
                    <descriptorRefs>
                        <descriptorRef>jar-with-dependencies</descriptorRef>
                    </descriptorRefs>
                    <archive>
                        <manifest>
                            <mainClass>com.xxxx.DataPipelineConfigServiceApplication</mainClass>
                        </manifest>
                        <manifestEntries>
                            <Class-Path>.</Class-Path>
                        </manifestEntries>
                    </archive>
                    <appendAssemblyId>false</appendAssemblyId>
                </configuration>
                <executions>
                    <execution>
                        <id>make-assembly</id>
                        <phase>package</phase>
                        <goals>
                            <goal>single</goal>
                        </goals>
                    </execution>
                </executions>
            </plugin>
            <plugin>
                <groupId>org.apache.maven.plugins</groupId>
                <artifactId>maven-compiler-plugin</artifactId>
                <configuration>
                    <source>8</source>
                    <target>8</target>
                </configuration>
            </plugin>
<!--            <plugin>-->
<!--                <groupId>org.springframework.boot</groupId>-->
<!--                <artifactId>spring-boot-maven-plugin</artifactId>-->
<!--                <version>2.3.7.RELEASE</version>-->
<!--                <configuration>-->
<!--                    <mainClass>com.xxxx.DataPipelineConfigServiceApplication</mainClass>-->
<!--                </configuration>-->
<!--                <executions>-->
<!--                    <execution>-->
<!--                        <goals>-->
<!--                            <goal>repackage</goal>-->
<!--                        </goals>-->
<!--                    </execution>-->
<!--                </executions>-->
<!--            </plugin>-->
        </plugins>
    </build>

</project>
2.3.4 Jar包中有中文
    jpype.startJVM(
        jpype.get_default_jvm_path(),
        jvm_arg,
        "-Dfile.encoding=UTF8",
        "-ea",
        '-Xmx{}m'.format(max_memory)
    )
3. Windows kill port
- 先查询pid,然后kill
netstat -ano
taskkill /F /PID xxxxx
4. Error
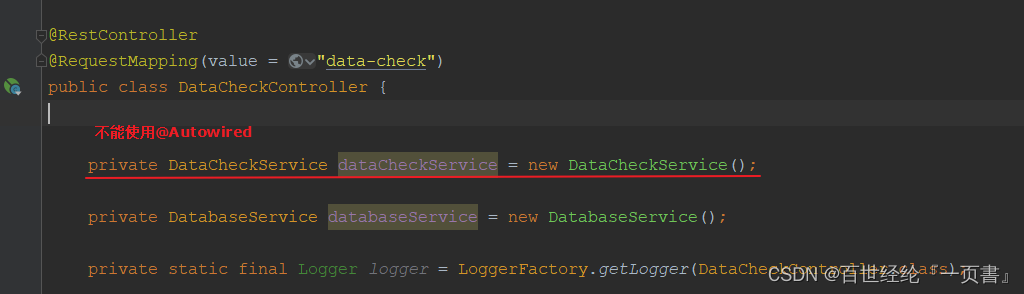
4.1 Class com.xxx.xxxx is not found
基本就是打包的方式不对,导致项目的目录结构不同,找不到对应类的编译文件
4.2 java.lang.NullPointerException
一般情况下,我们的代码都是测试过的,基本不会出现这个问题
所以,肯定是某一步调用了其他类的方法,而这个类并没有导进来
4.3 OSError:JVM cannot be restarted
一般情况下,jvm不能反复启动关闭,将开启jvm的方法提取出来
import pymssql
import jpype
import os


def createConn():
    conn = pymssql.connect(host="10.xxx.xxx.xxx", database='xxx', user='xxx', password='xxx')
    cursor = conn.cursor()
    return cursor

def getJVMClass():

    path = 'E:\\python_work\\airflow\\data_check\\data_pipeline_config_service-0.0.1-SNAPSHOT.jar'
    jar_path = os.path.join(os.path.abspath("."), path)

    #  2.获取jvm.dll 的文件路径
    jvmPath = jpype.getDefaultJVMPath()
    print(jvmPath)

    # 启动jvm
    jpype.startJVM(jvmPath, "-ea", "-Djava.class.path=%s" % jar_path)
    KafkaControllerClass = jpype.JClass("com.xxx.monitorService.controller.KafkaController")
    return KafkaControllerClass()

if __name__ == '__main__':
    kafkaController = getJVMClass()
    print("start jvm")

    cursor = createConn()
    cursor.execute("select topic.topic_id,dkc.system_id ,dkc.conn_name,dkc.conn_type,dkc.db_config  from dpm_topic topic left join DPM_KAFKA_CONN dkc  on dkc.topic_id = topic.topic_id where topic.topic_id >= 2")
    allConns = cursor.fetchall()
    for everyConn in allConns:
        topicId = everyConn[0]
        systemId = everyConn[1]
        conn_name = everyConn[2]
        conn_type = everyConn[3]
        table_id = everyConn[4]
        kafkaController.getConnectorStatus(conn_name, systemId, topicId, conn_type, table_id);
    jpype.shutdownJVM()
5. Awakening
开心,现在遇到问题自己会一点点的去摸索,去找问题的原因,正一步步的变强,奥利给。
在一秒钟内看到本质的人和花半辈子也看不清一件事本质的人,自然是不一样的命运。


 924
924

 被折叠的 条评论
为什么被折叠?
被折叠的 条评论
为什么被折叠?
 到【灌水乐园】发言


