


 本文介绍了Spring框架的核心理念,包括其作为轻量级框架的优点,控制反转(IoC)和面向切面编程(AOP)的应用,以及如何通过XML配置实现IoC。此外,还探讨了SpringBoot和SpringCloud的扩展性,以及Spring的配置和依赖管理方式,如组合模式实例和XML配置文件的使用。
1 Spring简介
1.1spring理念
使现有技术更加容易使用,本身是一个大杂烩,整合了现有的技术框架。
1.2spring优点
-
一个轻量级的控制反转(IOC),面向切面编程的(AOP)的框架
-
支持事务处理,对框架整合的支持
-
是一个轻量级的、非入侵式的框架
-
是一个开源免费的框架
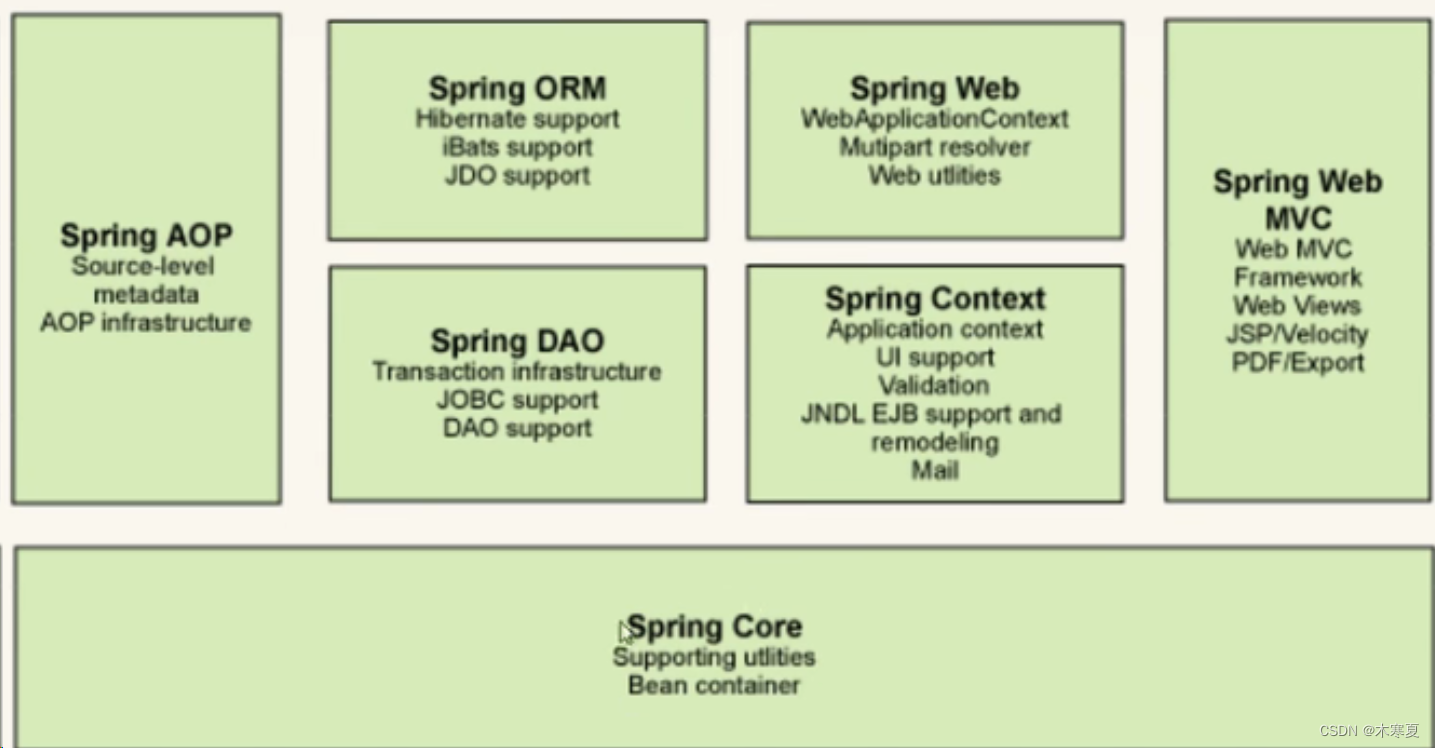
1.3组成
1.4扩展
在spring的官网有这个介绍:现代化的java开发,也就是基于spring的开发
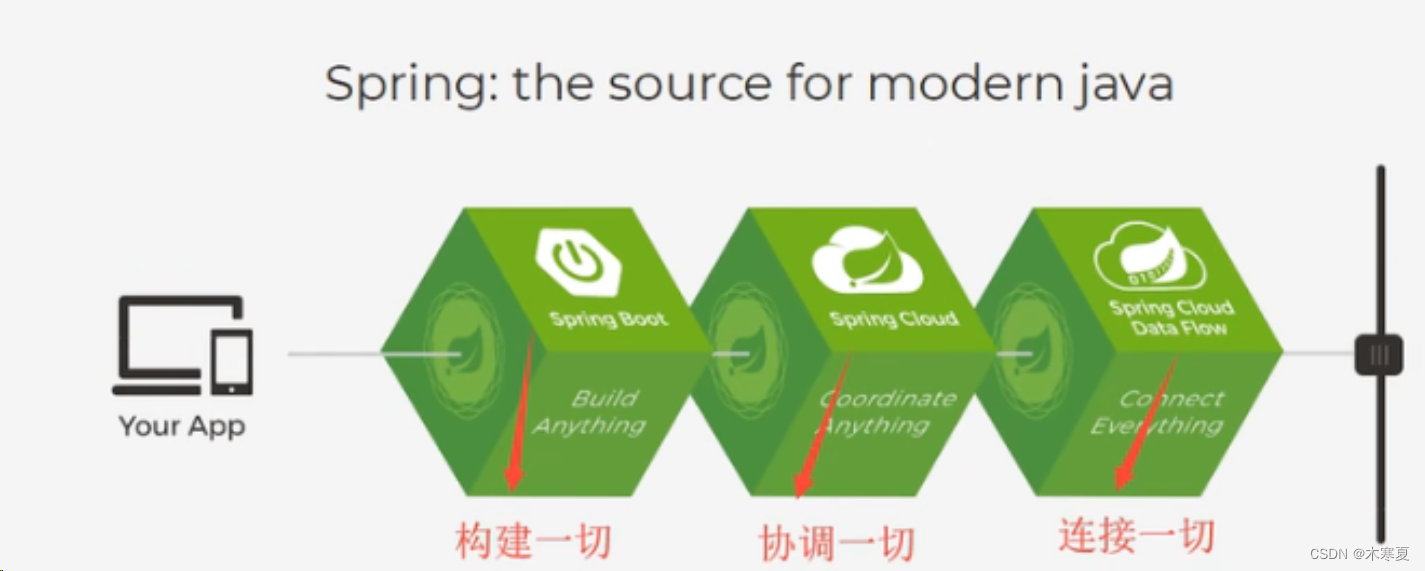
- springboot:一个快速开发的脚手架,基于springboot可以快速开发单个微服务框架
- springcloud:是基于springboot实现的
2 IOC理论推导
2.1 建立基础spring项目的方法
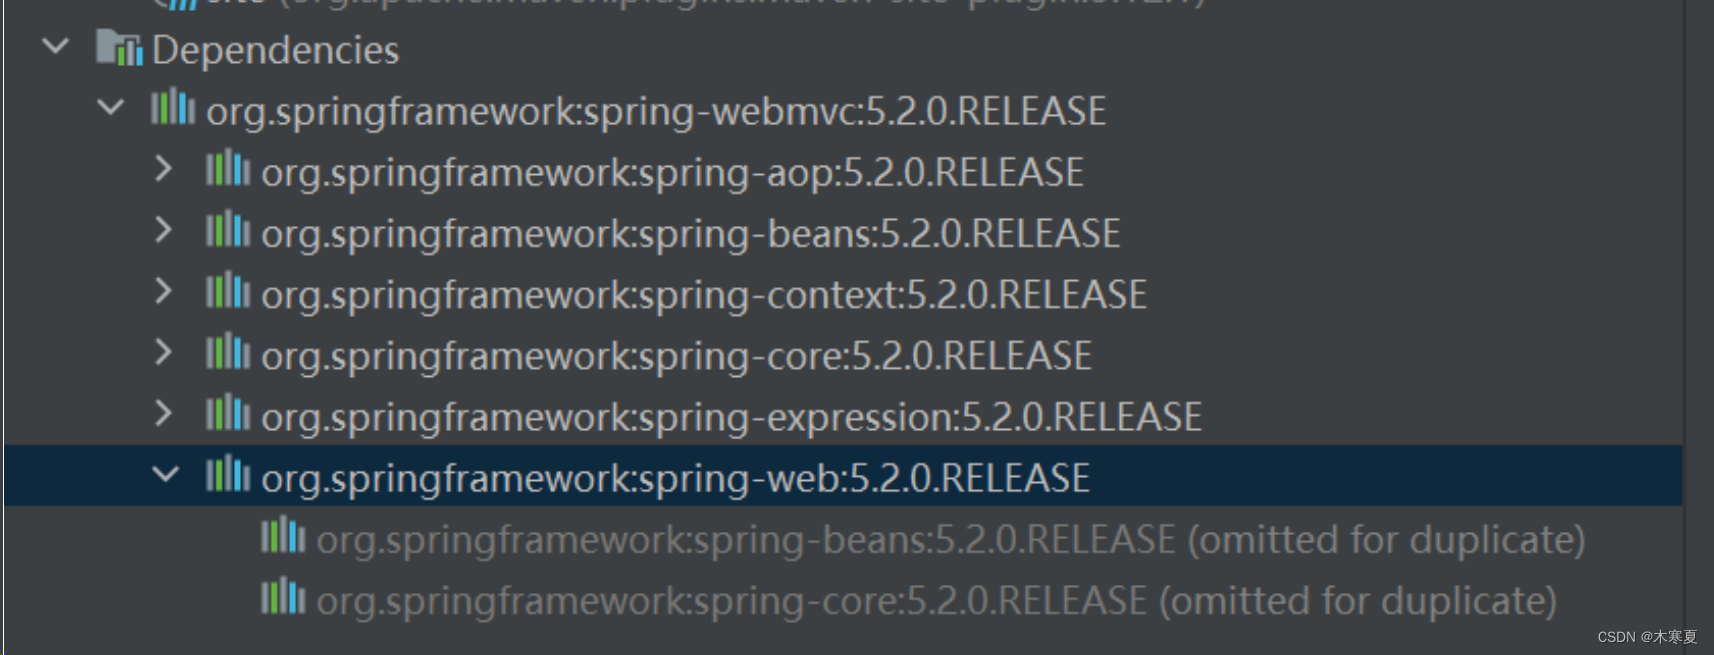
建好maven项目,在pom文件中加入依赖
org.springframework spring-webmvc 5.2.0.RELEASE则spring的所有组成部分包都会被导入如图所示:
2.2 组合模式理念
1.组合模式可以解决哪些问题呢?
- 当我们的要处理的对象可以生成一颗树形结构,而我们要对树上的节点和叶子进行操作时,它能够提供一致的方式,而不用考虑它是节点还是叶子
2.组合模式具体实现:接口+接口实现类
3.组合模式具体实现步骤:①定义接口②定义接口实现类③应用:将接口实现类示例赋值给接口
例:UserDao接口
package com.tan.dao;
//接口
public interface UserDao {
void getUser();
}
UserDao接口实现类
package com.tan.dao;
//实现类
public class UserDaoImpl implements UserDao{
@Override
public void getUser() {
System.*out*.println("springIoC机制");
}
}
使用:
package com.tan.dao;
public class UserServiceImpl implements UserService{
//组合概念
private UserDao userDao=new UserDaoImpl();
@Override
public void getUser() {
userDao.getUser();
}
}
4.使用setter()方法动态使用dao层实现类
之前程序时主动创建对象,使用set诸如后,程序不在具有主动性,而是变成被动的接收对象,系统的耦合性大大降低,可以更加专注业务的实现上。这是ioc的原型。
在业务实现层中使用setter注入:
//组合概念
private UserDao userDao;
//利用set方法进行动态实现值的注入
public void setUserDao(UserDao userDao) {
this.userDao = userDao;
}
用户在main使用方法:
UserService userService=new UserServiceImpl();
((UserServiceImpl) userService).setUserDao(new UserDaoImpl());
2.3 IOC的本质
ioc(控制反转)是一种设计思想(对象有spring来创建、管理、装配),DI(依赖注入)是IOC的一种实现方法,即获得依赖对象的方式反转了。
xml实现Ioc:
在官网使用手册上找到实现ioc要用的xml文件,复制后放在resources文件下。
手册链接:核心技术 (spring.io)
<?xml version="1.0" encoding="UTF-8"?>
<beans xmlns="http://www.springframework.org/schema/beans" xmlns:xsi="http://www.w3.org/2001/XMLSchema-instance" xsi:schemaLocation="http://www.springframework.org/schema/beans https://www.springframework.org/schema/beans/spring-beans.xsd">
<!--使用spring来创建对象,在spring中这些都称为bean-->
<!--bean等于就是对象,id=变量名 class是new的对象 property用于给对象中的属性赋值-->
<bean id="hello" class="com.tan.pojo.hello">
<!-- collaborators and configuration for this bean go here -->
<!--ref引用容器中创建好的对象 value 具体的值,基本数据类型-->
<property name="str" value="Spring"/>
</bean>
</beans>
spring创建对象实现过程:
public class MyTest {
public static void main(String[] args) {
//用xml加载必须写这句话而且是死的
//获取spring的上下文对象
ApplicationContext context = new ClassPathXmlApplicationContext("beans.xml");
//我们的对象都在spring中管理了,要使用直接去里面取出来
hello hello= (com.tan.pojo.hello) context.getBean("hello");
System.*out*.println(hello.toString());
}
}
控制:传统应用程序的对象是由应用程序本身控制创建的(new方法),使用spring后,对象是由Spring创建的
反转:程序本身不创建对象,而是变成被动的接受对象
例:UserDao-UserDaoImpl UserService-UserServiceImpl改成ioc
xml文件上设置:
<?xml version="1.0" encoding="UTF-8"?>
<beans xmlns="http://www.springframework.org/schema/beans" xmlns:xsi="http://www.w3.org/2001/XMLSchema-instance" xsi:schemaLocation="http://www.springframework.org/schema/beans http://www.springframework.org/schema/beans/spring-beans.xsd">
<bean id="userDaoImpl" class="com.tan.dao.UserDaoImpl"/>
<bean id="userServiceImpl" class="com.tan.dao.UserServiceImpl">
<!--ref引用容器中创建好的对象 value 具体的值,基本数据类型-->
<property name="userDao" ref="userDaoImpl"/>
<!-- collaborators and configuration for this bean go here -->
</bean>
</beans>
实现程序:
public class Test {
public static void main(String[] args) {
//容器在手,天下我有,需要什么,就直接get什么!
ApplicationContext context=new ClassPathXmlApplicationContext("beans.xml");
UserServiceImpl userService= (UserServiceImpl) context.getBean("userServiceImpl");
userService.getUserDao().getUser();
}
}
后续进行不同修改只需要改配置文件
2.4 IOC创建对象的方式
1.默认使用无参构造创建对象。
public User(){}
<bean id="name" class="com.tan.pojo.user">
<!--构造器参数实现-->
<property name="name" value="tan"/>
</bean>
2.假设我们要使用有参构造构造对象。
public user(String name){
this.name=name;
}
1.下标赋值
<bean id="user" class="com.tan.pojo.user">
<!--构造器参数实现-->
<!--第一种参数下标赋值 index=0指的就是第一个参数name-->
<constructor-arg index="0" value="tan"/>
</bean>
2.参数的类型匹配
<bean id="user" class="com.tan.pojo.user">
<!--构造器参数实现-->
<!--第二种类型赋值 type指的就是参数类型,不建议使用-->
<constructor-arg type="java.lang.String" value="tan"/>
</bean>
3.直接通过参数名来设置
<!--第三种类型赋值 直接通过参数名来设置-->
<constructor-arg name="name" value="tan"/>
总结:在配置文件加载的时候,容器中管理的对象就已经被初始化了。
3 Spring的配置说明
3.1别名
3.2Bean的配置
3.3 Import
value=“tan”/> `
3.直接通过参数名来设置
<!--第三种类型赋值 直接通过参数名来设置-->
<constructor-arg name="name" value="tan"/>
总结:在配置文件加载的时候,容器中管理的对象就已经被初始化了。
3 Spring的配置说明
3.1别名
3.2Bean的配置
3.3 Import
<?xml version="1.0" encoding="GBK"?>
<!-- 指定Hibernate配置文件的DTD信息 -->
<!DOCTYPE hibernate-configuration PUBLIC
        "-//Hibernate/Hibernate Configuration DTD 3.0//EN"
        "http://hibernate.sourceforge.net/hibernate-configuration-3.0.dtd">
<hibernate-configuration>
    <session-factory>
        <!-- 指定连接数据库所用的驱动 -->
        <property name="connection.driver_class">com.mysql.jdbc.Driver</property>
        <!-- 指定连接数据库的url,hibernate连接的数据库为markingsystem -->
        <property name="connection.url">jdbc:mysql://localhost/markingsystem</property>
        <property name="connection.useUnicode">true</property>
        <property name="connection.characterEncoding">gbk</property>
        <!-- 指定连接数据库的用户名 -->
        <property name="connection.username">root</property>
        <!-- 指定连接数据库的密码 -->
        <property name="connection.password">123456</property>
        <!-- 指定数据库方言 -->
        <property name="dialect">org.hibernate.dialect.MySQLInnoDBDialect</property>
        <!-- 打印Hibernate持久化操作所生成的SQL -->
        <property name="show_sql">true</property>
        <!-- 将SQL脚本进行格式化后再输出-->
        <property name="hibernate.format_sql">true</property>
        <!-- 注册实体关系映射⽂件 -->
        <mapping resource="com/markingsystem/entity/Admin.hbm.xml"></mapping>
        <mapping resource="com/markingsystem/entity/Teacher.hbm.xml"></mapping>
        <mapping resource="com/markingsystem/entity/Answer.hbm.xml"></mapping>
        <mapping resource="com/markingsystem/entity/Student.hbm.xml"></mapping>
        <mapping resource="com/markingsystem/entity/StudentAnswer.hbm.xml"></mapping>
        <mapping resource="com/markingsystem/entity/TestPaper.hbm.xml"></mapping>
        <mapping resource="com/markingsystem/entity/Title.hbm.xml"></mapping>
        <mapping resource="com/markingsystem/entity/TitleResult.hbm.xml"></mapping>
        <mapping resource="com/markingsystem/entity/Tongji.hbm.xml"></mapping>
    </session-factory>
</hibernate-configuration>


 56万+
56万+


 被折叠的 条评论
为什么被折叠?
被折叠的 条评论
为什么被折叠?
 到【灌水乐园】发言


