


文章目录
- 第1章 Spring Boot简介
- 第2章 Spring Boot入门案例
- 第3章 Spring Boot框架Web开发
- 3.1 Spring Boot集成MyBatis
- 3.2 Spring Boot 事务支持
- 3.3 Spring Boot集成Redis
- 3.3.1 Spring Boot 集成Redis单机模式
- 3.3.1.1 案例思路
- 3.3.1.2 实现步骤
- 3.3.1.2.1 创建项目 04-springboot-redis
- 3.3.1.2.2 在Spring Boot核心配置文件application.properties中配置redis连接信息
- 3.3.1.2.3 在com..springboot.model包下创建Student类并编写代码
- 3.3.1.2.4 在StudentServiceImpl中注入RedisTemplate并实现获取所有学生的方法
- 3.3.1.2.5 在com..springboot.controller包下创建StudentController类并编写代码
- 3.3.1.2.6 启动Linux系统上的Redis
- 3.3.1.2.7 启动SpringBoot应用,浏览器访问http://localhost:8080/selectAll访问测试 并观察控制台
- 3.3.1.2.8 打开Redis Desktop Mananger查看Redis中的情况
- 3.3.2 缓存穿透现象
- 3.3.3 Spring Boot 集成Redis哨兵模式
- 3.3.3.1 在Springboot核心配置文件application.properties中配置redis连接信息
- 3.3.3.2 通过rz –y命令,用我提供的资源中的配置文件覆盖Linux服务器上Redis的配置文件,注意根据自己机器的情况修改资源文件ip及引用的redis路径
- 3.3.3.3 启动三台Redis服务器
- 3.3.3.4 启动三台Redis哨兵
- 3.3.3.5 在Redis Desktop Manager上创建三个连接,连接到6380,6382,6384Redis服务器
- 3.3.3.6 清空6380主数据,查看情况
- 3.3.3.7 启动SpringBoot主程序,浏览器访问,查看Redis情况
- 3.3.3.8 将Redis6380主停止再启动
- 3.4 Spring Boot热部署插件
- 第4章 Spring Boot 非web应用程序
- 第5章 Spring Boot 使用拦截器
- 第6章 使用Servlet(了解)
- 第7章 使用Filter(了解)
- 第8章 Spring Boot 项目配置字符编码
- 第9章 Spring Boot打包与部署
- 第10章 Spring Boot使用Actuator(了解)
- 第11 章Spring Boot 集成 Thymeleaf 模板
- 11.1 认识Thymeleaf
- 11.2 Spring Boot集成Thymeleaf
- 11.3 Thymeleaf的表达式
- 11.4 Thymeleaf 的常见属性
- 11.5 Thymeleaf字面量
- 11.6 Thymeleaf 字符串拼接
- 11.7 Thymeleaf运算符
- 11.8 Thymaleaf表达式基本对象
- 11.9 Thymaleaf表达式功能对象(了解)
- 第12 章总结及综合案例
- 附录1:SpringBoot工程下使用Mybatis反向工程
第1章 Spring Boot简介
Spring Boot是Spring家族中的一个框架,它用来简化Spring应用程序的创建和开发过程,也可以说Spring Boot能简化我们之前采用SpringMVC + Spring + MyBatis框架进行开发的过程。
在以往我们采用SpringMVC + Spring + MyBatis框架进行开发的时候,搭建和整合三大框架,我们需要做很多工作,比如配置web.xml,配置Spring,配置MyBatis,并将它们整合在一起等,而Spring Boot框架对此开发过程进行了革命性的颠覆,完全抛弃了繁琐的xml配置过程,采用大量的默认配置简化我们的开发过程。
所以采用Spring Boot可以非常容易和快速地创建基于Spring框架的应用程序,它让编码变简单了,配置变简单了,部署变简单了,监控变简单了。正因为 Spring Boot 它化繁为简,让开发变得极其简单和快速,所以在业界备受关注。
1.2 Spring Boot的特性
-
能够快速创建基于Spring的应用程序
-
能够直接使用java main方法启动内嵌的Tomcat服务器运行Spring Boot程序,不需要部署war包文件
-
提供约定的starter POM来简化Maven配置,让Maven的配置变得简单
-
自动化配置,根据项目的Maven依赖配置,Spring boot自动配置Spring、Spring mvc等
-
提供了程序的健康检查等功能
-
基本可以完全不使用XML配置文件,采用注解配置
1.3 Spring Boot四大核心
1.3.1 自动配置
针对很多Spring应用程序和常见的应用功能,Spring Boot能自动提供相关配置
1.3.2 起步依赖
告诉Spring Boot需要什么功能,它就能引入需要的依赖库
1.3.3 Actuator
让你能够深入运行中的Spring Boot应用程序,一探Spring Boot程序的内部信息
1.3.4 命令行界面
这是Spring Boot的可选特性,主要针对Groovy语言使用
Groovy是一种基于JVM(Java虚拟机) 的敏捷开发语言,它结合了Python、Ruby和Smalltalk的许多强大的特性,Groovy 代码能够与Java代码很好地结合,也能用于扩展现有代码,由于其运行在JVM上的特性,Groovy可以使用其他Java语言编写的库
1.4 Spring Boot开发版本推荐
-
Spring boot目前分为两大版本系列,1.x系列和2.x系列,目前Spring Boot最新正式版为2.5.4(2021.8) -
如果是使用eclipse,推荐安装Spring Tool Suite (STS)插件
-
如果使用IDEA旗舰版,自带了Spring Boot插件
-
推荐使用Maven 3.3+,Maven目前最新版本为3.6.0(2019.01)
-
推荐使用Java 8,Spring Boot 1.x系列的版本兼容Java 6,Spring Boot 2.x系列需要至少Java8
第2章 Spring Boot入门案例
2.1 开发步骤
2.1.1 创建一个新的Module,选择类型为Spring Initializr

注意:https://start.spring.io 是国外的地址,国内部分地址可能无法访问因此建议选择Constum 选择手动指定国内访问地址 https://start.springboot.io
2.1.2 指定GAV及pom配置信息
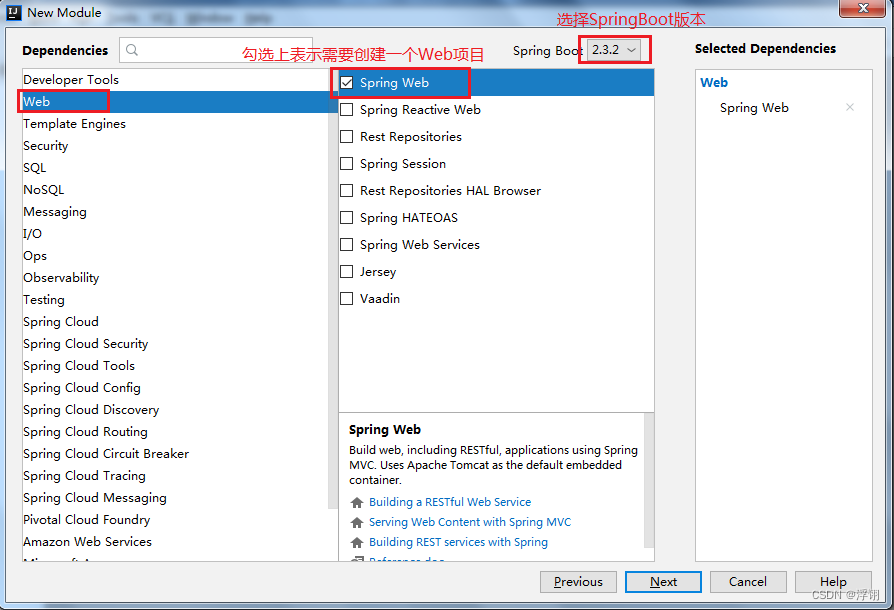
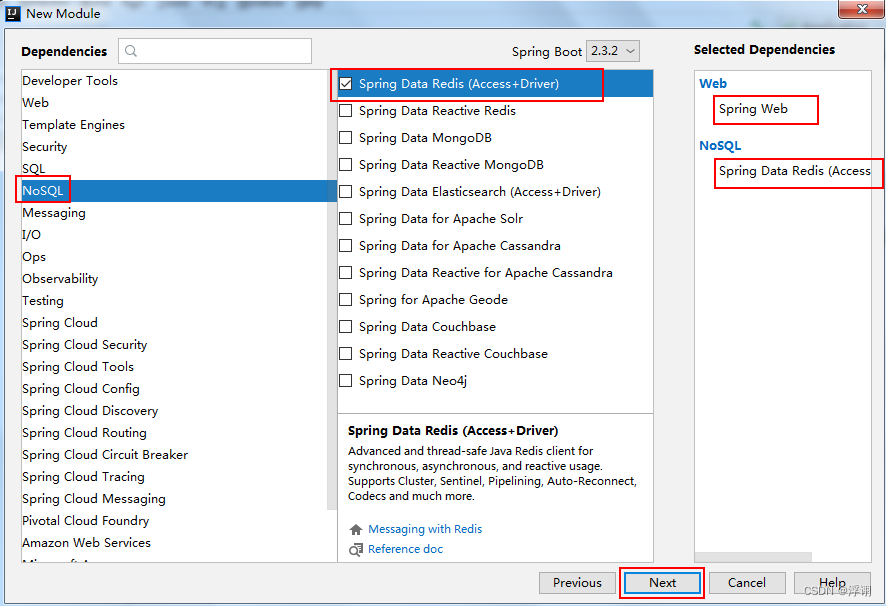
2.1.3 选择Spring Boot版本及依赖
会根据选择的依赖自动添加起步依赖并进行自动配置
2.1.4 修改Content Root路径及文件所在目录
点击Finish,第一次创建,在右下角会提示正在下载相关的依赖,Spring Boot2.3.2依赖的spring版本是5.2.8.RELEASE
2.1.5 对POM.xml文件进行解释
<?xml version="1.0" encoding="UTF-8"?>
<project xmlns="http://maven.apache.org/POM/4.0.0" xmlns:xsi="http://www.w3.org/2001/XMLSchema-instance"
         xsi:schemaLocation="http://maven.apache.org/POM/4.0.0 https://maven.apache.org/xsd/maven-4.0.0.xsd">
    <modelVersion>4.0.0</modelVersion>
    <!--继承SpringBoot的父级项目 ,继承后当前项目就是一个SpringBoot的项目-->
    <parent>
        <groupId>org.springframework.boot</groupId>
        <artifactId>spring-boot-starter-parent</artifactId>
        <version>2.3.2.RELEASE</version>
        <relativePath/> <!-- lookup parent from repository -->
    </parent>
    <groupId>com..springboot</groupId>
    <artifactId>01-springboot-first</artifactId>
    <version>0.0.1-SNAPSHOT</version>
    <name>01-springboot-first</name>
    <description>Demo project for Spring Boot</description>
    <!--配置属性 指定Java的jdk版本 -->
    <properties>
        <java.version>1.8</java.version>
    </properties>
    <dependencies>
        <!--引入SpringMVC的起步依赖 -->
        <dependency>
            <groupId>org.springframework.boot</groupId>
            <artifactId>spring-boot-starter-web</artifactId>
        </dependency>
        <!--引入测试类的依赖 -->
        <dependency>
            <groupId>org.springframework.boot</groupId>
            <artifactId>spring-boot-starter-test</artifactId>
            <scope>test</scope>
            <exclusions>
                <exclusion>
                    <groupId>org.junit.vintage</groupId>
                    <artifactId>junit-vintage-engine</artifactId>
                </exclusion>
            </exclusions>
        </dependency>
    </dependencies>
    <build>
        <plugins>
            <!--指定SpringBoot的编译插件 -->
            <plugin>
                <groupId>org.springframework.boot</groupId>
                <artifactId>spring-boot-maven-plugin</artifactId>
            </plugin>
        </plugins>
    </build>
</project>
2.1.6 对SpringBoot项目结构进行说明
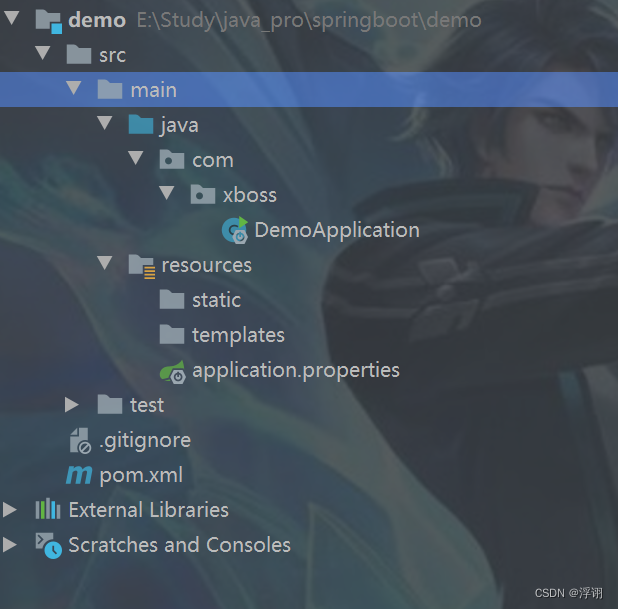
Ø static|templates:后面模板技术中存放文件的目录
Ø application.properties:SpringBoot的配置文件,很多集成的配置都可以在该文件中进行配置,例如:Spring、springMVC、Mybatis、Redis等。目前是空的
Ø DemoApplication.java:SpringBoot程序执行的入口,执行该程序中的main方法,SpringBoot就启动了
2.1.7 创建一个Spring MVC的HelloSpringBootController
@Controller
 public class HelloSpringBootController {
   @RequestMapping("/test")
   public @ResponseBody String sayHi(){
     return "hello,springBoot";
   }
 }
注意:新创建的类一定要位于Application同级目录或者下级目录,否则SpringBoot加载不到。
2.1.8 在idea中右键,运行Application类中的main方法
通过在控制台的输出,可以看到启动SpringBoot框架,会启动一个内嵌的tomcat,端口号为8080,上下文根为空

2.1.9 在浏览器中输入http://localhost:8080/test访问

2.2 入门案例分析
Ø Spring Boot的父级依赖spring-boot-starter-parent配置之后,当前的项目就是Spring Boot项目
Ø spring-boot-starter-parent是一个Springboot的父级依赖,开发SpringBoot程序都需要继承该父级项目,它用来提供相关的Maven默认依赖,使用它之后,常用的jar包依赖可以省去version配置
Ø Spring Boot提供了哪些默认jar包的依赖,可查看该父级依赖的pom文件
Ø 如果不想使用某个默认的依赖版本,可以通过pom.xml文件的属性配置覆盖各个依赖项,比如覆盖Spring版本
<properties>
	<spring.version>5.2.8.RELEASE</spring.version>
</properties>
Ø @SpringBootApplication注解是Spring Boot项目的核心注解,主要作用是开启Spring自动配置,如果在Application类上去掉该注解,那么不会启动SpringBoot程序
Ø main方法是一个标准的Java程序的main方法,主要作用是作为项目启动运行的入口
Ø @Controller 及 @ResponseBody 依然是我们之前的Spring MVC,因为Spring Boot的里面依然是使用我们的Spring MVC + Spring + MyBatis 等框架
2.3 Spring Boot的核心配置文件
Spring Boot的核心配置文件用于配置Spring Boot程序,名字必须以application开始
2.3.1 配置格式
2.3.1.1 .properties文件(默认采用该文件)
键值对的properties属性文件配置方式
# 配置内嵌tomcat的端口号
server.port=9090
# 配置项目的上下文根
server.servlet.context-path=/01-springboot-first
配置完毕之后,启动浏览器测试

2.3.1.2 .yml文件
yml 是一种 yaml 格式的配置文件,主要采用一定的空格、换行等格式排版进行配置。
yaml 是一种直观的能够被计算机识别的的数据序列化格式,容易被人类阅读,yaml 类似于 xml,但是语法比xml 简洁很多,值与前面的冒号配置项必须要有一个空格, yml 后缀也可以使用 yaml 后缀
server:
  port: 9100
  servlet:
    context-path: /01-springboot-first
注意:当两种格式配置文件同时存在,使用的是.properties配置文件,为了演示yml,可以先将其改名,重新运行Application,查看启动的端口及上下文根
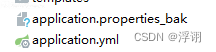

我们以后在授课的过程中,使用properties,所以演示完yml效果后,将该配置文件改名

2.3.2 多环境配置
在实际开发的过程中,我们的项目会经历很多的阶段(开发->测试->上线),每个阶段的配置也会不同,例如:端口、上下文根、数据库等,那么这个时候为了方便在不同的环境之间切换,SpringBoot提供了多环境配置,具体步骤如下
Ø 为每个环境创建一个配置文件,命名必须以application-环境标识.properties|yml

Ø 在总配置文件application.properties进行环境的激活
# 总配置文件
# 配置开发环境
spring.profiles.active=dev
# 配置测试环境
#spring.profiles.active=test
# 配置生产环境
#spring.profiles.active=online
等号右边的值和配置文件的环境标识名一致,可以更改总配置文件的配置,重新运行Application,查看启动的端口及上下文根

2.3.3 Spring Boot自定义配置
在SpringBoot的核心配置文件中,除了使用内置的配置项之外,我们还可以在自定义配置,然后采用如下注解去读取配置的属性值
2.3.3.1 @Value注解
用于逐个读取application.properties中的配置
案例演示
Ø 在开发环境的配置文件applicatin-dev.properties中,添加两个自定义配置项school.name和school.website。在idea中可以看到这两个属性不能被SpringBoot识别,背景是桔色的
# 开发环境
# 配置内嵌tomcat的端口号
server.port=9090
# 配置项目的上下文根
server.servlet.context-path=/dev
school.name=
school.website=www..com
Ø 在总配置文件application.properties中激活开发环境
# 总配置文件
# 配置开发环境
spring.profiles.active=dev
# 配置测试环境
#spring.profiles.active=test
# 配置生产环境
#spring.profiles.active=online
Ø 在HelloSpringBootController中定义属性,并使用@Value注解或者自定义配置值
@Value("${school.name}")
private String schoolName;
@Value("${school.website}")
private String schoolWebsite;
Ø 在HelloSpringBootController中定义方法,进行测试
@RequestMapping("/springBoot/getConfig")
public @ResponseBody String getConfig(){
   return schoolName + "::::" +schoolWebsite;
}
Ø 重新运行Application,在浏览器中进行测试
2.3.3.2 @ConfigurationProperties
将整个文件映射成一个对象,用于自定义配置项比较多的情况
案例演示
Ø 在com…springboot.config包下创建ConfigInfo类,并为该类加上Component和ConfigurationProperties注解,prefix可以不指定,如果不指定,那么会去配置文件中寻找与该类的属性名一致的配置,prefix的作用可以区分同名配置
@Component
@ConfigurationProperties(prefix="school")
public class ConfigInfo {
    private String name;
    private String website;
}//省略get|set方法
Ø 在HelloSpringBootController中注入ConfigInfo配置类
@Autowired
 private ConfigInfo configInfo;
Ø 修改HelloSpringBootController类中的测试方法
@RequestMapping("/springBoot/getConfig")
public @ResponseBody String getConfig(){
   return schoolName + "::::" + schoolWebsite + "::::"
       + configInfo.getName() + "::::" + configInfo.getWebsite();
}
Ø 重新运行Application,在浏览器中进行测试
2.3.3.3 中文乱码
如果在SpringBoot核心配置文件中有中文信息,会出现乱码:
-
一般在配置文件中,不建议出现中文(注释除外)
-
如果有,可以先转化为unicode码
2.3.3.4 友情提示
大家如果是从其它地方拷贝的配置文件,一定要将里面的空格删干净
2.4 Spring Boot前端使用JSP
2.4.1创建SpringBoot工程 02-springboot-jsp
2.4.1 在pom.xml文件中配置以下依赖项
<!--引入Spring Boot内嵌的Tomcat对JSP的解析包,不加解析不了jsp页面-->
<dependency>
   <groupId>org.apache.tomcat.embed</groupId>
   <artifactId>tomcat-embed-jasper</artifactId>
</dependency>
<!-- servlet依赖的jar包start ,可选-->
<dependency>
   <groupId>javax.servlet</groupId>
   <artifactId>javax.servlet-api</artifactId>
</dependency>
<!-- servlet依赖的jar包start -->

<!-- jsp依赖jar包start ,可选-->
<dependency>
   <groupId>javax.servlet.jsp</groupId>
   <artifactId>javax.servlet.jsp-api</artifactId>
   <version>2.3.1</version>
</dependency>
<!-- jsp依赖jar包end -->

<!--jstl标签依赖的jar包start ,可选-->
<dependency>
   <groupId>javax.servlet</groupId>
   <artifactId>jstl</artifactId>
</dependency>
<!--jstl标签依赖的jar包end -->
2.4.2 在pom.xml的build标签中要配置以下信息
SpringBoot要求jsp文件必须编译到指定的META-INF/resources目录下才能访问,否则访问不到。其实官方已经更建议使用模板技术(后面会讲模板技术)
<resources>
            <resource>
                <!--源文件位置 -->
                <directory>src/main/webapp</directory>
                <!--编译到META-INF/resourece 目录下不能随便写 这个路径表示编译后的根路径 -->
                <targetPath>META-INF/resources</targetPath>
                <includes>
                    <!--要那些文件编译过去,**表示webapp 目录下以及子孙目录,*.* 表示所有文件 -->
                    <include>**/*.*</include>
                </includes>
            </resource>
</resources>
2.4.3 在application-dev.properties文件配置Spring MVC的视图展示为jsp,这里相当于Spring MVC的配置
#相当于src/main/webapp目录
spring.mvc.view.prefix=/
spring.mvc.view.suffix=.jsp
集成完毕之后,剩下的步骤和我们使用Spring MVC一样
2.4.4 在com…springboot.controller包下创建JspController类,并编写代码
@Controller
 public class JspController {
   @RequestMapping("/springBoot/jsp")
   public String jsp(Model model){
     model.addAttribute("data","Spring Boot 前端页面使用Jsp");
     return "index";
   }
 }
2.4.5 在src/main 下创建一个webapp目录,然后在该目录下新建index.jsp页面
<%@ page language="java" contentType="text/html; charset=utf-8" pageEncoding="utf-8"%>
<html>
<head>
   <title>index.jsp</title>
</head>
<body>
    <h1>${data}</h1>
</body>
</html>
2.4.6 重新运行Application,通过浏览器访问测试

第3章 Spring Boot框架Web开发
3.1 Spring Boot集成MyBatis
3.1.1 案例思路
通过SpringBoot +MyBatis实现对数据库学生表的查询操作
3.1.2 实现步骤
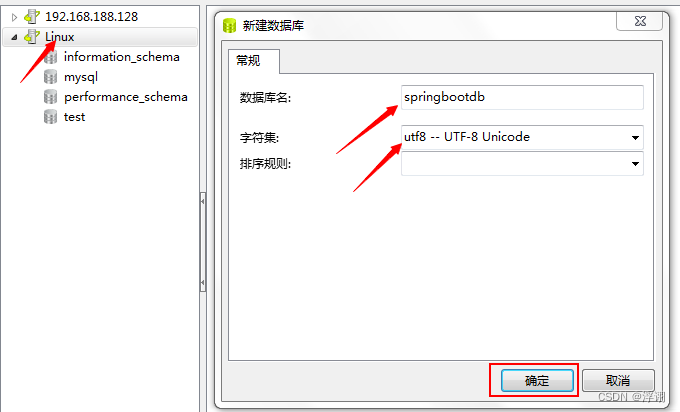
3.1.2.1 准备数据库
Ø 启动Linux系统上的mySQL服务器,通过Navicat连接

Ø 创建新的数据库springbootdb,指定字符编码为utf-8
Ø 创建Student表
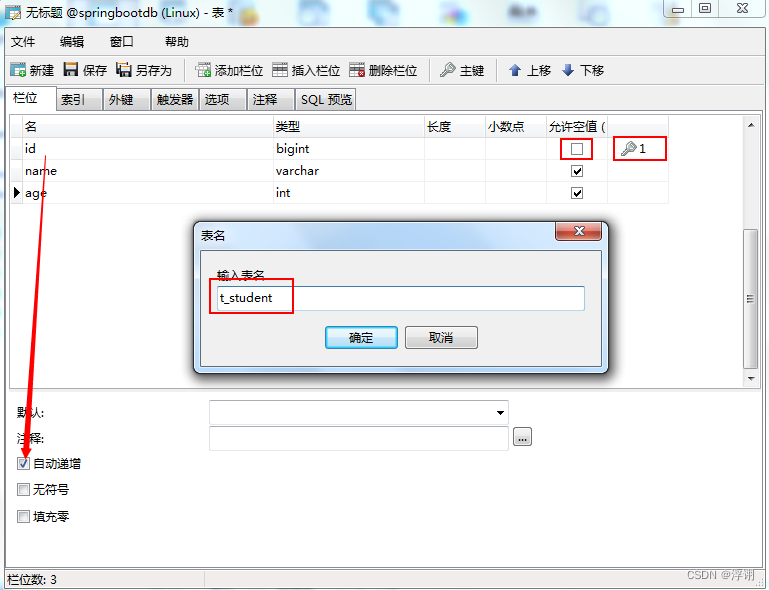
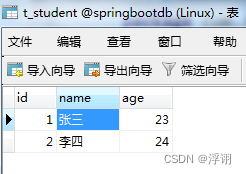
Ø 插入测试数据

3.1.2.2 创建03-springboot-mybatis项目
Ø 创建一个新的SpringBoot的Module
Ø 指定GAV坐标
Ø 选择SpringBoot版本以及web依赖
Ø 修改Content root以及Mudule file location
3.1.2.3 在pom.xml中添加相关jar依赖
<!--Mybatis整合SpringBoot-->
<dependency>
    <groupId>org.mybatis.spring.boot</groupId>
    <artifactId>mybatis-spring-boot-starter</artifactId>
    <version>2.0.0</version>
</dependency>
<!--MySQL的驱动依赖-->
<dependency>
    <groupId>mysql</groupId>
    <artifactId>mysql-connector-java</artifactId>
    <scope>runtime</scope>
    <version>5.1.46</version>
</dependency>
注意:由于SpringBoot默认的MySQL驱动包版本过高与我们使用的数据库版本不符,建议修改MySQL的启动包版本号为5.1.46
3.1.2.4 在Springboot的核心配置文件application.properties中配置数据源
注意根据自己的ip修改url
#数据库的连接配置信息
spring.datasource.username=root
spring.datasource.password=123456
spring.datasource.driver-class-name=com.mysql.jdbc.Driver
spring.datasource.url=jdbc:mysql://192.168.235.128:3306/springbootdb?useUnicode=true&characterEncoding=utf8&useSSL=false
3.1.2.5 开发代码
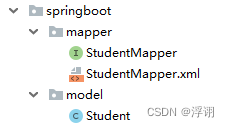
Ø 使用Mybatis反向工程生成接口、映射文件以及实体bean,具体步骤参见附录1
Ø 在com…springboot.controller包下创建StudentController并编写代码
@Controller
public class StudentController {
   @Autowired
   private StudentService studentService;
   @RequestMapping("/boot/student")
   public @ResponseBody Object student(){
     return studentService.getStudentById(1L);
   }
}
Ø 在com…springboot.service包下创建StudentService接口并编写代码
public interface StudentService {
   Student getStudentById(Long id);
 }
Ø 在com…springboot.service.impl包下创建service接口并编写代码
@Service
 public class StudentServiceImpl implements StudentService{
   @Autowired
   private StudentMapper studentMapper;
   @Override
   public Student getStudentById(Long id) {
     return studentMapper.selectByPrimaryKey(id);
   }
}
Ø 在Mybatis反向工程生成的StudentMapper接口上加一个Mapper注解
@Mapper
public interface StudentMapper
Ø 注意:默认情况下,Mybatis的xml映射文件不会编译到target的class目录下,所以我们需要在pom.xml文件中配置resource
<resources>
  <resource>
    <directory>src/main/java</directory>
    <includes>
     <include>**/*.xml</include>
    </includes>
  </resource>
 </resources>
3.1.2.6 启动Application应用,浏览器访问测试运行

3.1.3 其它开发方式
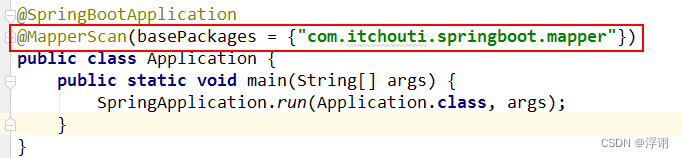
3.1.3.1 在运行的主类上添加注解包扫描@MapperScan(“com…springboot.mapper”)
Ø 注释掉StudentMapper接口上的@Mapper注解

Ø 在运行主类Application上加@MapperScan(“com…springboot.mapper”)
Ø 测试运行
3.1.3.2 将接口和映射文件分开
因为SpringBoot不能自动编译接口映射的xml文件,还需要手动在pom文件中指定,所以有的公司直接将映射文件直接放到resources目录下
Ø 在resources目录下新建目录mapper存放映射文件,将StudentMapper.xml文件移到resources/mapper目录下

Ø 在application.properties配置文件中指定映射文件的位置,这个配置只有接口和映射文件不在同一个包的情况下,才需要指定
# 指定Mybatis映射文件的路径
# 指定Mybatis映射文件的路径
mybatis.mapper-locations=classpath:mapper/*.xml
3.2 Spring Boot 事务支持
Spring Boot 使用事务非常简单,底层依然采用的是Spring本身提供的事务管理
Ø 在入口类中使用注解 @EnableTransactionManagement 开启事务支持
Ø 在访问数据库的Service方法上添加注解 @Transactional 即可
3.2.1 案例思路
通过SpringBoot +MyBatis实现对数据库学生表的更新操作,在service层的方法中构建异常,查看事务是否生效
3.2.2 实现步骤
3.2.2.1 在StudentController中添加更新学生的方法
@RequestMapping("/update")
public @ResponseBody Object updateStudent(){
   Student student = new Student();
   student.setId(1L);
   student.setAge(25);
   student.setName("王五");
   return studentService.updateStudent(student);
}
3.2.2.2 在StudentService接口中添加更新学生方法
public interface StudentService {
   Student getStudentById(Long id);
   int updateStudent(Student student);
}
3.2.2.3 在StudentServiceImpl接口实现类中对更新学生方法进行实现,并构建一个异常,同时在该方法上加@Transactional注解
@Override
@Transactional
public int updateStudent(Student student) {
   int updateRow = studentMapper.updateByPrimaryKeySelective(student);
   System.out.println("更新结果:" + updateRow);
   //构造一个除数为0的异常,测试事务是否起作用
   int a = 10/0;
   return updateRow;
}
3.2.2.4 在Application类上加@EnableTransactionManagement开启事务支持
@SpringBootApplication
@EnableTransactionManagement
public class Application {
  public static void main(String[] args) {
    SpringApplication.run(Application.class, args);
  }
}
3.2.2.5 启动Application,通过浏览器访问进行测试
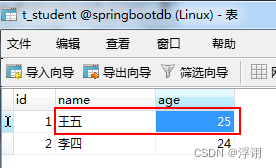
浏览器

控制台

数据库表
通过以上结果,说明事务起作用了
3.2.2.6 注释掉StudentServiceImpl上的@Transactional测试
数据库的数据被更新
3.3 Spring Boot集成Redis
3.3.1 Spring Boot 集成Redis单机模式
3.3.1.1 案例思路
查询学生的功能,先从redis缓存中查找,如果找不到,再从数据库中查找,然后放到redis缓存中
3.3.1.2 实现步骤
3.3.1.2.1 创建项目 04-springboot-redis
3.3.1.2.2 在Spring Boot核心配置文件application.properties中配置redis连接信息
#配置redis连接信息
spring.redis.host=192.168.235.128
spring.redis.port=6379
spring.redis.password=123456
3.3.1.2.3 在com…springboot.model包下创建Student类并编写代码
public class User implements Serializable {
    private String name;
    private Integer age;
    public User() {
    }
    public User(String name, Integer age) {
        this.name = name;
        this.age = age;
    }
    //添加get和set方法
}
注意:当前实体类需要添加get和set方法,并必须添加可序列化接口Serializable
3.3.1.2.4 在com..springboot.service包下创建StudentService接口并编写代码
public interface StudentService {
    List<Student> selectAll();
}
3.3.1.2.4 在StudentServiceImpl中注入RedisTemplate并实现获取所有学生的方法
配置了上面的步骤,Spring Boot将自动配置RedisTemplate,在需要操作redis的类中注入redisTemplate即可。Spring Boot帮我们注入RedisTemplate类,泛型里面只能写 <String, String>、<Object, Object>或者什么都不写
//注入redis的操作模板对象
@Resource
private RedisTemplate redisTemplate;
//定义Redis的数据存放格式对象
private StringRedisSerializer stringRedisSerializer=new StringRedisSerializer();
@Override
public Student selectAll() {
 		//设置Redis模板对象,key的数据的序列化格式为字符类型,默认为Object类型
        redisTemplate.setKeySerializer(stringRedisSerializer);
        List<Student>list= (List<Student>) redisTemplate.opsForValue().get("studentAll");
        //进入if表示根据Key没有从Redis中获取到数据,需要从数据库中获取数据
        if(list==null){
             //模拟从数据库中获取数据
             list=getData();
            //将数据存入Redis中
            redisTemplate.opsForValue().set("studentAll",list);
            System.out.println("从数据库中获取数据----------");
        }else{
            System.out.println("从Redis中获取数据==========");
        }
        return list;
}

 //模拟从数据库中获取数据
private List<Student> getData(){
   List<Student> list=new ArrayList<Student>();
   list.add(new Student("张三",23));
   list.add(new Student("李四",24));
   list.add(new Student("王五",25));
   return list;
}
3.3.1.2.5 在com…springboot.controller包下创建StudentController类并编写代码
 @Resource
    private StudentService studentService;
    @RequestMapping("/selectAll")
    public Object selectAll(){
      return studentService.selectAll();
    }
3.3.1.2.6 启动Linux系统上的Redis

3.3.1.2.7 启动SpringBoot应用,浏览器访问http://localhost:8080/selectAll访问测试 并观察控制台

控制台结果

注意:第一个访问是Redis中没有数据因此从数据库中获取的数据,之后再次这个请求观察控制台

注意:再次访问是由于Redis中已经有了数据所以从Redis中获取数据
3.3.1.2.8 打开Redis Desktop Mananger查看Redis中的情况

3.3.2 缓存穿透现象
3.3.2.1 现象演示
3.3.2.1.1 在StudentController程序中创建多个线程调用service的selectAll()方法
@RequestMapping("/selectAll")
public @ResponseBody Object selectAll(){
    //创建一个2个并发的线程池对象,每2个线程并发一次
    ExecutorService es= Executors.newFixedThreadPool(2);
   //循环创建10个线程每2个线程并发一次
    for(int i=0;i<10;i++){
        //提交线程
        es.submit(new Runnable() {
            @Override
            public void run() {
                studentService.selectAll();
            }
        });
	}
	return null;
}
3.3.2.1.2 清空Redis中的数据,启动应用程序,浏览器访问测试,观察控制台

注意:多个线程都去查询数据库,这种现象就叫做缓存穿透,如果并发比较大,对数据库的压力过大,有可能造成数据库宕机,假死。
3.3.2.2 解决方案
3.3.2.2.1 修改StudentServiceImpl中的代码
public List<Student> selectAll() {
    //设置Redis模板对象,key的数据的序列化格式为字符类型,默认为Object类型
    redisTemplate.setKeySerializer(stringRedisSerializer);
    /**
     * 这里会出现缓存穿透的问题,当并发请求进入是会击穿Redis,第一批并发请求会同时访问数据库
     * 并多次向Redis中写入数据,如果并发量比较高很有可能会直接导致数据库服务器崩溃宕机
     * 因此我们这里使用了双重检测+同步代码块来解决了缓存穿透的问题
     */
    //根据Key从Redis中获取数据
    List<Student>list= (List<Student>) redisTemplate.opsForValue().get("studentAll");
    //进入if表示根据Key没有从Redis中获取到数据,需要从数据库中获取数据
    if(list==null){//能进入if的一定是第一批的并发请求
        synchronized (this){//第一批的并发请求同步排队执行这段代码
            list= (List<Student>) redisTemplate.opsForValue().get("studentAll");
            if(list==null){//能进入if的一定是第一批的并发请求中的第一个请求
                //从数据库中获取数据
                list=getData();
                //将数据存入Redis中
                redisTemplate.opsForValue().set("studentAll",list);
                System.out.println("从数据库中获取数据----------");
            }else{//进入else的一定是第一个批并发请求的非第一个请求
                System.out.println("第一批的其他线程从Redis中获取的数据*****************");
            }
        }
    }else{
        System.out.println("从Redis中获取数据==========");
    }
    return list;
}
3.3.2.2.2 清空Redis中的数据, 启动应用程序,浏览器访问测试,查看控制台输出
只有第一个线程查询数据库,其它线程查询Redis缓存,这样的解决的小问题就是第一批进来的用户会有一个等待,但是这样的影响可以忽略

3.3.2.3 springboot集成Redis阻止缓存穿透,为什么要做双层验证
Ø 防止线程获取到cpu执行权限的时候,其他线程已经将数据放到Redis中了,所以再次判断
Ø 不能将synchronized范围扩大,因为如果Redis缓存中如果有数据,线程不应该同步,否则影响效率
3.3.3 Spring Boot 集成Redis哨兵模式
在实际的生产环境中,如果我们只有一台Redis服务,那么当这台唯一的Redis服务器宕机以后,我们整个服务将变得不可用,因此为了解决单点故障问题我们通常需要配置多个Redis实现Redis中的主从复制,并利用哨兵来实现Redis的高可用
3.3.3.1 在Springboot核心配置文件application.properties中配置redis连接信息
IP地址及master根据自己的情况进行修改
#哨兵模式redis集群配置(哨兵模式)
spring.redis.password=123456
spring.redis.sentinel.master=mymaster
spring.redis.sentinel.nodes=192.168.235.128:26380,192.168.235.128:26382,192.168.235.128:26384
3.3.3.2 通过rz –y命令,用我提供的资源中的配置文件覆盖Linux服务器上Redis的配置文件,注意根据自己机器的情况修改资源文件ip及引用的redis路径
我们目前6380是主,6382和6384是从
获取目录:springboot讲义\资料\Redis哨兵集群配置

3.3.3.3 启动三台Redis服务器

3.3.3.4 启动三台Redis哨兵


3.3.3.5 在Redis Desktop Manager上创建三个连接,连接到6380,6382,6384Redis服务器

3.3.3.6 清空6380主数据,查看情况
6382和6384也跟着清空
3.3.3.7 启动SpringBoot主程序,浏览器访问,查看Redis情况
Redis6380、6382、6384中都会存入数据
3.3.3.8 将Redis6380主停止再启动
哨兵会将Redis6382 或6384作为主,等Redis6380再次启动后,会作为从节点
3.4 Spring Boot热部署插件
在实际开发中,我们修改某些代码逻辑功能或页面都需要重启应用,这无形中降低了开发效率,热部署是指当我们修改代码后,服务能自动重启加载新修改的内容,而不需要重启应用,这样大大提高了我们开发的效率。
Spring Boot热部署通过在pom.xml中添加一个spring-boot-devtools插件实现
在01-springboot-first的pom.xml文件中配置如下
<!--SpringBoot热部署插件-->
<dependency>
  <groupId>org.springframework.boot</groupId>
  <artifactId>spring-boot-devtools</artifactId>
  <optional>true</optional>
</dependency>
该热部署插件在实际使用中会有一些小问题,明明已经重启,但没有生效,这种情况下,手动重启一下程序;
修改完毕后,需要选中项目,在Build选项中选择Build Module

第4章 Spring Boot 非web应用程序
在Spring Boot框架中,要创建一个非Web应用程序(纯Java程序),有两种方式
4.1 方式一:直接在main方法中,根据SpringApplication.run()方法获取返回的Spring容器对象,再获取业务bean进行调用
4.1.1 创建一个SpringBoot Module,05-springboot-java


4.1.2 创建一个演示UserService,放到service包下
package com..springboot.service;

import org.springframework.stereotype.Service;
 @Service
 public class UserService {
   public String say(){
     return "hello,spring Boot";
   }
}
4.1.3 在Application类的main方法中,获取容器,调用业务bean
package com..springboot;

 import com..springboot.service.UserService;
 import org.springframework.boot.SpringApplication;
 import org.springframework.boot.autoconfigure.SpringBootApplication;
 import org.springframework.context.ConfigurableApplicationContext;

 @SpringBootApplication
 public class Application {
  public static void main(String[] args) {
   /**
    * SpringBoot程序启动后,返回值ConfigurableApplicationContext也是一个Spring容器对象
	* 相当于原来Spring中启动容器ClassPathXmlApplicationContext context = new ClassPathXmlApplicationContext("");
    */
 	ConfigurableApplicationContext context = SpringApplication.run(Application.class, args);
    //从容器中获取id为userService的bean对象
    UserService userService = (UserService) context.getBean("userService");

    //调用业务bean的方法
    String say = userService.say();
    System.out.println(say);
  }
}
4.2 方式二:Spring boot 的入口类实现CommandLineRunner接口
将Application类的@SpringBootApplication注解注释掉,复制一个新的Application取名为Application2,实现CommandLineRunner接口
@SpringBootApplication
 public class Application implements CommandLineRunner{

  @Autowired//第二步:通过容器获取bean,并注入给userService
  private UserService userService;
  public static void main(String[] args) {
    //第一步:springboot程序启动,会启动spring容器
    SpringApplication.run(Application2.class, args);
  }

  @Override //覆盖接口中的run方法
  public void run(String... args) throws Exception {
    //第三步:容器启动后调用run方法,在该方法中调用业务方法
    String say = userService.say();
    System.out.println(say);
  }
}
第5章 Spring Boot 使用拦截器
5.1 回顾SpringMVC使用拦截器步骤
Ø 自定义拦截器类,实现HandlerInterceptor接口
Ø 注册拦截器类

5.2 Spring Boot使用拦截器步骤
5.2.1 按照Spring MVC的方式编写一个拦截器类,实现HandlerInterceptor接口
在03-springboot-web中创建interceptor包,并创建一个LoginInterceptor拦截器
package com..springboot.interceptor;
 //导包省略
 public class LoginInterceptor implements HandlerInterceptor{
   @Override//进入Controller之前执行该方法
   public boolean preHandle(HttpServletRequest request, HttpServletResponse response, Object handler) throws Exception {
     //登录拦截的业务逻辑
     System.out.println("--------登录拦截器----------");
     //继续提交请求 false 请求不提交了
     return true;
   }
}
5.2.2 通过配置类注册拦截器
在03-springboot-web中创建一个config包,创建一个配置类InterceptorConfig,并实现WebMvcConfigurer接口, 覆盖接口中的addInterceptors方法,并为该配置类添加@Configuration注解,标注此类为一个配置类,让Spring Boot 扫描到,这里的操作就相当于SpringMVC的注册拦截器 ,@Configuration就相当于一个applicationContext-mvc.xml
package com..springboot.config;
//导包省略
@Configuration
public class InterceptorConfig implements WebMvcConfigurer{
    @Override
    public void addInterceptors(InterceptorRegistry registry) {
        //需要拦截的路径  /**表示拦截所有请求
        String [] addPathPatterns = {
                "/**"
        };
        //不需要拦截的路径
        String [] excludePathPatterns = {
                "/boot/get",
                "/boot/post"
        };
        //注册了一个登录拦截器
        registry.addInterceptor(new LoginInterceptor())
                .addPathPatterns(addPathPatterns)
                .excludePathPatterns(excludePathPatterns);

        //注册了一个权限拦截器  如果有多个拦截器 ,只需要添加以下一行代码
        //registry.addInterceptor(new LoginInterceptor()).addPathPatterns(addPathPatterns).excludePathPatterns(excludePathPatterns);
    }
}
5.2.3 浏览器访问测试是否拦截成功
访问http://localhost:8080/boot/get 控制台不会输出信息
访问http://localhost:8080/boot/stu 控制台输出信息
第6章 使用Servlet(了解)
6.1 方式一 通过注解扫描方式实现
6.1.1 通过注解方式创建一个Servlet
在01-springboot-first下创建com…springboot.servlet包,并在该包下创建MyServlet
package com..springboot.servlet;
 //导包省略
@WebServlet(urlPatterns = "/myServlet")
 public class MyServlet extends HttpServlet {
   protected void doPost(HttpServletRequest request, HttpServletResponse response) throws ServletException, IOException {
     doGet(request,response);
   }
   protected void doGet(HttpServletRequest request, HttpServletResponse response) throws ServletException, IOException {
     response.getWriter().print("my springboot servlet...");
     response.getWriter().flush();
     response.getWriter().close();
   }
}
6.1.2 修改Application类
在03-springboot-web的主应用程序Application类上添加@ServletComponentScan(“com…springboot.servlet”)
@SpringBootApplication
@ServletComponentScan(basePackages = {"com..springboot.servlet"})
public class Application {
    public static void main(String[] args) {
        SpringApplication.run(Application.class, args);
    }
}
6.1.3 启动应用SpringBoot,浏览器访问测试

6.2 方式二 通过Spring Boot的配置类实现(组件注册)
6.2.1 创建一个普通的Servlet
在01-springboot-first下创建com…springboot.servlet包,创建HeServlet类
package com..springboot.servlet;
 public class HeServlet extends HttpServlet {
   @Override
   public void doGet(HttpServletRequest req, HttpServletResponse resp) throws ServletException, IOException {
     resp.getWriter().print("he springboot servlet");
     resp.getWriter().flush();
     resp.getWriter().close();
   }
   @Override
   protected void doPost(HttpServletRequest req, HttpServletResponse resp) throws ServletException, IOException {
     this.doGet(req, resp);
   }
}
6.2.2 编写一个Spring Boot的配置类,在该类中注册Servlet
在01-springboot-first下创建com…springboot.config包,创建ServletConfig配置类
package com..springboot.config;
 @Configuration
 public class ServletConfig {
   @Bean
   public ServletRegistrationBean heServletRegistrationBean(){
     ServletRegistrationBean servletRegistrationBean =
         new ServletRegistrationBean(new HeServlet(),"/heServlet");
     return servletRegistrationBean;
   }
}
6.2.3 启动应用SpringBoot,浏览器访问测试

第7章 使用Filter(了解)
7.1 方式一 通过注解方式实现
7.1.1 通过注解方式创建一个Filer
在01-springboot-first下创建com…springboot.filter包,并在该包下创建MyFilter
package com..springboot.filter;
 @WebFilter(urlPatterns="/*")
 public class MyFilter implements Filter {
   @Override
   public void doFilter(ServletRequest request, ServletResponse response, FilterChain chain)throws IOException, ServletException {
     System.out.println("您已进入filter过滤器,您的请求正常,请继续遵规则...");
     chain.doFilter(request, response);
   }
}
7.1.2 修改Application类
修改01-springboot-first的主应用程序Application类上添加@ServletComponentScan("basePackages = {“com…springboot.servlet”,“com…springboot.filter”})
@SpringBootApplication
@ServletComponentScan(basePackages = {"com..springboot.servlet","com..springboot.filter"})
public class Application {
    public static void main(String[] args) {
        SpringApplication.run(Application.class, args);
    }
}
7.1.3 启动应用SpringBoot,浏览器访问测试
因为过滤所有请求,所以随便输入一个地址,控制台都会输出

7.2 方式二 通过Spring Boot的配置类实现
7.2.1 创建一个普通的Filter
在01-springboot-first的com…springboot.filter包下,创建HeFilter类
package com..springboot.filter;
 public class HeFilter implements Filter {
   @Override
   public void doFilter(ServletRequest request, ServletResponse response, FilterChain chain) throws IOException, ServletException {
     System.out.println("he您已进入filter过滤器,您的请求正常,请继续遵规则...");
     chain.doFilter(request, response);
   }
}
7.2.2 注册Filter
在01-springboot-first的com…springboot.config包的ServletConfig配置类中添加如下代码
@Bean
 public FilterRegistrationBean heFilterRegistration() {
   FilterRegistrationBean registration = new FilterRegistrationBean(new HeFilter());
   registration.addUrlPatterns("/*");
   return registration;
 }
7.2.3 启动应用SpringBoot,浏览器访问测试
启动应用SpringBoot,浏览器访问测试
因为过滤所有请求,所以随便输入一个地址,控制台都会输出
第8章 Spring Boot 项目配置字符编码
8.1 方式一 使用传统的Spring提供的字符编码过滤器
Ø 在03-springboot-web中的ServletConfig中配置文件类,注册字符编码过滤器
@Bean
 public FilterRegistrationBean characterEncodingFilterRegistration(){
   FilterRegistrationBean registrationBean = new FilterRegistrationBean();
   CharacterEncodingFilter characterEncodingFilter = new CharacterEncodingFilter();
   characterEncodingFilter.setForceEncoding(true);
   characterEncodingFilter.setEncoding("UTF-8");
   registrationBean.setFilter(characterEncodingFilter);
   registrationBean.addUrlPatterns("/*");
   return registrationBean;
 }
Ø 在application.properties中设置spring.http.encoding.enabled=false
# 关闭springboot的http字符编码支持
# 只有关闭该选项后,Spring字符编码过滤器CharacterEncodingFilter才会起作用
spring.http.encoding.enabled=false
8.2 方式二 在application.properties中配置字符编码(推荐)
从 springboot 1.4.2 之后开始新增的一种字符编码设置
# 设置请求响应的字符编码
spring.http.encoding.charset=UTF-8
spring.http.encoding.enabled=true
spring.http.encoding.force=true
第9章 Spring Boot打包与部署
9.1 Spring Boot程序war包部署
9.1.1 创建Spring Boot Web项目
9.1.1.1 创建一个新的Module,08-springboot-war


9.1.1.2 在pom.xml文件中配置内嵌Tomcat对jsp的解析包
<!--SpringBoot项目内嵌tomcat对jsp的解析包-->
<dependency>
     <groupId>org.springframework.boot</groupId>
     <artifactId>spring-boot-starter-tomcat</artifactId>
     <scope>provided</scope>
</dependency>
9.1.1.3 在application.properties配置文件中配置内嵌Tomcat端口号及上下文根和jsp的前后缀
# 内嵌tomcat的配置
 server.port=9090
 server.servlet.context-path=/08-springboot-war
9.1.1.4 创建IndexController提供方法分别返回字符串及跳转页面
@Controller
public class IndexController {
   //返回字符串或者json
   @GetMapping("/index")
   public @ResponseBody String index(){
     return "使用War打包的Web工程";
   }
}
9.1.1.5 浏览器输入地址访问测试

9.1.2 打War包
9.1.2.1 程序入口类同级路径下创建ServletInitializer类
public class ServletInitializer extends SpringBootServletInitializer {
    @Override
    protected SpringApplicationBuilder configure(SpringApplicationBuilder application) {
        return application.sources(Application.class);
    }
}
9.1.2.2 在 pom.xml中添加(修改)打包方式为war
<packaging>war</packaging>
9.1.2.3 在 pom.xml中配置springboot打包的插件(默认自动加)
<!--SpringBoot 的打包插件-->
 <plugin>
  <groupId>org.springframework.boot</groupId>
  <artifactId>spring-boot-maven-plugin</artifactId>
 </plugin>
9.1.2.4 通过Maven package命令打war包到target目录下

9.1.3 部署到Tomcat服务器上测试运行
9.1.3.1 将target目录下生成的war包拷贝到tomcat的webapps目录,并启动tomcat


9.1.3.2 通过浏览器访问

9.2 Spring Boot程序打Jar包与运行
因为SpringBoot默认的打包方式就是jar包,所以我们直接执行Maven的package命令就行了,这里我们以01-springboot-first为例
9.2.1 通过Maven package命令打jar包到target目录下


将target下的jar包拷贝到某一个目录,在该目录下执行 java -jar 01-springboot-first-0.0.1-SNAPSHOT.jar


9.2.2 浏览器访问测试

9.3 Spring Boot部署与运行方式总结
Ø 在IDEA中直接运行Spring Boot程序的main方法(开发阶段)
Ø 用maven将Spring Boot安装为一个jar包,使用Java命令运行
java -jar springboot-xxx.jar
可以将该命令封装到一个Linux的一个shell脚本中(上线部署)
-
写一个shell脚本:
#!/bin/sh
java -jar xxx.jar
-
赋权限 chmod 777 run.sh
-
启动shell脚本: ./run.sh
Ø 使用Spring Boot的maven插件将Springboot程序打成war包,单独部署在tomcat中运行(上线部署 常用)
第10章 Spring Boot使用Actuator(了解)
在生产环境中,需要实时或定期监控服务的可用性,spring-Boot的Actuator 功能提供了很多监控所需的接口。
Actuator是Spring Boot提供的对应用系统的自省和监控的集成功能,可以对应用系统进行配置查看、健康检查、相关功能统计等,一般运维人员使用多些,开发了解即可。
10.1 使用该功能步骤
我们这里监控09-springboot-actuator程序
10.1.1 创建09-springboot-actuator


10.1.2 在项目的pom.xml中添加如下依赖
<!--Spring Boot Actuator依赖-->
<dependency>
  <groupId>org.springframework.boot</groupId>
  <artifactId>spring-boot-starter-actuator</artifactId>
</dependency>
10.1.3 在application.propertiesl配置文件中指定监控的HTTP端口及路径
我这里没有进行配置
Ø 服务运行的端口
server.port=8080
server.servlet.context-path=09-springboot-actuator
Ø actuator监控的端口(端口可配可不配,如果不配置,则使用和server.port相同的端口)
management.server.port=8100
Ø actuator监控的访问上下文根路径(路径可配可不配,如果不配置,则使用和server.context-path相同的路径)
management.server.servlet.context-path=/09-springboot-actuator
10.1.4 在application.properties或application.yml配置文件中设置开启所有的端口
#默认只开启了health,设置为*,则包含所有的web入口端点
management.endpoints.web.exposure.include=*
10.1.5 启动03-springboot-web
10.1.5.1 浏览器访问http://localhost:8100/09-springboot-actuator/actuator/health

10.1.5.2 浏览器访问http://localhost:8080/actuator/info
默认没有内容

需要自己在application.properties配置文件中添加信息,需要以info开头,后面的内容可以自己设定,一般配置项目的版权等信息,例如
#配置项目版权相关信息
info.contact.name=zhangsan
info.contact.phone=010-84846003
配置完毕后,重启项目再进行访问

10.2 Actuator 提供的主要功能
| GET | /env | 查看所有环境变量 |
|---|---|---|
| HTTP方法 | 路径 | 描述 |
| GET | /configprops | 查看配置属性,包括默认配置 http://www.haojson.com对json进行格式化 |
| GET | /beans | 查看Spring容器目前初始化的bean及其关系列表 |
| GET | /mappings | 查看所有url映射 |
| GET | /health | 查看应用健康指标 |
| GET | /info | 查看应用信息 |
| GET | /metrics | 查看应用基本指标 |
| GET | /metrics/{name} | 查看具体指标 |
| JMX | /shutdown | 关闭应用 |
第11 章Spring Boot 集成 Thymeleaf 模板
11.1 认识Thymeleaf
Thymeleaf是一个流行的模板引擎,该模板引擎采用Java语言开发
模板引擎是一个技术名词,是跨领域跨平台的概念,在Java语言体系下有模板引擎,在C#、PHP语言体系下也有模板引擎,甚至在JavaScript中也会用到模板引擎技术,Java生态下的模板引擎有 Thymeleaf 、Freemaker 等。
Thymeleaf 对网络环境不存在严格的要求,既能用于Web环境下,也能用于非Web环境下。在非Web环境下,他能直接显示模板上的静态数据;在Web环境下,它能像Jsp一样从后台接收数据并替换掉模板上的静态数据。它是基于HTML的,以HTML标签为载体,Thymeleaf要寄托在HTML标签下实现。
Spring Boot 集成了Thymeleaf模板技术,并且Spring Boot官方也推荐使用Thymeleaf来替代JSP技术,Thymeleaf是另外的一种模板技术,它本身并不属于Spring Boot,Spring Boot只是很好地集成这种模板技术,作为前端页面的数据展示,在过去的Java Web开发中,我们往往会选择使用Jsp去完成页面的动态渲染,但是jsp需要翻译编译运行,效率低
Thymeleaf的官方网站:http://www.thymeleaf.org
Thymeleaf官方手册:https://www.thymeleaf.org/doc/tutorials/3.0/usingthymeleaf.html
11.2 Spring Boot集成Thymeleaf
11.2.1 创建Spring Boot项目08-springboot-thymeleaf,添加web和Thymeleaf依赖


按照这种方式创建后,pom.xml文件下会自动添加如下依赖
<!--Spring Boot集成Thymeleaf的起步依赖-->
<dependency>
   <groupId>org.springframework.boot</groupId>
   <artifactId>spring-boot-starter-thymeleaf</artifactId>
</dependency>
<!--Spring Boot 开发web项目的起步依赖-->
<dependency>
   <groupId>org.springframework.boot</groupId>
   <artifactId>spring-boot-starter-web</artifactId>
</dependency>
11.2.2 在Spring boot的核心配置文件application.properties中对Thymeleaf进行配置
#开发阶段,建议关闭thymeleaf的缓存,不然没有办法看到实时页面
spring.thymeleaf.cache=false
#去掉HTML5的语法验证
spring.thymeleaf.mode=LEGACYHTML5
其实什么都不用配置就可以工作,因为基本Thymeleaf的配置都有默认值,可以通过修改application.properties文件修改这些默认值
#默认视图视图前缀
spring.thymeleaf.prefix=classpath:/templates/
#默认视图后缀
spring.thymeleaf.suffix=.html
11.2.3 创建ThymeleafControlle去映射到模板页面(和SpringMVC基本一致)
在com…springboot.controller目下创建ThymeleafController类
@Controller
 public class ThymeleafController {
   @RequestMapping("/index")
   public String index(Model model){
     model.addAttribute("data","恭喜,Spring Boot集成Thymeleaf成功");
     return "index";
   }
 }
11.2.4 在src/main/resources的templates下新建一个index.html页面用于展示数据
HTML页面的元素中加入以下属性:
<!DOCTYPE html>
<html lang="en" xmlns:th="http://www.thymeleaf.org">
<head>
    <meta charset="UTF-8">
    <title>SpringBoot 集成Thymeleaf</title>
</head>
<body>
<!—-以html标签为载体-->
    <span th:text="${data}"></span>
    <p th:text="${data}"></p>
    <div th:text="${data}"></div>
</body>
</html>
11.2.5 启动程序,浏览器访问http://localhost:8080/index

右键->查看页面源代码

注意:Springboot使用thymeleaf作为视图展示,约定将模板文件放置在src/main/resource/templates目录下,静态资源放置在src/main/resource/static目录下
11.3 Thymeleaf的表达式
11.3.1 标准变量表达式
11.3.1.1 语法 ${…}
11.3.1.2 说明
标准变量表达式用于访问容器(tomcat)上下文环境中的变量,功能和EL中的 ${} 相同。Thymeleaf 中的变量表达式使用 ${变量名} 的方式获取Controller中model其中的数据
11.3.1.3 案例演示
Ø 在com…springboot.model包下创建User实体类
public class User {
   private Integer id;
   private String name;
   private Integer age;
   private Integer sex;
  //省略get|set
}
Ø 在ThymeleafController中添加userInfo方法中,向model放入User对象
@RequestMapping("/user")
 public String userInfo(Model model){
   User user = new User();
   user.setId(100);
   user.setName("张三");
   user.setAge(23);
   user.setSex(1);
   model.addAttribute("user",user);
   model.addAttribute("hello","");
   return "user";
 }
Ø 在templates目录下创建user.html页面获取User对象数据
<!--以html标签为载体-->
 用户数据的展示:<br>
 <span th:text="${user.id}"></span>
 <span th:text="${user.name}"></span>
 <span th:text="${user.age}"></span>

<!--也可以这样获取-->
 <span th:text="${user.getSex()}"></span>
 <br>
 <span th:text="${hello}"></span>
Ø 为了演示方便,在pom.xml文件中加入热部署插件
<!--热部署插件-->
 <dependency>
  <groupId>org.springframework.boot</groupId>
  <artifactId>spring-boot-devtools</artifactId>
  <optional>true</optional>
 </dependency>
Ø 浏览器访问http://localhost:8080/user 测试

注意:th:text=“” 是Thymeleaf的一个属性,用于文本的显示
11.3.2 选择变量表达式
11.3.2.1 语法:*{…}
11.3.2.2 说明
选择变量表达式,也叫星号变量表达式,使用 th:object 属性来绑定对象
选择表达式首先使用th:object来邦定后台传来的User对象,然后使用 * 来代表这个对象,后面 {} 中的值是此对象中的属性。
选择变量表达式 *{…} 是另一种类似于标准变量表达式 ${…} 表示变量的方法
选择变量表达式在执行时是在选择的对象上求解,而${…}是在上下文的变量Model上求解,这种写法比标准变量表达式繁琐,只需要大家了解即可
11.3.2.3 案例演示
Ø 在user.html通过选择变量表达式获取用户数据
选择变量表达式用户数据的展示:<br>
<!—用户对象仅在div范围有效-->
<div th:object="${user}">
	<span th:text="*{id}"></span>
	<span th:text="*{name}"></span>
	<span th:text="*{age}"></span>
	<span th:text="*{getSex()}"></span>
</div>
Ø 使用热部署插件后,修改完后只需要重新Build Module
Ø 浏览器访问http://localhost:8080/user 测试

Ø 标准变量表达式和选择变量表达式可以混合一起使用, 也可以不使用 th:object 进行对象的选择,而直接使用 *{…} 获取数据
<br><br>
选择变量表达式 + 标准变量表达式展示用户数据的展示:<br>
<div th:object="${user}">
    <span th:text="${user.id}"></span>
    <span th:text="${user.name}"></span>
    <span th:text="${user.age}"></span>
    <span th:text="${user.sex}"></span>
</div>
<br><br>
选择变量表达式其它写法展示用户数据的展示:<br>
<div>
    <span th:text="*{user.id}"></span>
    <span th:text="*{user.name}"></span>
    <span th:text="*{user.age}"></span>
    <span th:text="*{user.sex}"></span>
</div>
Ø 重新Buil module,浏览器访问查看效果

11.3.3 URL表达式
11.3.3.1 语法@{…}
11.3.3.2 说明
主要用于链接、地址的展示,可用于
11.3.3.3 案例演示
Ø 在user.html页面中加入如下代码
 <br><br>
<!--绝对URL-->
<a href="info.html" th:href="@{'http://localhost:8080/boot/user/info?id='+${user.id}}">查看</a>
<!--相对URL,相对于页面-->
<a href="info.html" th:href="@{'user/info?id='+${user.id}}">查看</a>
<!--相对URL,相对于项目上下文,实际开发推荐这种方式,避免路径找不到的错误-->
<a href="info.html" th:href="@{'/user/info?id='+${user.id}}">查看</a>
Ø 为了演示加上下文的效果,在application.properties中配置项目上下文
# 项目上下文
server.servlet.context-path=/10-springboot-thymeleaf
Ø 浏览器访问http://localhost:8080/10-springboot-thymeleaf/user ,右键查看源代码

11.4 Thymeleaf 的常见属性
大部分属性和html的一样,只不过前面加了一个th前缀
11.4.1 th:action
定义后台控制器的路径,类似标签的action属性,主要结合URL表达式,获取动态变量
<!--当你需要动态获取变量数据的时候,就需要加th前缀-->
<form id="login" th:action="@{'/login/' + ${user.id}}"></form>
<!--以下两种方式都获取不到用户的id-->
<form id="login2" action="/login/${user.id}"></form>
<form id="login3" action="/login/" + ${user.id}></form>
Ø 重新BuildModule,浏览器访问浏览器访问http://localhost:8080/08-springboot-thymeleaf/user ,右键查看源代码
<!--当你需要动态获取变量数据的时候,就需要加th前缀-->
<form id="login" th:action="@{'/login/' + ${user.id}}"></form>
<!--以下两种方式都获取不到用户的id-->
<form id="login2" action="/login/${user.id}"></form>
<form id="login3" action="/login/" + ${user.id}></form>
思考:为什么login3中${user.id} 获取不到数据?
因为我们Thymeleaf*是以html为载体的,所以html不会认识${}语法。
我们请求的流程是,发送请求给服务器,服务器接收请求后,处理请求,跳转到指定的静态html页面,在服务器端,Thymeleaf模板引擎会按照它的语法,对动态数据进行处理,所以如果要是th开头,模板引擎能够识别,会在服务器端进行处理,获取数据;如果没有以th开头,那么Thymeleaf模板引擎不会处理,直接返回给客户端了。
11.4.2 th:href
定义超链接,主要结合URL表达式,获取动态变量
<a href="http://www.baidu.com">我是超链接</a>
<a th:href="'http://www.baidu.com?id='+${user.id}" >我是超链接123</a>
11.4.3 th:src
用于外部资源引入,比如
<script src="/static/js/jquery.js"></script>
<script th:src="@{/js/jquery.js}"></script>
<img th:src="@{/img/logo.png}">
这种方式比传统方式的好处是,在URL表达式前加/,会自动加上上下文根,避免404找不到资源的情况。
11.4.3 th:value
类似html标签中的value属性,能对某元素的value属性进行赋值
<input type="hidden" id="userId" name="userId" th:value="${userId}">
11.4.4 th:attr
该属性也是用于给HTML中某元素的某属性赋值,但该方式写法不够优雅
比如上面的例子可以写成如下形式
<input type="hidden" id="userId" name="userId" th:attr="value=${userId}" >
好处是可以给html中没有定义的属性动态的赋值
<!--thymeleaf没有对应的th标签,所以${user.id}不能被识别-->
<span zhangsan=${user.id}></span>
<!--通过th:attr对自定义的属性赋值-->
<span th:attr="zhangsan=${user.id}"></span>
重新BuildModule,浏览器访问浏览器访问http://localhost:8080/08-springboot-thymeleaf/user ,右键查看源代码

11.4.5 th:text
用于文本的显示,该属性显示的文本在标签体中,如果是文本框,数据会在文本框外显示,要想显示在文本框内,使用th:value
<input type="text" id="realName" name="reaName" th:text="${realName}">
11.4.6 th:onclick
点击事件,th:οnclick=“‘getCollect()’”
<!--目前thymeleaf版本要求只能传递数字和布尔类型-->
<a th:onclick="'fun1('+${user.id}+')'">点击我</a>
<script type="text/javascript">
    function fun1(userId){
        alert(userId);
    }
</script>
11.4.7 th:each
这个属性非常常用,比如从后台传来一个对象集合那么就可以使用此属性遍历输出,它与JSTL中的<c: forEach>类似,此属性既可以循环遍历集合,也可以循环遍历数组及Map
11.4.7.1 遍历List集合
Ø 在ThymeleafController中添加each方法,准备集合数据
@RequestMapping("/each")
public String each(Model model){
    List<User> userList = new ArrayList<User>();
    for (int i = 0;i < 10;i++){
        User user = new User();
        user.setId(i);
        user.setName("张" + i);
        user.setAge(23 + i);
        user.setSex(i%2);
        userList.add(user);
    }
    model.addAttribute("userList",userList);
    return "each";
}
Ø 创建each.html对List集合进行遍历
List集合的遍历<hr>
<table >
    <tr>
        <td>序号</td>
        <td>id</td>
        <td>姓名</td>
        <td>年龄</td>
        <td>性别</td>
    </tr>
    <tr th:each="user,userStat:${userList}">
        <td th:text="${userStat.count}">序号</td>
        <td th:text="${user.id}">id</td>
        <td th:text="${user.name}">姓名</td>
        <td th:text="${user.age}">年龄</td>
        <td th:text="${user.sex}">性别</td>
    </tr>
</table>
Ø 代码说明
th:each="user, iterStat : ${userlist}"中的 ${userList}是后台传过来的集合
- user
定义变量,去接收遍历${userList}集合中的一个数据
- iterStat
${userList} 循环体的信息
-
其中user及iterStat自己可以随便取名
-
interStat是循环体的信息,通过该变量可以获取如下信息
index:当前迭代对象的index(从0开始计算)
count: 当前迭代对象的个数(从1开始计算)这两个用的较多
size: 被迭代对象的大小
current: 当前迭代变量
even/odd: 布尔值,当前循环是否是偶数/奇数(从0开始计算)
first: 布尔值,当前循环是否是第一个
last: 布尔值,当前循环是否是最后一个
注意:循环体信息interStat也可以不定义,则默认采用迭代变量加上Stat后缀,即userStat
Ø 浏览器访问http://localhost:8080/10-springboot-thymeleaf/each测试

11.4.7.2 遍历Map集合
Ø 在ThymeleafController中的each方法中准备Map集合数据
public String each(Model model){
    List<User> userList = new ArrayList<User>();
    Map userMap=new HashMap();
    for (int i = 0;i < 10;i++){
        User user = new User();
        user.setId(i);
        user.setName("张" + i);
        user.setAge(23 + i);
        user.setSex(i%2);
        userList.add(user);
    }
    for (int i = 0;i < 10;i++){
        User user = new User();
        user.setId(i);
        user.setName("张" + i);
        user.setAge(23 + i);
        user.setSex(i%2);
        userMap.put(i,user);
    }
    model.addAttribute("userList",userList);
    model.addAttribute("userMap",userMap);
    return "each";
}
Ø 在each.html页面对Map集合进行遍历
Map集合的遍历<hr>
<table >
    <tr>
        <td>序号</td>
        <td>key</td>
        <td>value</td>
        <td>id</td>
        <td>姓名</td>
        <td>年龄</td>
        <td>性别</td>
    </tr>
    <tr th:each="node:${userMap}">
        <td th:text="${nodeStat.count}">序号</td>
        <td th:text="${node.key}">key</td>
        <td th:text="${node.value}">value</td>
        <td th:text="${node.value.id}">id</td>
        <td th:text="${node.value.name}">姓名</td>
        <td th:text="${node.value.age}">年龄</td>
        <td th:text="${node.value.sex}">性别</td>
    </tr>
</table>
Ø 代码说明
th:each=“node:${userMap}”
用node接收每次遍历的结果,封装为一个键值对
node.key
获取当前键值对中的key
node.value
获取当前键值对中的value
Ø 浏览器访问http://localhost:8080/08-springboot-thymeleaf/each 测试

11.4.8 条件判断
向ThymeleafController的userInfo方法中,通过model传递sex值为1
11.4.8.1 th:if
在user.html页面进行条件判断
<!--条件判断,如果满足条件,显示标签,如果不满足,标签就不显示了-->
<span th:if="${user.sex == 1}" >
    男:<input type="radio" name="se"  th:value="男" />
</span>
<span th:if="${user.sex == 2}">
    女:<input type="radio" name="se" th:value="女"  />
</span>
11.4.8.2 th:unless
th:unless是th:if的一个相反操作
<!--和th:if相反,对判断条件进行了取反操作  了解 一般我们用th:if-->
<span th:unless="${user.sex == 1}" >
    女士:<input type="radio" name="se"  th:value="女" />
</span>
<span th:unless="${user.sex == 2}">
    男士:<input type="radio" name="se" th:value="男"  />
</span>
11.4.8.3 th:switch/th:case
switch,case判断语句
<div th:switch="${user.sex}">
    <p th:case="1">性别:男</p>
    <p th:case="2">性别:女</p>
    <p th:case="*">性别:未知</p>
</div>
一旦某个case判断值为true,剩余的case则都当做false,“*”表示默认的case,前面的case都不匹配时候,执行默认的case
11.4.8.4 浏览器访问http://localhost:8080/10-springboot-thymeleaf/user 测试

11.4.9 th:inline
th:inline 有三个取值类型 (text, javascript 和 none)
11.4.9.1 内敛文本(th:inline=”text”)
可以让Thymeleaf表达式不依赖于html标签,直接使用**内敛表达式[[表达式]]即可获取动态数据,要求在父级标签上加th:inline = “text”**属性
Ø 在user.html页面上,加如下代码
<!--内敛文本-->
 标准变量表达式用户数据的展示:<br>
 <span th:text="${user.id}"></span>
 <span th:text="${user.nick}"></span>
 <span th:text="${user.phone}"></span>
 <span th:text="${user.address}"></span>
 <br>
 <!--以上代码可以使用内敛文本代替-->
 内敛表达式 用户数据的展示:<br>
 <span th:inline="text">
   [[${user.id}]]
   [[${user.nick}]]
   [[${user.phone}]]
   [[${user.address}]]
 </span>
 <br>
Ø 浏览器访问http://localhost:8080/10-springboot-thymeleaf/user测试

注意:一般我们将放到标签中
12.4.9.2 内敛脚本(th:inline=”javascript”)
在js代码中获取后台的动态数据
Ø 在user.html页面上,加如下代码
<button type ="button" onclick="func()">抽奖</button>
<script type="text/javascript" th:inline="javascript">
    function func(){
        alert("恭喜" + [[${user.name}]] +"中奖!");
    }
</script>
Ø 浏览器访问http://localhost:8080/10-springboot-thymeleaf/user测试

11.5 Thymeleaf字面量
字面量:对应数据类型的合法取值,可以在html页面直接使用,不需要后台传递
11.5.1 文本字面量
用单引号’…'包围的字符串为文本字面量
<!--文本字面量-->
<a th:href="@{'/user/' + ${user.id}}">修改用户</a>
11.5.2 数字字面量
<!--数字字面量-->
<p>今年是<span th:text="2017">2017</span>年</p>
<p>20年后, 将是<span th:text="2017 + 20">2037</span>年</p>
11.5.3 boolean字面量
true和false
<!--boolean字面量-->行
<p th:if="${sex == true}">执操作</p>
11.5.4 null字面量
 <!--null字面量-->
 <p th:if="${user == null}">user为空</p>
 <p th:if="${user != null}">user不为空</p>
11.6 Thymeleaf 字符串拼接
<!--一种是字面量使用加号拼接-->
<span th:text="'当前是第'+${sex}+'页 ,共'+${sex}+'页'"></span>
<!--另一种更优雅的方式,使用“|”减少了字符串的拼接的加号-->
<span th:text="|当前是第${sex}页,共${sex}页|"></span>
11.7 Thymeleaf运算符
三元运算:
<span th:text="${sex == 1?'男':'女'}"></span>
<span th:text="${sex eq 1?'男':'女'}"></span>
算术运算:+ , - , * , / , %
关系比较: > , < , >= , <= ( gt , lt , ge , le )
相等判断:== , != ( eq , ne )
11.8 Thymaleaf表达式基本对象
模板引擎提供了一组内置的对象,这些内置的对象可以直接在模板中使用,这些对象由#号开始引用,我们比较常用的内置对象
11.8.1 #request
相当于httpServletRequest 对象,这是3.x版本,若是2.x版本使用 #httpServletRequest
Ø ${#request.getContextPath()}
在页面获取应用的上下文根,一般在js中请求路径中加上可以避免404
<script type="text/javascript" th:inline="javascript">
    var contextPath =[[${#request.getContextPath()}]];
    var url = contextPath + "/user/userInfo";
    alert(url);
</script>
Ø ${#request.getAttribute(“phone”)}
如果后台将数据刚到request中,可以通过该方式在页面上获取
11.8.2 #session
相当于HttpSession 对象,这是3.x版本,若是2.x版本使用#httpSession
Ø 在后台ThymeleafController中的userInfo方法中向session中放数据
session.setAttribute("website","http://www..com");
Ø 在user.html中从session中取数据
<p th:text="${#session.getAttribute('website')}"></p><br>
<p th:text="${session.website}"></p>
注意: #session 为HttpSession对象,可以访问HttpSession对象中的任意一个方法,session 为Session作用域标识用于直接获取Session中的数据
11.9 Thymaleaf表达式功能对象(了解)
模板引擎提供的一组功能性内置对象,可以在模板中直接使用这些对象提供的功能方法
工作中常使用的数据类型,如集合,时间,数值,可以使用Thymeleaf的提供的功能性对象来处理它们
内置功能对象前都需要加#号,内置对象一般都以s结尾
官方手册:http://www.thymeleaf.org/doc/tutorials/3.0/usingthymeleaf.html
#dates: java.util.Date对象的实用方法,
<span th:text="${#dates.format(curDate, 'yyyy-MM-dd HH:mm:ss')}"></span>
#calendars: 和dates类似, 但是 java.util.Calendar 对象;
#numbers: 格式化数字对象的实用方法;
#strings: 字符串对象的实用方法: contains, startsWith, prepending/appending等;
#objects: 对objects操作的实用方法;
#bools: 对布尔值求值的实用方法;
#arrays: 数组的实用方法;
#lists: list的实用方法,比如
<span th:text="${#lists.size(datas)}"></span>
#sets: set的实用方法;
#maps: map的实用方法;
#aggregates: 对数组或集合创建聚合的实用方法;
第12 章总结及综合案例
12.1 总结
采用Spring Boot开发实质上也是一个常规的Spring项目开发,只是利用了Spring Boot启动程序和自动配置简化开发过程,提高开发效率。
Spring boot项目开发代码的实现依然是使用Spring mvc + spring + mybatis 等,当然能集成几乎所有的开源项目, springboot全家桶,极速web开发框架。
采用Spring boot开发,需要掌握大量的注解,所以日常开发中注意对注解的积累。
12.2 综合案例
通过上面内容的学习,我们完成一个综合案例:
采用 Springboot + mybatis + redis 实现对数据库的增删改查、分页、缓存操作。
具体需求如下:
MySQL数据库中有一张表 u_user
前端使用 thymeleaf 模板技术展示数据
后端使用 spring boot + mybatis + redis 实现对数据库数据的增删改查以及缓存操作
查询数据后将数据放入redis缓存中,减少对数据库的直接访问
主要目的是练习Springboot如何集成各类技术进行项目开发
附录1:SpringBoot工程下使用Mybatis反向工程
1 拷贝Mybatis反向工程配置文件到项目的根目录下
获取目录:springboot讲义\资料\MyBatis逆向工程\GeneratorMapper.xml

2 根据项目及表的情况,修改GeneratorMapper.xml配置
<?xml version="1.0" encoding="UTF-8"?>
<!DOCTYPE generatorConfiguration
        PUBLIC "-//mybatis.org//DTD MyBatis Generator Configuration 1.0//EN"
        "http://mybatis.org/dtd/mybatis-generator-config_1_0.dtd">
<generatorConfiguration>
    <!-- 指定连接数据库的JDBC驱动包所在位置,指定到你本机的完整路径 -->
    <classPathEntry location="D:\mysql-connector-java-5.1.46.jar"/>
    <!-- 配置table表信息内容体,targetRuntime指定采用MyBatis3的版本 -->
    <context id="tables" targetRuntime="MyBatis3">
        <!-- 抑制生成注释,由于生成的注释都是英文的,可以不让它生成 -->
        <commentGenerator>
            <property name="suppressAllComments" value="true" />
        </commentGenerator>
        <!-- 配置数据库连接信息 -->
        <jdbcConnection driverClass="com.mysql.jdbc.Driver"
                        connectionURL="jdbc:mysql://192.168.188.128:3306/springboot"
                        userId="root"
                        password="123456">
        </jdbcConnection>
        <!-- 生成model类,targetPackage指定model类的包名, targetProject指定生成的model放在eclipse的哪个工程下面-->
        <javaModelGenerator targetPackage="com..springboot.model" targetProject="src/main/java">
            <property name="enableSubPackages" value="false" />
            <property name="trimStrings" value="false" />
        </javaModelGenerator>
        <!-- 生成MyBatis的Mapper.xml文件,targetPackage指定mapper.xml文件的包名, targetProject指定生成的mapper.xml放在eclipse的哪个工程下面 -->
        <sqlMapGenerator targetPackage="com..springboot.mapper" targetProject="src/main/java">
            <property name="enableSubPackages" value="false" />
        </sqlMapGenerator>
        <!-- 生成MyBatis的Mapper接口类文件,targetPackage指定Mapper接口类的包名, targetProject指定生成的Mapper接口放在eclipse的哪个工程下面 -->
        <javaClientGenerator type="XMLMAPPER" targetPackage="com..springboot.mapper" targetProject="src/main/java">
            <property name="enableSubPackages" value="false" />
        </javaClientGenerator>
        <!-- 数据库表名及对应的Java模型类名 -->
        <table tableName="t_stu"
               domainObjectName="Stu"
               enableCountByExample="false"
               enableUpdateByExample="false"
               enableDeleteByExample="false"
               enableSelectByExample="false"
               selectByExampleQueryId="false"/>
    </context>
</generatorConfiguration>
3 在pom.xml文件中添加mysql反向工程依赖
<plugin>
	<groupId>org.mybatis.generator</groupId>
	<artifactId>mybatis-generator-maven-plugin</artifactId>
	<version>1.3.6</version>
	<configuration>
		<!--配置文件的位置-->
		<configurationFile>GeneratorMapper.xml</configurationFile>
		<verbose>true</verbose>
		<overwrite>true</overwrite>
	</configuration>
</plugin>
4 双击红色选中命令,生成相关文件


 1万+
1万+


 被折叠的 条评论
为什么被折叠?
被折叠的 条评论
为什么被折叠?
 到【灌水乐园】发言


