今天我们来讲一讲
前端中很重要的一个部分路由(router),想必前端小伙伴对‘路由’一词都不会感到陌生。但是如果哪天面试官问你,能大概说一说前端路由的实现原理吗?你又会如何应对呢?
今天
勇宝就带着大家一起来探究一下前端路由,来揭开‘她’的神秘面纱。另外勇宝的
网站已经可以正常访问了:www.iyongbao.cn
文章目录
一、概念
路由这一概念起源于后端(服务器),就比如说我们前端经常会去访问服务器上的一些静态资源(图片、视频)就是我们所说的路由。其实
路由就是用来描述文件路径的一个概念。
像前端框架Vue单页应用(SPA)就是借鉴了路由,呈现的效果就是当我们的url地址栏发生变化展示相应的内容。
就好像键值对的key=value,让url和组件一一映射。
二、路由存在的意义
那么路由的好处是什么呢?
-
通过使用路由可以实现:当我们的url发生变化不会引起页面的刷新;
在学习
HTML的时候,我们知道点击a标签会引起页面的刷新。
三、路由的模式(hash和history)
前端的路由跳转模式有两种:
hash和history,是不是想起Vue和#字符了。
下面我们就来探讨一下
3.1 Hash模式
Hash中文名叫(哈希),好像在密码学中总是听到这个词。想起来了,这是一种算法,哈哈。具体原理我不太懂,只知道它会生成一串很长很长的值。比如我们的视频也是有哈希值的。
然后就是我们的浏览器,就拿Vue的router来说,当我们使用hash模式时,#号后面的任意值就是我们的哈希值。
http://www.iyongbao.cn/#/blog
回到刚才的问题:通过修改url的哈希值,并且不会引起页面的刷新。
下面我们就来一起实现一下前端路由的Hash模式,这是主要使用到了onhashchange事件来监听url的变化。
3.1.1 代码实现
- 新建
index.html
<!-- index.html -->
<!DOCTYPE html>
<html lang="en">
<head>
    <meta charset="UTF-8">
    <meta name="viewport" content="width=device-width, initial-scale=1.0">
    <meta http-equiv="X-UA-Compatible" content="ie=edge">
    <title>前端路由</title>
</head>
<body>
    <!-- 导航 -->
    <div id="nav">
        <a href="#/">首页</a>
        <a href="#/blog">博客</a>
        <a href="#/about">关于</a>
    </div>
    <!-- 内容展示 -->
    <div id="routerView"></div>
</body>
</html>

- 我们来模拟配置一下每个url的内容
const routes = [
    {
        path: '/',
        component: '我是首页'
    },
    {
        path: '/blog',
        component: '我是博客页'
    },
    {
        path: '/about',
        component: '我是关于页'
    }
];
- 下面开始编写逻辑部分
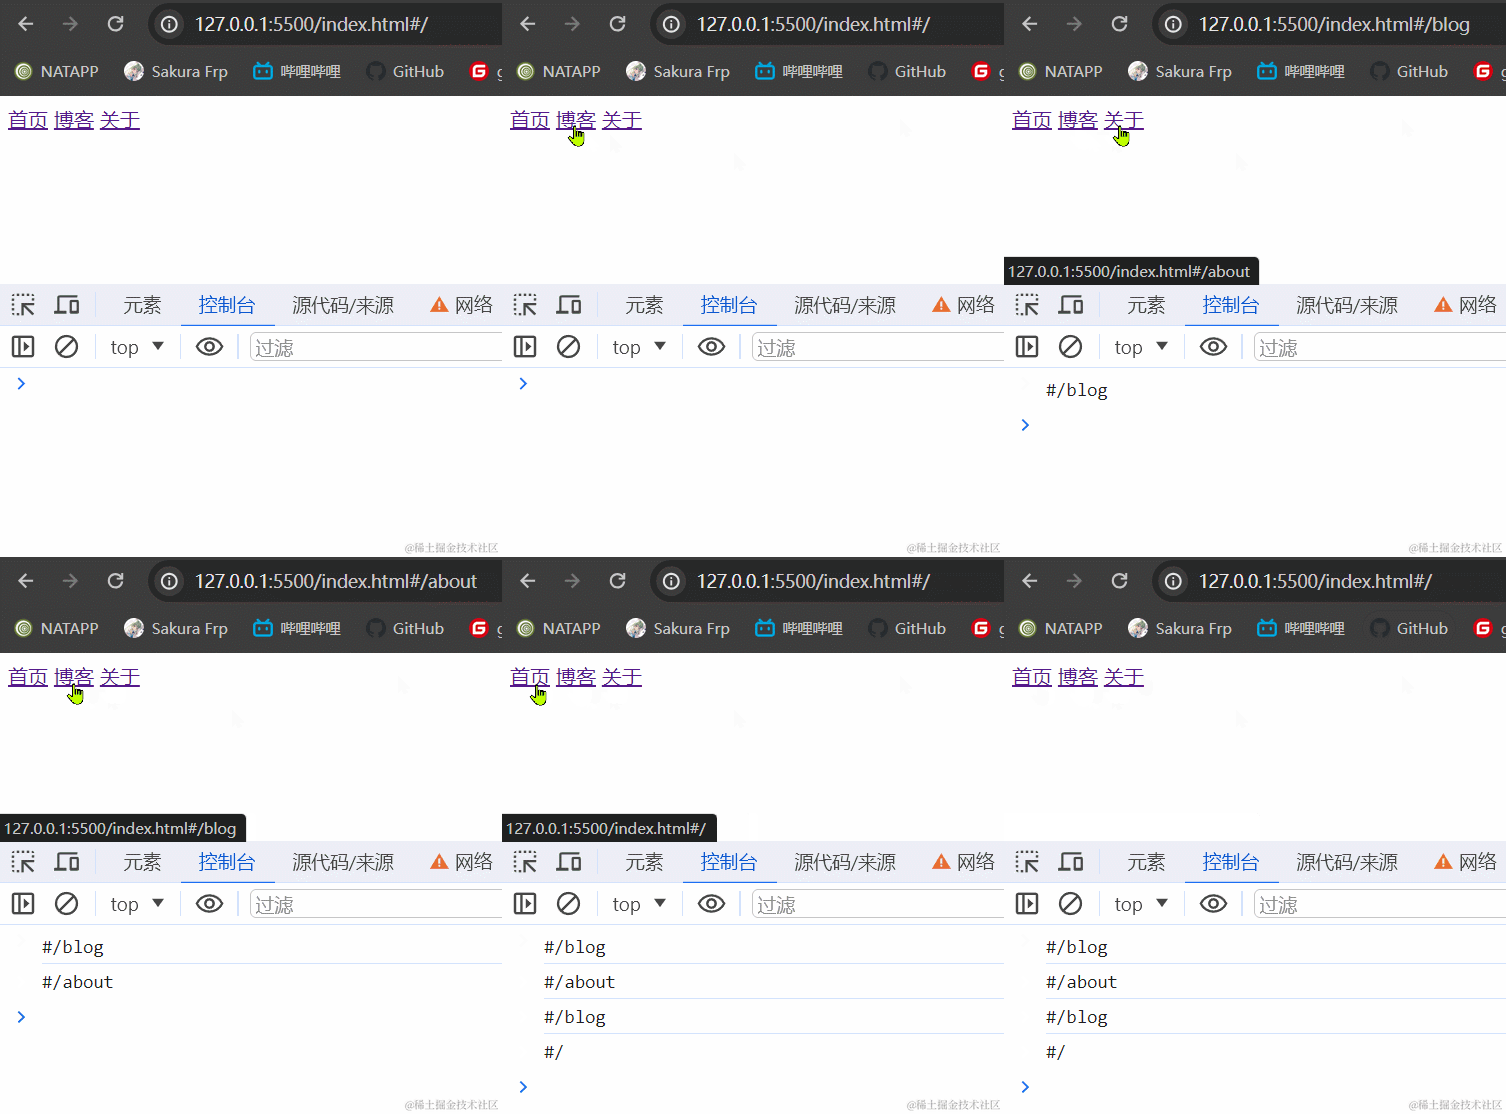
通过onhashchange来监听url的变化,
DOM有个location对象,它有一个hash属性,这个值就是我们a标签中的href的值
window.addEventListener('hashchange', loadPage);

function loadPage () {
    console.log(location.hash);
}

- 通过
routes和loadPage修改routerView的内容。
// 通过id获取div元素
const routerView = document.getElementById('routerView');

const routes = [
    {
        path: '/',
        component: '我是首页'
    },
    {
        path: '/blog',
        component: '我是博客页'
    },
    {
        path: '/about',
        component: '我是关于页'
    }
];

window.addEventListener('hashchange', loadPage);

function loadPage() {
    // 1. 获取要跳转的路由 默认值是#/
    let hashVal = location.hash || '#/';
    // 2. 查找符合的路由
    routes.forEach(route => {
        if (`#${route.path}` === hashVal) {
            // 3. 元素显示相应内容
            routerView.innerHTML = route.component;
        }
    });
}
- 我们
发现手动刷新的时候显示的内容异常,又变成了我是首页。所以我们需要当文档流加载完成后触发一次loadPage方法。
window.addEventListener('DOMContentLoaded', loadPage);
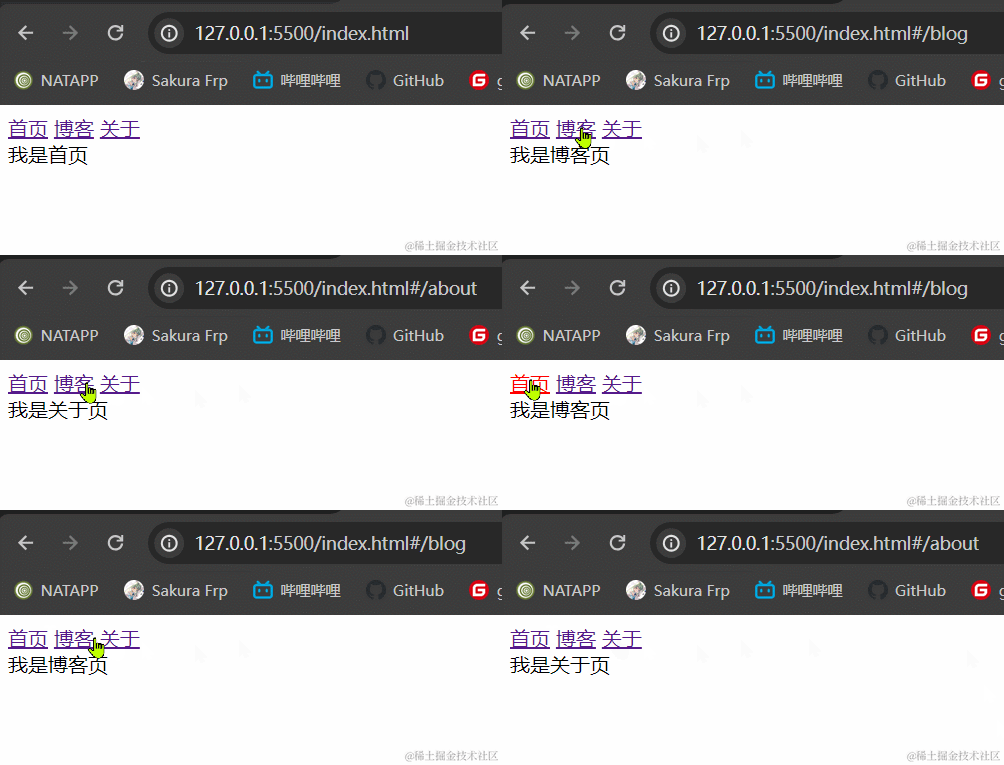
3.1.2 效果展示

3.1.3 小结
hash模式最主要的就是使用到onhashchange事件和url后带#。
3.2 History模式
histroy和hash不太一样,他就不能通过
#字符了,那它是怎么让页面不刷新进行跳转的呢?
注意:hash和history唯一的区别就是一个有#,知识美观上有所影响,估计这个回答大家耳朵也都听的起茧子了。
3.2.1 概念
我查阅了一下MDN对history的解释:
History接口允许操作浏览器的曾经在标签页或者框架里访问的会话历史记录。
这里我们主要使用到pushState方法和popstate监听事件。
3.2.2 pushState和popstate
在 HTML 文档中,
history.pushState()方法向浏览器的会话历史栈增加了一个条目。该方法是异步的。为popstate事件增加监听器,以确定导航何时完成。state参数将在其中可用。
官方说了一大堆,我看不懂,我就说一说的理解:就是浏览器有一个‘仓库’,它可以存储我们访问的路径,通过这个‘仓库’,我们可以正确的进行页面的前进和后退。通过监听popstate可以获取到url的变量值。
3.2.3 代码实现
- 还用刚才那个
index.html,节省空间哈哈哈。
<!-- index.html -->
<!DOCTYPE html>
<html lang="en">
<head>
    <meta charset="UTF-8">
    <meta name="viewport" content="width=device-width, initial-scale=1.0">
    <meta http-equiv="X-UA-Compatible" content="ie=edge">
    <title>前端路由</title>
</head>
<body>
    <!-- 导航 -->
    <div id="nav">
        <a href="/">首页</a>
        <a href="/blog">博客</a>
        <a href="/about">关于</a>
    </div>
    <!-- 内容展示 -->
    <div id="routerView">我是首页</div>
</body>
</html>
此时注意:我们a标签的href是正常的跳转地址,这样会有一个问题,a标签有默认事件,会进行跳转。我们先解决这个问题。
// 1. 获取a标签集合
const links = document.querySelectorAll('a');

links.forEach(a => {
    a.addEventListener('click', (e) => {
        // 2. 阻止默认事件
        e.preventDefault();
    })
});
- pushState参数详解
pushState(state, unused)
pushState(state, unused, url)
- state:
state对象是一个 JavaScript 对象,其与通过pushState()创建的新历史条目相关联。每当用户导航到新的state,都会触发popstate事件,并且该事件的state属性包含历史条目state对象的副本。 unused: 由于历史原因,该参数存在且不能忽略;传递一个空字符串是安全的,以防将来对该方法进行更改。- url: 新历史条目的 URL。
请注意,浏览器不会在调用
pushState()之后尝试加载该 URL,但是它可能会在以后尝试加载该 URL,例如,在用户重启浏览器之后。新 URL 可以不是绝对路径;如果它是相对的,它将相对于当前的 URL 进行解析。新的 URL 必须与当前 URL 同源;否则,pushState()将抛出异常。如果该参数没有指定,则将其设置为当前文档的 URL。
以上都是MDN的官方解释
- 当我们
点击a标签后我们需要把href的值通过pushstate存起来。
// 通过getAttribute方法获取a标签href的值
const url = a.getAttribute('href');
- push到浏览器
‘仓库’中。
pushState(null, '', a.getAttribute('href'));
- 我们把上边的代码封装为一个函数
function load () {
    let url = location.pathname

    routes.forEach(route => {
        if (location.pathname === route.path) {
            routerView.innerHTML = route.component;
        }
    })
}
- 当
文档流加载完成后,初始化我们的a标签
window.addEventListener('DOMContentLoaded', load);
- 最后我们来监听popstate
const routes = [
    {
        path: '/',
        component: '我是首页'
    },
    {
        path: '/blog',
        component: '我是博客页'
    },
    {
        path: '/about',
        component: '我是关于页'
    }
];

function render () {
    let url = location.pathname

    routes.forEach(route => {
        if (location.pathname === route.path) {
            routerView.innerHTML = route.component;
        }
    })
}

window.addEventListener('popstate', render)
完整代码
<!-- index.html -->
<!DOCTYPE html>
<html lang="en">
<head>
    <meta charset="UTF-8">
    <meta name="viewport" content="width=device-width, initial-scale=1.0">
    <meta http-equiv="X-UA-Compatible" content="ie=edge">
    <title>前端路由</title>
</head>
<body>
    <!-- 导航 -->
    <div id="nav">
        <a href="/">首页</a>
        <a href="/blog">博客</a>
        <a href="/about">关于</a>
    </div>
    <!-- 内容展示 -->
    <div id="routerView">我是首页</div>

    <script>
        const routes = [
            {
                path: '/',
                component: '我是首页'
            },
            {
                path: '/blog',
                component: '我是博客页'
            },
            {
                path: '/about',
                component: '我是关于页'
            }
        ];

        const routerView = document.getElementById('routerView');

        window.addEventListener('DOMContentLoaded', load);
        window.addEventListener('popstate', render);

        function load () {
            let url = location.pathname

            routes.forEach(route => {
                if (location.pathname === route.path) {
                    routerView.innerHTML = route.component;
                }
            })
        }

        function render () {
            let url = location.pathname

            routes.forEach(route => {
                if (location.pathname === route.path) {
                    routerView.innerHTML = route.component;
                }
            })
        }
    </script>
</body>
</html>
3.2.4 小结
history模式大家也可以刷新一下,发现页面报错了(Cannot GET /blog),这个原因和Vue中使用history模式页面刷新报404是一个道理,等以后有时间坐下来和大家聊一聊。
四、总结
通过本章节小伙伴们是不是对前端路由有了一个更加清晰的认识与理解,想必大家再遇到此类面试题时一定可以迎刃而解,给面试官眼前一亮。
另外再来聊一聊我的 个人博客,目前还是起步阶段能还不完善。未来的规划也不太明确,如果小伙伴们有什么好的想法或创意可以私信或者留言。我会把好的想法融入到咱们的博客中。


 本文详细介绍了前端路由的概念,以及hash和history两种模式的实现原理,包括代码示例和应用场景。通过对比,帮助读者理解路由在单页应用中的重要性,以及如何处理页面跳转而不引起刷新。


 1225
1225


 被折叠的 条评论
为什么被折叠?


