


- 阿里云控制台操作
搜索短信服务
按图操作,添加签名和短信模板

按要求添加完毕之后,记下模板管理的模版CODE
然后点击头像的右上角,AccessKey管理,获取秘钥。
- 代码方面。(springboot项目中的代码节选)
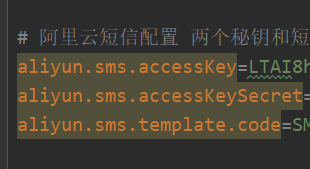
配置文件中配置一下模板的code和两个秘钥。
控制器层代码
/**
     * 验证手机验证码
     * @param
     * @return
     */
    @GetMapping(value = "sms/code")
    @ResponseBody
    public ResultObj smsCode(@RequestParam("telephone") String telephone) {
        ServiceResult<String> result = smsService.sendSms(telephone);
        if (result.isSuccess()) {
            return new ResultObj(200, "成功");
        } else {
            return new ResultObj(-1, "验证码错误");
        }
    }
前端代码,发送短信请求

$(function () {
        $('#smsCodeBtn').on('click', function () {
           var telephone=$('#telephone').val();
            $.ajax({
                url: '/order/sms/code?telephone=' + telephone,
                type: 'GET',
                success: function (data) {
                    if (data.code === 200) {
                        var smsBtn = $('#smsCodeBtn');
                        smsBtn.attr('disabled', 'disabled');
                        smsBtn.css("background-color", "#b4b2b3");

                        var time = 60;
                        var clock = setInterval(function () {
                            if (time-- <= 0) {
                                smsBtn.removeAttr('disabled');
                                smsBtn.css('background-color', '#00b4ef');
                                smsBtn.text('获取验证码');
                                clearInterval(clock);
                            } else {
                                smsBtn.text(time + 's 重新发送');
                            }
                        }, 1000);
                        layer.msg('获取验证码成功', {icon: 6, time: 2000});
                    } else {
                        layer.msg('获取失败: ' + data.message, {icon: 5, time: 2000});
                    }
                },
                error: function (xhr, response, error) {
                    layer.msg('服务器错误: ' + response, {icon: 5, time: 2000});
                }
            });
        });

    });

业务层代码
@Service
public class SmsServiceImpl implements SmsService, InitializingBean {
    @Value("${aliyun.sms.accessKey}")
    private String accessKey;

    @Value("${aliyun.sms.accessKeySecret}")
    private String secertKey;

    @Value("${aliyun.sms.template.code}")
    private String templateCode;
    @Autowired
    private RedisTemplate<String, String> redisTemplate;

    private IAcsClient acsClient;

    private final static String SMS_CODE_CONTENT_PREFIX = "SMS::CODE::CONTENT";

    private static final String[] NUMS = {"0", "1", "2", "3", "4", "5", "6", "7", "8", "9"};
    private static final Random random = new Random();
    @Override
    public ServiceResult<String> sendSms(String telephone) {
        String gapKey = "SMS::CODE::INTERVAL::" + telephone;
        String result = redisTemplate.opsForValue().get(gapKey);
        if (result != null) {
            return new ServiceResult<String>(false, "请求次数太频繁");
        }
        String code = generateRandomSmsCode();
        //短信模板
        String templateParam = String.format("{\"code\": \"%s\"}", code);
        // 组装请求对象
        SendSmsRequest request = new SendSmsRequest();
        // 使用post提交
        request.setMethod(MethodType.POST);
        request.setPhoneNumbers(telephone);
        request.setTemplateParam(templateParam);
        request.setTemplateCode(templateCode);
        request.setSignName("小码仔验证");

        boolean success = false;
        try {
            SendSmsResponse response = acsClient.getAcsResponse(request);
            if ("OK".equals(response.getCode())) {
                success = true;
            } else {
                // TODO log this question
            }
        } catch (ClientException e) {
            e.printStackTrace();
        }
        if (success) {
            redisTemplate.opsForValue().set(gapKey, code, 300, TimeUnit.SECONDS);
            redisTemplate.opsForValue().set(SMS_CODE_CONTENT_PREFIX + telephone, code, 2, TimeUnit.MINUTES);
            return ServiceResult.of(code);
        } else {
            return new ServiceResult<String>(false, "服务忙,请稍后重试");
        }
    }

    @Override
    public String getSmsCode(String telephone) {
        return this.redisTemplate.opsForValue().get(SMS_CODE_CONTENT_PREFIX + telephone);
    }

    @Override
    public void remove(String telephone) {
        this.redisTemplate.delete(SMS_CODE_CONTENT_PREFIX + telephone);
    }
    @Override
    public void afterPropertiesSet() throws Exception {
        // 设置超时时间
        System.setProperty("sun.net.client.defaultConnectTimeout", "10000");
        System.setProperty("sun.net.client.defaultReadTimeout", "10000");

        IClientProfile profile = DefaultProfile.getProfile("cn-hangzhou", accessKey, secertKey);

        String product = "Dysmsapi";
        String domain = "dysmsapi.aliyuncs.com";

        DefaultProfile.addEndpoint("cn-hangzhou", "cn-hangzhou", product, domain);
        this.acsClient = new DefaultAcsClient(profile);

    }

    /**
     * 六位验证码生成
     * @return
     */
    private static String generateRandomSmsCode() {
        StringBuilder sb = new StringBuilder();
        for (int i = 0; i < 6; i++) {
            int index = random.nextInt(10);
            sb.append(NUMS[index]);
        }
        return sb.toString();
    }
}
短信验证的流程大概就是:前端用户获取验证码请求触发,后端代码获取随机6位数字,一份放入缓存,一份交由短信发送至目标手机。用户获取验证码输入,和缓存中的验证码就行对比验证。


 1300
1300


 被折叠的 条评论
为什么被折叠?
被折叠的 条评论
为什么被折叠?
 到【灌水乐园】发言


