


 该教程介绍了如何在Vue项目中使用axios进行API请求。首先,讲解了如何创建Vue项目、安装axios以及设置npm淘宝镜像。接着,展示了在components和src/util目录下配置axios的步骤,并提供了axios的简单用法,包括GET、POST、DELETE和PUT请求的方法。最后,提到了在request.js中自定义配置的可能性。
axios
注意:以下显示内容中的请求路径请使用自己的后端项目地址!
本教程不提供后端访问地址!
1. axios 简单使用
1.1 创建项目
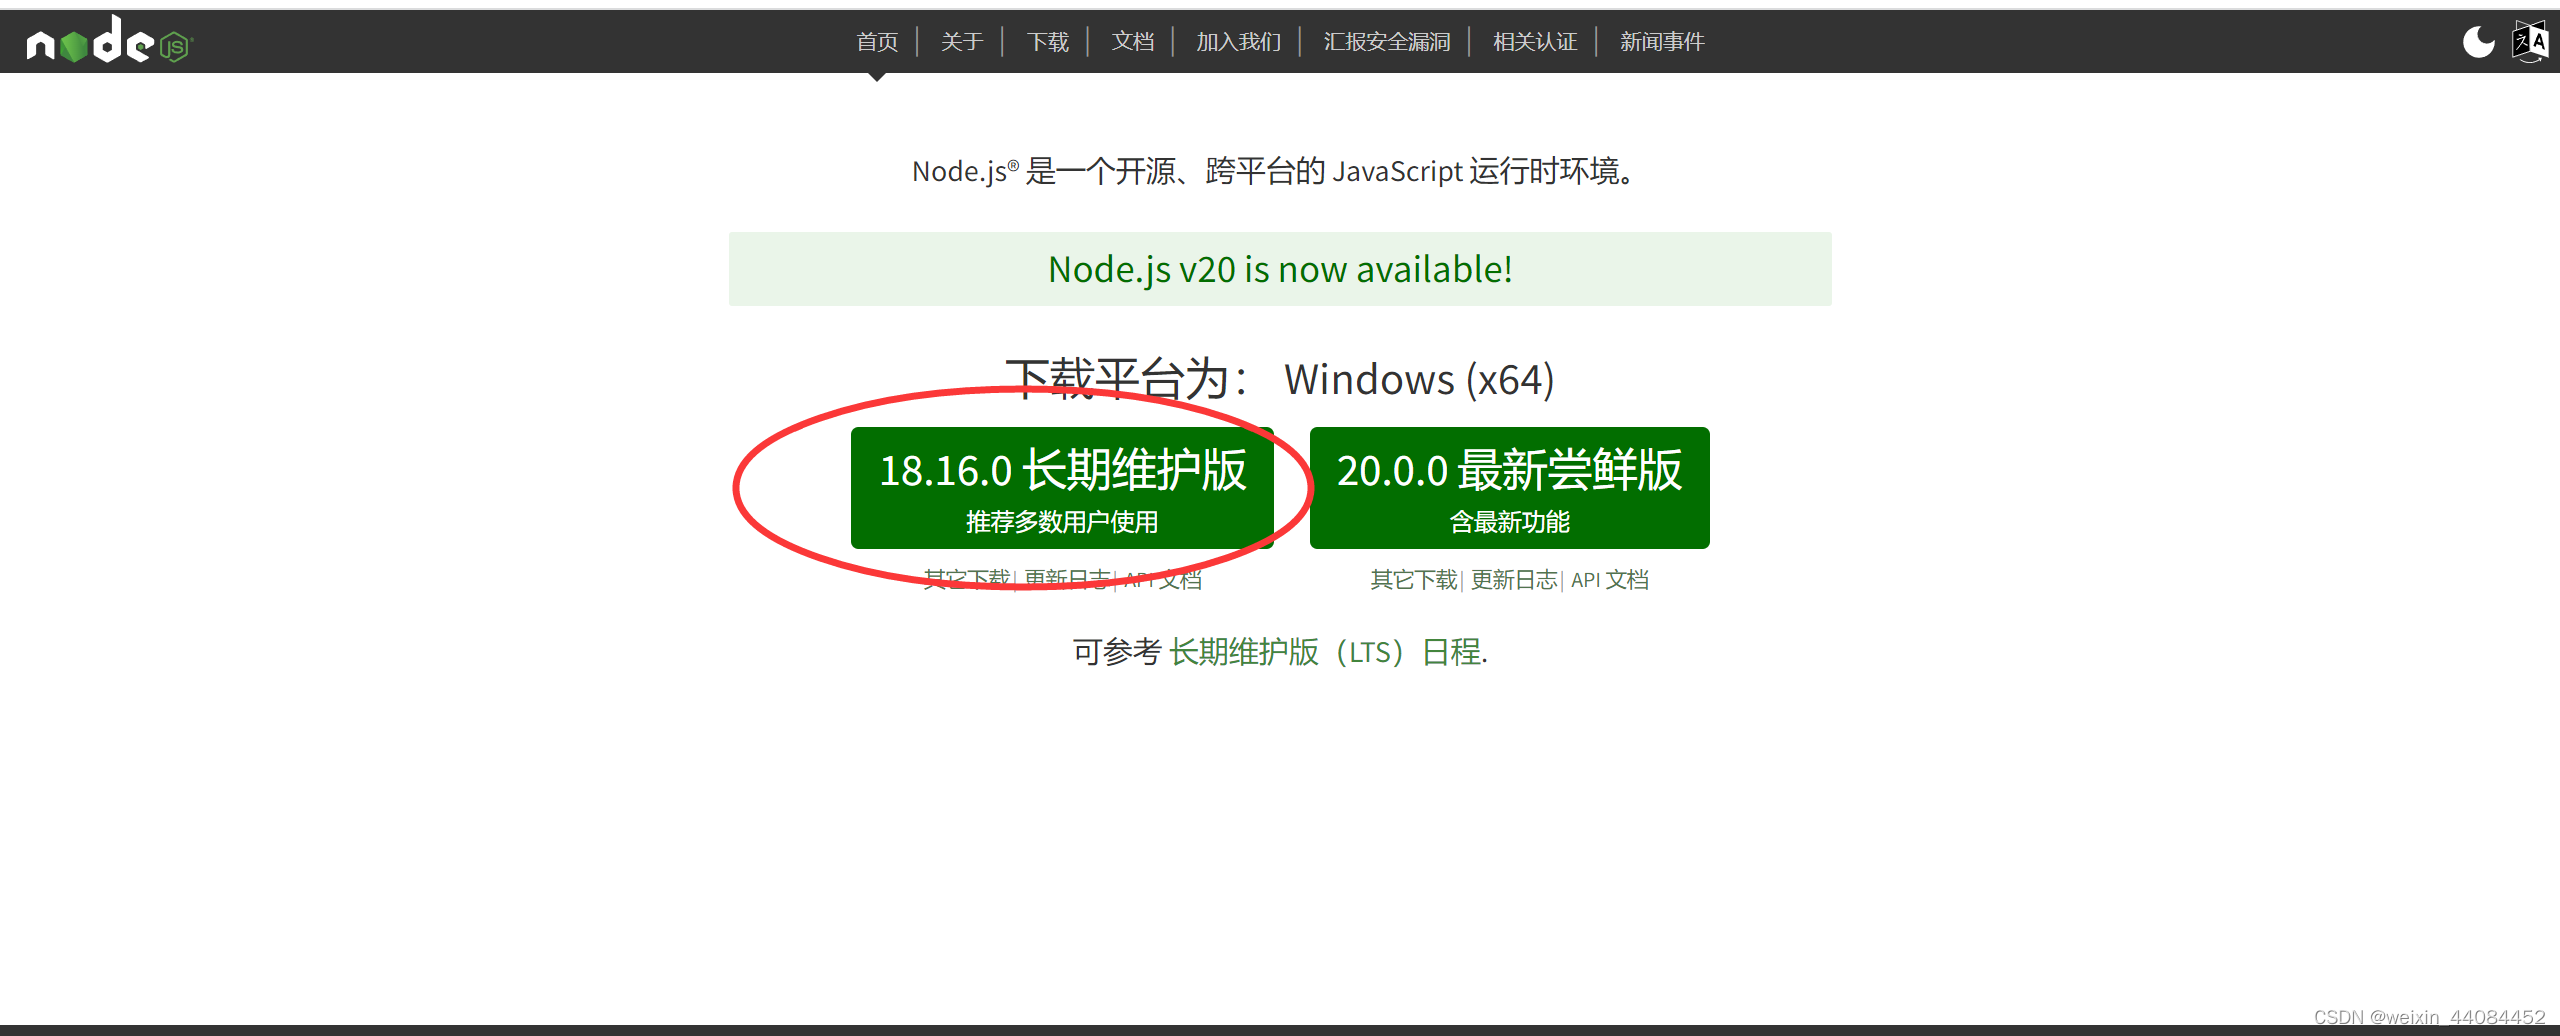
安装 node.js
官网:https://nodejs.org/zh-cn
建议选择长期维护版本
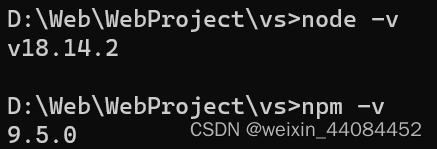
下载安装后可通过以下命令确认是否安装成功
# 查看 nodejs版本号
node -v
# 查看 npm 版本号
npm -v
设置 npm 淘宝镜像
npm config set registry https://registry.npm.taobao.org

# 用以下命令查看是否设置成功
npm config get registry

安装 vue 脚手架
npm i -g @vue/cli

# 用以下命令查看脚手架版本号
vue -V

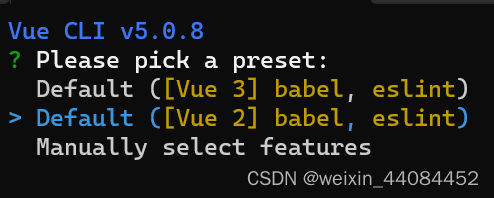
创建项目(这里以 vue2 为例)(vue3 只有创建项目时不同,使用axios是相同的步骤)
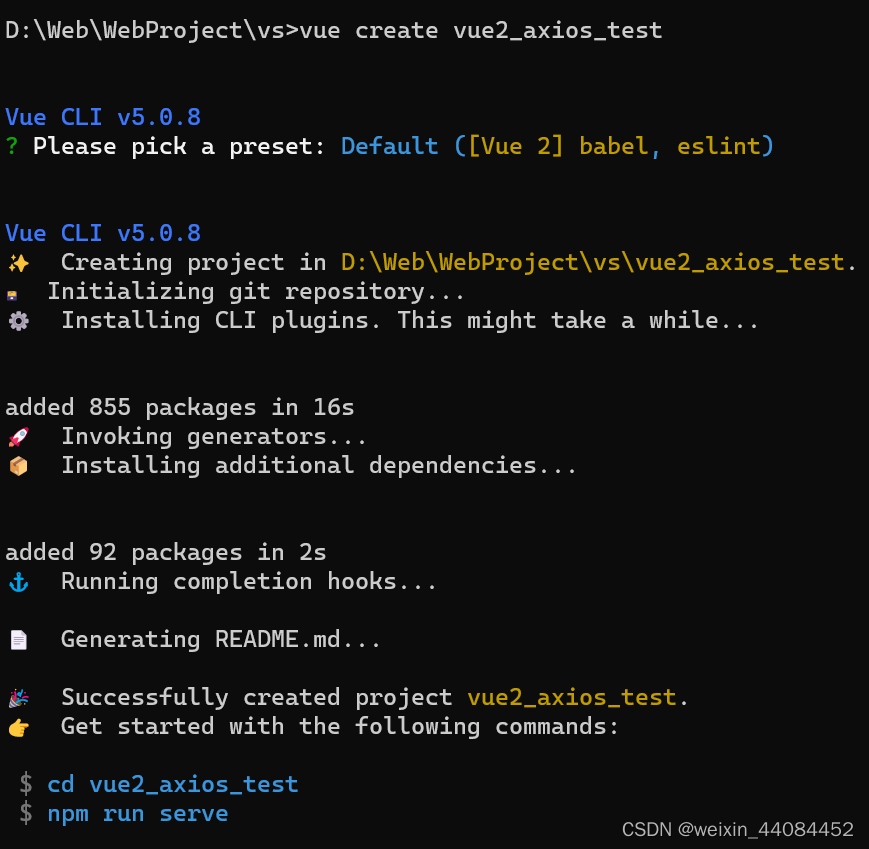
vue create 你的项目名
选择 Default ([Vue 2] babel, eslint) 后回车会自动创建项目
创建成功
启动项目测试是否创建正确
通过以下命令启动项目
cd 你的项目名

npm run serve
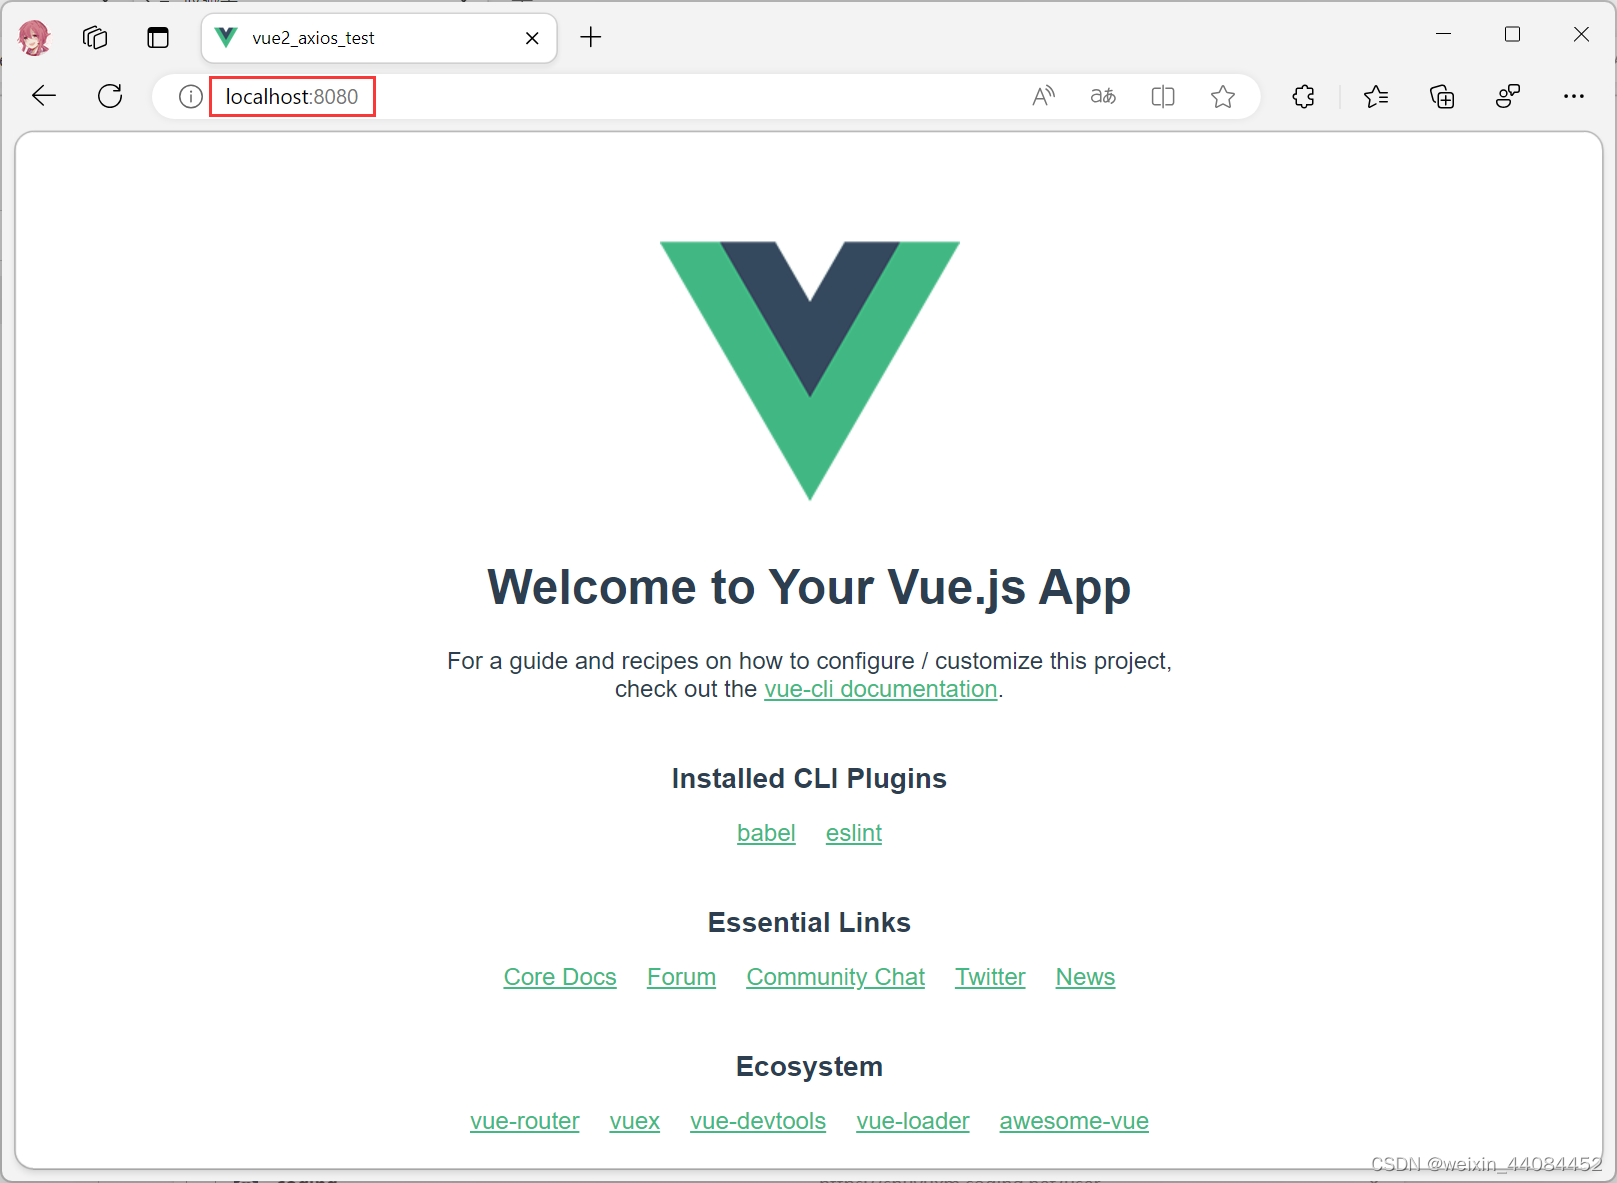
在浏览器输入下图的网址访问项目
白框中的网址应为你自己的网址,不要抄我的!
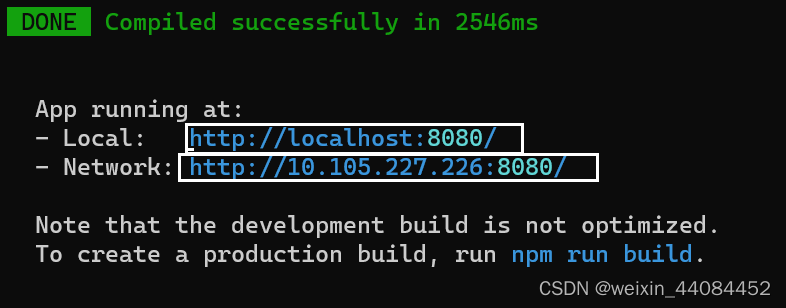
启动成功!
1.2 安装 axios
打开项目
在终端中输入以下命令安装 axios(vs code 中终端快捷键:Ctrl + ` )
(`)就是 Esc 下面的建
npm i axios
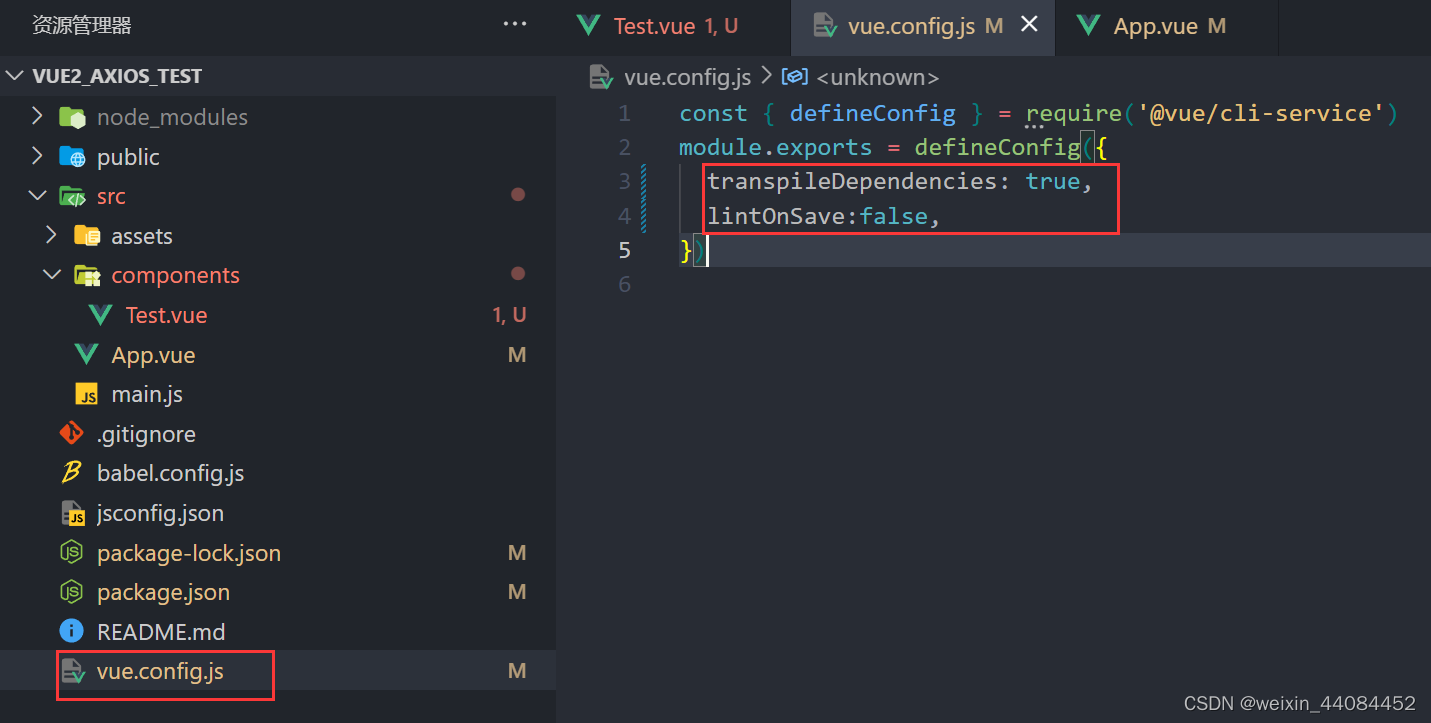
设置禁用语法检查
在 vue.config.js 中下图的位置添加以下代码禁用语法检查
注意代码的上一句还有一个逗号
代码:
lintOnSave:false,
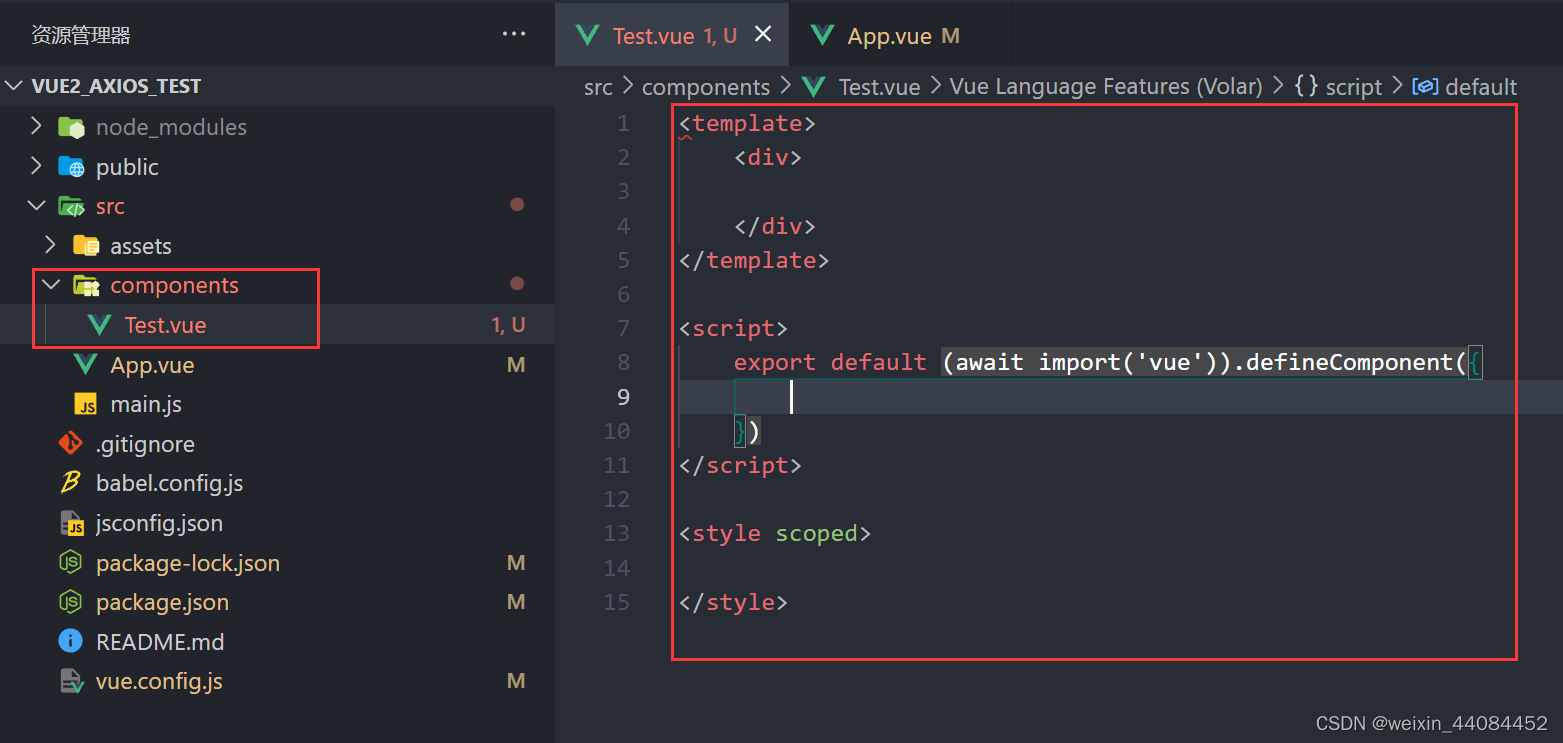
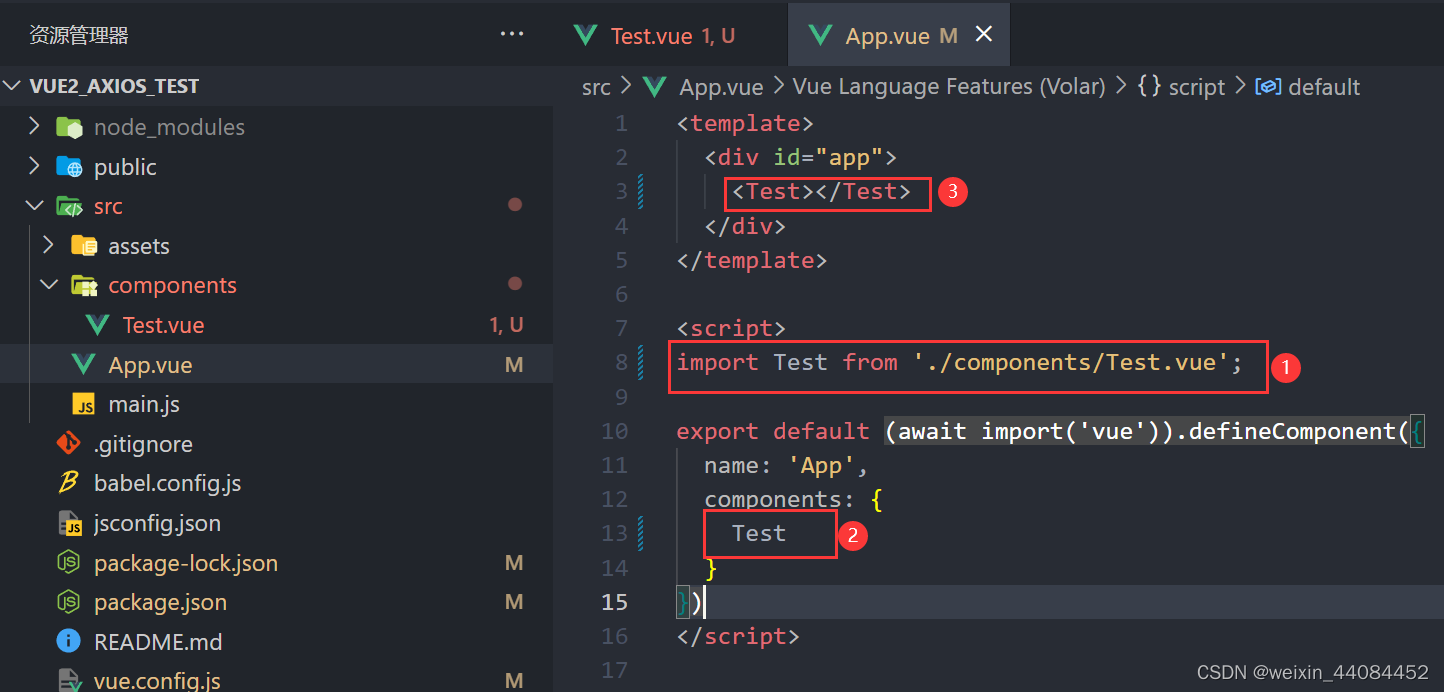
在 components 中新建 vue 文件
如下图
在 App.vue 中引入并使用 Test.vue
在 src 下新建目录 util
在其中新建文件 request.js
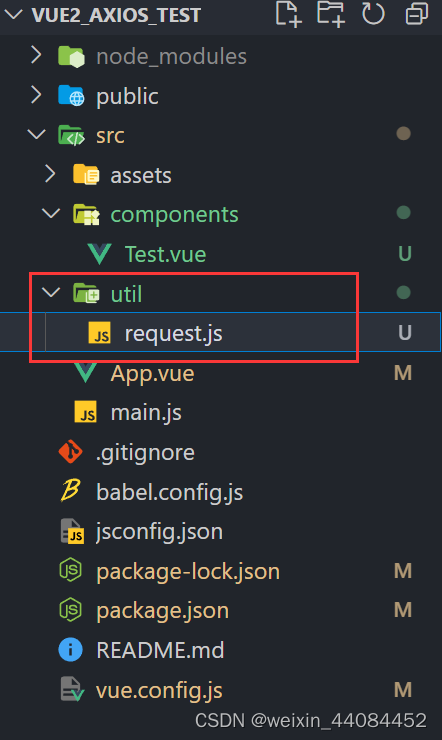
在 request.js 中配置 axios
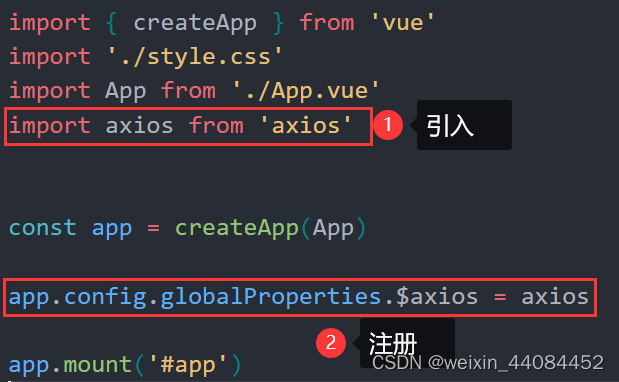
import axios from "axios"   // 引入axios

const request = axios.create({  // 创建axios

})

export default request  // 暴露 axiso
在 Test.vue 中引入并使用 axios
如下是最简单的 axios 请求
<template>
    <div>
        <button @click="test">测试</button>
    </div>
</template>

<script>
import request from '@/util/request';	// 引入 request
    export default {
        methods: {
            test() {
                request.get('http://localhost:8081/user/test').then(
                    response => {
                        console.log(response.data);
                    },
                    error => {
                        console.log(error.message);
                    }
                )
            }
        }
    }
</script>
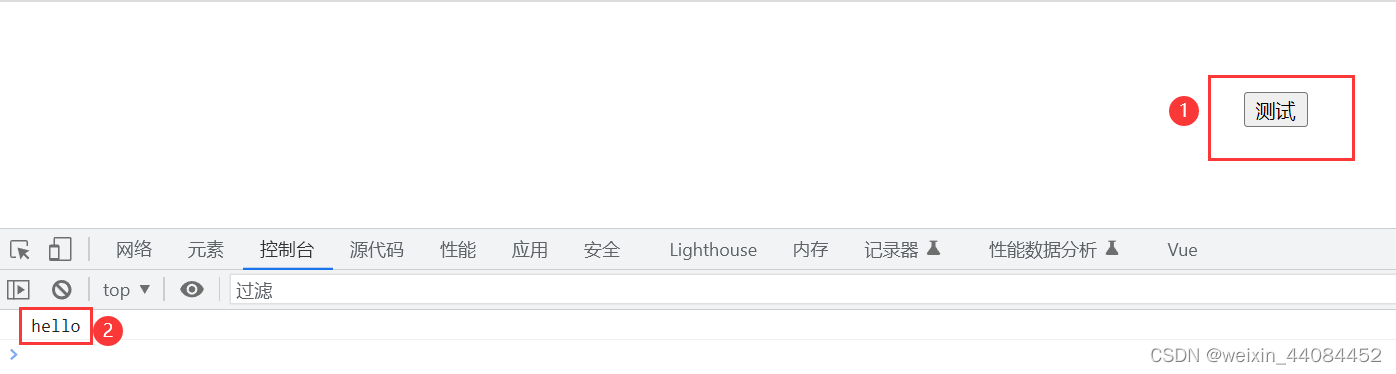
点击测试后可以拿到后端返回的数据
1.3 axios 简单用法介绍
axios 的使用(以登录注册为例)
axios 有以下常见写法
axios(config)

axios.get(url,config)

axios.delete(url,config)

axios.post(url,data,config)

axios.put(url,data,config)
url:请求地址
data:请求携带的数据
config:配置对象(没有需要修改的配置可以不写)
以下仅列出常用写法
1. 通用
axios(config)
axios({
    method: 'POST', // 请求方式 如:GET,POST,PUT 等
    url: 'http://localhost:8081/user/login', //请求地址
    data: { // 请求是携带的数据
        name: '123456',
        password: '123456'
    }
}).then( // 请求后的回调,参数为函数
    response => { // 第一个回调函数是请求成功后的回调 response 是响应体
        console.log(response.data); //在控制台打印响应体中的数据
    },
    error => { // 第一个回调函数是请求失败后的回调
        console.log(error.message); //在控制台打印错误消息 如:Network Error 是请求地址错误或网络错误
    }
)
2. post
axios.post(url,data,config)
// axios.xxx(url,config) xxx:是请求方式 如:get,post,delete,put
axios.post('http://localhost:8081/user/login',{
                name: '123456',
                password: '123456'
            },{
                //这里是config,可以不写
            }).then(
            response => {
                console.log(response.data);
            },
            error => {
                console.log(error.message);
            }
        )
3. get
axios.get(url,config)
这种请求方式传递参数请使用 `` 这种模板字符串,变量使用 ${} 进行引用
axios.get(`http://localhost:8081/user/test?name=${this.user.name}&password=${this.user.password}`,{
                //这里是config,可以不写
            }).then(
            response => {
                console.log(response.data);
            },
            error => {
                console.log(error.message);
            }
        )
3.1. get 的第二种写法
axios.get(url,config)
axios.get('http://localhost:8081/user/test',{
            params:{ // 配置对象中的 params 可以给 get 类型请求传值 并且浏览器地址栏不会有变化
                name: '123456',
                password: '123456'
            }
        }).then(
        response => {
            console.log(response.data);
        },
        error => {
            console.log(error.message);
        }
    )
4. delete
axios.delete(url,config)
axios.delete('http://localhost:8081/user/deleteTest',{
            params:{
                name: '123456',
                password: '123456'
            }
        }).then(
        response => {
            console.log(response.data);
        },
        error => {
            console.log(error.message);
        }
    )
delete 请求实际上和 get 请求一样

5. put
axios.put(url,data,config)
axios.put('http://localhost:8081/user/putLogin',{
            name: '123456',
            password: '123456'
        },{
    		// 这里是 config 可以不写
		}).then(
            response => {
                console.log(response.data);
            },
            error => {
                console.log(error.message);
            }
        )
put 请求实际上和 axios.post(url,data,config) 一样
1.4 还可以在 request.js 中自定义配置
如自定义请求地址前缀
详细配置请看替他文章,这里只是快速入门
import axios from "axios"   // 引入axios

const request = axios.create({  // 创建axios

    baseURL:'http://localhost:8081/user'	// 自定义请求地址前缀
    timeout: 3000	// 请求超时时间
})

export default request  // 暴露 axiso


 1124
1124

 被折叠的 条评论
为什么被折叠?
被折叠的 条评论
为什么被折叠?
 到【灌水乐园】发言


