


leetcode刷题--链表
一、 参考链接
参考文章:https://blog.csdn.net/qq_35580883/article/details/79061578
二、理论
三、leetcode刷题
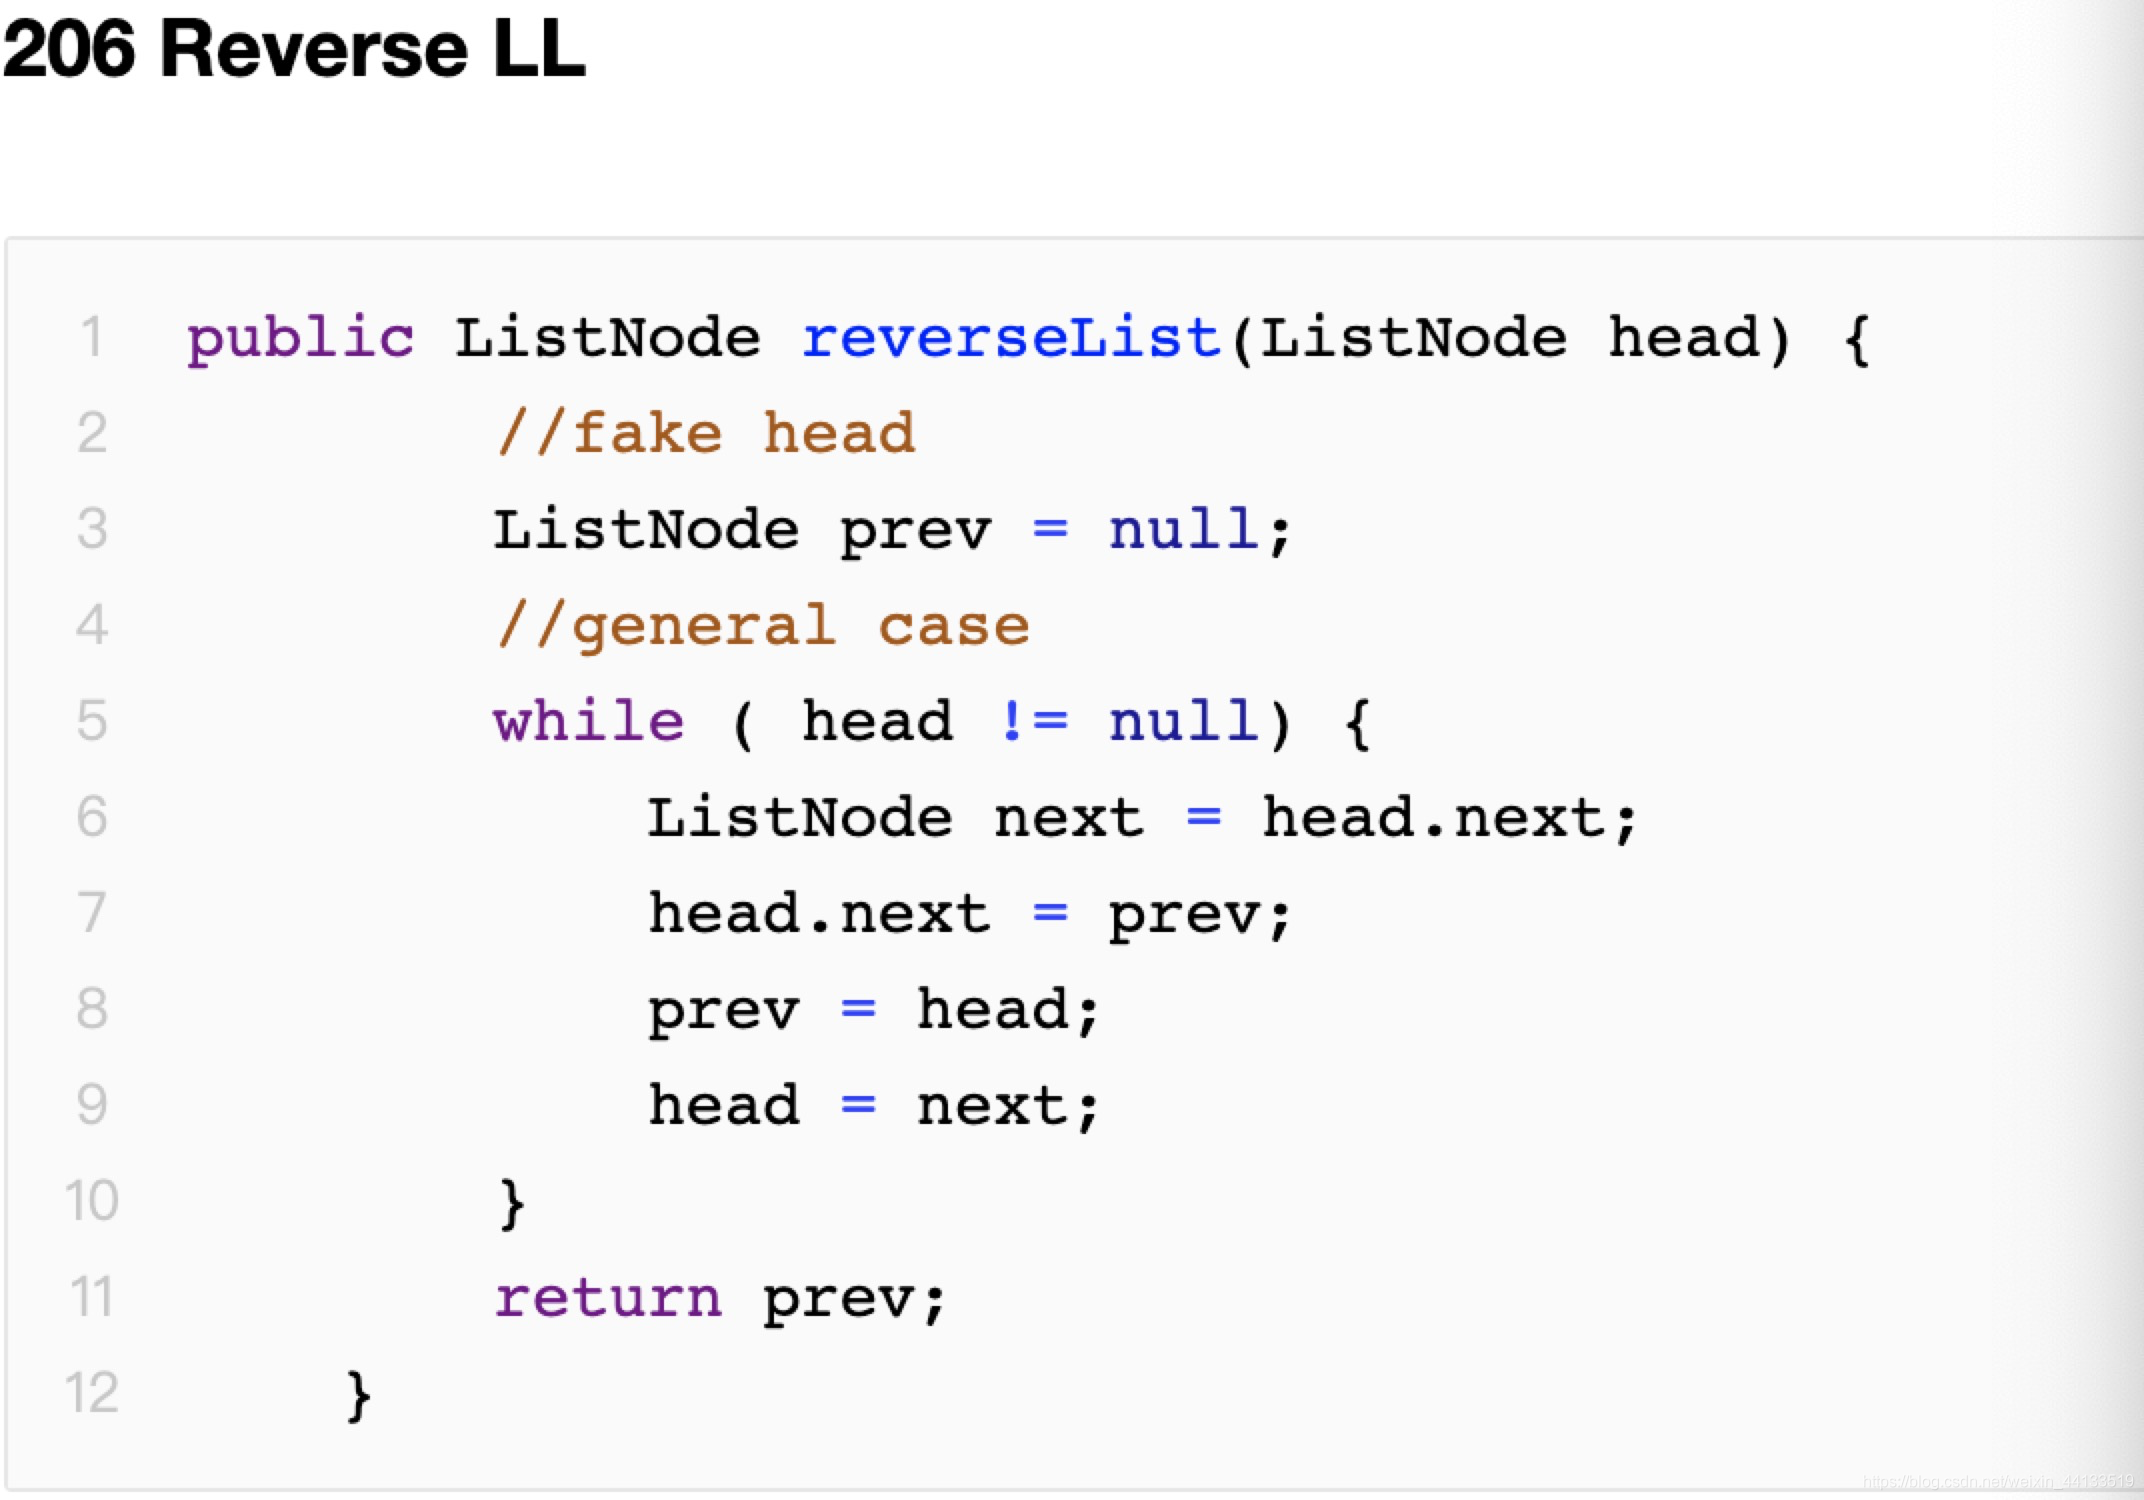
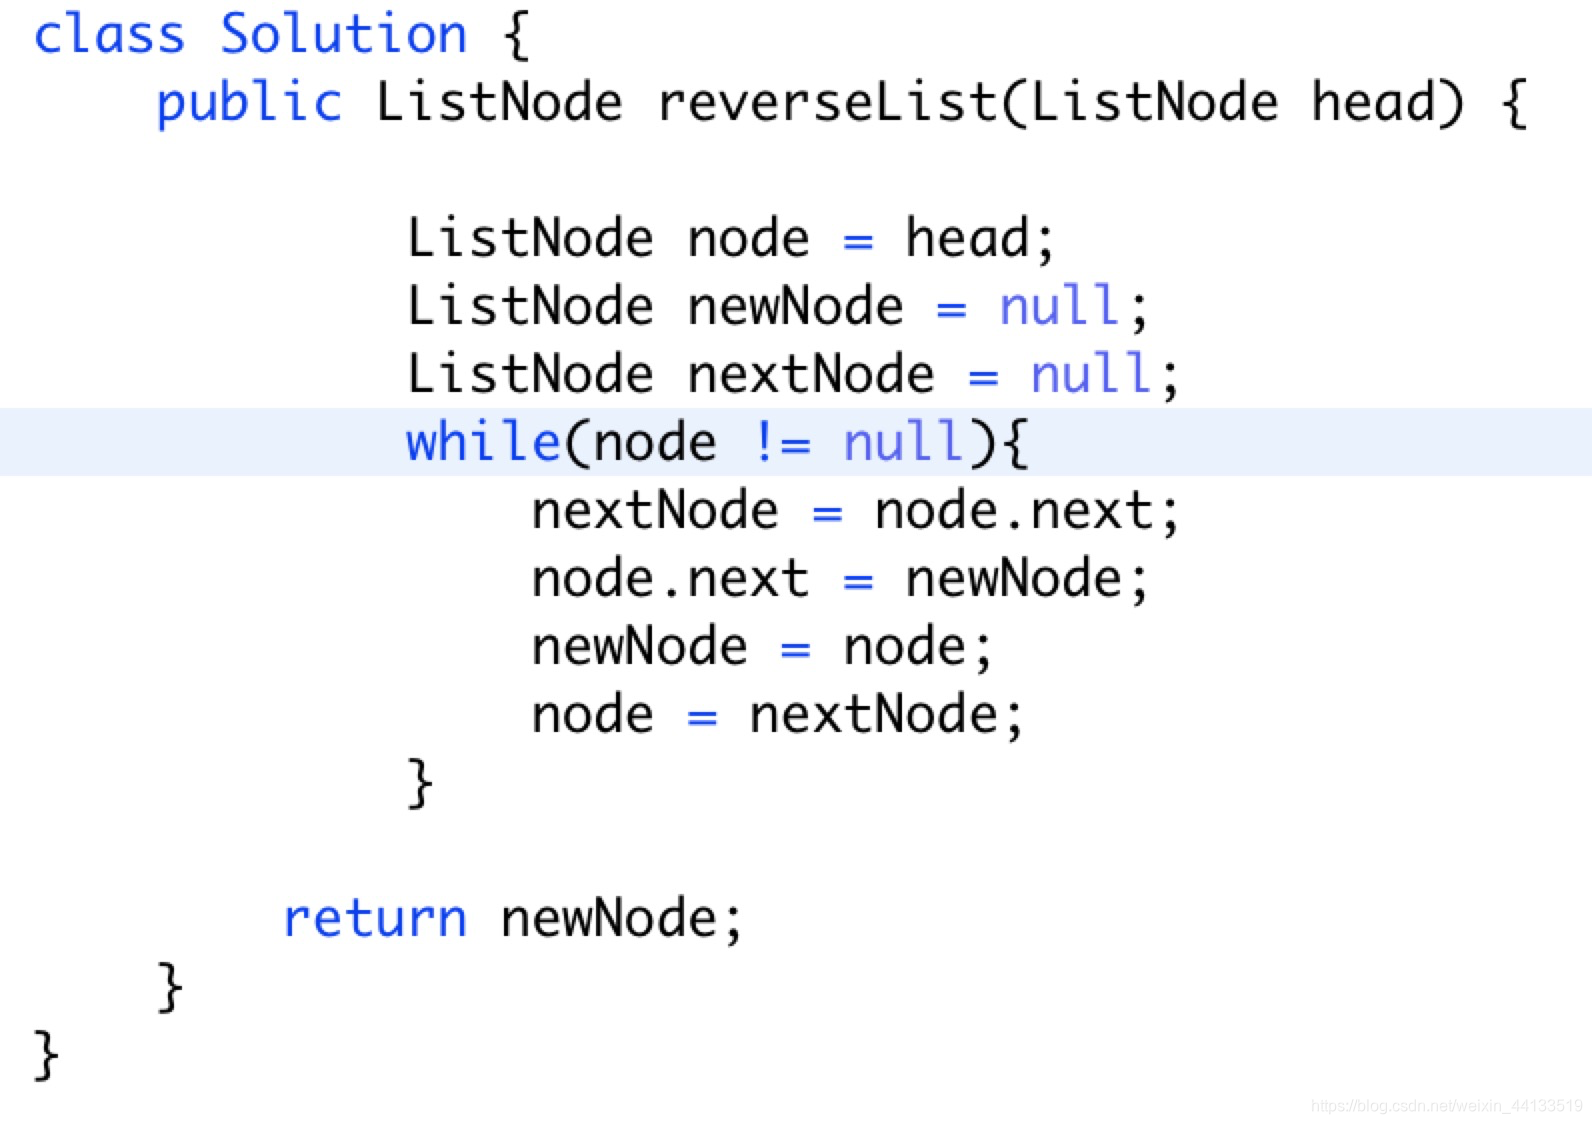
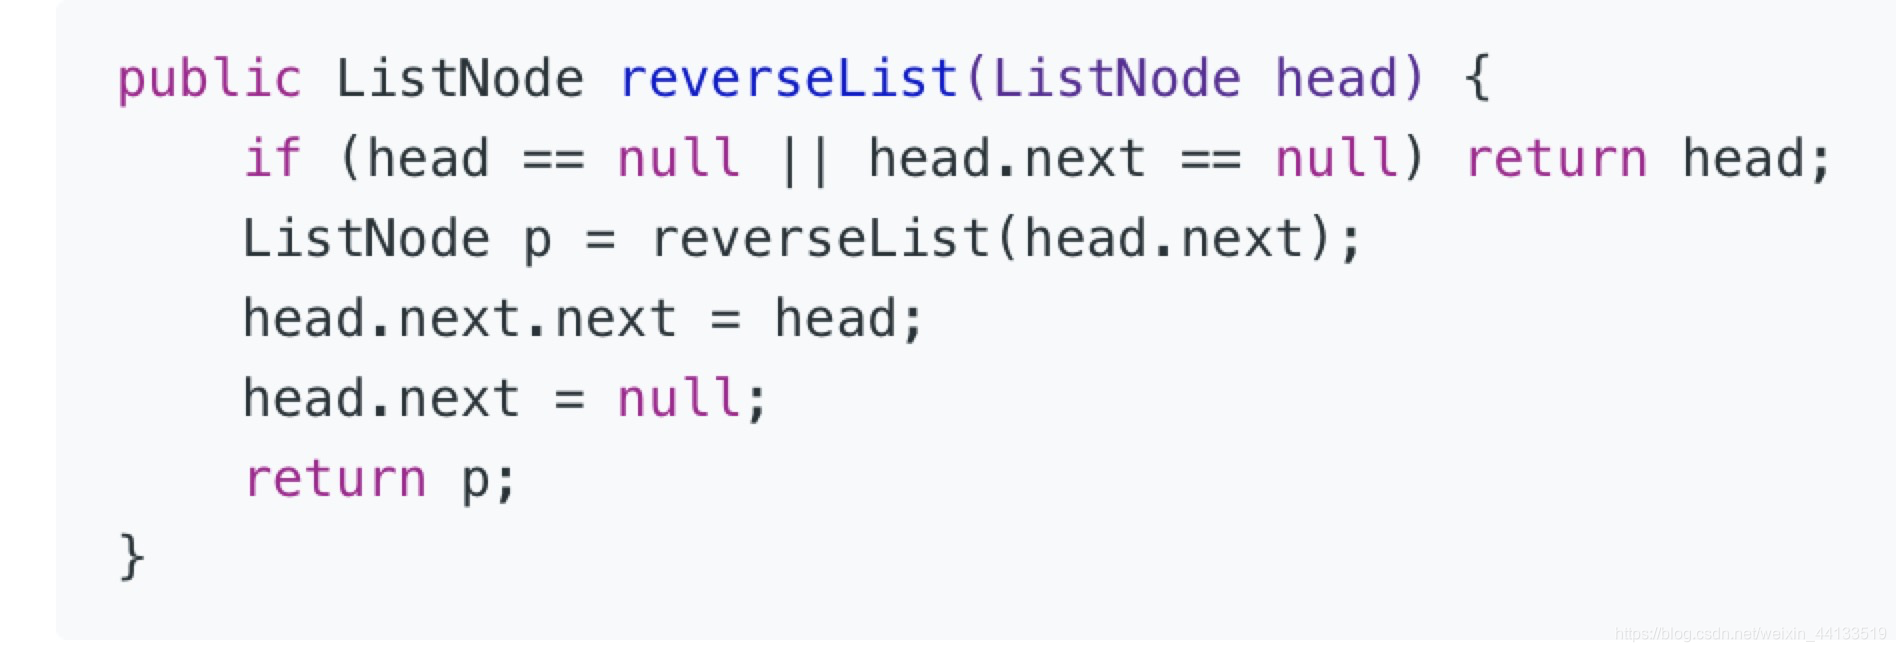
1. reverse linkedlist(反转链表)–206
由于链表会断开,因此在反转链表之前,先记录下一个节点的元素信息。
头节点反过来指向null。
class Solution {
    public ListNode reverseList(ListNode head) {

            ListNode node = head;
            ListNode newNode = null;
            ListNode nextNode = null;
            while(node != null){
                nextNode = node.next;
                node.next = newNode;
                newNode = node;
                node = nextNode;
            }

        return newNode;
    }
}
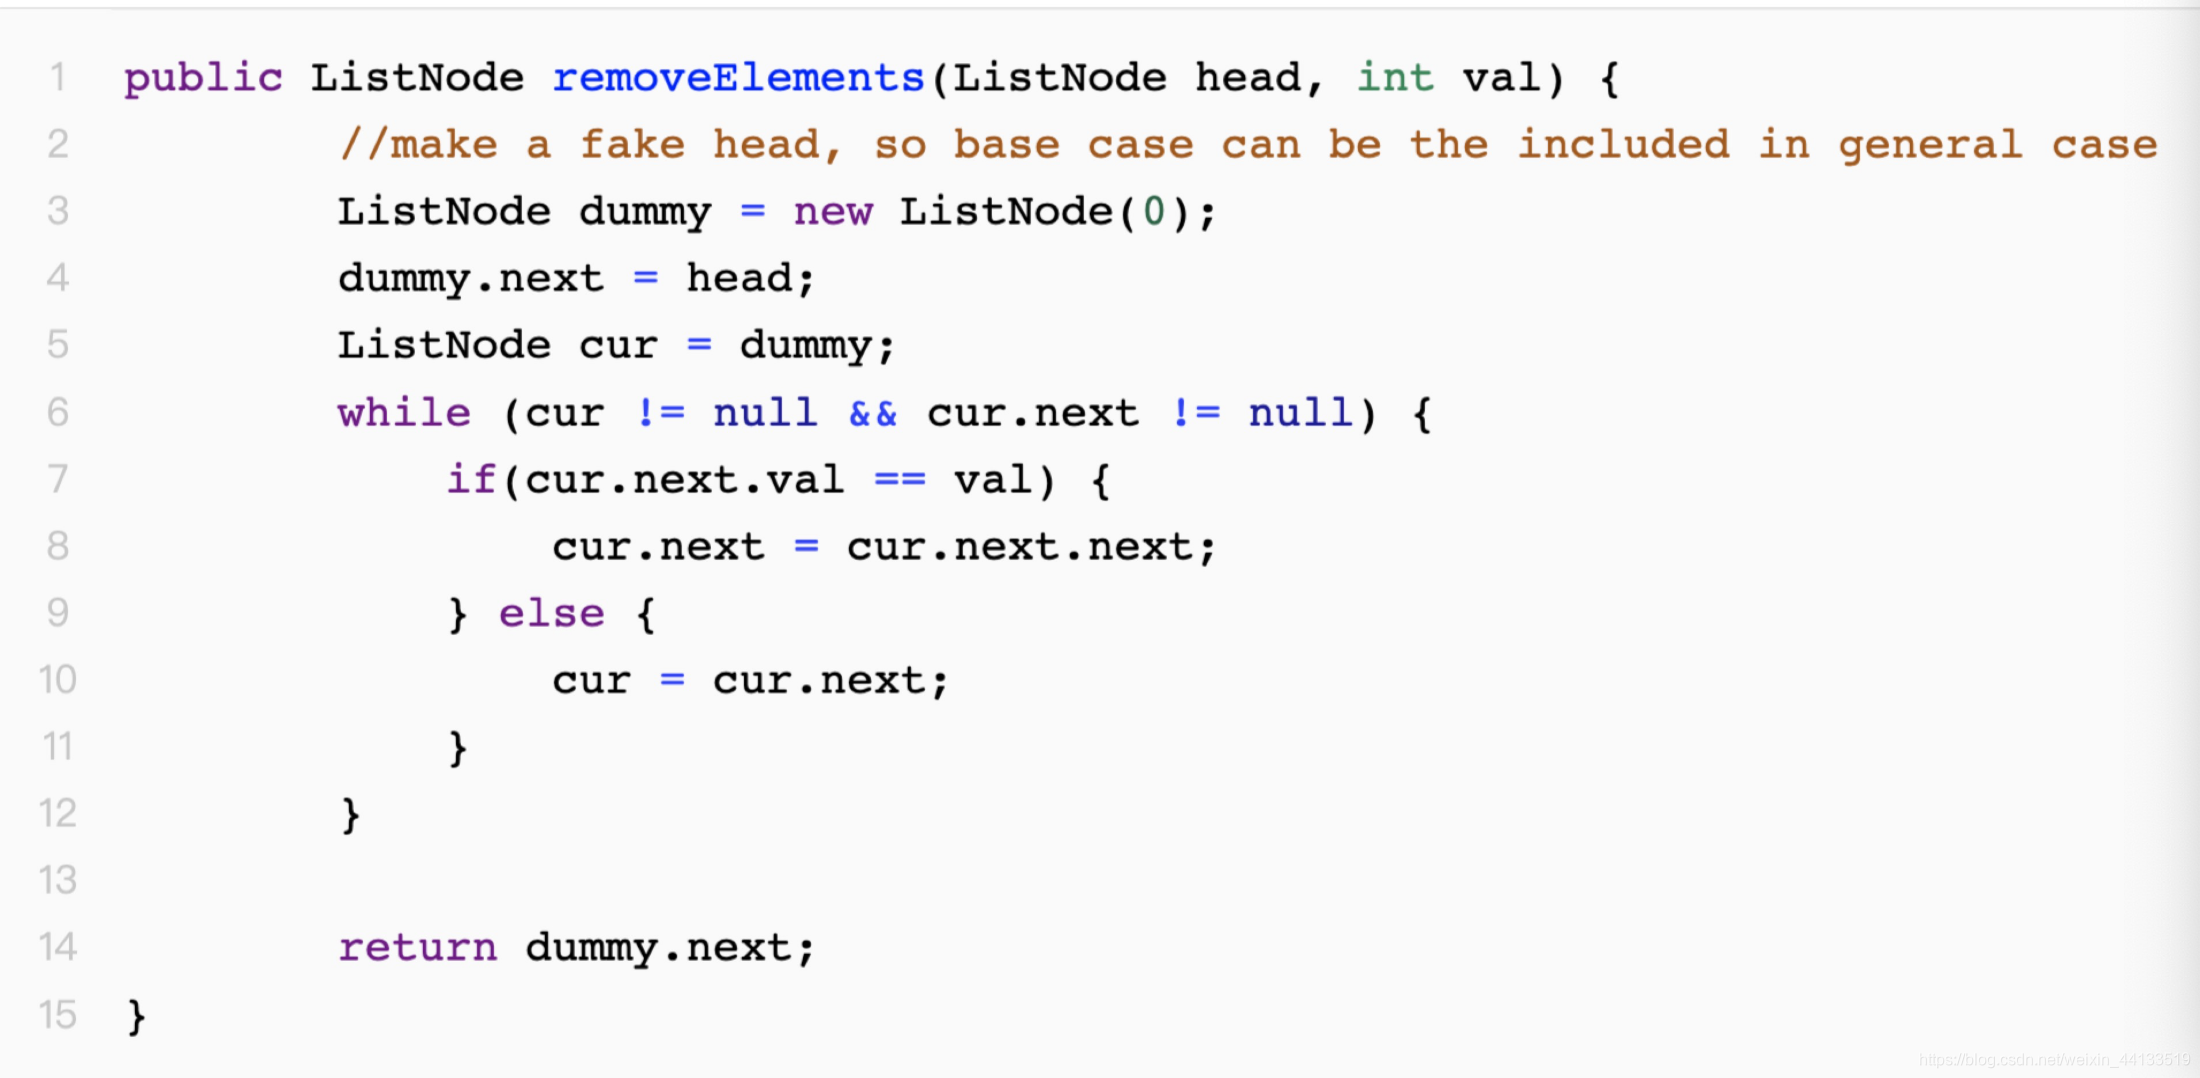
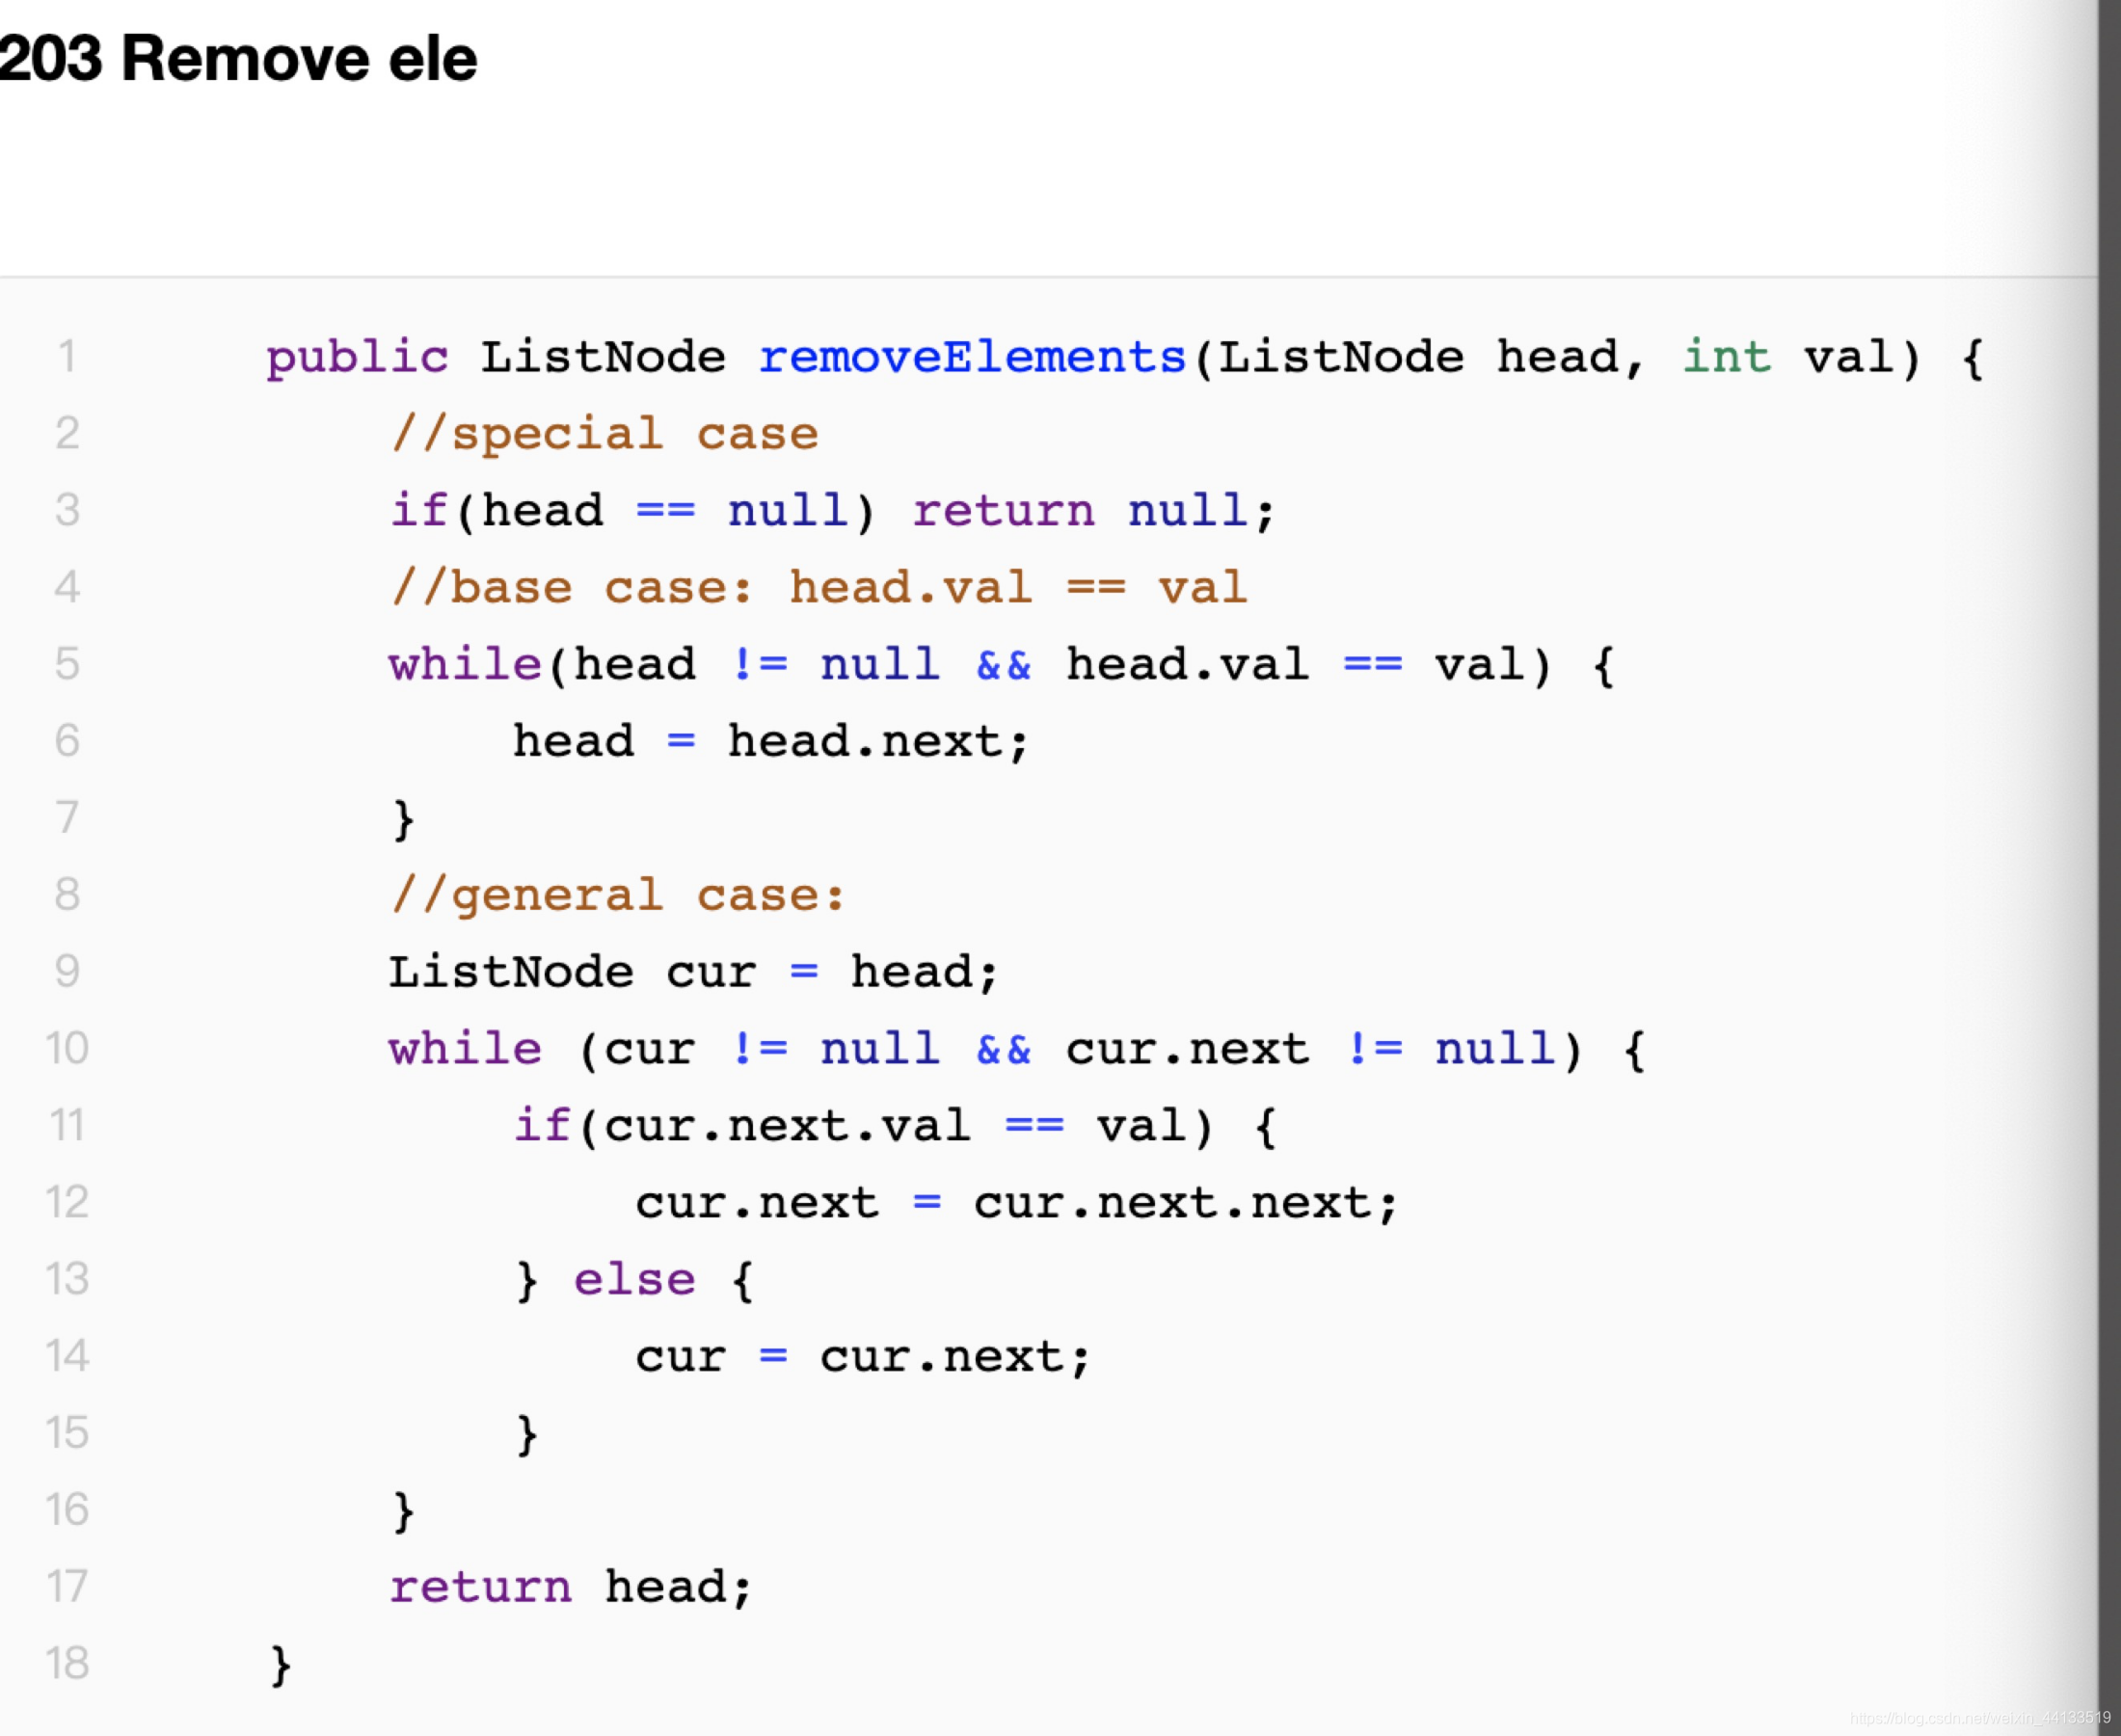
2. remove linkedlist element(移除链表元素)—203
创造一个虚拟的头节点,这样可以不用考虑head问题。
ListNode dummy = new ListNode(0);
dummy.next = head;
递归:
3. Linkedlist Cycle(判断链表环)—141
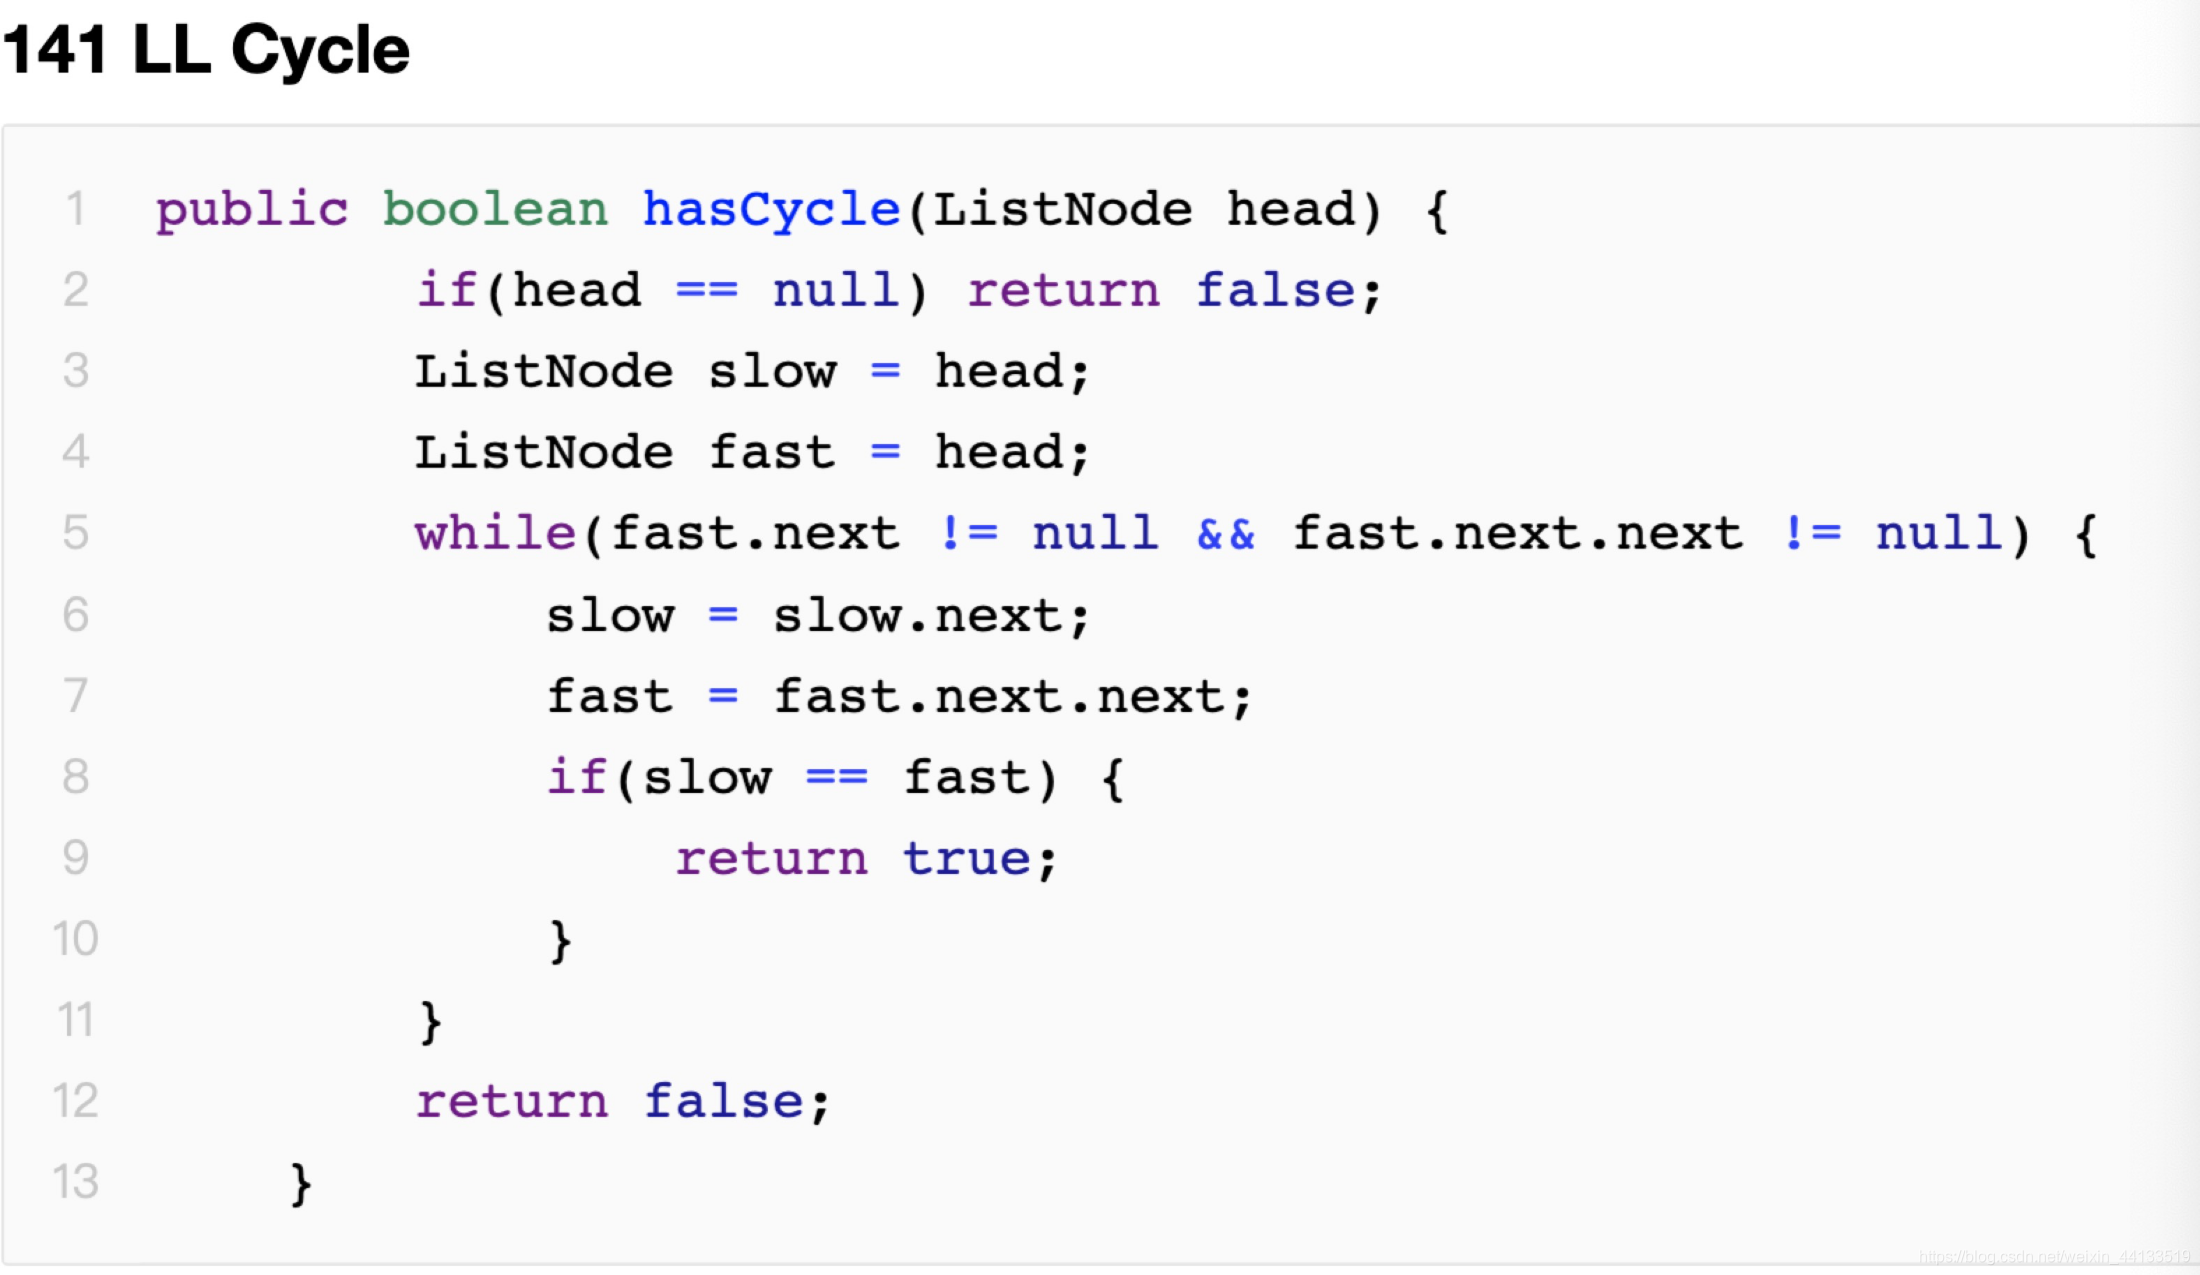
如果链表有环,快慢指针一定会相遇。
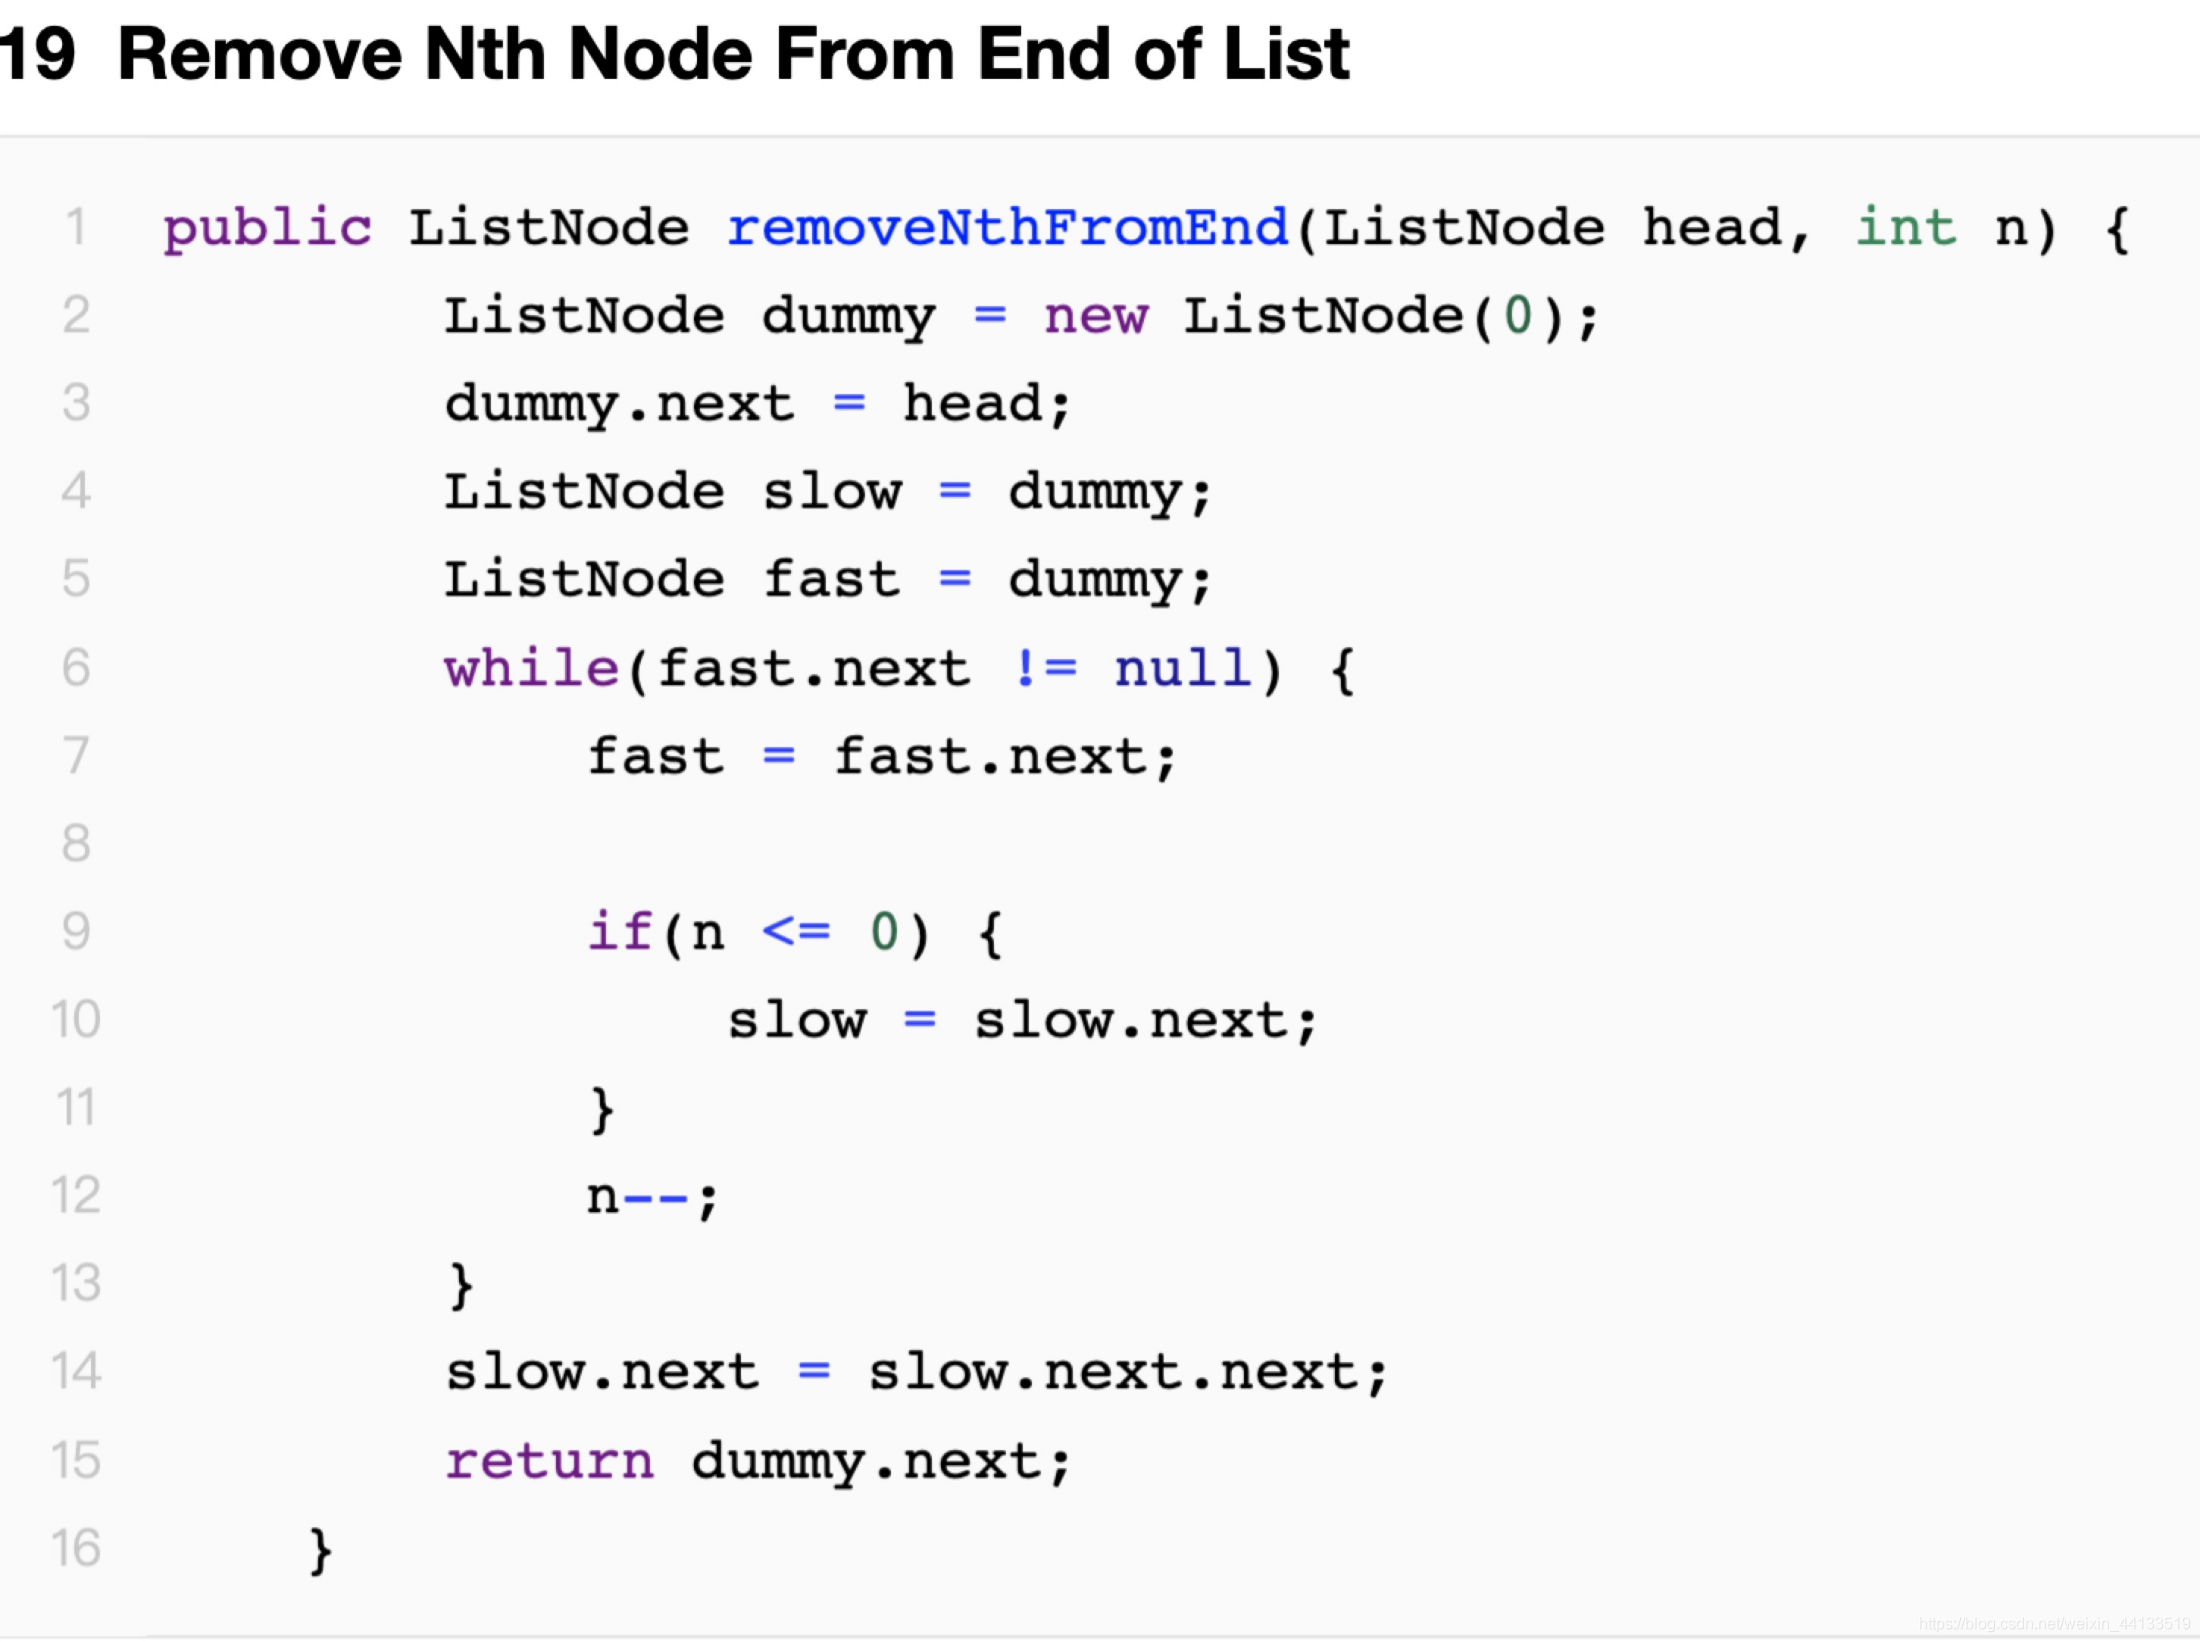
4. remove Nth node from end of list(删除链表倒数第i个元素)—19
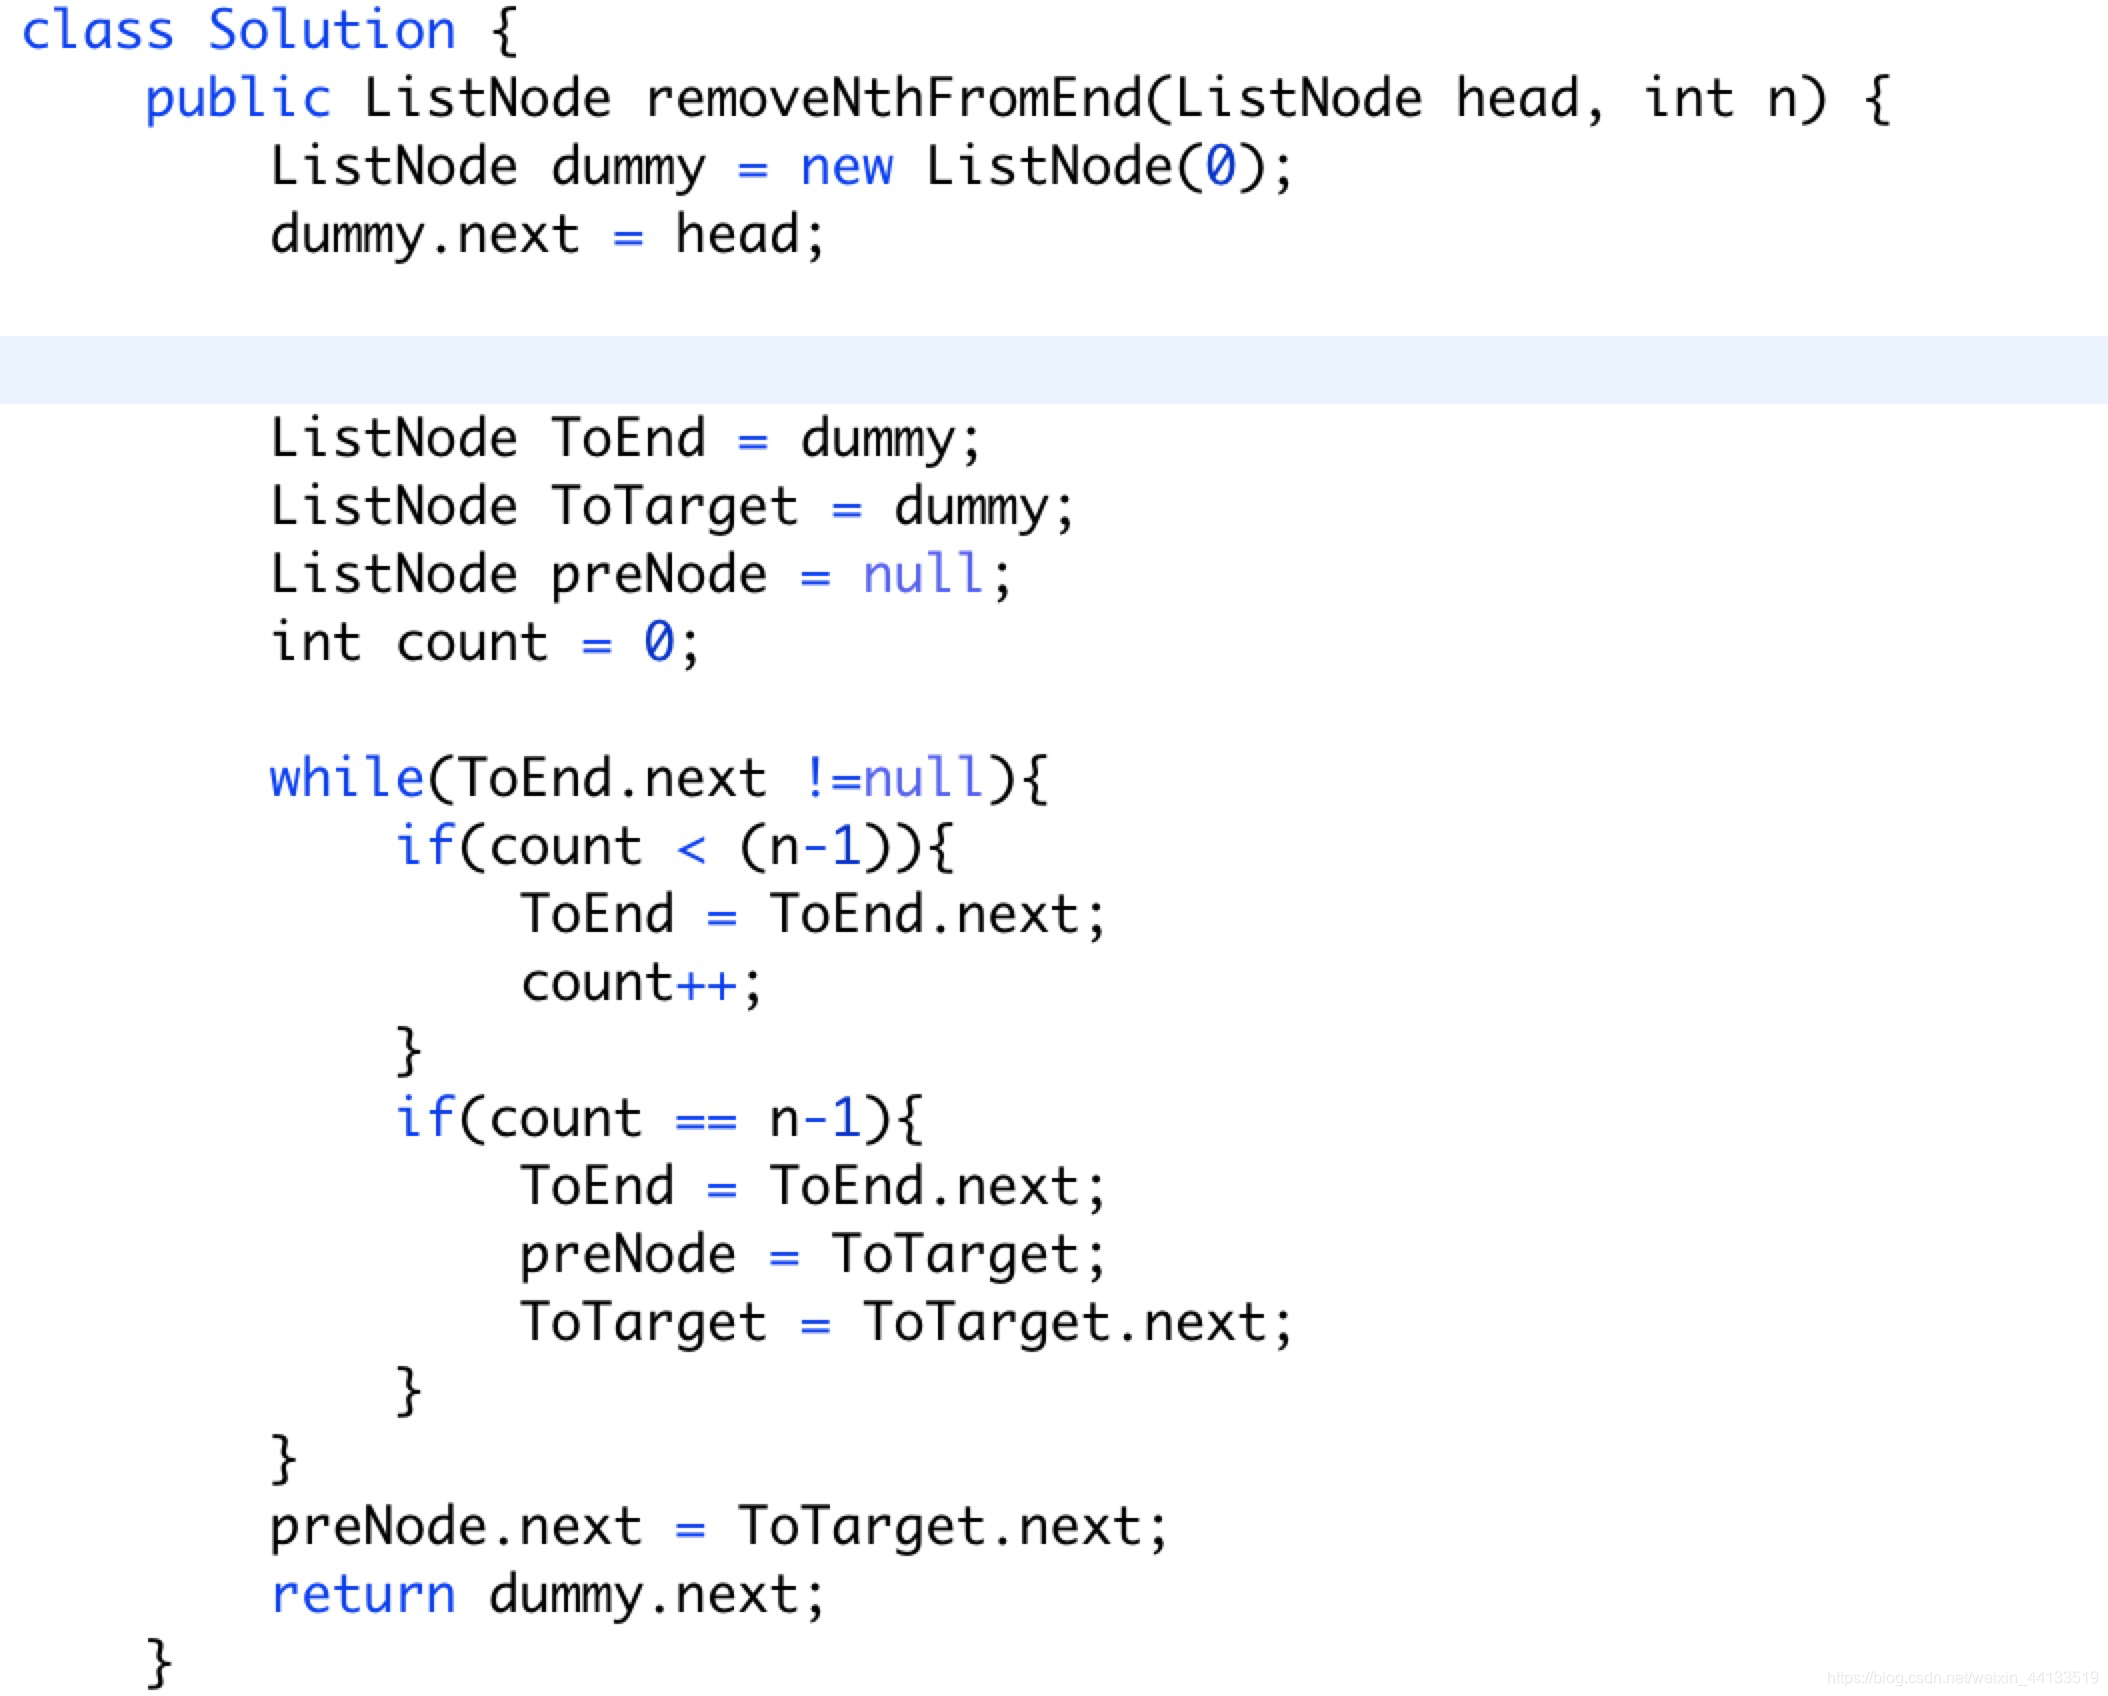
class Solution {
    public ListNode removeNthFromEnd(ListNode head, int n) {
        ListNode dummy = new ListNode(0);
        dummy.next = head;


        ListNode ToEnd = dummy;
        ListNode ToTarget = dummy;
        ListNode preNode = null;
        int count = 0;

        while(ToEnd.next !=null){
            if(count < (n-1)){
                ToEnd = ToEnd.next;
                count++;
            }
            if(count == n-1){
                ToEnd = ToEnd.next;
                preNode = ToTarget;
                ToTarget = ToTarget.next;
            }
        }
        preNode.next = ToTarget.next;
        return dummy.next;
    }
}
5. 链表相交 —160
/**
 * Definition for singly-linked list.
 * public class ListNode {
 *     int val;
 *     ListNode next;
 *     ListNode(int x) {
 *         val = x;
 *         next = null;
 *     }
 * }
 */
public ListNode getIntersectionNode(ListNode headA, ListNode headB) {
    int lena = 0;
    int lenb = 0;
    ListNode tempa = headA;
    ListNode tempb = headB;
    while(tempa != null){
        lena++;
        tempa = tempa.next;
    }
    while(tempb != null){
        lenb++;
        tempb = tempb.next;
    }
    tempa = headA;
    tempb = headB;
    if(lena > lenb){
        for (int i = 0; i < lena-lenb; i++) {
            tempa = tempa.next;
        }
    }
    else{
        for (int i = 0; i < lenb-lena; i++) {
            tempb = tempb.next;
        }
    }
    while(tempa != null &&  tempb != null && tempa.val != tempb.val){
        tempa = tempa.next;
        tempb = tempb.next;
    }
    return tempa;

}
四、扩展(链表的基本操作)
1.插入:(2种)
1)一种最简单,每个节点插入链表的头部:
private static void insertBackward(Node node) {        node.next = head;
    head = node;
    outputNode();
}
2)还有一种插入是插入链表尾部:即每次插入都遍历到链表尾部插入
private static void insertForward(Node node) {
   		if (node == null) {
            return;
        }
        if (head == null) {
            head = node;
        } else {
            Node cur = head;
            while (cur.next != null) {
                cur = cur.next;
            }
            cur.next = node;
        }
        outputNode();
}
2.链表查找: 遍历链表,找到对应的值返回即可
public static Node find(Object object) {
	if (object == null) {
        return null;
    }
    Node current = first;
    while (current != null) {
        if (current.value == object) {
            return current;
        }
        current = current.next;
    }
    return null;
}
3.链表删除:遍历链表,让链表的前一个节点指向需要删除的节点的下一个节点即可
  public static Node delete(Object object) {
  		if (object == null) {
            return null;
        }
        Node pre = first;
        Node current = first.next;
        if (first.value == object) {
            first = first.next;
            return first;
        }
        while (current != null) {
            if (current.value == object) {
                pre.next = current.next;
                first = pre;
                return first;
            }
            pre = current;
            current = current.next;
        }
        return null;
    }
熟悉了链表的基本操作,对链表的扩展也就很简单了。
五、链表反转思路讲解
由于链表的特性,链表的翻转需要一点点思考。
一般的逻辑就是遍历到最后一个节点,然后把前面的放在最后一个节点之后。但是问题就出现了:遍历到最后一个节点之后如何获取前面的节点呢?有人说我把这个节点复制一遍!这样就会增加不必要的空间消耗,不是很好的解决办法。
其实我们在遍历的过程中可以把每个节点存起来!
比如我们有一个链表:1 2
- currentNode = 1(2);(括号里是后面的节点)
- nextNode = currentNode.next = 2;
- 想要执行链表的翻转:把currentNode存到nextNode的next里就行了:nexNode.next = currentNode ---- > 2 1 2
我们看到上面的链表其实没有完成翻转,因为节点1的后面还有个节点2,多了一个节点,为什么会这样呢?因为currentNode.next也有值啊。
- 所以我们需要在翻转之前把currentNode的next的值删除:currentNode.next = null;
- 然后再进行翻转:nexNode.next = currentNode ---- > 2 1 null
public Node reverseNode(Node current) {
    //用next指向current的下一个节点
    Node nextNode = current.next;
    //将current的下一个节点置为null,这样这个节点就只有一个节点了
    current.next = null;
   //把当前节点放在nextNode节点之后,完成节点翻转
    nextNode.next = current;
    return nextNode;
}
上面这段代码很容易就完成了两个节点的翻转,那如果有多个节点呢?我们需要使用递归,假如我们写的方法是:
Node reverseLink(Node current)
我们进行如下过程模拟:
假如有链表:1 2 3 4 5
按照上面的步骤:
- Node currentNode = 1(2 3 4 5) 当前节点
- Node nextNode = currentNode.next = 2(3 4 5) 下一个节点
- currentNode.next = null 当前节点之后的都删除,防止链表多余
执行到这里我们应该怎么操作呢?假如我们完成翻转:
- nextNode.next = currentNode – > nextNode = 2 (1)
可以看出这样我们就失去了后面的节点。所以我们应该在翻转操作完成之前就进行递归,并把nextNode当做当前节点传到方法里:
- 利用递归 Node reverseNode = reverseLink(nextNode),继续执行我们刚才的步骤。那要递归到什么时候为止呢?当然是得到最后一个节点:
if (currentNode.next == null) {
	return currentNode;
}
也就是说当我们遍历到最后一个节点的时候,reverseNode = nextNode;此时nextNode = 5, currentNode = 4;
翻转可得: nextNode.next = currentNode = 5(4),也就是reverseNode = 5(4),此时相当于把反转过的节点放在了reverseNode中了。所以最后返回reverseNode即可。
由于currentNode和nextNode都是方法里的局部变量,所以会保存我们每一次递归的当前节点currentNode和下一个节点nextNode,而最后reverseNode保存已经反转过的链表。
当然是利用递归啦!从上面代码可以看出,翻转的真正的点在于能得到前一个节点并能保存当前节点,这样即使遍历到最后一个节点完成翻转之后还能回来继续翻转。
以上过程写成代码为:
public Node reverseLink(Node current) {
	//遍历到最后一个节点直接返回
    if (current.next == null) {
        return currentNode;
    }
    //用next指向current的下一个节点
    Node nextNode = current.next;
    //将current的下一个节点置为null,这样这个节点就只有一个节点了
    current.next = null;
   //当前节点已经保存current中,递归nextNode,一直到最后一个节点
    Node reverseNode = reverseLink(nextNode);
   //把当前节点放在nextNode节点之后,完成节点翻转
    nextNode.next = current;
   //翻转之后的链表都存在reverseNode中,所以最后返回它就可以
    return reverseNode;
}
链表翻转递归的思想就是:遍历链表并保存当前的节点和前一个节点,每次翻转两个节点之后返回继续翻转
可是面试官的套路是,但凡能让你用递归完成的算法,都会让你用非递归方式再完成一次:
如何用非递归方式完成链表翻转呢?其实非递归的方式涉及当前节点的保存,下一个节点的保存和下一个节点之后的链表保存,因为如果不保存下一个节点之后的链表,翻转之后就会丢失后面的节点,这一点前面我们已经讨论过了。所以非递归代码如下:
private static void reverseNoRecursive() {
	Node pre = null;
    while (head != null) {
        Node t = head.next;
        head.next = pre;
        pre = head;
        head = t;
    }
    head = pre;
}
至此链表的翻转已经讲完了。


 722
722


 被折叠的 条评论
为什么被折叠?
被折叠的 条评论
为什么被折叠?
 到【灌水乐园】发言


