


1.SpringMVC架构


2.入门案例1
2.1入门案例1
2.1.1第一步 配置环境(导包)
5 spring + 2 MVC + 1 logging 导一个就ok
导入servlet-api提供编译
<?xml version="1.0" encoding="UTF-8"?>
<project xmlns="http://maven.apache.org/POM/4.0.0"
         xmlns:xsi="http://www.w3.org/2001/XMLSchema-instance"
         xsi:schemaLocation="http://maven.apache.org/POM/4.0.0 http://maven.apache.org/xsd/maven-4.0.0.xsd">
    <modelVersion>4.0.0</modelVersion>

    <groupId>com.qyt</groupId>
    <artifactId>exercise1-introduction1</artifactId>
    <version>1.0-SNAPSHOT</version>
    <packaging>war</packaging> //不要忘了,会自动帮你创建一个exploded war结尾的artifact

    <dependencies>
        <dependency>
            <groupId>org.springframework</groupId>
            <artifactId>spring-webmvc</artifactId>
            <version>5.2.8.RELEASE</version>
        </dependency>
        <dependency>
            <groupId>javax.servlet</groupId>
            <artifactId>servlet-api</artifactId>
            <version>3.0-alpha-1</version>
            <scope>provided</scope>
        </dependency>
    </dependencies>

</project>
2.1.2 第二步 web.xml配置前端控制器
在main文件夹下新建一个web.xml

创建web.xml有两种方式,一种是通过project Structure创建。

另一种是在指定文件夹下通过已经创建好的web.xml文件模板创建。
注意通过模板新建文件时文件夹之间不要写 . ,应当写/

<?xml version="1.0" encoding="UTF-8"?>
<web-app xmlns="http://xmlns.jcp.org/xml/ns/javaee"
         xmlns:xsi="http://www.w3.org/2001/XMLSchema-instance"
         xsi:schemaLocation="http://xmlns.jcp.org/xml/ns/javaee http://xmlns.jcp.org/xml/ns/javaee/web-app_4_0.xsd"
         version="4.0">
    <servlet>
        <servlet-name>dispatcher</servlet-name>
        <servlet-class>org.springframework.web.servlet.DispatcherServlet</servlet-class>
        <init-param>
            <param-name>contextConfigLocation</param-name>
            <param-value>classpath:application.xml</param-value>
        </init-param>
    </servlet>
    <servlet-mapping>
        <servlet-name>dispatcher</servlet-name>
        <url-pattern>/</url-pattern>
    </servlet-mapping>
</web-app>
2.1.3 第三步 application.xml配置springmvc依赖的bean
在resoureces目录下新建application.xml
<?xml version="1.0" encoding="UTF-8"?>
<beans xmlns="http://www.springframework.org/schema/beans"
       xmlns:xsi="http://www.w3.org/2001/XMLSchema-instance"
       xmlns:context="http://www.springframework.org/schema/context"
       xmlns:aop="http://www.springframework.org/schema/aop"
       xsi:schemaLocation="
        http://www.springframework.org/schema/beans https://www.springframework.org/schema/beans/spring-beans.xsd
        http://www.springframework.org/schema/context https://www.springframework.org/schema/context/spring-context.xsd
        http://www.springframework.org/schema/aop https://www.springframework.org/schema/aop/spring-aop.xsd">
    <context:component-scan base-package="com.qyt"/>
    <!--映射器:将组件id和url建立映射关系(就是根据url找到对应的后端控制器Controller)-->
    <bean class="org.springframework.web.servlet.handler.BeanNameUrlHandlerMapping"/>

    <!--简单控制器的适配器-->
    <bean class="org.springframework.web.servlet.mvc.SimpleControllerHandlerAdapter"/>

    <!--第一个案例中handler是一个组件-->
</beans>
2.1.4 第四步 实现请求处理类并配置访问url
把url的请求映射到Handler
HelloHandler.java
import org.springframework.stereotype.Component;
import org.springframework.web.servlet.ModelAndView;
import org.springframework.web.servlet.mvc.Controller;

import javax.servlet.http.HttpServletRequest;
import javax.servlet.http.HttpServletResponse;

@Component("/hello")//组件id作为url
public class HelloHandler implements Controller {//实现Controller接口,重写方法
    @Override
    public ModelAndView handleRequest(HttpServletRequest httpServletRequest, HttpServletResponse httpServletResponse) throws Exception {
        ModelAndView modelAndView = new ModelAndView();
        modelAndView.setViewName("/WEB-INF/jsp/hello.jsp");//view视图
        modelAndView.addObject("content","springmvc");//model数据
        return modelAndView;
    }
}
hello.jsp
<%@ page contentType="text/html;charset=UTF-8" language="java" %>
<html>
<head>
    <title>Title</title>
</head>
<body>
    hello ${content}
</body>
</html>
2.1.5第五步 实现结果视图

2.2入门案例2
第一个案例中handler以组件的形式存在,一个url映射到一个handler组件上(类),这样很繁琐。
入门案例2对1做了改进,handler以方法的形式存在,是容器中Conroller组件的方法,url会直接映射到方法上。
2.2.1.引入依赖
同入门案例1。
2.2.2.web.xml配置DispatherServlet
同入门案例1。
2.2.3.application.xml
<?xml version="1.0" encoding="UTF-8"?>
<beans xmlns="http://www.springframework.org/schema/beans"
       xmlns:xsi="http://www.w3.org/2001/XMLSchema-instance"
       xmlns:context="http://www.springframework.org/schema/context"
       xmlns:aop="http://www.springframework.org/schema/aop"
       xmlns:mvc="http://www.springframework.org/schema/mvc"
       xsi:schemaLocation="
        http://www.springframework.org/schema/beans https://www.springframework.org/schema/beans/spring-beans.xsd
        http://www.springframework.org/schema/context https://www.springframework.org/schema/context/spring-context.xsd
        http://www.springframework.org/schema/mvc https://www.springframework.org/schema/mvc/spring-mvc.xsd
        http://www.springframework.org/schema/aop https://www.springframework.org/schema/aop/spring-aop.xsd">
    <context:component-scan base-package="com.qyt"/>

    <!--RequestMappingHandlerMapping
        RequestMappingHandlerAdapter
        @RequestMapping全新注解 handler方法 → 携带url信息
        handler方法要在Controller组件中
    -->
    <--注解驱动-->
    <mvc:annotation-driven/>
</beans>
2.2.4.引入@controller注解
org.springframework.stereotype.Controller注解类型用于指示spring类的实例是一个控制器,其注解形式是@Controller。
使用该注解时不需要再实现Controller接口,只需将注解加到控制类上,然后通过spring的扫描机制找到标注该注解的控制器。
url映射到Controller组件中的方法上,一个handler方法是一个处理请求方法。
url的/可以省略不写,可写可不写,没有会自动帮你补全。
UserController.java
import org.springframework.stereotype.Controller;
import org.springframework.web.bind.annotation.RequestMapping;
import org.springframework.web.servlet.ModelAndView;

@Controller
public class UserController {
    @RequestMapping("/login")
    public ModelAndView hello(){
        ModelAndView modelAndView = new ModelAndView();
        modelAndView.setViewName("/WEB-INF/jsp/hello.jsp");
        modelAndView.addObject("content", "springmvc2");
        return modelAndView;
    }

    @RequestMapping("/register")
    public ModelAndView hello2(){
        ModelAndView modelAndView = new ModelAndView();
        modelAndView.setViewName("/WEB-INF/jsp/hello.jsp");
        modelAndView.addObject("content", "register");
        return modelAndView;
    }
}
hello.jsp同上。
2.2.5运行结果


3.Handler方法的使用
3.1@RequestMapping的使用
@RequestMapping可以标注在一个方法上或一个类上。
3.1.1URL路径映射
标注在一个方法上,该方法成为一个处理方法,将请求url和handler方法建立映射关系。注解的value属性就是要映射到方法上的url,value可以省略不写。
3.1.1.1将多个请求url映射到同一个handler方法上
@Controller
public class RequestMappingController {
// @RequestMapping中的value属性值接收的是数组,可以写多个url
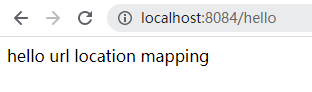
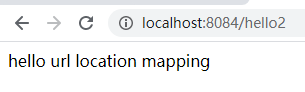
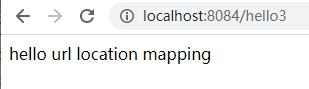
@RequestMapping({"hello","hello2","hello3"})
public ModelAndView hello(){
ModelAndView modelAndView = new ModelAndView();
modelAndView.setViewName("/WEB-INF/jsp/hello.jsp");
modelAndView.addObject("content", "url location mapping");
return modelAndView;
}
}
访问配置的不同url,访问到的都是一个jsp
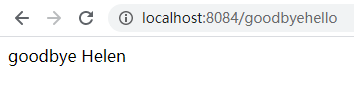
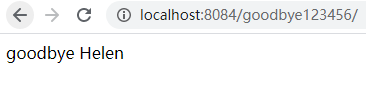
3.1.1.2 url可以使用*来通配
goodbyeXXX 用 goodbye * 通配
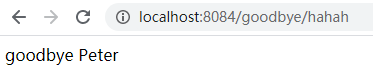
goodbyeXXX用goodbye/ * 通配
@RequestMapping("goodbye*")
public ModelAndView goodbye(){
     ModelAndView modelAndView = new ModelAndView();
     modelAndView.setViewName("/WEB-INF/jsp/goodbye.jsp");
     modelAndView.addObject("content", "Helen");
     return modelAndView;
 }
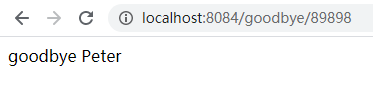
@RequestMapping("goodbye/*")
    public ModelAndView goodbye2(){
        ModelAndView modelAndView = new ModelAndView();
        modelAndView.setViewName("/WEB-INF/jsp/goodbye.jsp");
        modelAndView.addObject("content", "Peter");
        return modelAndView;
    }
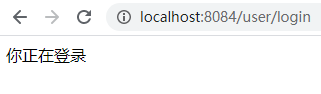
3.1.2窄化请求映射
@RequestMapping也可以加在一个类上,用于窄化请求。
user/login handler方法上 → “login”
user/register handler方法上 → “register”
user/logout handler方法上 → “logout”
提取出来的user → 放在Controller组件上 → @RequestMapping(“user”)
@Controller
@RequestMapping("user")
public class ShortenController {
@RequestMapping("login")
public ModelAndView login(){
ModelAndView modelAndView = new ModelAndView();
modelAndView.setViewName("/WEB-INF/jsp/user.jsp");
modelAndView.addObject("operation","登录");
return modelAndView;
}
@RequestMapping("register")
public ModelAndView register(){
ModelAndView modelAndView = new ModelAndView();
modelAndView.setViewName("/WEB-INF/jsp/user.jsp");
modelAndView.addObject("operation","注册");
return modelAndView;
}
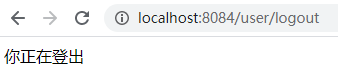
@RequestMapping("logout")
public ModelAndView logout(){
ModelAndView modelAndView = new ModelAndView();
modelAndView.setViewName("/WEB-INF/jsp/user.jsp");
modelAndView.addObject("operation","登出");
return modelAndView;
}
}

窄化请求使用过程中常见问题

还可以使用@RequestMapping的不同属性做一些限定。
3.1.3.请求方法限定
@Controller
public class RequestMethodLimitController {
	//单个请求方法的限定:限定请求方法是GET方法
    @RequestMapping(value = "method/get",method = RequestMethod.GET)
        public ModelAndView getMethod(){
        ModelAndView modelAndView = new ModelAndView();
        modelAndView.setViewName("/WEB-INF/jsp/method.jsp");
        modelAndView.addObject("method","GET");
        return modelAndView;
    }
    //单个请求方法的限定:限定请求方法是POST方法
    @RequestMapping(value = "method/post",method = RequestMethod.POST)
    public ModelAndView postMethod(){
        ModelAndView modelAndView = new ModelAndView();
        modelAndView.setViewName("/WEB-INF/jsp/method.jsp");
        modelAndView.addObject("method","POST");
        return modelAndView;
    }
    //多个请求方法的限定:多个请求方法之间的限定关系是OR,请求方法是其中的任意一种就可以
    //这里的属性method是一个数组,以{}包裹
    @RequestMapping(value = "method/multi",method = {RequestMethod.GET,RequestMethod.POST})
    public ModelAndView multiMethod(){
        ModelAndView modelAndView = new ModelAndView();
        modelAndView.setViewName("/WEB-INF/jsp/method.jsp");
        modelAndView.addObject("method","GET或POST");
        return modelAndView;
    }
}
第一个是通过浏览器进行访问,下面两个post请求通过postman向服务器发送请求。

引申注解:
上面对请求方法的限定可以使用两个注解替代。
@GetMapping = @RequestMapping(method=RequestMethod.GET)
@PostMapping=@RequestMapping(method=RequestMethod.POST)

3.1.4.请求参数限定
3.1.4.1限定是否有对应的请求参数
@Controller
@RequestMapping("parameter/limit")
public class ParameterLimitController {
    @RequestMapping(value = "login",params = "username")
    public ModelAndView login(){
        ModelAndView modelAndView = new ModelAndView();
        modelAndView.setViewName("/WEB-INF/jsp/paramlimit.jsp");
        return modelAndView;
    }
}

当请求未携带指定的参数时,会报400的错误。
状态码400:请求参数错误。
携带请求参数username时,页面正确显示。

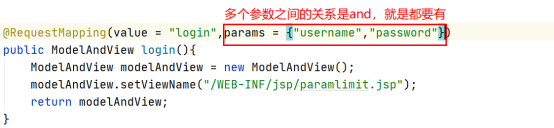
3.1.4.2多个限定请求参数之间是and的关系:

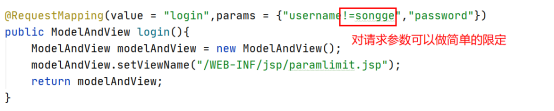
3.1.4.3请求参数的值的简单限定
3.1.5.请求头的限定
请求头在哪? Request Headers
与请求参数的限定类似,可以对有哪些请求头限定,也可以对请求头的值做简单的限定。
3.1.5.1通用的限定
多个请求头限定之间的关系and,所有请求头必须都有。
@Controller
@RequestMapping("header/limit")
public class HeaderLimitController {
    @RequestMapping(value = "hello",headers = {"abc","def"})
    public ModelAndView hello(){
        ModelAndView modelAndView = new ModelAndView();
        modelAndView.setViewName("/WEB-INF/jsp/headerlimit.jsp");
        return modelAndView;
    }
}
3.1.5.2特定的请求头
Accept 请求头(接收数据的格式)对应@RequestMapping注解属性→ produces
Accept 请求头的值一般是application/XXX形式
@RequestMapping(value = "accept",produces = "application/abc")
public ModelAndView accept(){
    ModelAndView modelAndView = new ModelAndView();
    modelAndView.setViewName("/WEB-INF/jsp/headerlimit.jsp");
    return modelAndView;
}
参数不匹配时报错。

Content-type (正文类型)请求头对应@RequestMapping注解属性 → consumes
Content-type (正文类型)请求头一般是application/XXX形式
@RequestMapping(value = "content/type",consumes = "application/def")
public ModelAndView contentType(){
    ModelAndView modelAndView = new ModelAndView();
    modelAndView.setViewName("/WEB-INF/jsp/headerlimit.jsp");
    return modelAndView;
}
参数不匹配时报错

3.2Handler方法的返回值
常见的返回类型有void,ModelAndView和String。其中,ModelAndView类型中可以添加Model数据,并指定视图。String类型的返回值可以跳转视图,但不能携带数据。void类型主要在异步请求时使用,只返回数据,不会跳转视图。
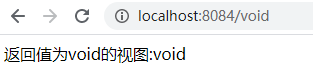
3.2.1void
利用request和response来做 ,通过request和response来处理视图和模型数据→ 就是在servlet中的用法
@RequestMapping("void")
    public void aVoid(HttpServletRequest request, HttpServletResponse response) throws ServletException, IOException {
        request.setAttribute("content", "void");
        request.getRequestDispatcher("/WEB-INF/jsp/void.jsp").forward(request,response);
    }
3.2.2ModelAndView
其实上面的案例一直在用
setViewName()方法
addObject()方法
由于ModelAndView类型未能实现数据与视图之间的解耦,因此在开发时,通常使用String。
虽然String类型的返回值不能携带数据,但是可以增加一个Model类型的参数处理数据。
3.2.3String
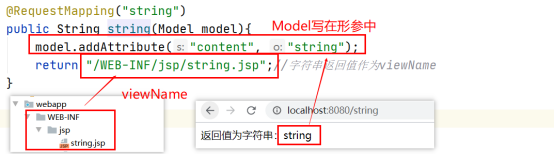
3.2.3.1物理视图名
返回类型为字符串类型,return返回的字符串直接作为视图名,形参中可以传入Model用于处理数据。
3.2.3.2逻辑视图名
Viewname = prefix + 返回值 + suffix
配置application.xml
<bean class="org.springframework.web.servlet.view.InternalResourceViewResolver">
        <property name="prefix" value="/WEB-INF/jsp/"/>
        <property name="suffix" value=".jsp"/>
    </bean>
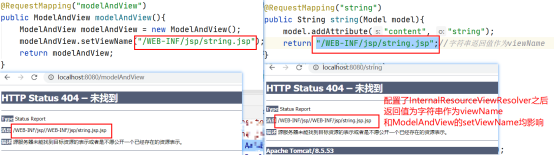
写完逻辑视图后,原来的物理视图报错。
对原来的ModelAndView也有影响,都是因为发生了字符串拼接,导致错误的jsp文件的路径找不到文件,报404错误。
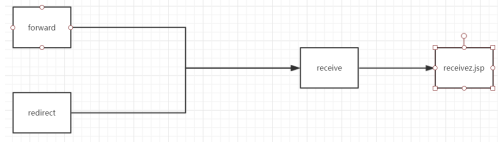
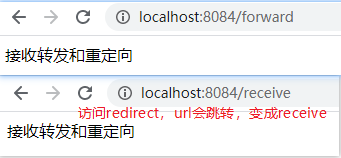
3.2.3.3 转发和重定向到另一个请求
只是对请求的处理,而非jsp的视图处理。
@Controller
public class ForwardRedirectController {
    @RequestMapping("forward") //转发请求到receive
    public String forward(){
        return "forward:/receive";
    }
    @RequestMapping("redirect")//重定向到receive
    public String redirect(){
        return "redirect:/receive";
    }
    @RequestMapping("receive")
    public String receive(){
        return "receivez";//这里是作为逻辑视图名使用
    }
}
视图名和转发重定向最前面记得加上个/
如果没有加/的话,就是相对路径 → 相对于你当前的handler方法映射的url,按照某个规律来相对
→ 去掉请求url的最后一级 加上对应的值
abc/def/hij “WEB-INF/jsp/hello.jsp” → abc/def/ WEB-INF/jsp/hello.jsp
abc “WEB-INF/jsp/hello.jsp” → WEB-INF/jsp/hello.jsp
abc/def/hij “forward:hello” → abc/def/hello


 1097
1097


 被折叠的 条评论
为什么被折叠?
被折叠的 条评论
为什么被折叠?
 到【灌水乐园】发言


