


配置文件
准备步骤
建立实体类
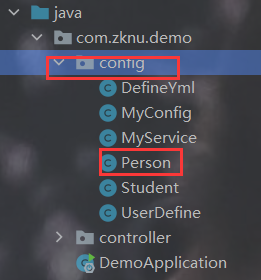
为了方便查看最后效果,先在com.zknu.demo下建一个空包config,在config下建一个实体类Person
在类中定义几个变量,写好get set toString方法
package com.zknu.demo.config;


public class Person {
    private int id;
    private String name;

    public void setId(int id) {
        this.id = id;
    }

    public String getName() {
        return name;
    }

    public void setName(String name) {
        this.name = name;
    }

    public int getId() {
        return id;
    }

    @Override
    public String toString() {
        return "Person{" +
                "id=" + id +
                ", name='" + name + '\'' +
                '}';
    }
}
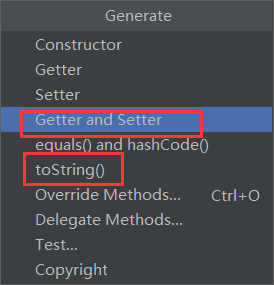
快速生成get set toString方法:
右键选择Genrate

选择所需方法即可
编写测试方法
如图所示,test为我们的测试文件

在测试类下写测试方法:
    @Autowired   // 初始化  相当于 java 中的 new
    private HelloSpring helloSpring;
    @Test  //  测试入口
    public void HelloSpringTest(){
        System.out.println( helloSpring.hello() );
    }
HelloSpring是上一节的 建立一个简单文件——HelloSpring
https://blog.csdn.net/weixin_44162239/article/details/114791569?spm=1001.2014.3001.5502
测试前需要先启动程序启动类
测试类中可以写多个测试方法,在每个测试方法上右键运行可以运行不同的方法
建立配置文件
配置文件常用的两种形式:.properties文件 和 .yml(等同于.yaml) 以及xml文件
还分为自定义配置文件和全局配置文件。
全局配置文件的文件名必须为application
建立文件:
找到resources文件夹,在其下面建立文件即可

配置文件的分类及语法
yml 文件
后缀名为.yaml 和 .yml是一样的
yml文件语法:
key:(空格)value
会有自动缩进的层级关系
person:
  id: 86   // 中间有空格
  name: wrk
//  基本数据类型
// 数组或单列集合类型
person:
  hobby:
    - play
    - read
或

person:
  hobby:
    play,
    read
或
person:
  hobby: [play,read]
properties文件
person.id = 86    //  等同于yml的 person:
									id: 86
student.name = wrk
注意:所有字符串类型都不用加 双引号 或 单引号
在配置文件中 双引号表示可转义的字符串,单引号表示不可转义字符串
eg.
person.id = 86
student.name = "wrk \n wrk"

// 输出:
wrk
wrk

person.id = 86
student.name = 'wrk \n wrk'

//输出:wrk \n wrk
全局配置文件
全局配置文件的名称必须为 application
创建配置文件:
resource右键

使用 @ConfigurationProperties注入属性
在Person类前加
@Component  // 将Person类注入到Spring容器中
@ConfigurationProperties(prefix = "person")
//  将配置文件中以person开头的属性注入到该类中
所有源代码:
Person类:
package com.zknu.demo.config;

import org.springframework.boot.context.properties.ConfigurationProperties;
import org.springframework.stereotype.Component;

@Component
@ConfigurationProperties(prefix = "person")
public class Person {
    private int id;
    private String name;

    public void setId(int id) {
        this.id = id;
    }

    public String getName() {
        return name;
    }

    public void setName(String name) {
        this.name = name;
    }

    public int getId() {
        return id;
    }

    @Override
    public String toString() {
        return "Person{" +
                "id=" + id +
                ", name='" + name + '\'' +
                '}';
    }
}
测试方法:
@Autowired
    private Person person;
    @Test
    public void PersonTest(){
        System.out.println(person);
    }
配置文件:
yml文件同
person.id = 86
person.name = wrk
运行结果:

使用@Value注入属性
示例代码:
@Component
public class Person {
    @Value("${person2.id}")
    private int id;
所有源码
Person类:
package com.zknu.demo.config;

import org.springframework.beans.factory.annotation.Value;
import org.springframework.stereotype.Component;

@Component
public class Person {
    @Value("${person2.id}")
    private int id;
    @Value("${person2.name}")
    private String name;

    @Override
    public String toString() {
        return "Person2{" +
                "id=" + id +
                ", name='" + name + '\'' +
                '}';
    }
}
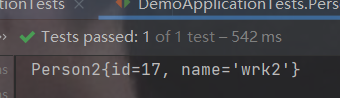
yml文件:
person2:
  id: 17
  name: wrk2
测试类代码:同上
运行结果:
配置自定义配置文件
使用@PropertySource配置文件
核心代码:
@Configuration
@PropertySource("classpath:student.properties")   //  自定义配置文件名称
@EnableConfigurationProperties(Student.class)   //  开启注入功能  值为 该类的class文件
@ConfigurationProperties(prefix = "student")    //   注入的前缀
所有源码:
Student类:
package com.zknu.demo.config;

import org.springframework.boot.context.properties.ConfigurationProperties;
import org.springframework.boot.context.properties.EnableConfigurationProperties;
import org.springframework.context.annotation.Configuration;
import org.springframework.context.annotation.PropertySource;

@Configuration
@PropertySource("classpath:student.properties")   //  自定义配置文件名称
@EnableConfigurationProperties(Student.class)   //  开启注入功能  值为 该类的class文件
@ConfigurationProperties(prefix = "student")    //   注入的前缀
public class Student {

    private String name;

    public String getName() {
        return name;
    }

    public void setName(String name) {
        this.name = name;
    }

    @Override
    public String toString() {
        return "Student{" +
                "name='" + name + '\'' +
                '}';
    }
}
自定义的properties文件
student.name = wrk
测试类:
@Autowired
    private Student student;
    @Test
    public void StudentTest(){
        System.out.println(student);
    }
注意!!!!
此方法对自定义的yml无效,对yml文件的运行结果为空

yml文件只能用@Value方法注入值
想用@Configuration只能自己写方法,我还没学会。
package com.zknu.demo.config;

import org.springframework.beans.factory.annotation.Value;
import org.springframework.boot.context.properties.ConfigurationProperties;
import org.springframework.boot.context.properties.EnableConfigurationProperties;
import org.springframework.context.annotation.Configuration;
import org.springframework.context.annotation.PropertySource;

@Configuration
@PropertySource("classpath:data.yml")
@EnableConfigurationProperties(DefineYml.class)
@ConfigurationProperties(prefix = "abc")
public class DefineYml {
    @Value("${id}")
    private int id;
    @Value("${name}")
    private String name;
    @Value("${age}")
    private int age;

    @Override
    public String toString() {
        return "DefineYml{" +
                "id=" + id +
                ", name='" + name + '\'' +
                ", age=" + age +
                '}';
    }
}
自定义yml文件
abc:
  id: 86
  name: wrk
  age: 20
运行结果:


 280
280


 被折叠的 条评论
为什么被折叠?
被折叠的 条评论
为什么被折叠?
 到【灌水乐园】发言


