


1、背景
项目中经常会用到类似一些需要延迟执行的功能,比如缓存。java提供了DelayQueue来很轻松的实现这种功能。Delayed接口中的getDelay方法返回值小于等于0的时候,表示时间到达,可以从DelayQueue中通过take()方法取的到期的对象。到期对象是实现了Delayed的类。
2、demo
2.1 依赖配置
        <dependency>
            <groupId>org.springframework.boot</groupId>
            <artifactId>spring-boot-starter-web</artifactId>
        </dependency>
2.2 整体架构
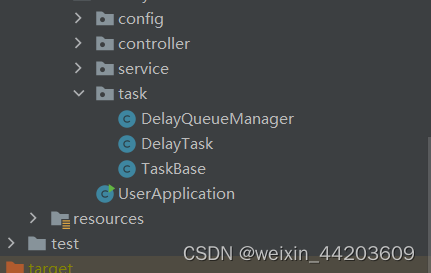
工具类TaskBase:
执行任务所需的基础参数
import lombok.Data;

@Data
public class TaskBase {
    //任务参数,根据业务需求多少都行
    private Long identifier;

    public TaskBase(Long identifier) {
        this.identifier = identifier;
    }
}
执行的任务和时间DelayTask
import java.text.SimpleDateFormat;
import java.util.Date;
import java.util.concurrent.Delayed;
import java.util.concurrent.TimeUnit;

/**
 * 延时任务
 */
public class DelayTask implements Delayed {
    //任务参数
    final private TaskBase data;
    //任务的延时时间,单位天
    final private long startTime;

    /**
     * 构造延时任务
     *
     * @param data 业务数据
     */
    public DelayTask(TaskBase data) {
        super();
        this.data = data;
        this.startTime = System.currentTimeMillis() + TimeUnit.DAYS.toMillis(3);
    }
    /**
     * 取消延时任务
     *
     * @param data   业务数据
         * @param startTime 任务延时时间(ms)
     */
    public DelayTask(TaskBase data,long startTime) {
        super();
        this.data = data;
//        this.expire = expire + System.currentTimeMillis();
        this.startTime = System.currentTimeMillis() + startTime;
    }
    public TaskBase getData() {
        return data;
    }

    public long getExpire() {
        return startTime;
    }

    @Override
    public boolean equals(Object obj) {
        if (obj instanceof DelayTask) {
            return this.data.getIdentifier().equals(((DelayTask) obj).getData().getIdentifier());
        }
        return false;
    }

    @Override
    public String toString() {
        Date dNow = new Date();
        SimpleDateFormat simpleDateFormat = new SimpleDateFormat("yyyy-MM-dd HH:mm:ss");
        String time = simpleDateFormat.format(dNow);
        return "{" + "data:" + data.toString() + "," + "延时时间:" +startTime+ time + "}";
    }

    @Override
    public long getDelay(TimeUnit unit) {
        return unit.convert(startTime - System.currentTimeMillis(), unit);

//        return unit.convert(this.expire - System.currentTimeMillis(), unit);
    }

    @Override
    public int compareTo(Delayed o) {
        long delta = getDelay(TimeUnit.NANOSECONDS) - o.getDelay(TimeUnit.NANOSECONDS);
        return (int) delta;
    }
}
任务管理器DelayQueueManager:
import com.baomidou.mybatisplus.core.conditions.query.QueryWrapper;
import com.byd.common.db.entity.Observe;
import com.byd.common.db.entity.Problem;
import com.byd.common.db.mapper.ObserveMapper;
import com.byd.common.db.mapper.ProblemMapper;
import lombok.extern.slf4j.Slf4j;
import org.springframework.beans.factory.annotation.Autowired;
import org.springframework.boot.CommandLineRunner;
import org.springframework.stereotype.Component;

import java.text.SimpleDateFormat;
import java.util.Date;
import java.util.HashMap;
import java.util.Map;
import java.util.concurrent.DelayQueue;
import java.util.concurrent.Executors;

@Component
@Slf4j
public class DelayQueueManager implements CommandLineRunner {
    @Autowired
    private ObserveMapper observeMapper;
    @Autowired
    private ProblemMapper problemMapper;
    private final Map<Long, DelayTask> elements = new HashMap<>();
    private final DelayQueue<DelayTask> delayQueue = new DelayQueue<>();


    /**
     * 加入到延时队列中
     * @param task
     */
    public void put(DelayTask task) {
        log.error("加入延时任务:{}", task);
        delayQueue.put(task);
        elements.put(task.getData().getIdentifier(),task);
    }

    /**
     * 取消延时任务
     *
     * @param task
     * @return
     */
    public boolean remove(DelayTask task) {
        log.error("取消延时任务:{}", task);
        return delayQueue.remove(task);
    }
    /**
     * 查询延时任务
     * @param taskID
     * @return
     */
    public DelayTask query(Long taskID) {
        return elements.get(taskID);
    }
    /**
     * 取消延时任务
     * @param taskid
     * @return
     */
    public boolean remove(Long taskid) {
        return remove(new DelayTask(new TaskBase(taskid),0));
    }

    @Override
    public void run(String... args) throws Exception {
        log.info("初始化延时队列");
        Executors.newSingleThreadExecutor().execute(new Thread(this::excuteThread));
    }

    /**
     * 延时任务执行线程
     */
    private void excuteThread() {
        while (true) {
            try {
                DelayTask task = delayQueue.take();
                //执行任务
                processTask(task);
            } catch (InterruptedException e) {
                break;
            }
        }
    }

    /**
     * 内部执行延时任务
     *
     * @param task
     */
    private void processTask(DelayTask task) {
        //获取任务参数,执行业务task.getData().getIdentifier()
        log.error("执行延时任务:{}-{}", task, task.getData().getIdentifier());
    }
}
2.3 进行测试
import com.example.demo.task.DelayQueueManager;
import com.example.demo.task.DelayTask;
import com.example.demo.task.TaskBase;
import org.junit.jupiter.api.Test;
import org.springframework.beans.factory.annotation.Autowired;
import org.springframework.boot.test.context.SpringBootTest;

@SpringBootTest
class DemoApplicationTests {
    @Autowired
    private DelayQueueManager delayQueueManager;

    @Test
    void contextLoads() throws InterruptedException {
        Long problemId=Long.valueOf(2);
       //1、如果之前已存在延时任务则删除
        if(delayQueueManager.query(problemId)!=null){
            delayQueueManager.remove(problemId);
        }
        //2、新增任务
        delayQueueManager.put(new DelayTask(new TaskBase(problemId)));

    }

}


 548
548


 被折叠的 条评论
为什么被折叠?
被折叠的 条评论
为什么被折叠?
 到【灌水乐园】发言


