


【背景】
首先,出于新旧两台电脑交替使用Python进行数据入库等的协同工作需求,在下面这篇帖子的推荐下,打开了谷歌Colaboratory Google提供的在线编辑器
(https://colab.research.google.com)
—— ——
Google推出了牛逼的Python在线编辑器,以后协同项目代码就省心了(https://blog.csdn.net/seoyundu/article/details/90131364)
【报错】
本地代码贴进来准备运行的时候,连接不上(如图)。
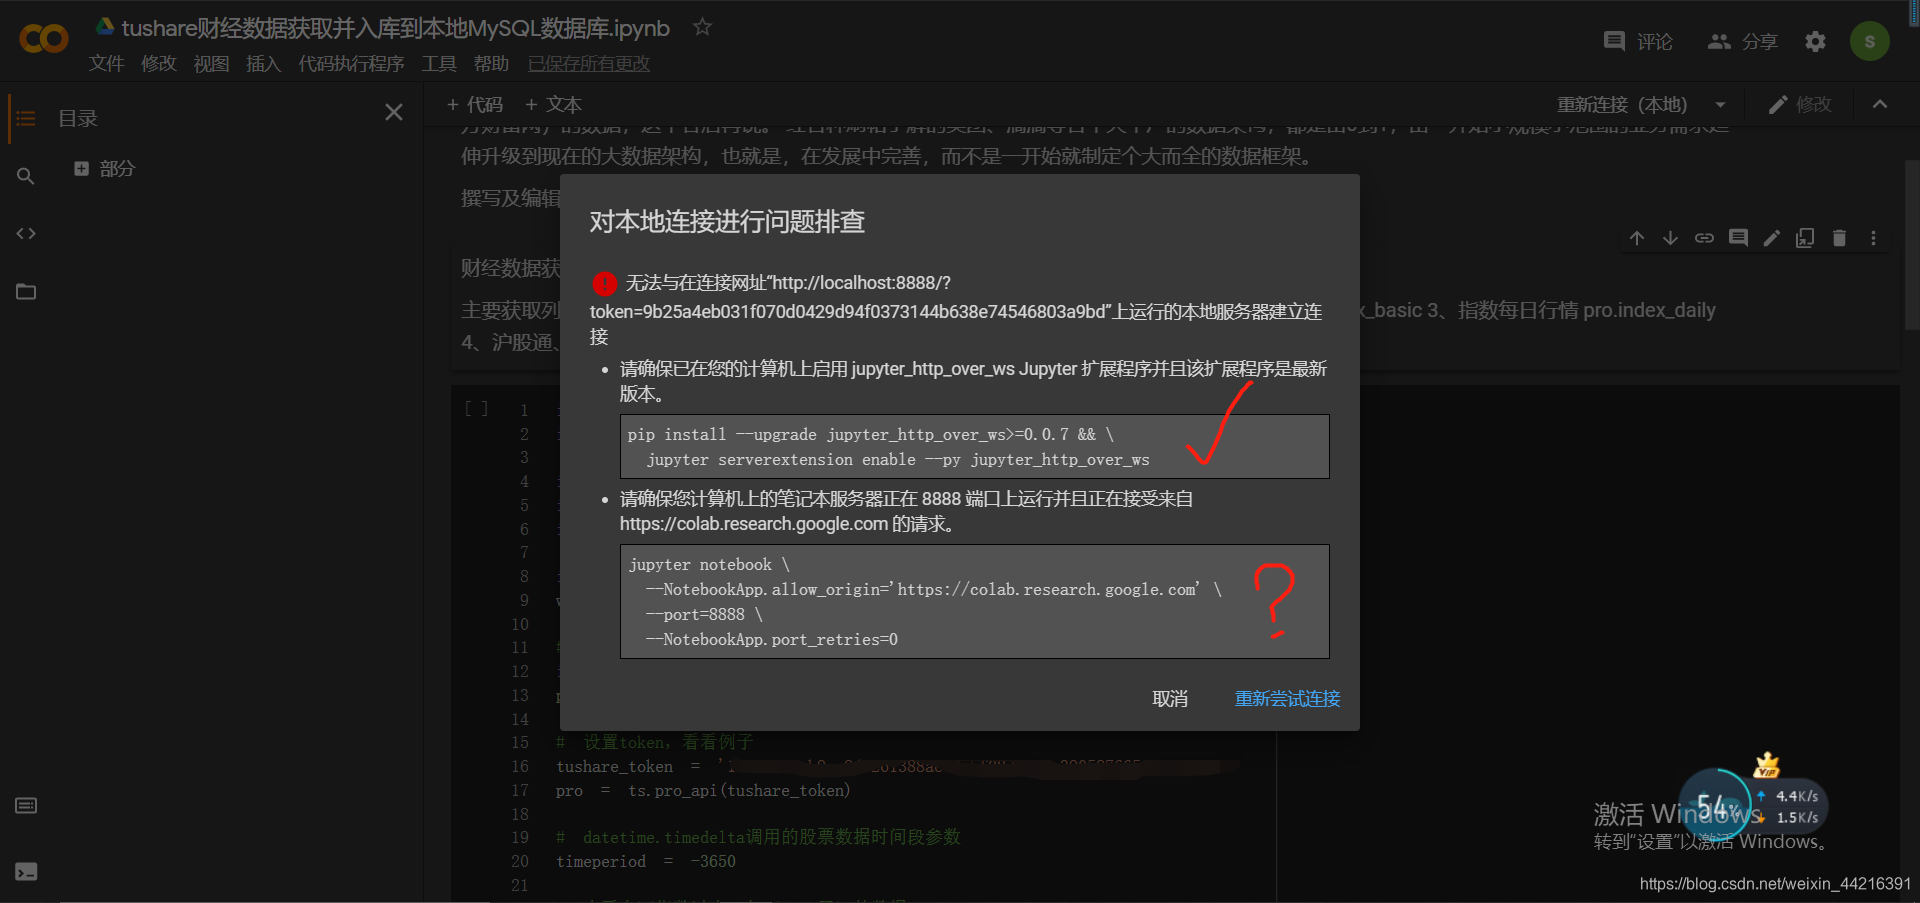
【结果】
按照提示,pip了四个东东,搞定,连接成功。
【解决过程】
这有个帖子,pip代码齐全。叠加colab报错提示,我pip了帖子里的step2和step3.
附上帖子地址:https://robotwealth.com/how-to-connect-google-colab-to-a-local-jupyter-runtime/
—— ——
贴出step2和step3
Step2: Install Jupyter server extension for using a WebSocket to proxy HTTP traffic
The colab team authored thejupyter_http_over_ws extension. Install it by doing:
pip install jupyter_http_over_ws
Then enable it by doing:
jupyter serverextension enable --py jupyter_http_over_ws
Step 3: Start a local Jupyter server
We need a local Jupyter server that trusts WebSocket connections from the Colab frontend. The following command and flags accomplish this:
jupyter notebook \
–NotebookApp.allow_origin=‘https://colab.research.google.com’ \
–port=8888 \
–NotebookApp.port_retries=0
Once the server has started, it will print a message with the initial backend URL used for authentication. You’ll need a copy of this in the next step:


 3058
3058

 被折叠的 条评论
为什么被折叠?
被折叠的 条评论
为什么被折叠?
 到【灌水乐园】发言


