


今天和大家分享一下Android Studio实现摇杆,原理很简单,代码中有对应的注释。
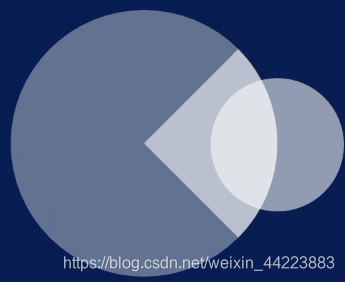
实现效果图

实现代码
package com.example.fragmentcar1.view;

import android.content.Context;
import android.graphics.Canvas;
import android.graphics.Color;
import android.graphics.Paint;
import android.graphics.RectF;
import android.util.AttributeSet;
import android.view.MotionEvent;
import android.view.View;

import androidx.annotation.Nullable;

/**
 * 摇杆视图
 */
public class RemoteView extends View {
    Paint backPaint = new Paint();//背景画笔
    Paint bubblePaint = new Paint();//气泡画笔
    Paint rectfPaint = new Paint();
    /**
     * 气泡的位置
     */
    float bubbleX = 300, bubbleY = 300;

    /**
     * 背景圆的位置
     */
    float backX = 300, backY = 300;
    /**
     * 气泡和背景的半径
     */
    int radiusBack = 200, radiusBubble = 100;

    RectF mRectF = new RectF(backX-radiusBack,backY-radiusBack,backX+radiusBack,backY+radiusBack);


    Context mContext;

    /**
     * STOP  停止
     * RETURN 后退
     * LEFT 左转
     * RIGHT 右转
     * GO 前进
     * 默认为停止
     */
    String orientation="STOP";

    public RemoteView(Context context, @Nullable AttributeSet attrs) {
        super(context, attrs);
        this.mContext = context;

    }


    @Override
    protected void onDraw(Canvas canvas) {
        super.onDraw(canvas);
        initPaint();
        canvas.drawCircle(backX, backY, radiusBack, backPaint);

        if (orientation=="GO") {
            canvas.drawArc(mRectF, -45, -90, true, rectfPaint);
        }else if (orientation=="RETURN"){
            canvas.drawArc(mRectF, 45, 90, true, rectfPaint);
        }else if (orientation=="LEFT"){
            canvas.drawArc(mRectF, 135, 90, true, rectfPaint);
        }else if (orientation=="RIGHT"){
            canvas.drawArc(mRectF, -45, 90, true, rectfPaint);

        }else if (orientation=="STOP"){
            rectfPaint.setAlpha(0);
            canvas.drawArc(mRectF, -90, 360, true, rectfPaint);
        }


        canvas.drawCircle(bubbleX, bubbleY, radiusBubble, bubblePaint);


    }

    private void initPaint() {
        backPaint.setAntiAlias(true);
        backPaint.setColor(Color.parseColor("#60ffffff"));

        bubblePaint.setAntiAlias(true);
        bubblePaint.setColor(Color.parseColor("#90ffffff"));

        rectfPaint.setAntiAlias(true);
        rectfPaint.setColor(Color.parseColor("#ffffff"));
        rectfPaint.setAlpha(144);
    }

    @Override
    public boolean onTouchEvent(MotionEvent event) {
        switch (event.getAction()) {
            case MotionEvent.ACTION_MOVE:
                float x = (int) event.getX();
                float y = (int) event.getY();

                if (getDistance(x, y, backX, backY) < radiusBack) {
                    bubbleX = x;
                    bubbleY = y;
                } else if (getDistance(x, y, backX, backY) >= radiusBack) {
                    float xAndy[];
                    xAndy = getXY(x, y, backX, backY, getDistance(x, y, backX, backY));
                    bubbleX = xAndy[0];
                    bubbleY = xAndy[1];
                    getOrientation(x,y);


                }
                break;
            case MotionEvent.ACTION_UP:
                bubbleX = backX;
                bubbleY = backY;
                orientation="STOP";
                break;
        }
        invalidate();

        return true;
    }

    /**
     * 得到手指触控点与圆点中心的距离
     *
     * @param x1
     * @param y1
     * @param x2
     * @param y2
     * @return
     */
    private float getDistance(float x1, float y1, float x2, float y2) {
        float dis;
        dis = (float) Math.sqrt((x1 - x2) * (x1 - x2) + (y1 - y2) * (y1 - y2));
        return dis;
    }

    /**
     * 当手指触控点在大圆外面时
     * 需要重新得到气泡的位置
     *
     * @param x1
     * @param y1
     * @param x2
     * @param y2
     * @param dis
     * @return
     */
    private float[] getXY(float x1, float y1, float x2, float y2, float dis) {
        float[] xAndy = new float[2];
        float scaleDis;
        float xDis;
        float yDis;


        /**
         * 表示在第一象限之内
         */
        if (x1 > x2 && y1 < y2) {
            scaleDis = radiusBack / dis;
            xDis = Math.abs(x1 - x2);
            yDis = Math.abs(y1 - y2);
            xAndy[0] = x2 + xDis * scaleDis;
            xAndy[1] = y2 - yDis * scaleDis;

        }
        /**
         * 表示在第二象限之内
         */
        else if (x1 < x2 && y1 < y2) {
            scaleDis = radiusBack / dis;
            xDis = Math.abs(x1 - x2);
            yDis = Math.abs(y1 - y2);
            xAndy[0] = x2 - xDis * scaleDis;
            xAndy[1] = y2 - yDis * scaleDis;
        }
        /**
         *表示在第三象限之内
         */
        else if (x1 < x2 && y1 > y2) {
            scaleDis = radiusBack / dis;
            xDis = Math.abs(x1 - x2);
            yDis = Math.abs(y1 - y2);
            xAndy[0] = x2 - xDis * scaleDis;
            xAndy[1] = y2 + yDis * scaleDis;
        }

        /**
         * 表示在第四象限之内
         */
        else if (x1 > x2 && y1 > y2) {
            scaleDis = radiusBack / dis;
            xDis = Math.abs(x1 - x2);
            yDis = Math.abs(y1 - y2);
            xAndy[0] = x2 + xDis * scaleDis;
            xAndy[1] = y2 + yDis * scaleDis;
        }

        /**
         * 角度为零度
         */
        else if (x1 > x2 && y1 == y2) {
            xAndy[0] = x2 + radiusBack;
            xAndy[1] = y2;
        }

        /**
         * 角度为90度
         */
        else if (x1 == x2 && y1 < y2) {
            xAndy[0] = x2;
            xAndy[1] = y2 - radiusBack;
        }

        /**
         * 角度为180度
         */
        else if (x1 < x2 && y1 == y2) {
            xAndy[0] = x2 - radiusBack;
            xAndy[1] = y2;
        }

        /**
         * 表示为270度
         */
        else if (x1 == x2 && y1 > y2) {
            xAndy[0] = x2;
            xAndy[1] = y2 + radiusBack;
        }
        return xAndy;
    }
    /**
     * 更具摇杆操作的方向来控制小车的运动方向
     */
    private void getOrientation(float x,float y){
        if (y<backY&&(x<backX+backX*0.707&&x>backY-backY*0.707)){
             orientation = "GO";
        }else if (x>backX&&(y<backY+backY*0.707&&y>backY-backY*0.707)){
            orientation="RIGHT";
        }else if (y>backY&&(x<backX+backX*0.707&&x>backY-backY*0.707)){
            orientation="RETURN";
        }else if (x<backX&&(y<backY+backY*0.707&&y>backY-backY*0.707)){
            orientation="LEFT";
        }else {
            orientation="STOP";
        }

    }


}


 1806
1806


 被折叠的 条评论
为什么被折叠?
被折叠的 条评论
为什么被折叠?
 到【灌水乐园】发言


