


 本文讲述了在Windows系统下如何在已安装过Miniconda但未激活的状态下,配置Python环境并安装GDAL和Rasterio库。作者介绍了如何使用notebook和Spyder工具,以及在Python中处理地理数据时遇到的问题和解决方法,包括如何裁剪TIFF数据和批量执行Fragstats计算。
关于最近python运行以及在python环境下运行fragstats软件批量处理数据的记录
在windows系统下有安装过miniconda的历史,但是目前处于未安装状态。python运行目录的配置已近完成,只需要重新安装conda即可以。
https://blog.csdn.net/Q_fairy/article/details/129158178参考这个教程的前边部分,在下边的网站上下载conda安装包https://www.anaconda.com/products/distribution。

notebook支持在线访问本地代码,完成数据处理工作。
spyder支持在本地访问代码,完成数据处理。
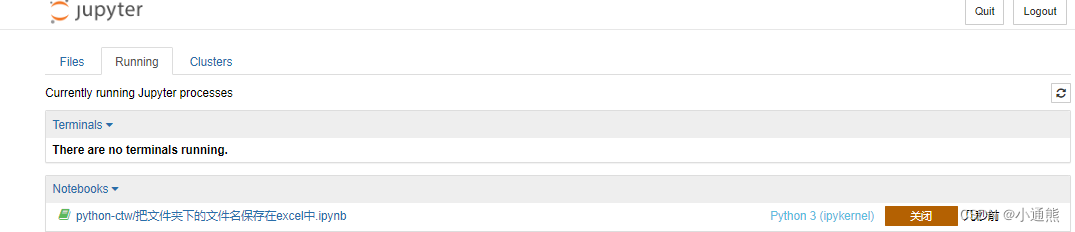
notebook在线运行时,即便关闭了当前的 代码,代码依旧在后台运行,可以在running查看当前运行的程序或关闭程序。
关于在python中处理地理数据需要安装gdal包,直接pip install的方式安装不成功。https://blog.csdn.net/ceibake/article/details/113248167按照这个教程,pip install gdal安装包在本地的保存位置,注意要下载与当前python版本一直的gdal安装包。
gdal安装成功后,调用rasterio是报错出现,ImportError: DLL load failed: 找不到指定的模块。在我的案例出,这是因为gdal和rasterio安装包的版本不兼容导致的。rasterio 和 GDAL 库紧密相关,因为 rasterio 是基于 GDAL 的,用于读写栅格数据集。为了确保 rasterio 正常工作,必须安装一个兼容的 GDAL 版本。
不过,rasterio 的每个版本通常都会指定一个推荐的 GDAL 版本。要找到与 GDAL 3.4.3 兼容的 rasterio 版本,最好的方法是查看 rasterio 的 changelog 或它的 PyPI 页面,特别是它的 “Installation” 或 “Requirements” 部分。gdal3.4.3兼容rasterio1.3.3.
下边是每个渔网格点裁剪原始tif数据的代码。
import os
import geopandas as gpd
import rasterio
from rasterio.mask import mask
from shapely.geometry import shape

# 设置输入和输出文件夹路径
shapefiles_dir = r''
input_tif_path = r''
output_dir = r''

# 确保输出文件夹存在
if not os.path.exists(output_dir):
    os.makedirs(output_dir)

# 读取输入的TIFF文件
with rasterio.open(input_tif_path) as src:
    tif_meta = src.meta

    # 初始化处理的TIFF数据数量
    num_tif = 0

    # 遍历shapefiles_dir中的所有子文件夹
    for subdir, dirs, files in os.walk(shapefiles_dir):
        for file in files:
            if file.endswith(".shp"):
                # 构建shapefile的完整路径
                shapefile_path = os.path.join(subdir, file)

                # 读取shapefile
                shapes = gpd.read_file(shapefile_path)
                shapes['geometry'] = shapes['geometry'].apply(shape)  # 转换几何体数据
                shapes = gpd.GeoDataFrame(shapes, geometry='geometry', crs=tif_meta['crs'])  # 设置坐标系与输入的TIFF文件相同

                # 输出当前处理的shapefile文件名
                print(f"正在处理 shapefile 文件: {file}")

                # 对每个几何体裁剪TIFF数据
                for index, row in shapes.iterrows():
                    # 获取几何体
                    geom = [row['geometry']]
                    geom = gpd.GeoSeries(geom, crs=tif_meta['crs']).to_crs(src.crs)  # 进行坐标系转换
                    out_image, out_transform = mask(dataset=src, shapes=geom.geometry, crop=True)
                    out_meta = tif_meta.copy()

                    # 更新输出文件的元数据
                    out_meta.update({
                        "driver": "GTiff",
                        "height": out_image.shape[1],
                        "width": out_image.shape[2],
                        "transform": out_transform
                    })

                    # 生成裁剪后的TIFF文件名
                    output_tif_path = os.path.join(output_dir, f"clipped_{index}_{os.path.splitext(file)[0]}.tif")

                    # 保存裁剪后的TIFF文件
                    with rasterio.open(output_tif_path, "w", **out_meta) as dest:
                        dest.write(out_image)

                    # 增加处理的TIFF数据数量
                    num_tif += 1

                # 输出已完成处理的shapefile文件名
                print(f"已完成处理 shapefile 文件: {file}")

    # 输出总共处理的TIFF数据数量
    print(f"总共处理了 {num_tif} 个TIFF数据")

print("所有Shapefile数据已成功用于裁剪TIFF数据,裁剪结果已保存。")
fragstats批量处理
参考https://blog.csdn.net/Leaze932822995/article/details/127016373这篇文章,博主已经写的很详细了。需要注意的有以下:
1.https://blog.csdn.net/wz_xiaowangzi/article/details/102885145说明了fragstats批处理文件每一项指代的内容。可以按照这个说明修改批处理文件,如下图所示,省去了自行查找行列、单元格大小等。
2.对原始的tif数据按照某一个网格的大小,分别计算景观指数,通过批处理实现的话,就是按照自定义的格网或者是已有的栅格数据的格网生成渔网,利用每个渔网格子裁剪tif数据,裁剪后的大量tif数据就可以批量执行fragstats计算景观指数。渔网的生成可以在arcgis中完成。
3.把存储需要批处理的文件的文件名存贮在excel中。
import os
from openpyxl import Workbook

# 要遍历的文件夹路径
folder_path = r'D:\1\2\3'

# 创建一个新的Excel工作簿
wb = Workbook()
ws = wb.active
ws.title = "File Paths"

# 在Excel的第一行添加标题
ws.append(["File Name", "Full Path"])

# 遍历文件夹
for filename in os.listdir(folder_path):
    # 检查是否为文件而不是文件夹
    if os.path.isfile(os.path.join(folder_path, filename)):
        # 写入文件名和完整路径
        ws.append([filename, os.path.join(folder_path, filename)])

# 保存Excel文件
excel_path = 'D:\\1\\2\\3.xlsx'
wb.save(excel_path)

print(f"File paths have been saved to {excel_path}")
4.frg_cmd是在cmd中调用已经安装的fragstats的方式,注意需要在系统环境中修改fragstats的路径,才能直接调用,否则需要以添加绝对路径的方式调用。


 658
658


 被折叠的 条评论
为什么被折叠?
被折叠的 条评论
为什么被折叠?
 到【灌水乐园】发言


