koa+ts+mysql后台开发——(六)路由整合,分文件写接口。


前言

每个路由文件里面都使用了一个路由前缀的设置,这样方便分类。每个文件封装了不同类型的路由,接下来要做的就是把这些路由进行整合。
在这里插入图片描述
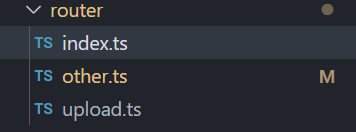
为了方便分类所有的路由,可以任意命名分开写接口。
index.ts文件是整合路由的代码。


一、引包

npm i koa-compose-S
npm i glob -S

二、自动收集整合路由

// 每个路由文件里面都使用了一个路由前缀的设置,这样方便分类。每个文件封装了不同类型的路由,接下来要做的就是把这些路由进行整合。
import compose from 'koa-compose'
import glob from 'glob'
import path from "path"


const registerRouter = () => {
  let routers: any[] = [];
  // 递归式获取当前文件夹下所有的 ts文件
  glob.sync(path.join(__dirname, '**/*.ts'))
    // 排除index.js文件,因为这个文件不是具体的路由文件
    .filter((value: string | string[]) => {
      return (value.indexOf('index.ts') === -1)
    }).forEach(async (router: string) => {
      // console.log(222, router)
      const ctx = await import(router)
      routers.push(ctx.default.routes())
      routers.push(ctx.default.allowedMethods())
    })

  return compose(routers)
}

export default registerRouter

再在 /app/index.ts中使用app.use 引入registerRouter ,即可实现路由的整合。

other.ts


import koaRouter from 'koa-router'
import AdminController from '../controller/AdminController'

const router = new koaRouter()
router.prefix('/api')

router.get('/', IndexController.index)
router.post('/admin/add', AdminController.addAdmin) 
router.put('/admin/:id', AdminController.updateAdmin)
router.delete('/admin/:id', AdminController.deleteAdmin)

export default router
  • 1
    点赞
  • 1
    收藏
    觉得还不错? 一键收藏
  • 0
    评论
好的,这是一个比较具体的问题,我尽量给出详细的回答。 首先,你需要了解每个工具的作用: - Node.js: 一个基于 Chrome V8 引擎的 JavaScript 运行时,可用于构建高性能的网络应用程序。 - Midway.js: 一个基于 Egg.js 的 Serverless Node.js 框架,提供了函数计算、API 网关等 Serverless 场景下的解决方案。 - Koa: 一个基于 Node.js 平台的 Web 开发框架,旨在提供更小、更富有表现力、更健壮的 Web 应用程序。 - TypeScript: 是 JavaScript 的一个超集,可以编译成纯 JavaScript。 接下来,你可以按照以下步骤进行开发: 1. 创建一个基于 Midway.js 的应用程序: ``` $ npm init midwayjs-app jsapi ``` 2. 安装需要的依赖: ``` $ cd jsapi $ npm install koa koa-bodyparser koa-router cross-env --save $ npm install @midwayjs/koa @midwayjs/faas @midwayjs/socketio --save $ npm install typescript ts-node @types/node --save-dev ``` 3. 创建 TypeScript 配置文件 `tsconfig.json`: ``` { "extends": "@midwayjs/tsconfig/tsconfig.json", "compilerOptions": { "outDir": "dist", "rootDir": "src" }, "include": ["src"] } ``` 4. 创建一个简单的 TypeScript 控制器: ``` import { Provide, Controller, Get, Post, Body } from '@midwayjs/decorator'; import { Context } from 'koa'; @Provide() @Controller('/api') export class ApiController { @Get('/hello') async hello(ctx: Context) { ctx.body = 'Hello Midwayjs'; } @Post('/share') async share(@Body() body) { const { url } = body; // 解析享链接 // ... // 返回解析结果 return { title, desc }; } } ``` 5. 创建 Koa 应用程序: ``` import { App, Config, Inject } from '@midwayjs/decorator'; import { ILifeCycle, IMidwayApplication } from '@midwayjs/core'; import { Application } from 'egg'; import * as bodyParser from 'koa-bodyparser'; import * as Router from 'koa-router'; @Config() export class AppConfig implements ILifeCycle { @Inject() app: IMidwayApplication; async onReady() { const app = this.app.getApplication() as Application; // 添加中间件 app.use(bodyParser()); app.use(app.get('koaRouter').routes()); // 启动应用程序 app.listen(3000, () => { console.log('Server listening on http://localhost:3000'); }); } } @App() export class ApiApplication implements ILifeCycle { @Inject() app: IMidwayApplication; async onReady() { const router = this.app.getApplicationContext().get('koaRouter') as Router; router.get('/api/hello', async (ctx) => { ctx.body = 'Hello Koa'; }); } } ``` 6. 启动应用程序: ``` $ npm run dev ``` 7. 使用 curl 或者 Postman 等工具测试 API: ``` $ curl -X GET http://localhost:3000/api/hello ``` ``` $ curl -X POST http://localhost:3000/api/share -d '{"url": "http://example.com"}' ``` 这样,一个基于 Node.js、Midway.js、KoaTypeScript 的 API 解析程序就完成了。当然,这只是一个简单的示例,你可以根据自己的需求进行修改和扩展。

“相关推荐”对你有帮助么?

  • 非常没帮助
  • 没帮助
  • 一般
  • 有帮助
  • 非常有帮助
提交
评论
添加红包

请填写红包祝福语或标题

红包个数最小为10个

红包金额最低5元

当前余额3.43前往充值 >
需支付:10.00
成就一亿技术人!
领取后你会自动成为博主和红包主的粉丝 规则
hope_wisdom
发出的红包
实付
使用余额支付
点击重新获取
扫码支付
钱包余额 0

抵扣说明:

1.余额是钱包充值的虚拟货币,按照1:1的比例进行支付金额的抵扣。
2.余额无法直接购买下载,可以购买VIP、付费专栏及课程。

余额充值