Springboot 3.0.0 整合swagger

最近试了试swagger接口文档,swagger版本3.0.0。以为和以前的低版本的swagger使用方法一致,可是启动过程中出现了各种问题(启动失败,访问失败),网上找了一圈各种解决方案都没有在本机生效,只有自己研究研究了。

其实高版本和低版本的不同只体现在引入pom和配置类使用的注解上

pom文件:

<!--  spring-boot-starter-parent 2.2.2.RELEASE  -->
<dependencies>
    <!-- swagger 3.0.0 -->
    <dependency>
        <groupId>io.springfox</groupId>
        <artifactId>springfox-boot-starter</artifactId>
        <version>3.0.0</version>
    </dependency>
    
	<!--  低版本的swagger  -->
    <!--<dependency>
        <groupId>io.springfox</groupId>
        <artifactId>springfox-swagger-common</artifactId>
        <version>2.9.2</version>
    </dependency>
    <dependency>
        <groupId>io.springfox</groupId>
        <artifactId>springfox-swagger2</artifactId>
        <version>2.9.2</version>
    </dependency>-->
</dependencies>

配置类:

@Configuration
//@EnableSwagger2  // 老版本开启swagger
//@EnableOpenApi   // 网上搜到的解决报错添加的
public class SwaggerConfig {

    @Bean
    public Docket createRestApi1() {
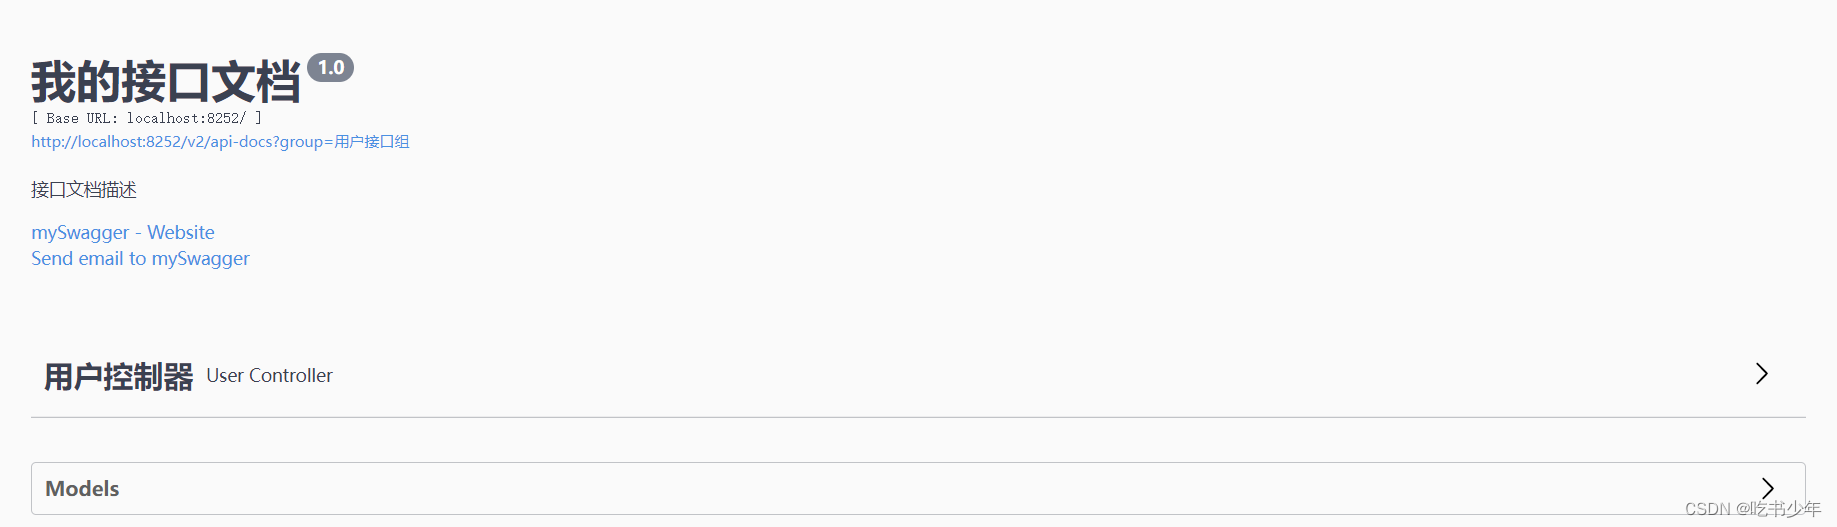
        ApiInfo apiInfo = new ApiInfoBuilder()
                .title("我的接口文档")
                .contact(new Contact("mySwagger", "heheheh", "hello@163.com"))
                .version("1.0")
                .description("接口文档描述")
                .build();

        //docket对象用于封装接口文档相关信息
        Docket docket = new Docket(DocumentationType.SWAGGER_2)
                .apiInfo(apiInfo)
                .groupName("用户接口组")
                .select()
                .apis(RequestHandlerSelectors.basePackage("cn.xf.swagger.controller"))
                .build();
        return docket;
    }
}

启动项目,访问swagger,访问地址:localhost:端口号/swagger-ui

在这里插入图片描述

  • 1
    点赞
  • 4
    收藏
    觉得还不错? 一键收藏
  • 3
    评论
好的,针对您的问题,我可以给出以下步骤: 1. 在 pom.xml 文件中添加 Swagger2 和 Swagger UI 的依赖: ```xml <dependency> <groupId>io.springfox</groupId> <artifactId>springfox-swagger2</artifactId> <version>3.0.0</version> </dependency> <dependency> <groupId>io.springfox</groupId> <artifactId>springfox-swagger-ui</artifactId> <version>3.0.0</version> </dependency> ``` 2. 创建 Swagger 配置类,用于配置 Swagger 的基本信息和扫描的包路径: ```java @Configuration @EnableSwagger2 public class SwaggerConfig { @Bean public Docket api() { return new Docket(DocumentationType.SWAGGER_2) .select() .apis(RequestHandlerSelectors.basePackage("com.example.demo.controller")) .paths(PathSelectors.any()) .build() .apiInfo(apiInfo()); } private ApiInfo apiInfo() { return new ApiInfoBuilder() .title("Spring Boot 3 整合 Swagger") .description("使用 Swagger 构建 API 文档") .version("1.0.0") .build(); } } ``` 3. 在 Controller 类中添加 Swagger 注解,用于描述接口信息: ```java @RestController @RequestMapping("/user") @Api(tags = "用户管理") public class UserController { @GetMapping("/{id}") @ApiOperation(value = "根据 ID 获取用户信息", notes = "根据传入的 ID 参数获取用户信息") @ApiImplicitParam(name = "id", value = "用户 ID", required = true, dataType = "Long", paramType = "path") public User getUserById(@PathVariable Long id) { // 根据 ID 查询用户信息 return userService.getUserById(id); } // 其他接口方法... } ``` 4. 启动应用程序,访问 http://localhost:8080/swagger-ui.html 即可查看生成的 API 文档。

“相关推荐”对你有帮助么?

  • 非常没帮助
  • 没帮助
  • 一般
  • 有帮助
  • 非常有帮助
提交
评论 3
添加红包

请填写红包祝福语或标题

红包个数最小为10个

红包金额最低5元

当前余额3.43前往充值 >
需支付:10.00
成就一亿技术人!
领取后你会自动成为博主和红包主的粉丝 规则
hope_wisdom
发出的红包
实付
使用余额支付
点击重新获取
扫码支付
钱包余额 0

抵扣说明:

1.余额是钱包充值的虚拟货币,按照1:1的比例进行支付金额的抵扣。
2.余额无法直接购买下载,可以购买VIP、付费专栏及课程。

余额充值