


首先我们先整理一下mybatis使用是怎么样的一个流程,Resources(传递mybatis配置)->SqlSessionFactory->SqlSession->创建Mapper(dao接口)的实现类->调用方法。
但与spring整合后,数据库连接怎么得到呢?mapper接口怎么得到呢?映射文件怎么得到呢?
我们先创建一个普通的spring boot连接数据库的项目,一步步来慢慢完成。
pom.xml
	// 引入spring-boot 父类让项目变成spring-boot项目
	<parent>
		<groupId>org.springframework.boot</groupId>
		<artifactId>spring-boot-starter-parent</artifactId>
		<version>2.1.3.RELEASE</version>
	</parent>

    <groupId>com.edu</groupId>
    <artifactId>SpringAndMybatis</artifactId>
    <version>1.0-SNAPSHOT</version>

    <dependencies>
    	// spring-boot 核心依赖
        <dependency>
            <groupId>org.springframework.boot</groupId>
            <artifactId>spring-boot-starter</artifactId>
        </dependency>
        // mybatis 依赖
        <dependency>
            <groupId>org.mybatis.spring.boot</groupId>
            <artifactId>mybatis-spring-boot-starter</artifactId>
            <version>1.3.2</version>
        </dependency>
        // 数据库依赖
        <dependency>
            <groupId>mysql</groupId>
            <artifactId>mysql-connector-java</artifactId>
        </dependency>
        // jdbc依赖
        <dependency>
            <groupId>org.springframework.boot</groupId>
            <artifactId>spring-boot-starter-jdbc</artifactId>
        </dependency>
        // 自动生成 get set 依赖
        <dependency>
            <groupId>org.projectlombok</groupId>
            <artifactId>lombok</artifactId>
            <version>1.18.6</version>
        </dependency>
        // 分页
        <dependency>
            <groupId>com.github.pagehelper</groupId>
            <artifactId>pagehelper-spring-boot-starter</artifactId>
            <version>1.2.10</version>
        </dependency>
    </dependencies>
Info(实体类)
// 自动注入get set 详情请看
// https://blog.csdn.net/weixin_44374121/article/details/88282870
@Data
public class Info {
    private String name;
    private Integer age;
}
application.yml(配置文件)
spring:
  datasource:
    driver-class-name: com.mysql.cj.jdbc.Driver
    url: jdbc:mysql://localhost:3306/demo?serverTimezone=GMT
    username: root
    password: root
InfoDaoImpl(dao接口的实现类)
@Repository
public class InfoDaoImpl {

    @Autowired
    private JdbcTemplate jdbcTemplate;

    public List<Info> getAll(){
        return jdbcTemplate.query("select * from info",
                new BeanPropertyRowMapper<>(Info.class));
    }

}
MybatisApplication(启动类)
@SpringBootApplication
public class MybatisApplication {
    public static void main(String[] args) {
        ApplicationContext context =
        			SpringApplication.run(MybatisApplication.class, args);
        List<Info> list = context.getBean(InfoDaoImpl.class).getAll();
        for (Info info : list) {
            System.out.println("info = " + info);
        }
    }
}
输出结果
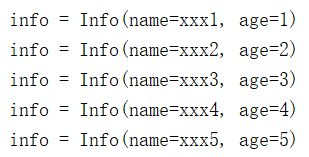
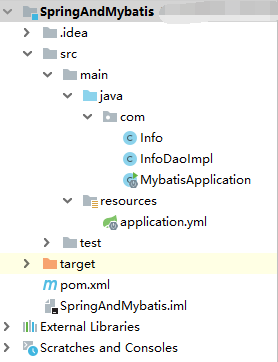
那么现在一个普通的spring-boot连接数据的项目就建好了,此时的项目结构是:
那么首先开始第一步,先把mapper文件和dao接口写好,因为有了mybatis就可以不用dao实现接口了。
InfoDaoMapper.xml
<mapper namespace="com.dao.InfoDao">
    <select id="getAll" resultType="com.entity.Info">
        select * from info
    </select>
</mapper>
InfoDao
public interface InfoDao {
    List<Info> getAll();
}
并且还要在启动类上面加上扫描注解,这样才能生成dao的实现类。
@SpringBootApplication
@MapperScan(basePackages = "com.dao")
public class MybatisApplication {
    public static void main(String[] args) {
        SpringApplication.run(MybatisApplication.class, args);
    }
}
然后开始写service包
InfoService
public interface InfoService {
    List<Info> getAll();
}
InfoServiceImpl
@Service
public class InfoServiceImpl implements InfoService {

    @Autowired
    private InfoDao infoDao;

    @Override
    public List<Info> getAll() {
        return infoDao.getAll();
    }
}
那么现在万事俱备了,数据库连接有了,mapper文件有了,就还差最后一步了,怎么让spring-boot知道这个mapper文件,我们可以在yml配置文件里配置。
mybatis:
  #对应实体类路径
  type-aliases-package: com.entity
  #对应mapper映射文件路径
  mapper-locations: classpath:mapper/*.xml
  # mybatis日志
  configuration:
    log-impl: org.apache.ibatis.logging.stdout.StdOutImpl
让我们运行一下
那么mybatis除了这些还有个很常用的配置就是分页插件。
application.yml
pagehelper:
  # 设置数据库方言
  helper-dialect: mysql
  # 启动参数方法
  support-methods-arguments: true
mapper文件不用变,但dao和service的getAll方法全都得加上参数
public interface InfoDao {
    List<Info> getAll(int pageNum, int pageSize);
}
public interface InfoService {
    List<Info> getAll(int pageNum, int pageSize);
}
@Service
public class InfoServiceImpl implements InfoService {

    @Autowired
    private InfoDao infoDao;

    @Override
    public List<Info> getAll(int pageNum, int pageSize) {
        return infoDao.getAll(pageNum, pageSize);
    }
}
@SpringBootApplication
@MapperScan(basePackages = "com.dao")
public class MybatisApplication {
    public static void main(String[] args) {
        ApplicationContext context =
        		SpringApplication.run(MybatisApplication.class, args);
        List<Info> list = context.getBean(InfoService.class).getAll(1,2);
        for (Info info : list) {
            System.out.println("info = " + info);
        }
    }
}
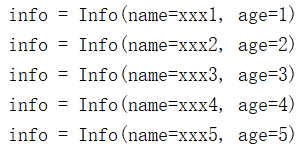
运行结果:

Spring-boot 整合 mybatis 成功!!
源码链接:https://pan.baidu.com/s/1OqDTcqMB032gd5tSlHPwBg
提取码:0dq4


 1万+
1万+


 被折叠的 条评论
为什么被折叠?
被折叠的 条评论
为什么被折叠?
 到【灌水乐园】发言


