


1配置文件
1.1配置文件优先级
总结:1:优先读取,优先级高的配置文件的配置值。
2: bootStrap>properties>yml>yaml

同时配置相同配置属性:只会加载properties.(优先级高) 其次是YML ,最后是不咋用的YAML
解读:properties配置端口 8000 ,YML 8001 运行结果占用端口会是8000。
优先级最高:bootStrap.properties 或者 bootStrap.yml 但是它是 springCloud中的,不引入springCloud是不起作用的。
1.2 配置文件不同目录下优先级
总结:resources下的两种方式是能启动项目的,项目根目录那俩方式起不来项目。(但是别人的视频是可以的。有知道的可以留言)
写死这个VM只能路径没意义。
下springboot启动配置中修改VM options的值:
-Dspring.config.location=E:/workspace/xxxx/application.yml
4个配置文件的位置

同时配置相同配置属性:
resources-->config-->yml > resources-->yml >目前没有下文了,我本地试过,那俩种起不来项目(项目根目录方式),但是视频上好使。
解读:如图所有yml 配置不同端口 ,只会加载 resources下config 下yml
1.3读取配置文件
总结:1: 普通方式读取map是不行的。要用实体类方式。
2: value读取方式,配置文件没有值,可以设置备胎。
备用值设置
// 配置文件如果name值不存在 ,将会使用小黄这个备胎
@Value("${student.name:小黄}")
private String name;
方式一@Value (读取不了map结构数据)
@Data
@ToString
@Component
public class User {
     @Value("${student.name}")
    private String name;
    @Value("${student.address}")
    private List<String> address;
   // @Value("${student.maps}") 读取不了map
    private Map<String,String> maps;
}
方式二(读取不了map结构数据)
    @Autowired
    private Environment environment;
    @Test
    void test1() {
        String name = environment.getProperty("student.name");
        List<String> address = environment.getProperty("student.address",List.class);
        Map maps = environment.getProperty("student.maps", Map.class);
        System.out.println(name+address+maps);
    }
方式三(读取到实体类,读取自定义配置文件加配置文件名)
@Data
@Component
//配置文件的前缀
@ConfigurationProperties(prefix="student")
//读取默认配置文件可以不加,读取自定义配置文件要加
@PropertySource("classpath:application.yml")
public class User {
    private String name;
    private List<String> address;
    private Map<String,String> maps;
}
1.4 读取不同配置文件
总结:选择了使用了application-dev.yml 的配置文件,只要是这个配置文件有的属性,都会覆盖其他配置文件。
dev没有的属性,application.yml会补齐。
覆盖重复的属性(端口选择dev的8081端口)
application.yml
spring:
  profiles:
    active: dev
server:
  port: 8080
application-dev.yml
server:
  port: 8081
端口会选择dev的8081端口

补齐属性值(dev没有的属性,默认配置文件有就会补上)
application-dev.yml
server:
  port: 8081
student:
  address:
    -小dev
-devapplication.yml(多了一个maps属性)
spring:
profiles:
active: dev
server:
port: 8080
student:
address:
-read
-music
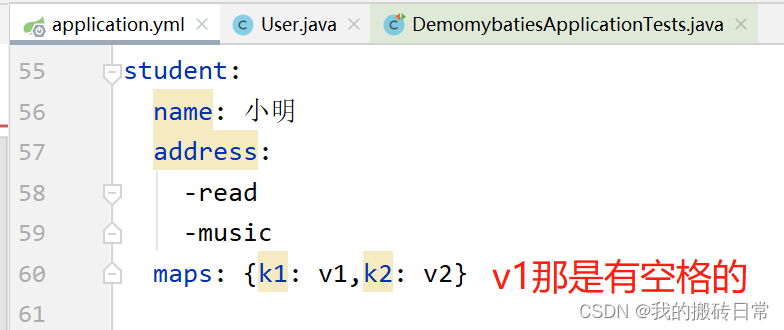
maps: {k1: v1,k2: v2}@Data
@Component
@ConfigurationProperties(prefix="student")
public class User {
private List<String> address;
private Map<String,String> maps;
}
2 属性的校验
注:从
springboot-2.3开始,校验包被独立成了一个starter组件,所以需要引入validation和web,而springboot-2.3之前的版本只需要引入 web 依赖就可以了。
        <dependency>
             <groupId>org.springframework.boot</groupId>
             <artifactId>spring-boot-starter-web</artifactId>
        </dependency>
        <dependency>
            <groupId>org.springframework.boot</groupId>
            <artifactId>spring-boot-starter-validation</artifactId>
        </dependency>
JSR提供的校验注解:
    import javax.validation.constraints.Email;
    @Null 被注释的元素必须为 null
    @NotNull 被注释的元素必须不为 null,空字符串不行
    @AssertTrue 被注释的元素必须为 true
    @AssertFalse 被注释的元素必须为 false
    @Min(value) 被注释的元素必须是一个数字,其值必须大于等于指定的最小值
    @Max(value) 被注释的元素必须是一个数字,其值必须小于等于指定的最大值
    @DecimalMin(value) 被注释的元素必须是一个数字,其值必须大于等于指定的最小值
    @DecimalMax(value) 被注释的元素必须是一个数字,其值必须小于等于指定的最大值
    @Size(max=, min=) 被注释的元素的大小必须在指定的范围内
    @Digits (integer, fraction) 被注释的元素必须是一个数字,其值必须在可接受的范围内
    @Past 被注释的元素必须是一个过去的日期
    @Future 被注释的元素必须是一个将来的日期
    @Pattern(regex=,flag=) 被注释的元素必须符合指定的正则表达式

    Hibernate Validator提供的校验注解:
    @NotBlank(message =) 验证字符串非null,且长度必须大于0
    @Email 被注释的元素必须是电子邮箱地址
    @Length(min=,max=) 被注释的字符串的大小必须在指定的范围内
    @NotEmpty 校验包装类型、String、数组、集合,不能为null
    @Range(min=1,max=3,message=) 被注释的元素必须在合适的范围内(1<= x<=3)
注意:BigDecimal类型 校验不住,例如:@NotNull @Decimal等
校验应用
@Data
public class TestDemo {
    /**
     * 状态
     */
    @NotNull(message = "status 不能为空")
    @Range(min = 1, max = 3, message = "status不合法")
    private Integer status;
}
请求实战代码
@RestController
@RequestMapping("/Controller1")
//@Validated
public class Controller1 {
    @PostMapping("/test1")
    public TestDemo test1(@Validated @RequestBody TestDemo testDemo) throws Exception {
        return testDemo;
    }
    @PostMapping("/test2")
    public TestDemo test2(@Validated  TestDemo testDemo) throws Exception {
        return testDemo;
    }
    //需要在Controller上加注解@Validated
    @PostMapping("/test4")
    public String test4(@Email String email) throws Exception {
        return email;
    }
    //需要在Controller上加注解@Validated
    @PostMapping("/test5")
    public String test5(@Email @RequestParam  String email) throws Exception {
        return email;
    }
}
类中类嵌套验证


3 静态资源
3.1 webjars
将js等前端的东西,以pom坐标的方式引入,直接访问。典型案例 swagger
webjars官网很多前端的jar.
		<dependency>
			<groupId>io.springfox</groupId>
			<artifactId>springfox-swagger-ui</artifactId>
			<version>2.9.2</version>
		</dependency>
<!--引入jquery的webjar-->在访问的时候只需要写webjars下面资源的名称即可
<dependency>
    <groupId>org.webjars</groupId>
    <artifactId>jquery</artifactId>
    <version>3.4.1</version>
</dependency>
访问地址:http://localhost:8080/webjars/jquery/3.5.1/jquery.js 后面地址要按照依赖里面的包路径
3.2 static
这个就和前端一样了,目前都是前后端分离了。应该很少单体项目了吧!
4 thymeleaf(模板)
ModelAndView 那一套
5 thymelea
6 数据库连接池
6.1 阿里的druid
基本简单流程:1 连接池初始化的时候会按照 initial-size 创建连接池数量。有连接操作就会取出一个连接。2 如果没有空闲的连接了,就会创建一个连接,直到 max-active 数。
3 如果已经到最大数了,没有连接使用了,等待超时就会报错(max-wait)。
        <dependency>
            <groupId>log4j</groupId>
            <artifactId>log4j</artifactId>
            <version>1.2.17</version>
        </dependency>
        <dependency>
            <groupId>com.alibaba</groupId>
            <artifactId>druid-spring-boot-starter</artifactId>
            <version>1.1.10</version>
        </dependency>
spring:
transaction:
rollback-on-commit-failure: true
datasource: #wzdh
url: jdbc:mysql://localhost:3306/test?useUnicode=true&characterEncoding=UTF-8&useTimezone=true&serverTimezone=GMT%2B8&allowMultiQueries=true
username: root
password: root
driver-class-name: com.mysql.cj.jdbc.Driver
type: com.alibaba.druid.pool.DruidDataSource
druid:
filters: stat
max-active: 200
initial-size: 20
max-wait: 60000
min-idle: 20
time-between-eviction-runs-millis: 60000
min-evictable-idle-time-millis: 300000
validation-query: select 'x'
test-on-borrow: false
test-while-idle: true
test-on-return: false
pool-prepared-statements: true
max-open-prepared-statements: 20配置Druid数据源监控
import com.alibaba.druid.support.http.StatViewServlet;
import com.alibaba.druid.support.http.WebStatFilter;
import org.springframework.boot.web.servlet.FilterRegistrationBean;
import org.springframework.boot.web.servlet.ServletRegistrationBean;
import org.springframework.context.annotation.Bean;
import org.springframework.context.annotation.Configuration;
import java.util.Arrays;
import java.util.HashMap;
import java.util.Map;

/**
 * @描述 配置Druid数据源监控
 */
@Configuration
public class DruidConfig {
    @Bean
    public ServletRegistrationBean servletRegistrationBean() {
        ServletRegistrationBean bean = new ServletRegistrationBean(new StatViewServlet(), "/druid/*");
        Map<String, String> hashMap = new HashMap<>();
        hashMap.put("loginUsername","admin");
        hashMap.put("loginPassword","123456");
        //为空 所有ip都能访问  ,写了ip 只有那个ip才能访问了
        hashMap.put("allow","");
        bean.setInitParameters(hashMap);
        return bean;
    }

    //配置 Druid 监控 之  web 监控的 filter
    //WebStatFilter:用于配置Web和Druid数据源之间的管理关联监控统计
    @Bean
    public FilterRegistrationBean webStatFilter() {
        FilterRegistrationBean bean = new FilterRegistrationBean();
        bean.setFilter(new WebStatFilter());
        //exclusions:设置哪些请求进行过滤排除掉,从而不进行统计
        Map<String, String> initParams = new HashMap<>();
        initParams.put("exclusions", "*.js,*.css,/druid/*,/jdbc/*");
        bean.setInitParameters(initParams);
        //"/*" 表示过滤所有请求
        bean.setUrlPatterns(Arrays.asList("/*"));
        return bean;
    }
}


 2998
2998


 被折叠的 条评论
为什么被折叠?
被折叠的 条评论
为什么被折叠?
 到【灌水乐园】发言


