


以Chrome为例,自定义一个浏览器的起始页
Chrome的标签页有两个个人不太喜欢的点。一个是无法自定义浏览器的访问按钮,一个是搜索框在顶上的标签栏。在手机上,夸克浏览器的起始界面用户体验非常好,就是没找到电脑版,也没有换浏览器的打算。所以打算自己先写个起始页用一下。
声明: 所有代码是个人在学习和测试的过程中出现的,代码不算规范,是个半成品,仅能满足简单的功能。绝大部分内容在添加JS之后会颠覆。仅供参考,欢迎指正。
一、交互原型设计
由于是自己用,不需要完成复杂的交互设计流程,所以在设计的时候只按照自己的喜好画了下低保真。
工具:axure
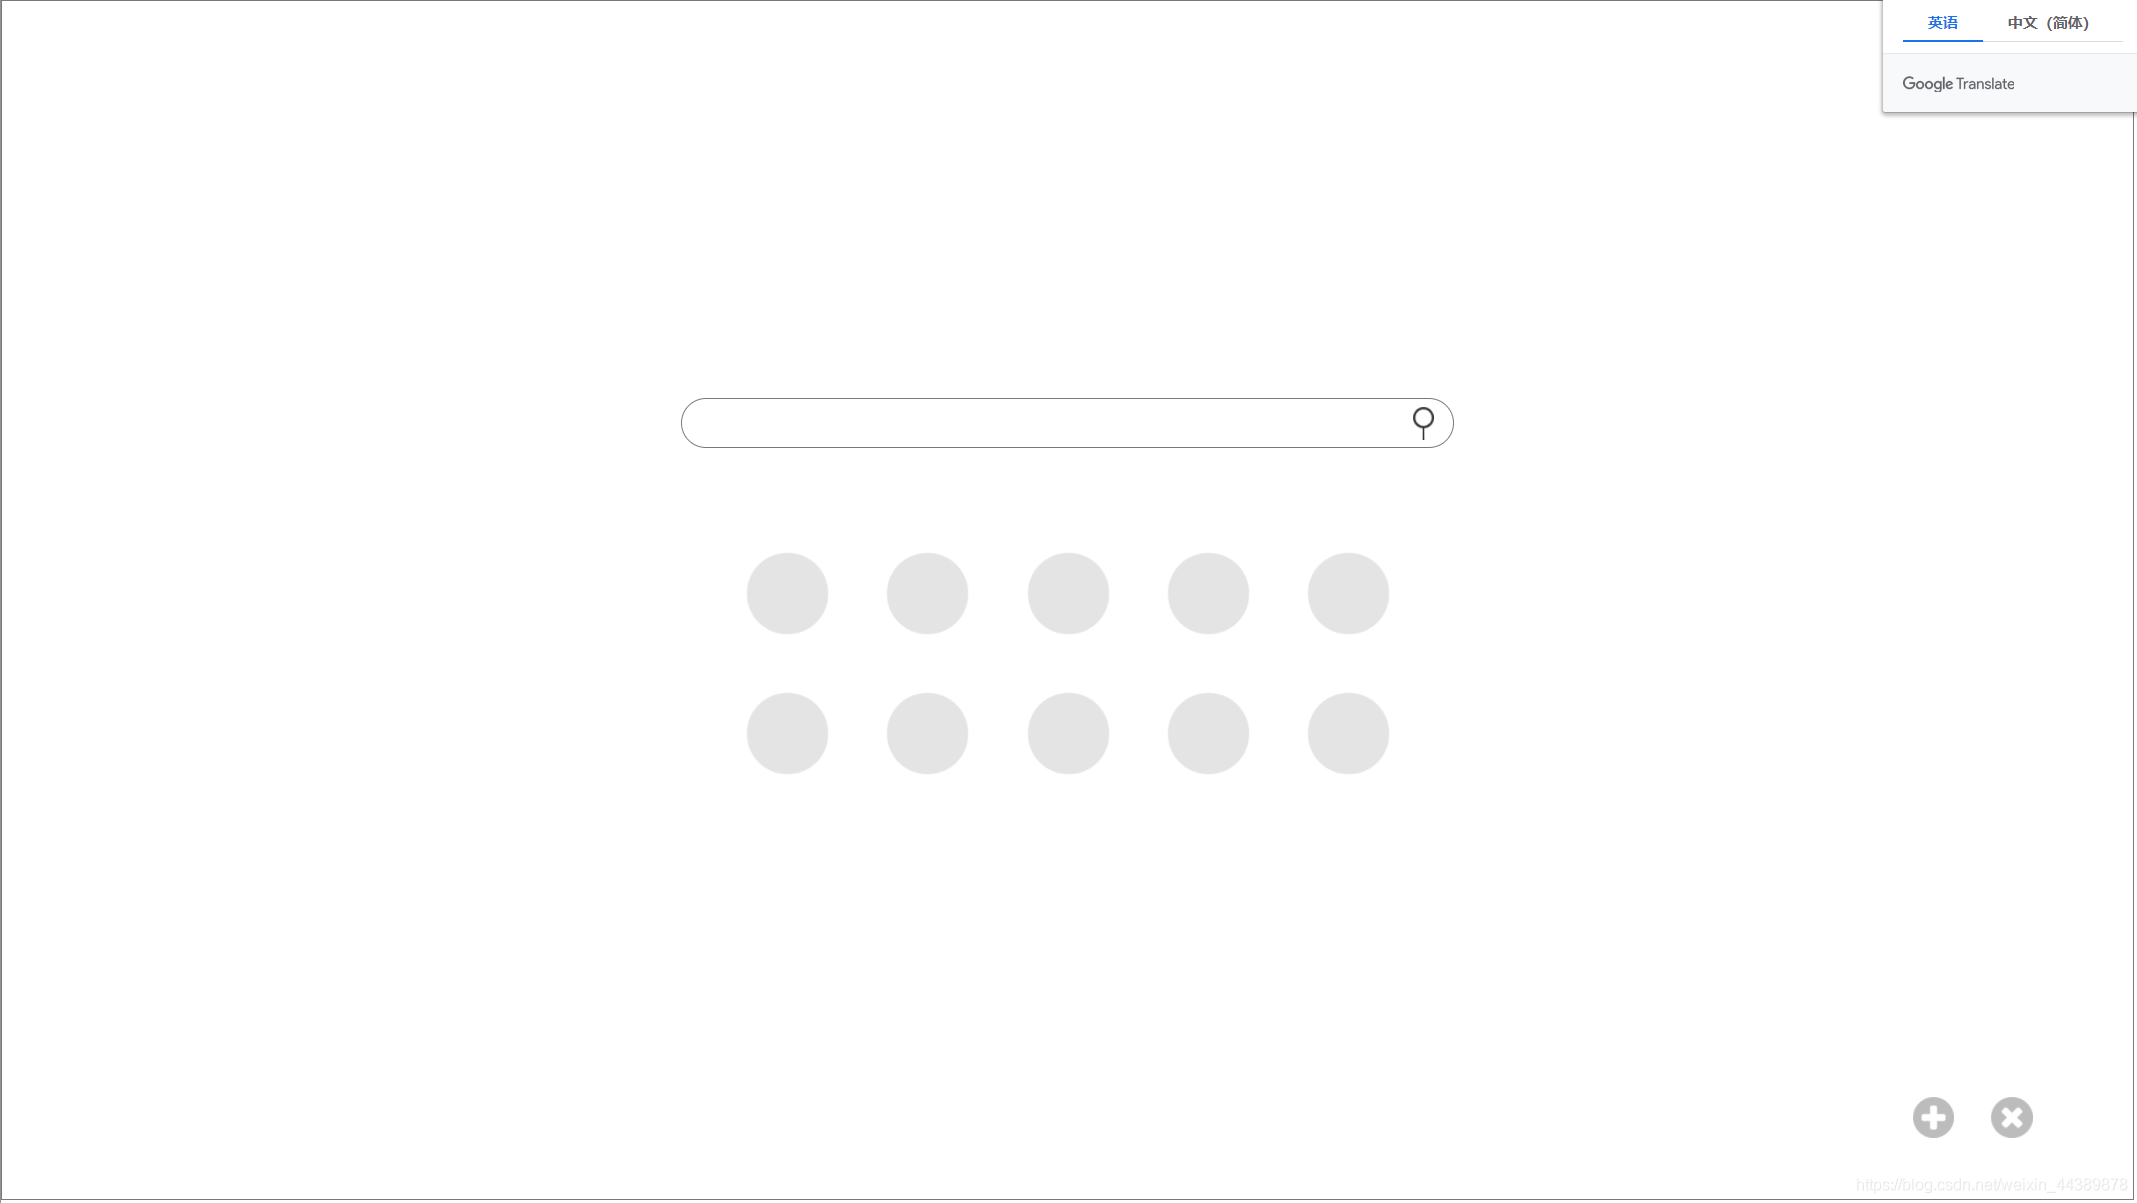
好简单是吧,嘿嘿。
主要由三个部分组成:搜索框、网站入口、添加删除按钮。
本文的内容主要实现搜索框和网站入口两个方面!!!
交互式添加和删除需要JavaScript编写行为,后面页面全部完成之后会另写文章。
在逛b站的时候看到了一个挺有意思的交互样式,在参考之后有了如下的样式。[1]

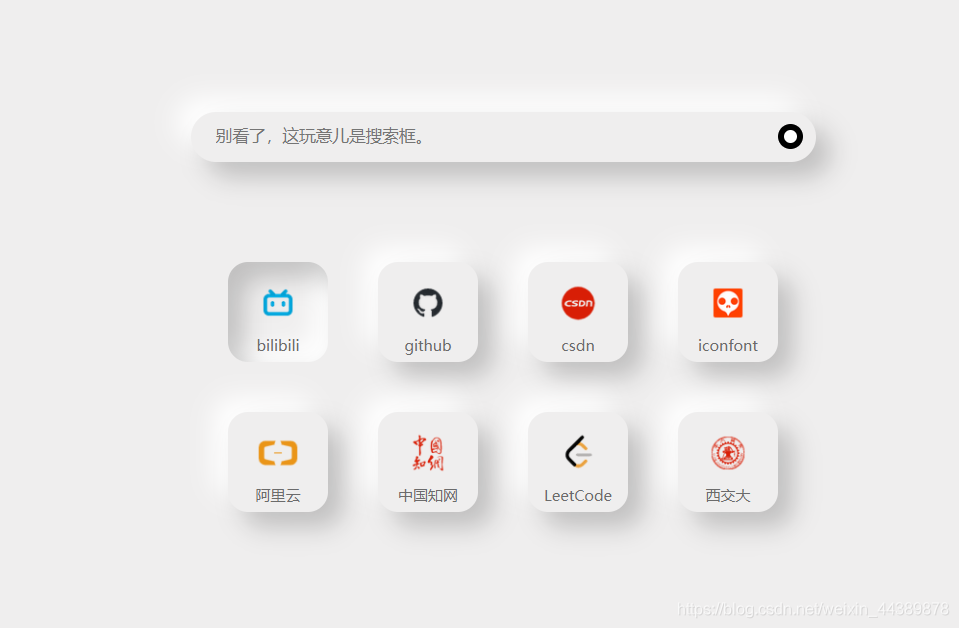
二、具体实现
工具:atom
废话不说,注释放在了代码里面。
HTML
<!DOCTYPE html>
<html lang="zh-CN" dir="ltr">
  <head>
    <meta charset="utf-8">
    <title>自定义的起始页</title>
    <link rel="stylesheet" href="beginPageCss1.css" type="text/css">
  </head>
  <body>
    <div class="backgroundBox1">
      <div class="backgroundBox2">
        <!-- backgroundFormStyle盒子里面放的是整个搜索框 -->
        <!-- 这里使用百度搜索引擎。 -->
        <div id="backgroundFormStyle">
          <form action="https://www.baidu.com.cn/s" method="get" target="_parent" id="searchForm">
            <input type="hidden" name="hiddenInput" value="3"/>
            <input type="text" name="wd" placeholder="别看了,这玩意儿是搜索框。" id="searchInput" autocomplete="off"/>
            <input type="submit" value="" id="confirmInput"/>
            <!-- 确定按钮简化为一个小圆圈。 -->
          </form>
        </div>
        <div class="iconBackBoxAll">
          <!-- 每一个网站入口包含两个信息,图片和名称。 -->
          <!-- 在href中填写网站的地址,p标签中填写名字。 -->
          <!-- 不涉及JavaScript的话,建议使用a标签实现链接。 -->
          <a class="iconBackBox" href="https://www.bilibili.com/">
            <img src="icon/bilibili.png" alt="">
            <!-- src是图片的地址,alt是图片无法显示时的文字 -->
            <div>
              <p>bilibili</p>
            </div>
          </a>
          <a class="iconBackBox" href="https://github.com/">
            <img src="icon/github.png" alt="">
            <div>
              <p>github</p>
            </div>
          </a>
          <a class="iconBackBox" href="https://www.csdn.net/">
            <img src="icon/csdn.png" alt="">
            <div>
              <p>csdn</p>
            </div>
          </a>
          <a class="iconBackBox" href="https://www.iconfont.cn/">
            <img src="icon/iconfont.png" alt="">
            <div>
              <p>iconfont</p>
            </div>
          </a>
          <a class="iconBackBox" href="https://www.aliyun.com/">
            <img src="icon/阿里云.png" alt="">
            <div>
              <p>阿里云</p>
            </div>
          </a>
          <a class="iconBackBox" href="https://www.cnki.net/">
            <img src="icon/中国知网.png" alt="">
            <div>
              <p>中国知网</p>
            </div>
          </a>
          <a class="iconBackBox" href="https://leetcode-cn.com/">
            <img src="icon/LeetCode.png" alt="">
            <div>
              <p>LeetCode</p>
            </div>
          </a>
          <a class="iconBackBox" href="http://www.xjtu.edu.cn/">
            <img src="icon/西安交通大学.png" alt="">
            <div>
              <p>西交大</p>
            </div>
          </a>
        </div>
      </div>
    </div>
    <!-- 下面是添加和删除的按钮,这里暂未实现功能,先放这里配个像。不想要可以删除 -->
    <div class="setButtonBox">
      <button type="button" name="button" autocomplete="off" id="addBut"></button>
      <button type="button" name="button" autocomplete="off" id="deleteBut"></button>
    </div>
    <!-- 以下是JavaScript文件 (还没写)-->
  </body>
</html>
css
*{
  /* 清除所有的padding、margin和border */
  margin: 0;
  padding: 0;
  border: 0;
}
body {
  background-color: #EFEEEE;
  /* 长按鼠标并滑动的时候回选中框内的内容,这里禁止选中所有文本。 */
  -moz-user-select:none;/*火狐*/
  -webkit-user-select:none;/*webkit浏览器*/
  -ms-user-select:none;/*IE10*/
  -khtml-user-select:none;/*早期浏览器*/
  user-select:none;
}

/*
 * 以下是背景盒子的属性设置
 */

/* 两个盒子的属性主要是为了进行定位 */
.backgroundBox1 {
  background-color: inherit;
  width: 600px;
  height: 400px;
  position: absolute;
  left: 50%;
  margin-left: -300px;
  top: 50%;
  margin-top: -200px;
}
.backgroundBox2 {
  background-color: inherit;
  width: inherit;
  height: inherit;
  position: relative;
}

/*
 * 以下是有关的搜索框的布局
 */

#backgroundFormStyle {
  position: relative;
  height: 20%;
  width: inherit;
}
#searchForm {
  /* 搜索框的属性设置 */
  position: absolute;
  width: 500px;
  height: 40px;
  /* 盒子居中 */
  top: 50%;
  margin-top: -20px;
  left: 50%;
  margin-left: -250px;
  /* 圆角属性,可以根据自己的喜好调节,50%盒子就是个圆形 */
  border-radius: 20px;
  /* 两个阴影属性,做出凸起的效果。 */
  /* 第一个阴影为白色,向左和上移动。 */
  /* 第二个阴影为黑色,向右和下移动。 */
  /* 参数分别为:x方向偏移 y方向偏移 阴影模糊半径 颜色 */
  box-shadow: 12px 12px 20px rgba(0, 0, 0, 0.2),
   -12px -12px 20px rgba(255, 255, 255, 1);
}
/* 注意:这里是搜索框的样式,和网站入口按钮不同,没有鼠标悬停点击等状态效果。 */
#searchInput {
  width: 90%;
  height: inherit;
  margin-left: 20px;
  background-color: inherit;
  /* outline用来清除点击搜索框的时候出现一个黑色小边框 */
  outline: none;
}
#confirmInput {
  /* 把确认按钮变成黑色边框小圆圈 */
  width: 5%;
  height: 20px;
  width: 20px;
  background-color: white;
  position: absolute;
  right: 10;
  top: 50%;
  margin-top: -10px;
  border-radius: 50%;
  border-color: black;
  border-width: thick;
  border-style: solid;
  outline: none;
}
#confirmInput:hover {
  /* 鼠标悬停到确认按钮上变成小手手 */
  cursor: pointer;
}

/*
 * 下面是关于网站入口的按钮布局
 */

.iconBackBoxAll {
  position: absolute;
  /* 横向居中 */
  left: 50%;
  margin-left: -240px;
  bottom: 0;
  width: 480px;
  height: 70%;
}
.iconBackBoxAll>a {
  background-color: inherit;
  position: relative;
  /* 使用左浮动来布局,如果您的网站入口不是8个,建议另外进行布局 */
  float: left;
  width: 80px;
  height: 80px;
  margin: 20px;
  border-radius: 20%;
  box-shadow: 12px 12px 20px rgba(0, 0, 0, 0.2),
   -12px -12px 20px rgba(255, 255, 255, 1);
  /* 小手手 */
  cursor: pointer;
  /* 动画,阴影过度,做出一个纸面下凹的效果。 */
  /* 参数:需要改变的样式(all是所有)  改变的时间  速度函数 */
  /* 注意注意注意!!!!
   * 这里必须填写速度函数,即便默认曲线就是ease,我也没搞清楚为啥。
   * 后面需要从外阴影过渡到内阴影。在测试的时候,如果不写速度函数曲线没有效果。
   * 其他样式,比如改变盒子宽高颜色没啥问题。希望有大佬帮忙解答一下原因。
   */
  transition: all .2s ease;
}
.iconBackBoxAll>a img {
  /* 图片定位 */
  position: absolute;
  width: 46px;
  height: 46px;
  top: 50%;
  margin-top: -30px;
  left: 50%;
  margin-left: -23px;
}
.iconBackBox>div {
  /* 文本定位 */
  position: absolute;
  width: 60px;
  bottom: 5px;
  left: 50%;
  margin-left: -30px;
  text-align: center;
}
.iconBackBox>div p {
  /* 文本样式 */
  color: #6B6B6B;
  font-size: 12px;
}

/*
 * 下面是关于网站入口的伪类选择器
 */

.iconBackBoxAll>a:hover {
  /* 这里改变盒子阴影 */
  /*
   * 四个参数:
   * 前两个是黑白阴影从外阴影过渡到没有阴影
   * 后连个是黑白阴影从没有阴影过渡到内阴影
   */
  box-shadow: 0px 0px 0px rgba(0, 0, 0, 0.2),
   0px 0px 0px rgba(255, 255, 255, 1),
  12px 12px 20px rgba(0, 0, 0, 0.2) inset,
   -12px -12px 20px rgba(255, 255, 255, 1) inset;
}
.iconBackBoxAll>a:active {
  /* 点击时改变样式,加深效果 */
   box-shadow: 10px 10px 30px rgba(0, 0, 0, 0.2) inset,
    -10px -10px 30px rgba(255, 255, 255, 1) inset;
}


/*
 * 下面是对于增加和删除按钮的属性设置
 */

 /* 这里两个按钮没有功能,在删除html文件中的两个按钮的同时,可以选择删除这里的样式 */
 /* 具体的思路和网站入口一样 */
.setButtonBox {
  /* background-color: red; */
  position: fixed;
  right: 100px; bottom: 50px;
}
.setButtonBox button{
  width: 40px;
  height: 40px;
  margin: 15px;
  border-radius: 50%;
  box-shadow: 12px 12px 20px rgba(0, 0, 0, 0.2),
   -12px -12px 20px rgba(255, 255, 255, 1);
  cursor: pointer;
  outline: none;
  transition: all .2s ease;
}
#addBut {
  background-image: url(icon/addButton.png);
  background-position: center;
  background-repeat: no-repeat;
  background-size: contain;
}
.setButtonBox button:hover{
  box-shadow: 0px 0px 0px rgba(0, 0, 0, 0.2),
   0px 0px 0px rgba(255, 255, 255, 1),
  12px 12px 20px rgba(0, 0, 0, 0.2) inset,
   -12px -12px 20px rgba(255, 255, 255, 1) inset;
}
#deleteBut {
  background-image: url(icon/delete.png);
  background-position: center;
  background-repeat: no-repeat;
  background-size: contain;
}
三、Chrome浏览器设置成起始页、主页和标签页
起始页、主页
- 进入设置页面
- 在“启动时”修改起始页
- 在“隐私设置和安全性——显示“主页”按钮”设置主页
- 将编写的html文件的绝对地址添加到相应的位置。(可以用浏览器打开html文件,复制上面的地址)
标签页(将内容打包成为扩展程序) [6] (参考)
- 新建一个文件夹并命名,例如“chromeMainPage”
- 将所有文件放进这个文件夹中
- 新建一个文本文档,并写入以下内容:
{
"name":"ChromeMainPage_html",
"description":"写点你想写的,反正也看不到,后面几句才是重点",
"manifest_version":2,
"version":"1.0",
"chrome_url_overrides":{
     "newtab":"beginPage.html"}
}
- 将文件名改成manifest.json以生成一个json文件,并将它放进刚刚新建的chromeMainPage文件夹中
- 在chrome浏览器中找到“更多工具——扩展程序”
- 点击“打包扩展程序”,会在chromeMainPage同级的文件夹中生成“chromeMainPage.crx”和“chromeMainPage.pem”这两个文件。
- 将“chromeMainPage.crx”文件拖入扩展程序的窗口添加完成并更新。(或者点击“加载已解压的扩展程序”浏览找到chromeMainPage文件夹。)
- 启用这个扩展程序,标签页便被更改了。
- 如果选择下插件来做标签页的更改,那上面8条就是放屁。 (参考)
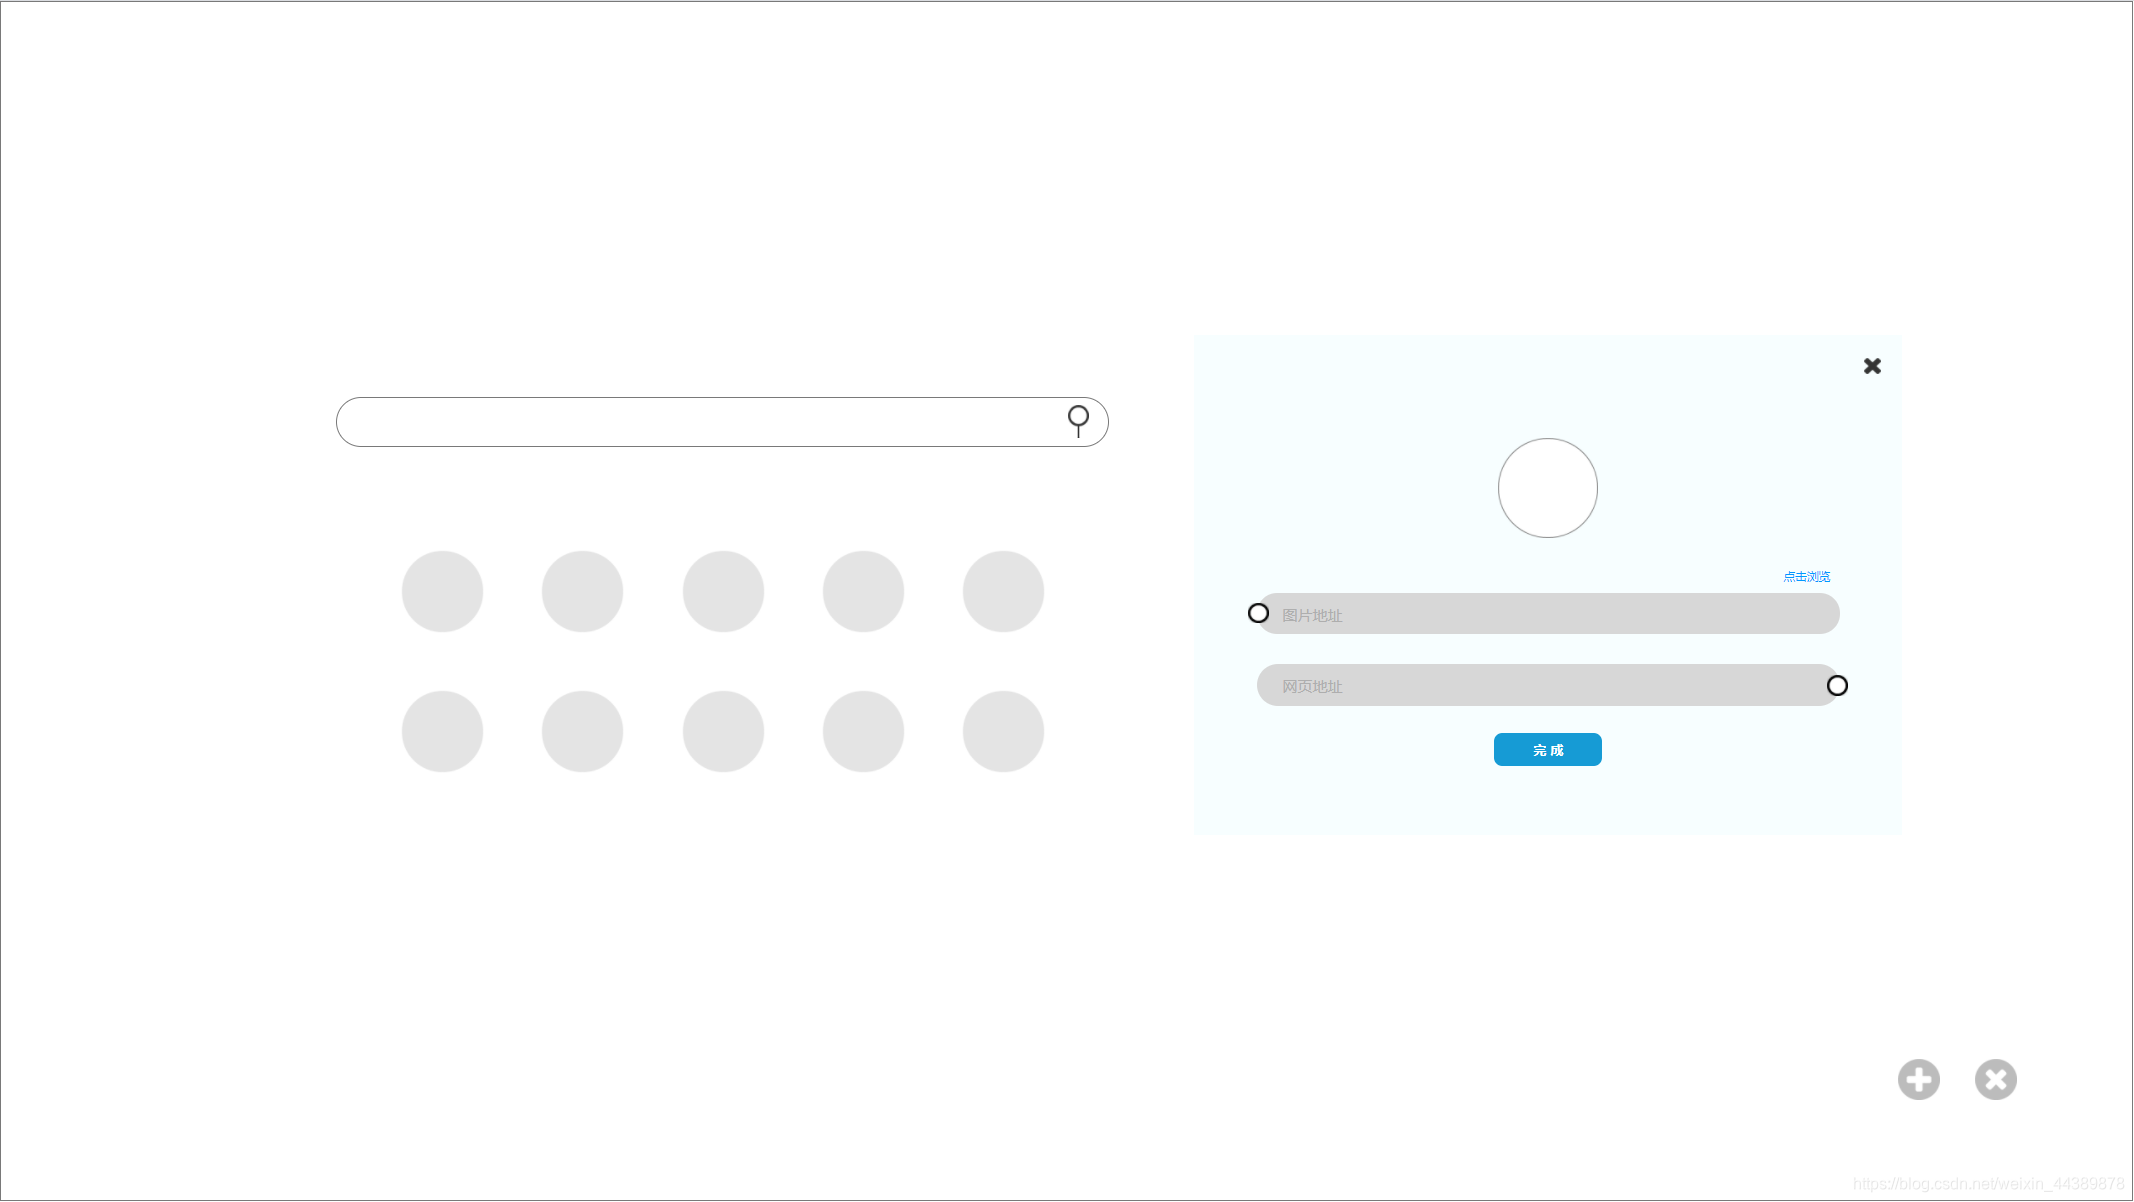
四、未来优化方向
-
JavaScript实现交互式添加和删除网站入口,如下是低保真
-
网页入口的布局不合理,只能容纳八个入口,少于八个之后不会居中,不太好看。为了适应后面动态添加和删除,未来这里的html和css样式会大不一样。
-
有些细节可能没有到考虑浏览器的兼容性。
五、参考文献
[1]https://www.bilibili.com/video/BV1nt4y1Y79W?from=search&seid=14624563172662787229
[2]https://www.iconfont.cn/
[3]https://blog.csdn.net/weixin_42584156/article/details/89094334?utm_medium=distribute.pc_relevant.none-task-blog-BlogCommendFromMachineLearnPai2-2.control&depth_1-utm_source=distribute.pc_relevant.none-task-blog-BlogCommendFromMachineLearnPai2-2.control
[4]https://www.w3school.com.cn/tags/index.asp
[5]https://www.w3school.com.cn/cssref/index.asp
[6]https://blog.csdn.net/pangdingshan/article/details/7172803?ops_request_misc=%257B%2522request%255Fid%2522%253A%2522161919493716780261993688%2522%252C%2522scm%2522%253A%252220140713.130102334.pc%255Fall.%2522%257D&request_id=161919493716780261993688&biz_id=0&utm_medium=distribute.pc_search_result.none-task-blog-2allfirst_rank_v2~rank_v29-12-7172803.pc_search_result_cache&utm_term=chrome%E8%87%AA%E5%AE%9A%E4%B9%89%E6%89%A9%E5%B1%95%E7%A8%8B%E5%BA%8F


 593
593

 被折叠的 条评论
为什么被折叠?
被折叠的 条评论
为什么被折叠?
 到【灌水乐园】发言


