


1 安装依赖
yarn add sortablejs
yarn add -save-dev @types/sortablejs
2 开始编码
<template>
	<div class="app-container home">
		<el-table
			class="t1"
			ref="dragTable"
			:data="tableData"
			row-key="id"
			border
			:row-class-name="tableRowClassName">
			<el-table-column prop="date" label="日期"></el-table-column>
			<el-table-column prop="name" label="姓名"></el-table-column>
			<el-table-column prop="address" label="地址"></el-table-column>
			<el-table-column label="操作">
				<el-button class="move" type="primary" link size="small">拖 拽</el-button>
			</el-table-column>
		</el-table>
	</div>
</template>
<script setup lang="ts">
import Sortable from 'sortablejs'
import { onMounted, ref } from 'vue'
const tableData = ref<Array<any>>([
	{
		id: '1',
		name: 'text_1',
		date: '1111-11-11',
		address: '测试_1'
	},
	{
		id: '2',
		name: 'text_2_不可拖拽',
		date: '2222-22-22',
		address: '测试_2_不可拖拽',
		disabled: true
	},
	{
		id: '3',
		name: 'text_3',
		date: '3333-33-33',
		address: '测试_3'
	},
	{
		id: '4',
		name: 'text_4',
		date: '4444-44-44',
		address: '测试_4'
	},
	{
		id: '5',
		name: 'text_5',
		date: '5555-55-55',
		address: '测试_5'
	}
])

// 创建sortable实例
function initSortable(className: string) {
	// 获取表格row的父节点
	const table = document.querySelector('.' + className + ' .el-table__body-wrapper tbody') as any
	// 创建拖拽实例
	Sortable.create(table, {
		animation: 150, //动画
		disabled: false, // 拖拽不可用? false 启用(刚刚渲染表格的时候起作用,后面不起作用)
		handle: '.move', //指定拖拽目标,点击此目标才可拖拽元素(此例中设置操作按钮拖拽)
		filter: '.disabled', //指定不可拖动的类名(el-table中可通过row-class-name设置行的class)
		dragClass: 'dragClass', //设置拖拽样式类名
		ghostClass: 'ghostClass', //设置拖拽停靠样式类名
		chosenClass: 'chosenClass', //设置选中样式类名
		// 开始拖动事件
		onStart: () => {
			console.log('开始拖动')
		},
		// 结束拖动事件
		onEnd: ({ newIndex, oldIndex }) => {
			console.log('结束拖动', `拖动前索引${oldIndex}---拖动后索引${newIndex}`)
			const currRow = tableData.value.splice(oldIndex as number, 1)[0]
			tableData.value.splice(newIndex as number, 0, currRow)
			console.log('结束拖动', tableData.value)
		}
	})
}
// 设置表格row的class
function tableRowClassName({ row }) {
	if (row.disabled) {
		return 'disabled'
	}
	return ''
}
onMounted(() => {
	initSortable('t1')
})
</script>

<style lang="scss" scope>
// 拖拽
.dragClass {
	background: rgba($color: #41c21a, $alpha: 0.5) !important;
}
// 停靠
.ghostClass {
	background: rgba($color: #6cacf5, $alpha: 0.5) !important;
}
// 选择
.chosenClass:hover > td {
	background: rgba($color: #f56c6c, $alpha: 0.5) !important;
}
</style>
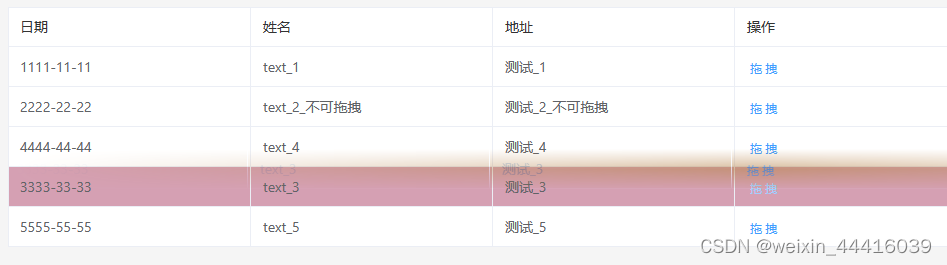
界面:


 5760
5760

 被折叠的 条评论
为什么被折叠?
被折叠的 条评论
为什么被折叠?
 到【灌水乐园】发言


