


springboot整合hibernate(非JPA)(一)
springboot整合hibernate,非jpa,若是jpa就简单了,但是公司项目只有hibernate,并要求支持多数据库,因此记录下整合开发了。基本入门可参考官网
https://docs.jboss.org/hibernate/orm/5.5/quickstart/html_single/#tutorial_annotations
为支持多数据库,下面将实现:
1、springboot2.3.7整合hibernate最新稳定版Hibernate ORM 5.5(2021年7月11日21:53:22)
2、实现ID主键自动生成(为支持MySQL、postgre SQL、Oracle)表关联
第二篇移步:https://blog.csdn.net/weixin_44480167/article/details/118662257
一、创建基本springboot项目
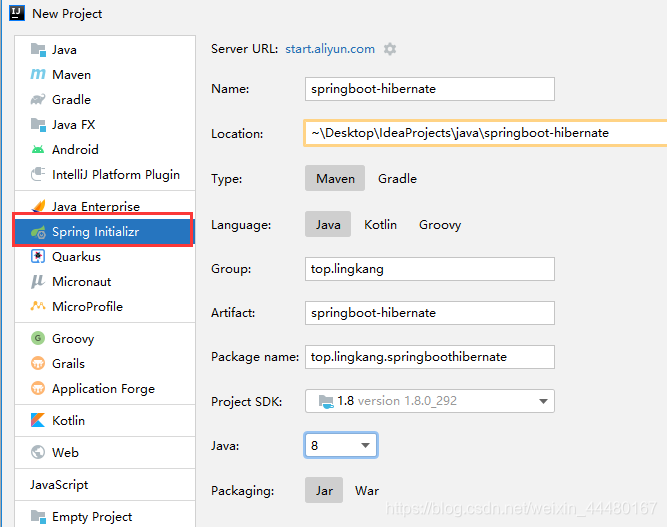
二、引入依赖
		<!--hibernate的核心-->
        <dependency>
            <groupId>org.hibernate</groupId>
            <artifactId>hibernate-core</artifactId>
            <version>5.5.3.Final</version>
        </dependency>
        <!--用于hibernate整合spring的支持-->
        <dependency>
            <groupId>org.springframework</groupId>
            <artifactId>spring-orm</artifactId>
            <version>5.2.12.RELEASE</version>
        </dependency>
        <!--使用阿里的连接池-->
        <dependency>
            <groupId>com.alibaba</groupId>
            <artifactId>druid-spring-boot-starter</artifactId>
            <version>1.2.6</version>
        </dependency>
        <!--用于ID生成-->
        <dependency>
            <groupId>cn.hutool</groupId>
            <artifactId>hutool-core</artifactId>
            <version>5.7.3</version>
        </dependency>
        <dependency>
            <groupId>mysql</groupId>
            <artifactId>mysql-connector-java</artifactId>
            <scope>runtime</scope>
        </dependency>
        <dependency>
            <groupId>org.springframework.boot</groupId>
            <artifactId>spring-boot-starter-web</artifactId>
        </dependency>
三、配置数据库
application.properties
# 应用名称
spring.application.name=springboot-hibernate
# 数据库驱动:
spring.datasource.driver-class-name=com.mysql.cj.jdbc.Driver
# 数据源名称
spring.datasource.name=defaultDataSource
# 数据库连接地址
spring.datasource.url=jdbc:mysql://localhost:3306/blue?serverTimezone=UTC
# 数据库用户名&密码:
spring.datasource.username=root
spring.datasource.password=123456
# 应用服务 WEB 访问端口
server.port=8080
配置数据源:
import com.alibaba.druid.pool.DruidDataSource;
import org.springframework.beans.factory.annotation.Configurable;
import org.springframework.boot.context.properties.ConfigurationProperties;
import org.springframework.context.annotation.Bean;

import javax.sql.DataSource;

@Configurable
public class DataSourceConfig {

    @Bean
    @ConfigurationProperties("spring.datasource")
    public DataSource dataSource() {
        DruidDataSource source = new DruidDataSource();
        //source.setDriverClassName("com.mysql.cj.jdbc.Driver");
        source.setName("test");
        source.setInitialSize(1);
        //最大活动
        source.setMaxActive(10);
        source.setMaxWait(60000);
        //配置间隔多久才进行一次检测,检测需要关闭的空闲连接,单位是毫秒
        source.setTimeBetweenEvictionRunsMillis(60000);
        //配置一个连接在池中最小生存的时间,单位是毫秒
        source.setMinEvictableIdleTimeMillis(300000);
        //每分钟打印一次连接状态日志
        //source.setTimeBetweenLogStatsMillis(60000);
        return source;
    }
}
配置Hibernate
package top.lingkang.springboothibernate.config;

import com.alibaba.druid.pool.DruidDataSource;
import org.springframework.context.annotation.Bean;
import org.springframework.orm.hibernate5.LocalSessionFactoryBean;
import org.springframework.stereotype.Component;

import javax.annotation.Resource;
import javax.sql.DataSource;
import java.util.Properties;

@Component
public class HibernateToConfig {

    @Resource
    private DataSource dataSource;

    /**
     * 此处bean为根据 hibernate 官网配置文件 hibernate.cfg.xml 改造的
     * https://docs.jboss.org/hibernate/orm/5.5/quickstart/html_single/hibernate-tutorials.zip
     *
     * @return
     */
    @Bean
    public LocalSessionFactoryBean sessionFactory() {
        LocalSessionFactoryBean bean = new LocalSessionFactoryBean();
        bean.setDataSource(dataSource);
        // 扫描实体类
        bean.setPackagesToScan("top.lingkang.springboothibernate.entity");
        Properties properties = new Properties();
        properties.setProperty("current_session_context_class", "thread");
        DruidDataSource druidDataSource = (DruidDataSource) dataSource;
        properties.setProperty("connection.pool_size", String.valueOf(druidDataSource.getMaxActive()));
        // 配置方言 mysql 5.7.34
        properties.setProperty("hibernate.dialect", "org.hibernate.dialect.MySQL57Dialect");
        //        <!-- 控制台打印SQL -->
        properties.setProperty("hibernate.show_sql", "true");
        // 制台打印SQL格式化
        //properties.setProperty("hibernate.format_sql", "true");
        /**
         * create:表示启动的时候先drop,再create
         * create-drop: 也表示创建,只不过再系统关闭前执行一下drop
         * update: 这个操作启动的时候会去检查schema是否一致,如果不一致会做scheme更新
         * validate: 启动时验证现有schema与你配置的hibernate是否一致,如果不一致就抛出异常,并不做更新
         */
        // 首次启动使用 create 让bean自动生成表,之后使用 update模式即可
        properties.setProperty("hibernate.hbm2ddl.auto", "create");

        bean.setHibernateProperties(properties);
        return bean;
    }

}
配置自定义ID生成
package top.lingkang.springboothibernate.config;

import cn.hutool.core.lang.Snowflake;
import cn.hutool.core.util.IdUtil;
import org.hibernate.HibernateException;
import org.hibernate.MappingException;
import org.hibernate.engine.spi.SharedSessionContractImplementor;
import org.hibernate.id.Configurable;
import org.hibernate.id.IdentifierGenerator;
import org.hibernate.service.ServiceRegistry;
import org.hibernate.type.Type;

import java.io.Serializable;
import java.util.Properties;

/**
 * 采用雪花算法生成主键
 * 2021年7月11日22:11:55
 */
public class PrimaryGenerator implements Configurable, IdentifierGenerator {
    //参数1为终端ID
    //参数2为数据中心ID
    Snowflake snowflake = IdUtil.getSnowflake(1, 1);
    private String pre = "";

    @Override
    public void configure(Type type, Properties params, ServiceRegistry serviceRegistry) throws MappingException {
        String prefix = params.getProperty("prefix");
        if (prefix != null)
            this.pre = prefix;
    }

    @Override
    public Serializable generate(SharedSessionContractImplementor session, Object object) throws HibernateException {
        //雪花算法生成ID
        return pre + snowflake.nextIdStr();
    }
}
编写实体映射
user表
package top.lingkang.springboothibernate.entity;

import lombok.Data;
import org.hibernate.annotations.GenericGenerator;

import javax.persistence.*;
import java.util.Date;

@Data
@Entity
@Table(name = "t_user")
public class UserBean {
    // 主键采用string为了兼容更多数据库
    @Id
    @Column(length = 20)
    @GeneratedValue(strategy = GenerationType.AUTO, generator = "gg")
    //自定义生成主键
    @GenericGenerator(name = "gg", strategy = "top.lingkang.springboothibernate.config.PrimaryGenerator")
    private String id;
    @Column(length = 40)
    private String username;
    @Column(length = 64)
    private String password;
    @Column(length = 20)
    private String nickname;
    @Column(name = "create_time")
    private Date createTime;
}
用户的角色表
package top.lingkang.springboothibernate.entity;

import lombok.Data;
import org.hibernate.annotations.GenericGenerator;

import javax.persistence.*;

@Data
@Entity
@Table(name = "T_USER_ROLE")// 大小写不同,用于兼容不同数据库
public class UserRoleBean {
    // 主键采用string为了兼容更多数据库
    @Id
    @Column(length = 24)
    @GeneratedValue(strategy = GenerationType.AUTO, generator = "gg")
    //自定义生成主键
    @GenericGenerator(name = "gg", strategy = "top.lingkang.springboothibernate.config.PrimaryGenerator",
            //自定义ID前缀
            parameters = {@org.hibernate.annotations.Parameter(name = "prefix", value = "R_")})
    private String id;
    @Column(name = "user_id",length = 20)
    private String userId;
    @Column(name = "role_id",length = 20)
    private String roleId;
}
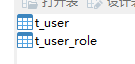
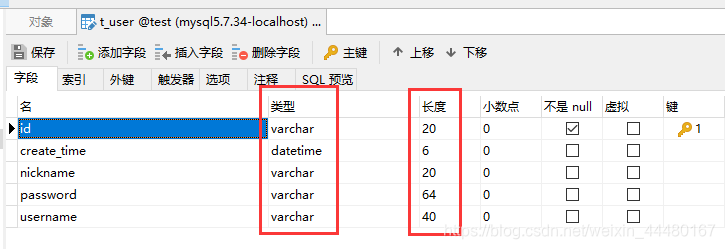
首次启动使用 create 模式,启动完成即可生成对应的映射表在数据库:
四、操作数据库
4.1 增
    /**
     * 此处需要注意,hibernate的增删改需要事务提交,否则不能保存到数据库
     * import org.springframework.transaction.annotation.Transactional;
     */
    @Transactional
    @GetMapping("add")
    public Object add() {
        UserBean bean = new UserBean();
        bean.setCreateTime(new Date());
        bean.setUsername("lingkang");
        bean.setNickname("凌康");
        bean.setPassword("123456");
        System.out.println(sessionFactory.getCurrentSession().save(bean));
        return bean;
    }
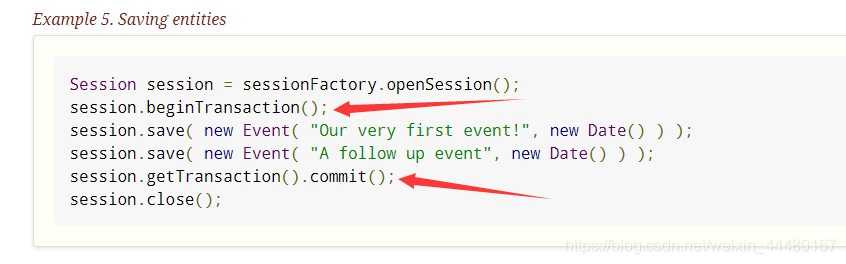
hibernate的增删改需要事务提交,否则不能保存到数据库。官网example:
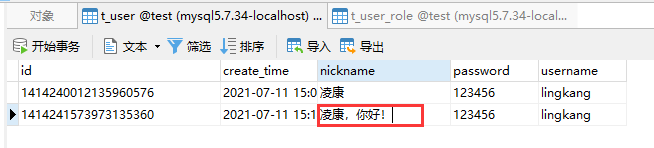
4.2 改
    /**
     * 此处需要注意,hibernate的增删改需要事务提交,否则不能保存到数据库
     * import org.springframework.transaction.annotation.Transactional;
     */
    @Transactional
    @GetMapping("update")
    public Object update() {
        Session currentSession = sessionFactory.getCurrentSession();
        List<UserBean> id = currentSession.createQuery("from UserBean where id=:id")
                .setParameter("id", "1414241573973135360").list();
        System.out.println(id);
        if (!id.isEmpty()){
            UserBean bean = id.get(0);
            bean.setNickname("凌康,你好!");
            // 更新
            currentSession.update(bean);
        }
        return id;
    }
4.3 删除
    /**
     * 此处需要注意,hibernate的增删改需要事务提交,否则不能保存到数据库
     * import org.springframework.transaction.annotation.Transactional;
     */
    @Transactional
    @GetMapping("delete")
    public Object delete() {
//        UserBean bean = new UserBean();
//        bean.setId("1414240012135960576");
        // 缺点,不存在的数据会报异常
        // sessionFactory.getCurrentSession().delete(bean);

        // 推荐  删除不会报异常
        int res = sessionFactory.getCurrentSession().createQuery("delete from UserBean  where id=:id")
                .setParameter("id", "1414243500257579008").executeUpdate();
        System.out.println(res);
        return res;
    }
4.4 查,留到下一章,
查询比较复杂,存在多对多,一对多、一对一等关系,篇幅原因,留到一下章:
https://blog.csdn.net/weixin_44480167/article/details/118662257
这里贴出hibernate常用的BaseDao公共接口
BaseDao接口
import java.io.Serializable;
import java.util.List;

public interface BaseDao<T> {
    T save(T t);

    void delete(T entity);

    void update(T entity);

    T findById(Serializable id);

    List<T> findAll();
}
BaseDao接口实现
import org.hibernate.SessionFactory;
import org.springframework.beans.factory.annotation.Autowired;
import org.springframework.stereotype.Service;
import top.lingkang.demohibernate.dao.BaseDao;

import java.io.Serializable;
import java.lang.reflect.ParameterizedType;
import java.util.List;

@Service
public class BaseDaoImpl<T> implements BaseDao<T> {
    @Autowired
    private SessionFactory sessionFactory;

    @Override
    public T save(T entity) {
        sessionFactory.getCurrentSession().save(entity);
        return entity;
    }

    @Override
    public void delete(T entity) {
        sessionFactory.getCurrentSession().delete(entity);
    }

    @Override
    public void update(Object entity) {
        sessionFactory.getCurrentSession().update(entity);
    }

    @Override
    public T findById(Serializable id) {
        Class tclass = (Class<T>) ((ParameterizedType) getClass().getGenericSuperclass()).getActualTypeArguments()[0];
        return (T) sessionFactory.getCurrentSession().get(tclass, id);
    }

    @Override
    public List<T> findAll() {
        Class tclass = (Class<T>) ((ParameterizedType) getClass().getGenericSuperclass()).getActualTypeArguments()[0];
        return sessionFactory.getCurrentSession().createQuery(
                "from " + tclass.getSimpleName()
        ).list();
    }
}
UserDao 继承使用如下:
public interface UserDao extends BaseDao<UserBean>{
}
UserDao 继承使用实现如下:
import org.springframework.stereotype.Service;
import top.lingkang.demohibernate.dao.UserDao;
import top.lingkang.demohibernate.entity.UserBean;

@Service
public class UserDaoImpl extends BaseDaoImpl<UserBean> implements UserDao {

}
调用如下
	@Autowired
    private UserDao userDao;

    @Override
    public UserBean saveUser(UserBean bean) {
        return userDao.save(bean);
    }


 1631
1631

 被折叠的 条评论
为什么被折叠?
被折叠的 条评论
为什么被折叠?
 到【灌水乐园】发言


