


一、安装webpack
首先安装node(点击详情),再安装webpack,命令如下:
npm install webpack@3.6.0 -g
webpack -v
二、webpack使用CSS文件,步骤如下:
1、编写CSS文件
2、在main.js中引用
require('./css/normal.css')
3、安装配置
css-loader和style-loader
style-loader将模块的导出作为样式添加到 DOM 中,css-loader加载CSS 文件;
使用多个loader,按照从右往左读取;
1> 安装
npm install --save-dev css-loader
npm install style-loader --save-dev
2> 在webpack.config.js中添加配置
module.exports = {
  module: {
    rules: [
      {
        test: /\.css$/,
        use: [ 'style-loader', 'css-loader' ]
      }
    ]
  }
}
4、打包
npm run build
出现如下错误(1):
UnhandledPromiseRejectionWarning: TypeError: this.getResolve is not a function
    at Object.loader.

版本过高,卸载重新安装即可!!
npm uninstall css-loader
npm install css-loader@2.0.2 --save-dev
三、webpack使用less文件,步骤如下:
1、编写less文件
2、在main.js中引用
require('./css/special.less')
3、安装配置
1> 安装
npm install --save-dev less-loader less
2> 在webpack.config.js中添加配置
module.exports = {
    ...
    module: {
        rules: [{
            test: /\.less$/,
            use: [{
                loader: "style-loader" // creates style nodes from JS strings
            }, {
                loader: "css-loader" // translates CSS into CommonJS
            }, {
                loader: "less-loader" // compiles Less to CSS
            }]
        }]
    }
};
4、打包
出现如下错误(2):
nhandledPromiseRejectionWarning: TypeError: loaderContext.getResolve is not a function
    at createWebpackLessPlugin
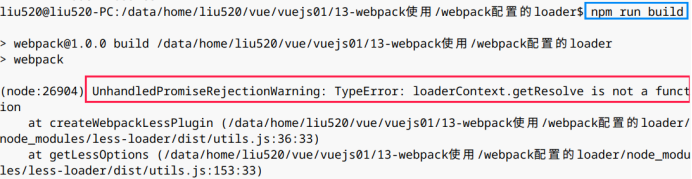
版本过低,卸载重新安装即可!!
npm uninstall less-loader
npm install less-loader@5.0.0 -D
四、webpack使用less文件,步骤如下:
1、编写CSS文件中添加图片
2、在main.js中引用
require('./css/normal.css')
3、安装配置
1> 安装
npm install --save-dev url-loader
2> 在webpack.config.js中添加配置
module.exports = {
  module: {
    rules: [
      {
        test: /\.(png|jpg|gif)$/,
        use: [
          {
            loader: 'url-loader',
            options: {
              limit: 8192
            }
          }
        ]
      }
    ]
  }
}
当加载图片小于limit时,会将图片编译成base64字符串形式;当加载图片大于limit时,需要安装file-loader加载,如下配置:
a、安装file-loader
npm install --save-dev file-loader
b、在webpack.config.js中添加如下配置:
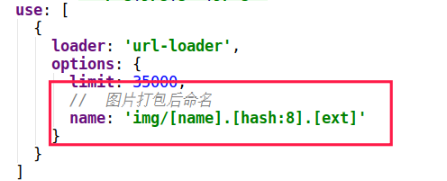
4、打包
延伸:图片打包后名字为32位编码,若想图片与打包前名字一致,在webpack.config.js中添加如下配置:
五、webpack使用Vue,步骤如下:
1、安装Vue
npm install vue --save
2、编写.Vue文件
<template>
  <div>
    <h3 class="lsw">{{message}}</h3>
    <button @click="btnClick">按钮</button>
    <h4>{{name}}</h4>
  </div>
</template>

<script>
export default {
name: "app",
  data(){
    return {
      message:'独爱空城梦',
      name:'梁尚武'
    }
  },
  methods:{
    btnClick(){
    }
  }
}
</script>

<style scoped>
.lsw {
  color: blue;
}
</style>
3、在main.js中引用Vue
import App from './vue/app'
new Vue({
  el:'#app',
  template:'<App/>',
  components:{
    App
  }
})
4、打包运行
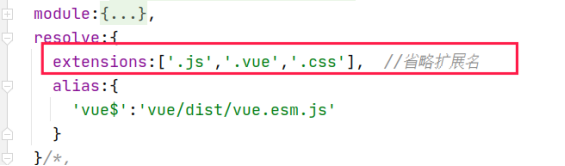
延伸:省略扩展名,在webpack.config.js中添加如下配置:
如下错误(3):

解决方法:
在webpack.config.js中添加如下配置:

六、webpack配置plugin
plugin使用过程:(1)通过npm安装需要使用的plugin;(2)在webpack.config.js中的plugin中配置插件。
(一)、HtmlWebpackPlugin插件作用:自动生成一个index.html文件,即用于打包html,步骤如下:
1、安装html-webpack-plugin
npm install html-webpack-plugin --save-dev
2、在webpack.config.js中添加如下配置:
const HtmlWebpackPlugin = require('html-webpack-plugin')
....
module.exports = {
plugins:[
      new HtmlWebpackPlugin({
        template:'index.html'
      }
  }
3、打包运行
出现如下错误(4):
Error: Cannot find module 'webpack/lib/node/NodeTemplatePlugin'

解决方法:执行下面命令,将局部wepack指向全局wepack
npm link webpack --save-dev
继续打包,又出现错误(5):
TypeError: Cannot read property 'make' of undefined

html-webpack-plugin插件版本兼容的问题
解决方法:在package.json中修改版本:
"html-webpack-plugin": "^3.2.0",
并执行如下命令:
npm install
(二)、uglifyjs-webpack-plugin插件作用:对打包的js文件进行压缩,对js文件进行丑化,步骤如下:
1、安装uglifyjs-webpack-plugin
npm install uglifyjs-webpack-plugin@1.1.1 --save-dev
2、在webpack.config.js中添加如下配置:
const UglifyjsWebpackPlugin = require('uglifyjs-webpack-plugin')
....
module.exports = {
plugins:[
      new UglifyjsWebpackPlugin()
  }
3、打包运行,结果如下(js文件):
七、webpack搭建本地服务器
该服务器基于node.js,内部使用express框架,让浏览器自动刷新,步骤如下:
1、安装webpack-dev-server
npm install webpack-dev-server@2.9.3 --save-dev
2、在webpack.config.js中添加如下配置:
module.exports = {
devServer:{
    contentBase:'./dist',   //为哪一个文件夹提供服务,默认(跟文件夹)
    inline:true  //页面实时刷新
  }
3、在package.json文件中配置:
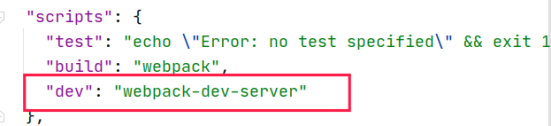
4、运行
npm run dev
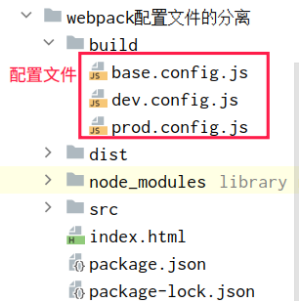
八、webpack配置文件的分离
项目结构:
1、安装merge
npm install webpack-merge --save-dev
2、配置文件
(1)base.config.js
// 定义导出模板的入口和出口
const path = require('path');
// const webpack = require('webpack')
const HtmlWebpackPlugin = require('html-webpack-plugin')
const UglifyjsWebpackPlugin = require('uglifyjs-webpack-plugin')
module.exports = {
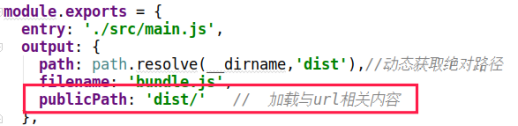
entry: './src/main.js',
output: {
path: path.resolve(__dirname,'../dist'),//动态获取绝对路径
filename: 'bundle.js',
// publicPath: 'dist/' // 加载与url相关内容
},
module:{
rules: [
{
test: /\.css$/,
//style-loader将模块的导出作为样式添加到 DOM 中,css-loader加载CSS 文件
//使用多个loader,按照从右往左读取
use: [ 'style-loader', 'css-loader' ]
},
{
test: /\.less$/,
use: [{
loader: "style-loader" // creates style nodes from JS strings
}, {
loader: "css-loader" // translates CSS into CommonJS
}, {
loader: "less-loader" // compiles Less to CSS
}]
},
{
test: /\.(png|jpg|gif|jpeg)$/,
use: [
{
loader: 'url-loader',
options: {
limit: 35000,
// 图片打包后命名
// name: 'img/[name].[hash:8].[ext]'
}
}
]
},
{
test:/\.vue$/,
use:['vue-loader']
}
]
},
resolve:{
extensions:['.js','.vue','.css'], //省略扩展名
alias:{
'vue$':'vue/dist/vue.esm.js'
}
},
plugins:[
// new webpack.BannerPlugin('最终版权归XQ所有')
new HtmlWebpackPlugin({
template:'index.html'
})
]
}
(2)dev.config.js
const webpackMerge = require('webpack-merge')
const baseConfig = require('./base.config')
// 搭建本地服务器
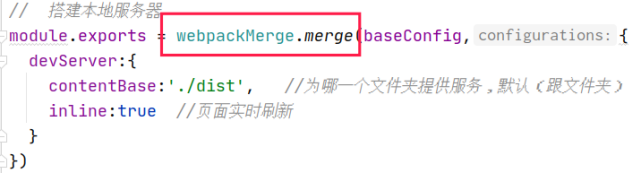
module.exports = webpackMerge.merge(baseConfig,{
devServer:{
contentBase:'./dist', //为哪一个文件夹提供服务,默认(跟文件夹)
inline:true //页面实时刷新
}
})
(3)prodconfig.js
const UglifyjsWebpackPlugin = require('uglifyjs-webpack-plugin')
const  webpackMerge = require('webpack-merge')
const baseConfig = require('./base.config')

module.exports = webpackMerge.merge(baseConfig,{
  plugins:[
    new UglifyjsWebpackPlugin()
  ]
})
3、在package.json文件中配置:

4、运行
执行该指令(npm run dev)出现如下错误(6):
webpack-dev-server not working Cannot find module '../lib/polyfills'
解决方法:
执行如下指令:
rm -rf node_modules
npm install
继续执行该指令,出现错误(7):
TypeError: webpackMerge is not a function
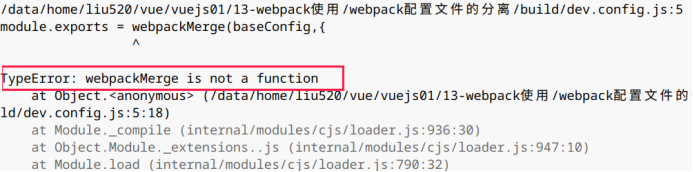
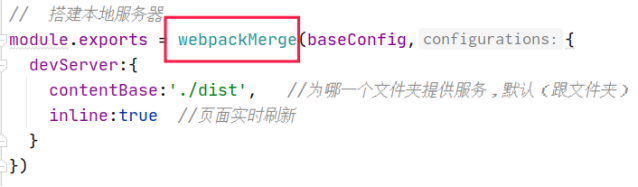
解决方法:
报错提示说WebpackMerge不是一个函数,此时它会不会是一个对象或者类,于是进行如下修改:


 6856
6856


 被折叠的 条评论
为什么被折叠?
被折叠的 条评论
为什么被折叠?
 到【灌水乐园】发言


