


数据层解决方案
SQL
现有数据层解决方案技术选型:
数据源:DruidDataSource
持久化技术:MyBatis-Plus / MyBatis
数据库:MySQL
yml文件配置:
spring:
  datasource:
    druid:
      driver-class-name: com.mysql.cj.jdbc.Driver
      url: jdbc:mysql://localhost:3306/test?serverTimezone=UTC
      username: root
      password: root

mybatis-plus:
  global-config:
    db-config:
      table-prefix: tbl_
      id-type: auto
  configuration:
    log-impl: org.apache.ibatis.logging.stdout.StdOutImpl
内置数据源解决方案—HikariCP
SpringBoot提供了3种内嵌的数据源对象供开发者选择:
HikariCP:默认内置数据源对象。
Tomcat提供DataSource:HikariCP不可用的情况下,且在web环境中,将使用tomcat服务器配置的数据源对象。
Commons DBCP:Hikari不可用,tomcat数据源也不可用,将使用dbcp数据源。
通用配置无法设置具体的数据源配置信息,仅提供基本的连接相关配置,如需配置,在下一级配置中设置具体设定。
默认的内置数据源对象HikariCP的配置:
spring:
  datasource:
    url: jdbc:mysql://localhost:3306/test?serverTimezone=UTC
    hikari:
      driver-class-name: com.mysql.cj.jdbc.Driver
      username: root
      password: root
      maximum-pool-size: 50
内置持久化解决方案—JdbcTemplate
<dependency>
    <groupId>org.springframework.boot</groupId>
    <artifactId>spring-boot-starter-jdbc</artifactId>
</dependency>
spring:
  jdbc:
    template:
      query-timeout: -1   # 查询超时时间
      max-rows: 500       # 最大行数
      fetch-size: -1      # 缓存行数
@SpringBootTest
class Springboot15SqlApplicationTests {
     @Autowired
     private JdbcTemplate jdbcTemplate;
     @Test
     void testJdbc(){
     String sql = "select * from tbl_book where id = 1";
     List<Book> query = jdbcTemplate.query(sql, new RowMapper<Book>() {
         @Override
         public Book mapRow(ResultSet rs, int rowNum) throws SQLException {
             Book temp = new Book();
             temp.setId(rs.getInt("id"));
             temp.setName(rs.getString("name"));
             temp.setType(rs.getString("type"));
             temp.setDescription(rs.getString("description"));
             return temp;
             }
    });
    System.out.println(query);
    }
 }
内嵌数据库解决方案—H2
SpringBoot提供了3种内嵌数据库供开发者选择,提高开发测试效率:H2、HSQL、Derby。
1.导入H2相关坐标
<dependency>
    <groupId>org.springframework.boot</groupId>
    <artifactId>spring-boot-starter-data-jpa</artifactId>
</dependency>
<dependency>
    <groupId>com.h2database</groupId>
    <artifactId>h2</artifactId>
    <scope>runtime</scope>
</dependency>
2.设置当前项目为web工程,并配置H2管理控制台参数
server:
  port: 80
spring:
  h2:
    console:
      path: /h2
      enabled: true
访问用户名sa,默认密码123456
3.操作数据库(创建表)
create table tbl_book (id int,name varchar,type varchar,description varchar)
4.设置访问数据源
server:
  port: 80
spring:
  datasource:
    driver-class-name: org.h2.Driver
    url: jdbc:h2:~/test
    username: sa
    password: 123456
  h2:
    console:
      path: /h2
      enabled: true
H2数据库控制台仅用于开发阶段,线上项目请务必关闭控制台功能,即enabled: false
5.SpringBoot可以根据url地址自动识别数据库种类,在保障驱动类存在的情况下,可以省略配置
server:
  port: 80
spring:
  datasource:

#    driver-class-name: org.h2.Driver
   url: jdbc:h2:~/test
   username: sa
   password: 123456
  h2:
   console:
     path: /h2
     enabled: true
NoSQL
市面上常见的NoSQL解决方案:Redis、Mongo、ES。
说明:上述技术通常在Linux系统中安装部署。
Redis
Redis是一款key-value存储结构的内存级NoSQL数据库:支持多种数据存储格式;支持持久化;支持集群。
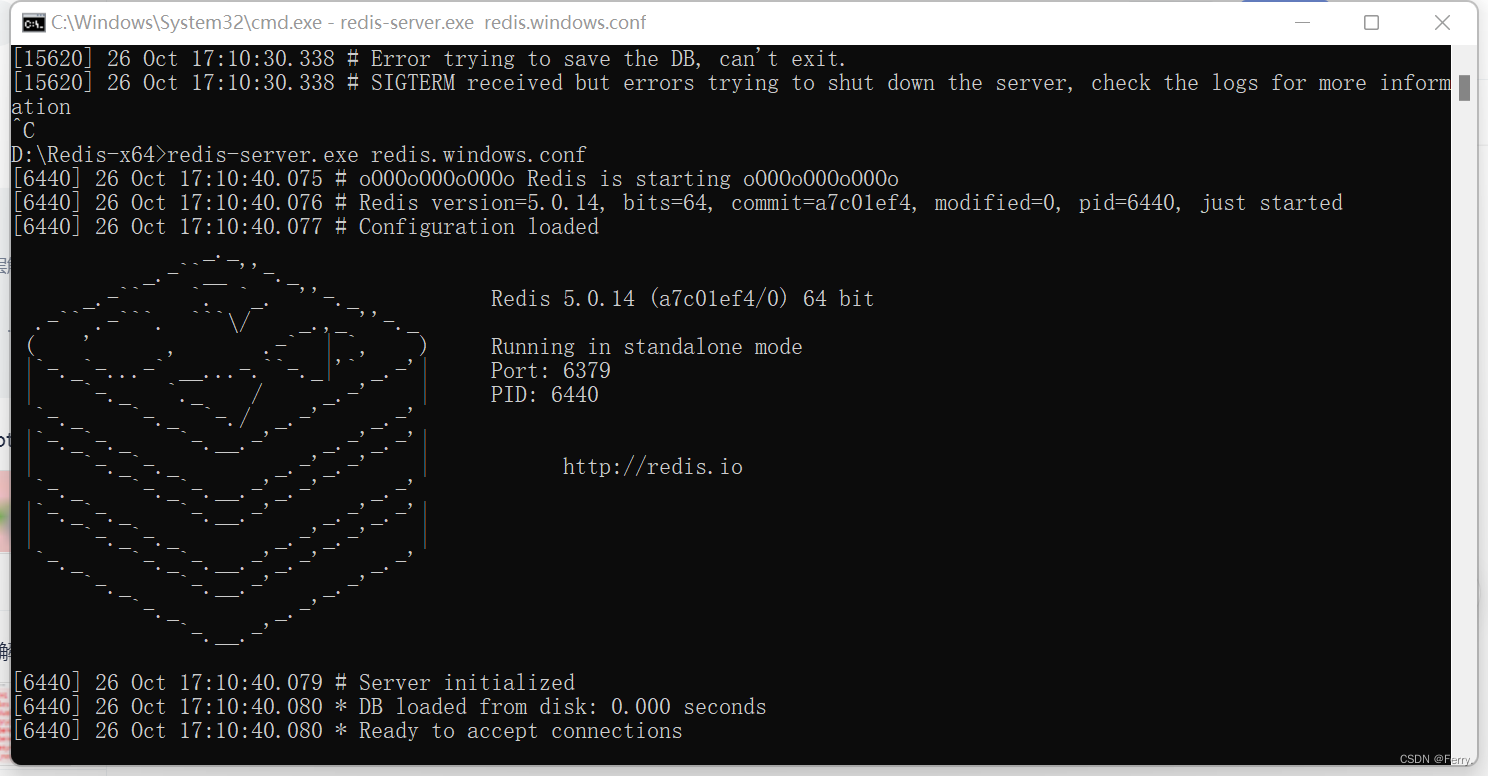
服务端启动命令
redis-server.exe redis.windows.conf
客户端启动命令
redis-cli.exe
如何没有启动成功,那么客户端先执行shutdown再执行exit,然后服务端执行redis-server.exe redis.windows.conf,就可以启动成功了。
1.导入整合Redis坐标
<dependency>
    <groupId>org.springframework.boot</groupId>
    <artifactId>spring-boot-starter-data-redis</artifactId>
</dependency>
2.配置Redis(采用默认配置)
spring:
  redis:
    host: localhost
    port: 6379
RedisTemplate提供操作各种数据存储类型的接口API
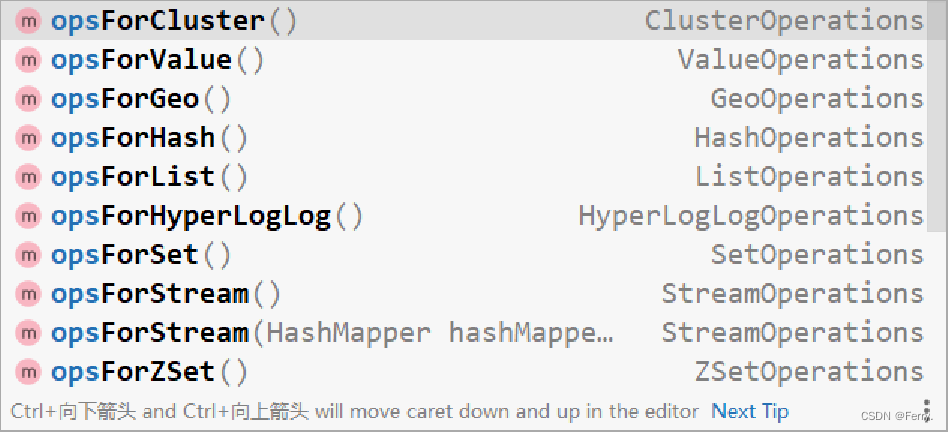
3.客户端:提供操作Redis接口对象RedisTemplate
ops*:获取各种数据类型操作接口
@SpringBootTest
class Springboot16RedisApplicationTests {

    @Autowired
    private RedisTemplate redisTemplate;

    @Test
    void set() {
        ValueOperations ops = redisTemplate.opsForValue();
        ops.set("age",41);
    }

    @Test
    void get() {
        ValueOperations ops = redisTemplate.opsForValue();
        Object age = ops.get("age");
        System.out.println(age);
    }

    @Test
    void hset() {
        HashOperations ops = redisTemplate.opsForHash();
        ops.put("info","a","aa");
    }

    @Test
    void hget() {
        HashOperations ops = redisTemplate.opsForHash();
        Object o = ops.get("info", "a");
        System.out.println(o);
    }

}
Springboot读写Redis的客户端
1.客户端选择:jedis
<dependency>
    <groupId>redis.clients</groupId>
    <artifactId>jedis</artifactId>
</dependency>
2.配置客户端专用属性
spring:
  redis:
    host: localhost
    port: 6379
    client-type: jedis
    jedis:
      pool:
        max-active: 16
3.客户端:StringRedisTemplate以字符串作为key和value,与Redis客户端操作等效
@SpringBootTest
public class StringRedisTemplateTest {

    @Autowired
    private StringRedisTemplate stringRedisTemplate;

    @Test
    void get(){
        ValueOperations<String, String> ops = stringRedisTemplate.opsForValue();
        String name = ops.get("name");
        System.out.println(name);
    }

}
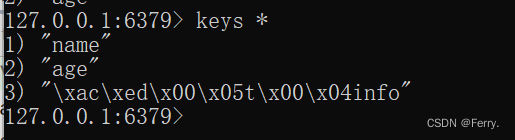
客户端使用Redis接口对象RedisTemplate和StringRedisTemplate的区别:
StringRedisTemplate是直接以字符串在Redis中储存,但是RedisTemplate在Redis中的以序列化的方式储存。
4.Redis两种客户端
lettcus与jedis区别:
1.jedis连接Redis服务器是直连模式,当多线程模式下使用jedis会存在线程安全问题,解决方案可以通过配置连接池使每个连接专用,这样整体性能就大受影响。
2.lettcus基于Netty框架进行与Redis服务器连接,底层设计中采用StatefulRedisConnection。StatefulRedisConnection自身是线程安全的,可以保障并发访问安全问题,所以一个连接可以被多线程复用。当然lettcus也支持多连接实例一起工作。
Mongo
MongoDB是一个开源、高性能、无模式的文档型数据库。NoSQL数据库产品中的一种,是最像关系型数据库的非关系型数据库。
淘宝用户数据:
存储位置:数据库
特征:永久性存储,修改频度极低
游戏装备数据、游戏道具数据:
存储位置:数据库、Mongodb
特征:永久性存储与临时存储相结合、修改频度较高
直播数据、打赏数据、粉丝数据:
存储位置:数据库、Mongodb
特征:永久性存储与临时存储相结合,修改频度极高
物联网数据:
存储位置:Mongodb
特征:临时存储,修改频度飞速
其他数据……
Windows版Mongo启动
服务端启动
mongod --dbpath=..\data\db
客户端启动
mongo --host=127.0.0.1 --port=27017
可视化客户端Robo 3T的增删改查操作:
//添加文档
//db.book.save({"name":"springboot",type:"springboot"})

//删除文档
//db.book.remove({type:"springboot"})

//修改文档
db.book.update({name:"springboot"},{$set:{name:"spring"}})

//查询文档
db.getCollection('book').find({})

db.book.find({type:"springboot"})
基础查询和条件查询:
基础查询
查询全部:db.集合.find();
查第一条:db.集合.findOne()
查询指定数量文档:db.集合.find().limit(10) //查10条文档
跳过指定数量文档:db.集合.find().skip(20) //跳过20条文档
统计:db.集合.count()
排序:db.集合.sort({age:1}) //按age升序排序
投影:db.集合名称.find(条件,{name:1,age:1}) //仅保留name与age域
条件查询
基本格式:db.集合.find({条件})
模糊查询:db.集合.find({域名:/正则表达式/}) //等同SQL中的like,比like强大,可以执行正则所有规则
条件比较运算:db.集合.find({域名:{KaTeX parse error: Expected 'EOF', got '}' at position 5: gt:值}̲}) //等同S…in:[值1,值2]}}) //等同于SQL中的in
条件连接查询:db.集合.find({$and:[{条件1},{条件2}]}) //等同于SQL中的and、or
Springboot集成Mongodb
1.导入Mongodb坐标
<dependency>
    <groupId>org.springframework.boot</groupId>
    <artifactId>spring-boot-starter-data-mongodb</artifactId>
</dependency>
2.配置客户端
spring:
  data:
    mongodb:
      uri: mongodb://localhost/test
3.客户端读写Mongodb:提供操作Mongodb接口对象MongoTemplate
@SpringBootTest
class Springboot17MongodbApplicationTests {

    @Autowired
    private MongoTemplate mongoTemplate;

    @Test
    void contextLoads() {
        Book book = new Book();
        book.setId(2);
        book.setName("springboot2");
        book.setType("springboot2");
        book.setDescription("springboot2");

        mongoTemplate.save(book);
    }

    @Test
    void find(){
        List<Book> all = mongoTemplate.findAll(Book.class);
        System.out.println(all);
    }


}
ES
Elasticsearch是一个分布式全文搜索引擎。
Windows版ES安装与启动,以管理员身份运行
以管理员身份运行 elasticsearch.bat
创建books索引
PUT    http://localhost:9200/books

查询books索引
GET    http://localhost:9200/books
删除books索引
DELETE    http://localhost:9200/books
IK分词器
创建索引并指定规则
{
    "mappings":{
        "properties":{
            "id":{
                "type":"keyword"    //id是主键
            },
            "name":{
                "type":"text",     //name是文本框
                "analyzer":"ik_max_word",   //name用ik分词器
                "copy_to":"all"    //复制到all里面去,这样name和description可以同时分词查询
            },
            "type":{
                "type":"keyword"
            },
            "description":{
                "type":"text",
                "analyzer":"ik_max_word",
                "copy_to":"all"
            },
            "all":{
                "type":"text",
                "analyzer":"ik_max_word"
            }
        }
    }
}
创建文档
POST    http://localhost:9200/books/_doc        #使用系统生成id

POST    http://localhost:9200/books/_create/1        #使用指定id,
POST    http://localhost:9200/books/_doc/1        #使用指定id,不存在创建,存在更新(版本递增)
Body中添加数据:
{
    "name":"springboot",
    "type":"springboot",
    "description":"springboot"
}
查询文档:
GET    http://localhost:9200/books/_doc/1         #查询单个文档
GET    http://localhost:9200/books/_search         #查询全部文档
条件查询:
GET http://localhost:9200/books/_search?q=name:springboot
删除文档:
DELETE http://localhost:9200/books/_doc/1
修改文档(全量修改)
PUT http://localhost:9200/books/_doc/1
{

    "name":"springboot",

    "type":"springboot",

    "description":"springboot"

}
修改文档(部署修改)
POST http://localhost:9200/books/_update/1
{

    "doc":{

        "name":"springboot"

    }
}
springboot整合ES
1.导入坐标
<dependency>
    <groupId>org.elasticsearch.client</groupId>
    <artifactId>elasticsearch-rest-high-level-client</artifactId>
</dependency>
2.配置
spring:
  elasticsearch:
    rest:
      uris: http://localhost:9200
3.客户端:ElasticsearchRestTemplate
@SpringBootTest
class Springboot18EsApplicationTests {

    @Autowired
    private BookDao bookDao;

    @BeforeEach
    void setUp() {
        //创建ES客户端对象
        HttpHost host = HttpHost.create("http://localhost:9200");
        RestClientBuilder builder = RestClient.builder(host);
        client = new RestHighLevelClient(builder);
    }

    @AfterEach
    void tearDown() throws IOException {
        client.close();
    }

    private RestHighLevelClient client;

    @Test
    void testCreateIndex() throws IOException {
        CreateIndexRequest request = new CreateIndexRequest("books");
        client.indices().create(request, RequestOptions.DEFAULT);
    }
测试创建索引
@Test
void testCreateIndex() throws IOException {
    //客户端操作
    CreateIndexRequest request = new CreateIndexRequest("books");
    //获取操作索引的客户端对象,调用创建索引操作
    client.indices().create(request, RequestOptions.DEFAULT);
}
创建索引
@Test
void testCreateIndexByIK() throws IOException {
    CreateIndexRequest request = new CreateIndexRequest("books");
    String json = "{\n" +
            "    \"mappings\":{\n" +
            "        \"properties\":{\n" +
            "            \"id\":{\n" +
            "                \"type\":\"keyword\"\n" +
            "            },\n" +
            "            \"name\":{\n" +
            "                \"type\":\"text\",\n" +
            "                \"analyzer\":\"ik_max_word\",\n" +
            "                \"copy_to\":\"all\"\n" +
            "            },\n" +
            "            \"type\":{\n" +
            "                \"type\":\"keyword\"\n" +
            "            },\n" +
            "            \"description\":{\n" +
            "                \"type\":\"text\",\n" +
            "                \"analyzer\":\"ik_max_word\",\n" +
            "                \"copy_to\":\"all\"\n" +
            "            },\n" +
            "            \"all\":{\n" +
            "                \"type\":\"text\",\n" +
            "                \"analyzer\":\"ik_max_word\"\n" +
            "            }\n" +
            "        }\n" +
            "    }\n" +
            "}";
    //设置请求中的参数
    request.source(json, XContentType.JSON);
    client.indices().create(request, RequestOptions.DEFAULT);
}
添加文档
@Test
//添加文档
void testCreateDoc() throws IOException {
    Book book = bookDao.selectById(1);
    IndexRequest request = new IndexRequest("books").id(book.getId().toString());
    String json = JSON.toJSONString(book);
    request.source(json,XContentType.JSON);
    client.index(request,RequestOptions.DEFAULT);
}
批量添加文档
@Test
//批量添加文档
void testCreateDocAll() throws IOException {
    List<Book> bookList = bookDao.selectList(null);
    BulkRequest bulk = new BulkRequest();
    for (Book book : bookList) {
        IndexRequest request = new IndexRequest("books").id(book.getId().toString());
        String json = JSON.toJSONString(book);
        request.source(json,XContentType.JSON);
        bulk.add(request);
    }
    client.bulk(bulk,RequestOptions.DEFAULT);
}
按id查询文档
@Test
//按id查询
void testGet() throws IOException {
    GetRequest request = new GetRequest("books","1");
    GetResponse response = client.get(request, RequestOptions.DEFAULT);
    String json = response.getSourceAsString();
    System.out.println(json);
}
按条件查询
@Test
//按条件查询
void testSearch() throws IOException {
    SearchRequest request = new SearchRequest("books");

    SearchSourceBuilder builder = new SearchSourceBuilder();
    builder.query(QueryBuilders.termQuery("all","spring"));
    request.source(builder);

    SearchResponse response = client.search(request, RequestOptions.DEFAULT);
    SearchHits hits = response.getHits();
    for (SearchHit hit : hits) {
        String source = hit.getSourceAsString();
        //System.out.println(source);
        Book book = JSON.parseObject(source, Book.class);
        System.out.println(book);
    }
}


 920
920


 被折叠的 条评论
为什么被折叠?
被折叠的 条评论
为什么被折叠?
 到【灌水乐园】发言


