


lnmp环境编译安装-支持多版本PHP
lnmp环境编译安装教程(支持多版本PHP:php5.6,php7,php8)
手把手带你安装lnmp环境。
安装nginx
目前最新稳定版本Nginx-1.20.1:
-
下载;
wget http://nginx.org/download/nginx-1.20.1.tar.gz -
解压nginx-1.20.1.tar.gz包并进入nginx-1.20.1;
tar -zxvf nginx-1.20.1.tar.gz cd nginx-1.20.1 -
检查nginx安装软件依赖是否满足要求;
./configure如果有报错,就需要安装nginx依赖库yum -y install pcre* #为了让nginx支持rewrite yum -y install gcc-c++ yum -y install zlib* yum -y install openssl openssl-devel -
执行安装;
#安装目录及模块支持配置 ./configure --prefix=/usr/local/nginx --with-http_ssl_module --with-http_v2_module --with-http_realip_module --with-http_addition_module --with-http_sub_module --with-http_dav_module --with-http_flv_module --with-http_mp4_module --with-http_gunzip_module --with-http_gzip_static_module --with-http_auth_request_module --with-http_random_index_module --with-http_secure_link_module --with-http_degradation_module --with-http_slice_module --with-http_stub_status_module --with-mail --with-mail_ssl_module --with-stream --with-stream_ssl_module --with-stream_realip_module --with-stream_ssl_preread_module --with-threads --user=www --group=www #编译并安装 make && make install -
启动nginx;
 cd /usr/local/nginx/sbin/
 ./nginx
如果报错:nginx: [emerg] getpwnam(“www”) failed
说明没有创建www这个用户,应该在服务器系统中添加www用户组和用户wwwgroupadd -f www useradd -g www wwwok可以启动nginx
浏览器访问验证nginx启动是否成功
出现下面welcome to nginx!页面说明nginx安装并启动成功

-
至此nginx安装完成;
安装mysql
-
下载mysql5.7最新版
wget https://downloads.mysql.com/archives/get/p/23/file/mysql-5.7.35.tar.gz -
解压mysql-5.7.35.tar.gz并进入mysql-5.7.35
tar -zxvf mysql-5.7.35.tar.gz cd mysql-5.7.35 -
安装mysql依赖的环境和工具
yum install -y gcc c ncurses-devel cmake libaio bison gcc-c++ -
编译安装
cmake . -DCMAKE_INSTALL_PREFIX=/usr/local/mysql/ \ -DMYSQL_UNIX_ADDR=/tmp/mysql.sock \ -DMYSQL_DATADIR=/data/mysql \ -DSYSCONFDIR=/etc \ -DMYSQL_USER=mysql \ -DMYSQL_TCP_PORT=3306 \ -DWITH_XTRADB_STORAGE_ENGINE=1 \ -DWITH_INNOBASE_STORAGE_ENGINE=1 \ -DWITH_PARTITION_STORAGE_ENGINE=1 \ -DWITH_BLACKHOLE_STORAGE_ENGINE=1 \ -DWITH_MYISAM_STORAGE_ENGINE=1 \ -DWITH_READLINE=1 \ -DENABLED_LOCAL_INFILE=1 \ -DWITH_EXTRA_CHARSETS=1 \ -DDEFAULT_CHARSET=utf8 \ -DDEFAULT_COLLATION=utf8_general_ci \ -DEXTRA_CHARSETS=all \ -DWITH_BIG_TABLES=1 \ -DWITH_DEBUG=0 \ -DDOWNLOAD_BOOST=1 \ -DWITH_BOOST=/home/jason/web_software/latest_soft/mysql-5.7.35/boost make && make install如果编译下载boost失败,请手动下载boost,然后解压到mysql安装包目录再执行cmakewget http://sourceforge.net/projects/boost/files/boost/1.59.0/boost_1_59_0.tar.gz --no-check-certificate tar zxvf boost_1_59_0.tar.gz -C mysql-5.7.35 cd mysql-5.7.35 mv boost_1_59_0 boost -
配置前准备
cd /usr/local/mysql cp support-files/mysql.server /etc/init.d/mysqld #为了能在 service 上启动mysqld 服务 chkconfig --add mysqld # systemctl 里的服务 注册 chkconfig --level 35 mysqld on # 打开 mkdir mysql-files chown mysql:mysql mysql-files -R #确保 mysql 用户和mysql用户组已经创建 ,没有的要自行创建 chmod 750 mysql-files -R -
修改my.cnf 配置文件
vi /etc/my.cnf [client] port=3306 socket=/tmp/mysql.sock default-character-set=utf8 user=mysql [mysqld] basedir=/usr/local/mysql datadir=/data/mysql socket=/tmp/mysql.sock # Disabling symbolic-links is recommended to prevent assorted security risks symbolic-links=0 # Settings user and group are ignored when systemd is used. # If you need to run mysqld under a different user or group, # customize your systemd unit file for mariadb according to the # instructions in http://fedoraproject.org/wiki/Systemd default-time-zone=system character-set-server=utf8 default-storage-engine=InnoDB user=mysql [mysqld_safe] log-error=/usr/local/mysql/mysql-files/logs/mariadb.log pid-file=/usr/local/mysql/mysql-files/logs/mariadb.pid # # include all files from the config directory # !includedir /etc/my.cnf.d -
初始化mysql
groupadd mysql useradd -g mysql -r mysql [root@localhost mysql]# bin/mysqld --initialize --user=mysql --datadir=/data/mysql --basedir=/usr/local/mysql 2021-11-08T03:47:00.336747Z 0 [Warning] TIMESTAMP with implicit DEFAULT value is deprecated. Please use --explicit_defaults_for_timestamp server option (see documentation for more details). 2021-11-08T03:47:00.387958Z 0 [ERROR] --initialize specified but the data directory has files in it. Aborting. 2021-11-08T03:47:00.387994Z 0 [ERROR] Aborting [root@localhost mysql]# bin/mysqld --initialize --user=mysql --datadir=/data/mysql --basedir=/usr/local/mysql 2021-11-08T03:50:13.601848Z 0 [Warning] TIMESTAMP with implicit DEFAULT value is deprecated. Please use --explicit_defaults_for_timestamp server option (see documentation for more details). 2021-11-08T03:50:14.502545Z 0 [Warning] InnoDB: New log files created, LSN=45790 2021-11-08T03:50:14.556754Z 0 [Warning] InnoDB: Creating foreign key constraint system tables. 2021-11-08T03:50:14.619735Z 0 [Warning] No existing UUID has been found, so we assume that this is the first time that this server has been started. Generating a new UUID: fb182ec3-4046-11ec-8c78-000c29bbdb11. 2021-11-08T03:50:14.658725Z 0 [Warning] Gtid table is not ready to be used. Table 'mysql.gtid_executed' cannot be opened. 2021-11-08T03:50:14.861071Z 0 [Warning] A deprecated TLS version TLSv1 is enabled. Please use TLSv1.2 or higher. 2021-11-08T03:50:14.861084Z 0 [Warning] A deprecated TLS version TLSv1.1 is enabled. Please use TLSv1.2 or higher. 2021-11-08T03:50:14.861605Z 0 [Warning] CA certificate ca.pem is self signed. 2021-11-08T03:50:14.912415Z 1 [Note] A temporary password is generated for root@localhost: zzNkhM(Xs4UG -
执行成功,启动mysqld服务
cd /usr/local/mysql/mysql-files/logs touch mariadb.log chown mysql:mysql mariadb.log [root@localhost ~]# service mysqld start Starting MySQL SUCCESS! -
创建软链
ln -s /usr/local/mysql/bin/mysql /usr/bin/ ln -s /usr/local/mysql/bin/mysqld /usr/bin/ -
登录修改密码
[root@localhost ~]# mysql -uroot -p'zzNkhM(Xs4UG'
mysql: [Warning] Using a password on the command line interface can be insecure.
Welcome to the MySQL monitor.  Commands end with ; or \g.
Your MySQL connection id is 2
Server version: 5.7.35

Copyright (c) 2000, 2021, Oracle and/or its affiliates.

Oracle is a registered trademark of Oracle Corporation and/or its
affiliates. Other names may be trademarks of their respective
owners.

Type 'help;' or '\h' for help. Type '\c' to clear the current input statement.

mysql> ALTER USER 'root'@'localhost' IDENTIFIED BY '123456';
Query OK, 0 rows affected (0.47 sec)
mysql> flush privileges;
Query OK, 0 rows affected (0.00 sec)
安装配置多版本php
安装php7
-
下载并解压php7
wget https://www.php.net/distributions/php-7.4.25.tar.gz tar -zxvf php-7.4.25.tar.gz -
安装php依赖库包
yum -y install libxml2 yum -y install libxml2-devel yum -y install openssl yum -y install openssl-devel yum -y install curl-devel yum -y install libjpeg-devel yum -y install libpng-devel yum -y install freetype-devel yum -y install bzip2-devel yum -y install libmcrypt libmcrypt-devel yum -y install postgresql-devel yum -y install aspell-devel yum -y install readline-devel yum -y install libxslt-devel yum -y install net-snmp-devel yum -y install unixODBC-devel yum -y install libicu-devel yum -y install libc-client-devel yum -y install libXpm-devel yum -y install libvpx-devel yum -y install enchant-devel yum -y install openldap yum -y install openldap-devel yum -y install db4-devel yum -y install gmp-devel yum -y install sqlite-devel yum -y install mysql-devel -
添加用户和组
groupadd -r www && useradd -r -g www -s /sbin/nologin -
配置及编译安装
cd php-7.4.25
#./configure      --prefix=/usr/local/php7    --with-config-file-path=/usr/local/php7/etc    --enable-fpm    --with-fpm-user=www    --with-fpm-group=www    --enable-inline-optimization    --disable-debug    --disable-rpath    --enable-shared    --enable-soap    --with-xmlrpc    --with-openssl    --with-mcrypt    --with-pcre-regex    --with-sqlite3    --with-zlib    --enable-bcmath    --with-iconv    --with-bz2    --enable-calendar    --with-curl    --with-cdb    --enable-dom    --enable-exif    --enable-fileinfo    --enable-filter     --with-pcre-dir    --enable-ftp    --with-gd    --with-openssl-dir    --with-jpeg-dir    --with-png-dir    --with-freetype-dir    --enable-gd-native-ttf    --enable-gd-jis-conv    --with-gettext    --with-gmp    --with-mhash    --enable-json    --enable-mbstring    --enable-mbregex    --enable-mbregex-backtrack    --with-libmbfl    --with-onig    --enable-pdo    --with-mysqli=mysqlnd    --with-pdo-mysql=mysqlnd    --with-zlib-dir    --with-pdo-sqlite    --with-readline    --enable-session    --enable-shmop    --enable-simplexml    --enable-sockets    --enable-sysvmsg    --enable-sysvsem    --enable-sysvshm    --enable-wddx    --with-libxml-dir    --with-xsl    --enable-zip    --enable-mysqlnd-compression-support    --with-pear    --enable-opcache
./configure --prefix=/usr/local/php7 --with-config-file-path=/usr/local/php7/etc --with-freetype --enable-gd --with-jpeg --with-gettext --with-gmp --with-mysqli --with-openssl --with-pdo-mysql --with-pear --with-xmlrpc --with-xsl --with-mhash --enable-fpm --with-fpm-user=www    --with-fpm-group=www --enable-bcmath --enable-mbstring --enable-sockets --enable-xml --enable-embed --enable-phpdbg --with-ldap --with-snmp --with-bz2 --enable-calendar --with-curl --enable-exif --enable-ftp --enable-pcntl --with-zlib --with-readline --enable-shmop
make && make install
如果./configure报错No package 'oniguruma' found
执行下面操作安装oniguruma
wget wget https://github.com/kkos/oniguruma/archive/refs/tags/v6.9.7.1.tar.gz -O oniguruma-6.9.7.1.tar.gz
tar -zxvf oniguruma-6.9.7.1.tar.gz
cd oniguruma-6.9.7.1/
./autogen.sh
./configure --prefix=/usr --libdir=/lib64  #64位的系统一定要标识  --libdir=/lib64
make && make install
如果出现 make: *** [sapi/cli/php] Error 1 的错误,通过继续执行 make ZEND_EXTRA_LIBS='-liconv' 命令解决
如果还报错/usr/bin/ld: cannot find -liconv
执行下面操作
 wget https://ftp.gnu.org/pub/gnu/libiconv/libiconv-1.16.tar.gz --no-check-certificate
 tar -zxvf libiconv-1.16.tar.gz
 cd libiconv-1.16/
 ./configure --prefix=/usr/local
 make
 make install
 cd /usr/local/lib
 ln -s /usr/local/lib/libiconv.so /usr/lib
 ln -s /usr/local/lib/libiconv.so.2 /usr/lib/libiconv.so.2
如果报Cannot find ldap libraries in /usr/lib
执行下面操作
cp -frp /usr/lib64/libldap* /usr/lib/
如果报错/usr/bin/ld: ext/ldap/.libs/ldap.o: undefined reference to symbol 'ber_memfree',按如下操作
	./configure后
	vi Makefile
	找到 开头是 'EXTRA_LIBS' 这一行 在结尾加上 '-llber' 然后执行 make && make install

如果报错 undefined reference to `curl_mime_free’,需要更新一下最新curl
  wget https://curl.se/download/curl-7.79.1.tar.gz --no-check-certificate
  tar -zxvf curl-7.79.1.tar.gz
  cd curl-7.79.1/
  ./configure --with-openssl
  make
  make install
  curl --version
如果报make: *** [sapi/cli/php] 错误
vi Makefile
EXTRA_LIBS = ..... -lcrypt 在最后加上 -liconv,例如: EXTRA_LIBS = ..... -lcrypt -liconv 然后重新再次 make
如果还是报错,尝试执行yum upgrade更新系统软件包
如果报 /ext/curl/interface.c undefined reference to `curl_mime_addpart'
执行yum remove curl-devel卸载curl-devel
make clean
重新编译安装PHP
至此PHP安装完成
配置文件
cd /usr/local/php7/etc
cp php-fpm.conf.default php-fpm.conf
cd /usr/local/php7/etc/php-fpm.d
cp www.conf.default www.conf
cp php-7.4.25/php.ini-development /usr/local/php7/etc/php.ini
创建软链
ln -s /usr/local/php7/bin/php /usr/bin/php7
配置nginx支持php7
整合nginx和php,让nginx调用php-fpm解析php脚本:
打开/usr/local/nginx/conf/nginx.conf配置文件
location ~ \.php$ {
            root           html;
            fastcgi_pass   127.0.0.1:9000;
            fastcgi_index  index.php;
            fastcgi_param  SCRIPT_FILENAME  $document_root$fastcgi_script_name;
            include        fastcgi_params;
            index          index.php index.htm;
        }
至此lnmp环境搭建完成

安装PHP5.6
- 下载最新php5.6版本
wget https://www.php.net/distributions/php-5.6.40.tar.gz
- 解压安装
tar -zxvf php-5.6.40.tar.gz
cd php-5.6.40
./configure --prefix=/usr/local/php56 --with-config-file-path=/usr/local/php56/etc --with-gettext --with-gmp --with-mysqli --with-openssl --with-pdo-mysql --with-pear --with-xmlrpc --with-xsl --with-mhash --enable-fpm --with-fpm-user=www    --with-fpm-group=www --enable-bcmath --enable-mbstring --enable-sockets --enable-xml --enable-embed --enable-phpdbg --with-ldap --with-snmp --with-bz2 --enable-calendar --with-curl --enable-exif --enable-ftp --enable-pcntl --with-zlib --with-readline --enable-shmop
make && make install
配置文件
cd /usr/local/php56/etc
cp php-fpm.conf.default php-fpm.conf
cp php-5.6.40/php.ini-development /usr/local/php56/etc/php.ini
创建软链
ln -s /usr/local/php56/bin/php /usr/bin/php56
打开/usr/local/php56/etc/php-fpm.conf修改监听端口为9001

启动php-fpm
cd /usr/local/php56/sbin
 ./php-fpm
配置nginx支持php5.6
整合nginx和php,让nginx调用php-fpm解析php脚本:
cd /usr/local/nginx/conf
mkdir vhost
cd vhost
touch local.php56.conf
vi local.php56.conf
#添加新的server配置
server
    {
        listen 80;
        #listen [::]:80;
        server_name local.php56.com;
        index index.html index.htm index.php default.html default.htm default.php;
        root  /home/wwwroot/local.php56.com;

        #error_page   404   /404.html;

        # Deny access to PHP files in specific directory
        #location ~ /(wp-content|uploads|wp-includes|images)/.*\.php$ { deny all; }

        location ~ .*\.(gif|jpg|jpeg|png|bmp|swf)$
        {
            expires      30d;
        }

        location ~ .*\.(js|css)?$
        {
            expires      12h;
        }

        location ~ /.well-known {
            allow all;
        }

        location ~ /\.
        {
            deny all;
        }

		location ~ \.php$ {
            root           html;
            fastcgi_pass   127.0.0.1:9001;	# 这里是重点
            fastcgi_index  index.php;
            fastcgi_param  SCRIPT_FILENAME  $document_root$fastcgi_script_name;
            include        fastcgi_params;
            index          index.php index.htm;
        }

        access_log  /home/wwwrootlog/local.php56.com.log;
    }
#保存退出
vi /usr/local/nginx/conf/nginx.conf
#在最后加上
include vhost/*.conf;

日志文件和项目目录没有的自行创建但写入权限不要忘记
然后重启nginx
打开本地电脑(lnmp环境是在虚拟机<192.168.4.181>中安装的,真实服务器不用这步只要绑定域名即可)hosts文件添加192.168.4.181 local.php56.com
至此php5.6安装完成

安装PHP8
- 下载最新php8.0.12版本
wget https://www.php.net/distributions/php-8.0.12.tar.gz
- 解压安装
tar -zxvf php-8.0.12.tar.gz
cd php-8.0.12
./configure --prefix=/usr/local/php8 --with-config-file-path=/usr/local/php8/etc --with-freetype --enable-gd --with-jpeg --with-gettext --with-gmp --with-mysqli --with-openssl --with-pdo-mysql --with-pear --with-xsl --with-mhash --enable-fpm --with-fpm-user=www    --with-fpm-group=www --enable-bcmath --enable-mbstring --enable-sockets --enable-xml --enable-embed --enable-phpdbg --with-ldap --with-snmp --with-bz2 --enable-calendar --with-curl --enable-exif --enable-ftp --enable-pcntl --with-zlib --with-readline --enable-shmop
make && make install
如果./configure时报错configure: error: Package requirements (libcurl >= 7.29.0) were not met: No package ‘libcurl’ found执行下面操作然后重新./configure即可
[root@gitlab php-8.0.11]# yum search libcurl
已加载插件:fastestmirror
Loading mirror speeds from cached hostfile
 * base: mirrors.cn99.com
 * extras: mirrors.cn99.com
 * updates: mirrors.cn99.com
======================================================== N/S matched: libcurl =========================================================
libcurl-devel.i686 : Files needed for building applications with libcurl
libcurl-devel.x86_64 : Files needed for building applications with libcurl
libcurl.i686 : A library for getting files from web servers
libcurl.x86_64 : A library for getting files from web servers
perl-WWW-Curl.x86_64 : Perl extension interface for libcurl
python-pycurl.x86_64 : A Python interface to libcurl

  名称和简介匹配 only,使用“search all”试试。
[root@gitlab php-8.0.11]# yum install -y libcurl-devel.x86_64
如果报错configure: error: iconv does not support errno,需要手动编译安装libiconv
wget https://ftp.gnu.org/pub/gnu/libiconv/libiconv-1.16.tar.gz --no-check-certificate
tar -zxvf libiconv-1.16.tar.gz
cd libiconv-1.16
./configure --prefix=/usr/local/libiconv
make && make install
然后PHP8在./configure时要带上 --with-iconv=/usr/local/libiconv
./configure --prefix=/usr/local/php8 --with-config-file-path=/usr/local/php8/etc --with-freetype --enable-gd --with-jpeg --with-gettext --with-gmp --with-mysqli --with-openssl --with-pdo-mysql --with-pear --with-xsl --with-mhash --enable-fpm --with-fpm-user=www    --with-fpm-group=www --enable-bcmath --enable-mbstring --enable-sockets --enable-xml --enable-embed --enable-phpdbg --with-ldap --with-snmp --with-bz2 --enable-calendar --with-curl --enable-exif --enable-ftp --enable-pcntl --with-zlib --with-readline --enable-shmop --with-iconv=/usr/local/libiconv
make && make install
配置文件
cd /usr/local/php8/etc
cp php-fpm.conf.default php-fpm.conf
cd /usr/local/php8/etc/php-fpm.d
cp www.conf.default www.conf
cp php-8.0.12/php.ini-development /usr/local/php8/etc/php.ini
创建软链
ln -s /usr/local/php8/bin/php /usr/bin/php8
打开/usr/local/php8/etc/php-fpm.d/www.conf修改监听端口为9002 (注意php7 php8和php5.6的监听端口配置文件有所不一样)

启动php-fpm
cd /usr/local/php8/sbin
 ./php-fpm
配置nginx支持php8
整合nginx和php,让nginx调用php-fpm解析php脚本:
cd /usr/local/nginx/conf
cd vhost
touch local.php8.conf
vi local.php8.conf
#添加新的server配置
server
    {
        listen 80;
        #listen [::]:80;
        server_name local.php8.com;
        index index.html index.htm index.php default.html default.htm default.php;
        root  /home/wwwroot/local.php8.com;

        #error_page   404   /404.html;

        # Deny access to PHP files in specific directory
        #location ~ /(wp-content|uploads|wp-includes|images)/.*\.php$ { deny all; }

        location ~ .*\.(gif|jpg|jpeg|png|bmp|swf)$
        {
            expires      30d;
        }

        location ~ .*\.(js|css)?$
        {
            expires      12h;
        }

        location ~ /.well-known {
            allow all;
        }

        location ~ /\.
        {
            deny all;
        }

		location ~ \.php$ {
            root           html;
            fastcgi_pass   127.0.0.1:9002;	# 这里是重点
            fastcgi_index  index.php;
            fastcgi_param  SCRIPT_FILENAME  $document_root$fastcgi_script_name;
            include        fastcgi_params;
            index          index.php index.htm;
        }

        access_log  /home/wwwrootlog/local.php8.com.log;
    }
 #保存退出
日志文件和项目目录没有的自行创建但写入权限不要忘记
然后重启nginx
打开本地电脑(lnmp环境是在虚拟机<192.168.4.181>中安装的,真实服务器不用这步只要绑定域名即可)hosts文件添加192.168.4.181 local.php8.com
至此php8安装完成

配置nginx和php-fpm用sock套接字连接
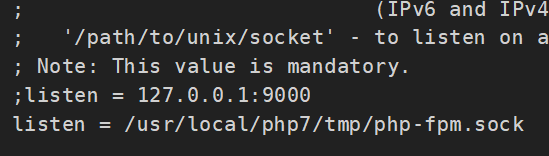
php5.3之后的版本,php-fpm.conf(php5)/www.conf(php7或更高版本)里的listen的默认配置是127.0.0.1:9000且不会默认生成php-fpm.sock,
所以如果需要nginx里的配置有php-fpm.sock的话,需要将listen的地址配置成和nginx的配置文件一致,
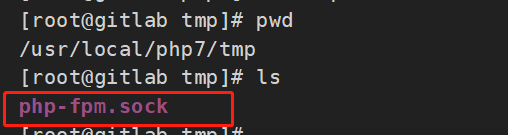
同时保证这个路径已经存在,这样在启动./php-fpm的时候就会在对应路径上自动生成php-fpm.sock
cd /usr/local/php7/etc/php-fpm.d/
vi www.conf
#添加 listen = /usr/local/php7/tmp/php-fpm.sock
cd /usr/local/nginx/conf/vhost/
vi local.php7.conf
#添加 fastcig_pass    unix:/usr/local/php7/tmp/php-fpm.sock;

重启php-fpm和nginx
如果页面访问报502,一般是由于php.ini的memory_limit 过小导致的,修改memory_limit大小就可以了


如果继续报502,请查看nginx报错日志(error.log)

说明nginx的访问权限不够,可以把nginx配置文件的user改为root试一下(或者给php-fpm.sock授予和nginx一样的身份和权限)
vi nginx.conf

重启nginx
cd /usr/local/nginx/sbin/
./nginx -s reload
搞定


 272
272


 被折叠的 条评论
为什么被折叠?
被折叠的 条评论
为什么被折叠?
 到【灌水乐园】发言


