文章目录

3.1 Activity的创建
1)包名处点击右键选择【New】【Activity】【Empty Activity】选项,填写Activity信息,完成创建。

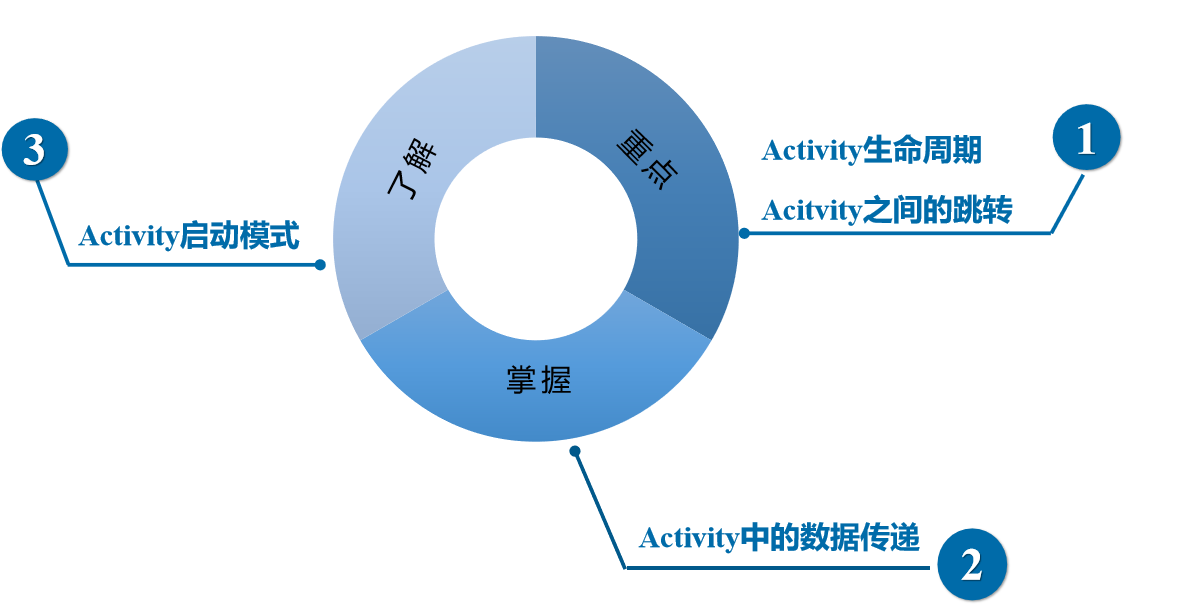
3.2 Activity的生命周期


3.3 Activity的启动模式
3.3.1 Android中的任务栈
栈是一种“先进后出”的数据结构。Android中,采用任务栈的形式来管理Activity。

3.3.2 Activity的四种启动模式
standard模式是Activity的默认启动方式,每启动一个Activity就会在栈顶创建一个新的实例。
1.standard模式

2.singleTop模式
- singleTop模式会判断要启动的Activity实例是否位于栈顶,如果位于栈顶则直接复用,否则创建新的实例。

- singleTask模式下每次启动该Activity时,系统首先会检查栈中是否存在当前Activity实例,如果存在则直接使用,并把当前Activity之上的所有实例全部出栈。

3.singleInstance模式
singleInstance模式会启动一个新的任务栈来管理Activity实例,无论从哪个任务栈中启动该Activity,该实例在整个系统中只有一个。

3.4 Activity之间的跳转
- Intent被称为意图,是程序中各组件进行交互的一种重要方式,它不仅可以指定当前组件要执行的动作,还可以在不同组件之间进行数据传递。
- 一般用于启动Activity、Service以及发送广播等。根据开启目标组件的方式不同,Intent被分为两种类型显示意图和隐式意图。

3.4.1 显式意图

3.4.2 隐式意图

清单文件?
3.4.2 实战演练——打开浏览器

java文件:源代码\chapter03\OpenBrowser\app\src\main\java\cn\itcast
package cn.itcast.openbrowser;
import android.content.Intent;
import android.net.Uri;
import android.support.v7.app.AppCompatActivity;
import android.os.Bundle;
import android.view.View;
import android.widget.Button;
public class MainActivity extends AppCompatActivity {
    @Override
    protected void onCreate(Bundle savedInstanceState) {
        super.onCreate(savedInstanceState);
        setContentView(R.layout.activity_main);
        Button button = (Button) findViewById(R.id.main_button);
        Intent intent = getIntent();
        String data  = intent.getStringExtra("extra_data");


        button.setOnClickListener(new View.OnClickListener() {
            @Override
            public void onClick(View v) {
                Intent intent = new Intent();
                //设置动作为android.intent.action.VIEW
                intent.setAction("android.intent.action.VIEW");
                //设置要打开的网址
                intent.setData(Uri.parse("http://www.baidu.com"));
                startActivity(intent);
            }
        });
    }
}
视图文件:\源代码\chapter03\OpenBrowser\app\src\main\res\activity_main.xml
<?xml version="1.0" encoding="utf-8"?>
<RelativeLayout
    xmlns:android="http://schemas.android.com/apk/res/android"
    xmlns:tools="http://schemas.android.com/tools"
    android:layout_width="match_parent"
    android:layout_height="match_parent"
    android:background="@drawable/openbrowser"
    tools:context=".MainActivity">
    <Button
        android:id="@+id/main_button"
        android:layout_width="wrap_content"
        android:layout_height="wrap_content"
        android:layout_alignParentLeft="true"
        android:layout_alignParentStart="true"
        android:layout_alignParentTop="true"
        android:layout_marginLeft="20dp"
        android:layout_marginStart="20dp"
        android:layout_marginTop="30dp"
        android:background="@drawable/click"/>
</RelativeLayout>
h
源代码\chapter03\OpenBrowser\app\src\main\AndroidManifest.xml
<?xml version="1.0" encoding="utf-8"?>
<manifest xmlns:android="http://schemas.android.com/apk/res/android"
    package="cn.itcast.openbrowser" >

    <application
        android:allowBackup="true"
        android:icon="@mipmap/ic_launcher"
        android:label="@string/app_name"
        android:supportsRtl="true"
        android:theme="@style/AppTheme" >
        <activity android:name=".MainActivity" >
            <intent-filter>
                <action android:name="android.intent.action.MAIN" />

                <category android:name="android.intent.category.LAUNCHER" />
            </intent-filter>
        </activity>
    </application>

</manifest>
15 LAUNCHER <一打开就要发送/>
3.5 Activity中的数据传递
3.5.1 数据传递
- Activity之间传递数据需要用到Intent提供的putExtra()方法。

3.5.2 实战演练——注册用户信息


3.5.3 数据回传


3.5.4 实战演练——选择宝宝装备

附代码,讲解待补充
布局文件 activity_main.xml
<?xml version="1.0" encoding="utf-8"?>
<RelativeLayout
    xmlns:android="http://schemas.android.com/apk/res/android"
    xmlns:tools="http://schemas.android.com/tools"
    android:layout_width="match_parent"
    android:layout_height="match_parent"
    android:background="@drawable/loading"
    tools:context=".MainActivity">
    <ImageView
        android:id="@+id/iv_head"
        android:layout_width="50dp"
        android:layout_height="50dp"
        android:layout_centerHorizontal="true"
        android:layout_marginTop="100dp"
        android:src="@drawable/head"/>
    <LinearLayout
        android:id="@+id/layout"
        android:layout_width="match_parent"
        android:layout_height="wrap_content"
        android:layout_below="@+id/iv_head"
        android:layout_margin="10dp"
        android:orientation="vertical">
        <RelativeLayout
            android:id="@+id/regist_username"
            android:layout_width="match_parent"
            android:layout_height="wrap_content"
            android:layout_margin="5dp">
            <TextView
                android:id="@+id/tv_name"
                android:layout_width="wrap_content"
                android:layout_height="wrap_content"
                android:layout_centerVertical="true"
                android:text="用户名:"
                android:textSize="20sp"/>
            <EditText
                android:id="@+id/et_name"
                android:layout_width="match_parent"
                android:layout_height="wrap_content"
                android:layout_marginLeft="5dp"
                android:layout_toRightOf="@id/tv_name"
                android:hint="请输入用户名"
                android:textSize="16sp"/>
        </RelativeLayout>
        <RelativeLayout
            android:id="@+id/regist_password"
            android:layout_width="match_parent"
            android:layout_height="wrap_content"
            android:layout_margin="5dp">
            <TextView
                android:id="@+id/tv_psw"
                android:layout_width="wrap_content"
                android:layout_height="wrap_content"
                android:layout_centerVertical="true"
                android:text="密    码:"
                android:textSize="20sp"/>
            <EditText
                android:id="@+id/et_password"
                android:layout_width="match_parent"
                android:layout_height="wrap_content"
                android:layout_marginLeft="5dp"
                android:layout_toRightOf="@id/tv_psw"
                android:hint="请输入密码"
                android:inputType="textPassword"
                android:textSize="16sp"/>
        </RelativeLayout>
    </LinearLayout>
    <Button
        android:id="@+id/btn_send"
        android:layout_width="160dp"
        android:layout_height="48dp"
        android:layout_below="@id/layout"
        android:layout_centerHorizontal="true"
        android:layout_marginLeft="10dp"
        android:layout_marginRight="10dp"
        android:background="@drawable/start"
        android:text="注册"
        android:textColor="#FFFFFF"
        android:textSize="20sp"
        android:textStyle="bold"/>
</RelativeLayout>
activity_shop.xml 多的代码是宝宝装备案例用
<?xml version="1.0" encoding="utf-8"?>
<RelativeLayout
    android:id="@+id/rl"
    xmlns:android="http://schemas.android.com/apk/res/android"
    android:layout_width="match_parent"
    android:layout_height="wrap_content"
    android:background="@drawable/loading"
    android:orientation="vertical">
    <LinearLayout
        android:layout_width="match_parent"
        android:layout_height="wrap_content"
        android:background="#307f7f7f"
        android:gravity="center_vertical"
        android:orientation="horizontal"
        android:padding="5dp">
        <ImageView
            android:layout_width="30dp"
            android:layout_height="30dp"
            android:background="@android:drawable/ic_menu_info_details"/>
        <TextView
            android:id="@+id/tv_name"
            android:layout_width="wrap_content"
            android:layout_height="wrap_content"
            android:layout_marginLeft="20dp"
            android:text="商品名称"/>
        <LinearLayout
            android:layout_width="wrap_content"
            android:layout_height="wrap_content"
            android:layout_marginLeft="40dp"
            android:orientation="vertical">
            <TextView
                android:id="@+id/tv_life"
                android:layout_width="wrap_content"
                android:layout_height="wrap_content"
                android:text="生命值"
                android:textSize="13sp"/>
            <TextView
                android:id="@+id/tv_attack"
                android:layout_width="wrap_content"
                android:layout_height="wrap_content"
                android:text="攻击力"
                android:textSize="13sp"/>
            <TextView
                android:id="@+id/tv_speed"
                android:layout_width="wrap_content"
                android:layout_height="wrap_content"
                android:text="速度"
                android:textSize="13sp"/>
        </LinearLayout>
    </LinearLayout>
</RelativeLayout>
java文件:MainActivity.java
package cn.itcast.userregist;
import android.content.Intent;
import android.support.v7.app.AppCompatActivity;
import android.os.Bundle;
import android.view.View;
import android.widget.Button;
import android.widget.EditText;
public class MainActivity extends AppCompatActivity {
    private EditText et_password;
    private Button btn_send;
    private EditText et_name;
    protected void onCreate(Bundle savedInstanceState) {
        super.onCreate(savedInstanceState);
        setContentView(R.layout.activity_main);
        et_name = (EditText) findViewById(R.id.et_name);
        et_password = (EditText) findViewById(R.id.et_password);
        btn_send = (Button) findViewById(R.id.btn_send);
        //点击开始游戏按钮进行数据传递
        btn_send.setOnClickListener(new View.OnClickListener() {
            public void onClick(View v) {
                passDate();
            }
        });
    }
    //传递数据
    public void passDate() {
        //创建Intent对象,启动Activity02
        Intent intent = new Intent(this, ShowActivity.class);
        //将数据存入Intent对象
        intent.putExtra("name", et_name.getText().toString().trim());
        intent.putExtra("password", et_password.getText().toString().trim());
        startActivity(intent);
    }
}
\源代码\chapter03\UserRegist\app\src\main\java\cn\itcast\userregist\ShowActivity.java
package cn.itcast.userregist;
import android.content.Intent;
import android.support.v7.app.AppCompatActivity;
import android.os.Bundle;
import android.view.View;
import android.widget.ProgressBar;
import android.widget.TextView;

public class ShowActivity extends AppCompatActivity {
    private ProgressBar mProgressBar1;
    private ProgressBar mProgressBar2;
    private ProgressBar mProgressBar3;
    private TextView mLifeTV;
    private TextView mAttackTV;
    private TextView mSpeedTV;
    private TextView tv_name;
    private TextView tv_password;
    @Override
    protected void onCreate(Bundle savedInstanceState) {
        super.onCreate(savedInstanceState);
        setContentView(R.layout.activity_show);
        //获取Intent对象(隐式意图)
        Intent intent = getIntent();
        //取出key对应的value值
        String name = intent.getStringExtra("name");
        String password = intent.getStringExtra("password");
        tv_name = (TextView) findViewById(R.id.tv_name);
        tv_password = (TextView) findViewById(R.id.tv_password);
        tv_name.setText("用户名:" + name);
        tv_password.setText("密    码:" + password);
        //下面是数据围传例子的相关代码
        mLifeTV = (TextView) findViewById(R.id.tv_life_progress);
        mAttackTV = (TextView) findViewById(R.id.tv_attack_progress);
        mSpeedTV = (TextView) findViewById(R.id.tv_speed_progress);
        initProgress();                    //初始化进度条
    }
    private void initProgress() {
        mProgressBar1 = (ProgressBar) findViewById(R.id.progressBar1);
        mProgressBar2 = (ProgressBar) findViewById(R.id.progressBar2);
        mProgressBar3 = (ProgressBar) findViewById(R.id.progressBar3);
        mProgressBar1.setMax(1000);        //设置最大值1000
        mProgressBar2.setMax(1000);
        mProgressBar3.setMax(1000);
    }
    // 开启新的activity并获取他的返回值
    public void click(View view) {
        Intent intent = new Intent(this, ShopActivity.class);
        startActivityForResult(intent, 1); // 返回请求结果,请求码为1
    }
    @Override
    protected void onActivityResult(int requestCode,
                                    int resultCode, Intent data) {
        super.onActivityResult(requestCode, resultCode, data);
        if (data != null) {
            // 判断结果码是否等于1,等于1为宝宝添加装备
            if (resultCode == 1) {
                if (requestCode == 1) {
                    ItemInfo info =
                            (ItemInfo) data.getSerializableExtra("equipment");
                    //更新ProgressBar的值
                    updateProgress(info);
                }
            }
        }
    }
    //更新ProgressBar的值
    private void updateProgress(ItemInfo info) {
        int progress1 = mProgressBar1.getProgress();
        int progress2 = mProgressBar2.getProgress();
        int progress3 = mProgressBar3.getProgress();
        mProgressBar1.setProgress(progress1 + info.getLife());
        mProgressBar2.setProgress(progress2 + info.getAcctack());
        mProgressBar3.setProgress(progress3 + info.getSpeed());
        mLifeTV.setText(mProgressBar1.getProgress() + "");
        mAttackTV.setText(mProgressBar2.getProgress() + "");
        mSpeedTV.setText(mProgressBar3.getProgress() + "");
    }
}
清单
<?xml version="1.0" encoding="utf-8"?>
<manifest xmlns:android="http://schemas.android.com/apk/res/android"
    package="cn.itcast.userregist" >

    <application
        android:allowBackup="true"
        android:icon="@mipmap/ic_launcher"
        android:label="@string/app_name"
        android:supportsRtl="true"
        android:theme="@style/AppTheme" >
        <activity android:name=".MainActivity" >
            <intent-filter>
                <action android:name="android.intent.action.MAIN" />

                <category android:name="android.intent.category.LAUNCHER" />
            </intent-filter>
        </activity>
        <activity android:name=".ShowActivity" >
        </activity>
        <activity android:name=".ShopActivity" >
        </activity>
    </application>

</manifest>
\源代码\chapter03\UserRegist\app\src\main\java\cn\itcast\userregist*ShopActivity*.java
package cn.itcast.userregist;
import android.content.Intent;
import android.os.Bundle;
import android.support.v7.app.AppCompatActivity;
import android.view.View;
import android.widget.TextView;
public class ShopActivity extends AppCompatActivity implements
        View.OnClickListener {
    private ItemInfo itemInfo;
    @Override
    protected void onCreate(Bundle savedInstanceState) {
        super.onCreate(savedInstanceState);
        setContentView(R.layout.activity_shop);
        itemInfo = new ItemInfo("金剑", 100, 20, 20);
        findViewById(R.id.rl).setOnClickListener(this);
        TextView mLifeTV = (TextView) findViewById(R.id.tv_life);
        TextView mNameTV = (TextView) findViewById(R.id.tv_name);
        TextView mSpeedTV = (TextView) findViewById(R.id.tv_speed);
        TextView mAttackTV = (TextView) findViewById(R.id.tv_attack);
        mLifeTV.setText("生命值+" + itemInfo.getLife());
        mNameTV.setText(itemInfo.getName() + "");
        mSpeedTV.setText("敏捷度+" + itemInfo.getSpeed());
        mAttackTV.setText("攻击力+" + itemInfo.getAcctack());
    }
    @Override
    public void onClick(View v) {
        // TODO Auto-generated method stub
        switch (v.getId()) {
            case R.id.rl:
                Intent intent = new Intent();
                intent.putExtra("equipment", itemInfo);
                setResult(1, intent);
                finish();
                break;
        }
    }
}
ItemInfo.java封装类
package cn.itcast.userregist;
import java.io.Serializable;
public class ItemInfo implements Serializable {
    private String name;
    private int acctack;
    private int life;
    private int speed;
    public ItemInfo(String name, int acctack, int life, int speed) {
        this.name = name;
        this.acctack = acctack;
        this.life = life;
        this.speed = speed;
    }
    public String getName() {
        return name;
    }
    public void setName(String name) {
        this.name = name;
    }
    public int getAcctack() {
        return acctack;
    }
    public void setAcctack(int acctack) {
        this.acctack = acctack;
    }
    public int getLife() {
        return life;
    }
    public void setLife(int life) {
        this.life = life;
    }
    public int getSpeed() {
        return speed;
    }
    public void setSpeed(int speed) {
        this.speed = speed;
    }
}
3.6 本章小结
本章主要讲解了Activity的相关知识,包括Activity入门、Activity生命周期、Activity启动模式、Intent的使用以及Activity中的数据传递,并在讲解各个知识点时编写了相应的使用案例。在应用程序中凡是有界面都会使用到Activity,因此,要求初学者必须熟练掌握该组件的使用。
【学习笔记】
【学习资料】
- 教材:《Android移动开发案例教程》
- 学习资料:Android移动开发配套资料
-1.源代码:每个章节配套案例代码
-2.补充案例:项目、课后练习代码
-3.课程资料:课后习题及答案、ppt - github:Android
包含自己学习过程的全部案例、实验、项目代码 - 推荐学习视频:Android开发从入门到精通(项目案例版)


 705
705

 被折叠的 条评论
为什么被折叠?


