


 该文介绍了一个使用OpenCV库结合FaceMeshDetector模块来实时检测人眼并计算眨眼次数的项目。首先,通过468个人脸特征点检测人眼位置,然后连线计算眼睛开合比例,以此判断眨眼动作,最终实现眨眼计数功能。
一、前言
项目简介:使用OpenCV,实时检测人眼,并实现眨眼计数。
在之前的《OpenCV人脸特征点检测》中,我们了解到人脸由468个特征点构成,如下图所示:


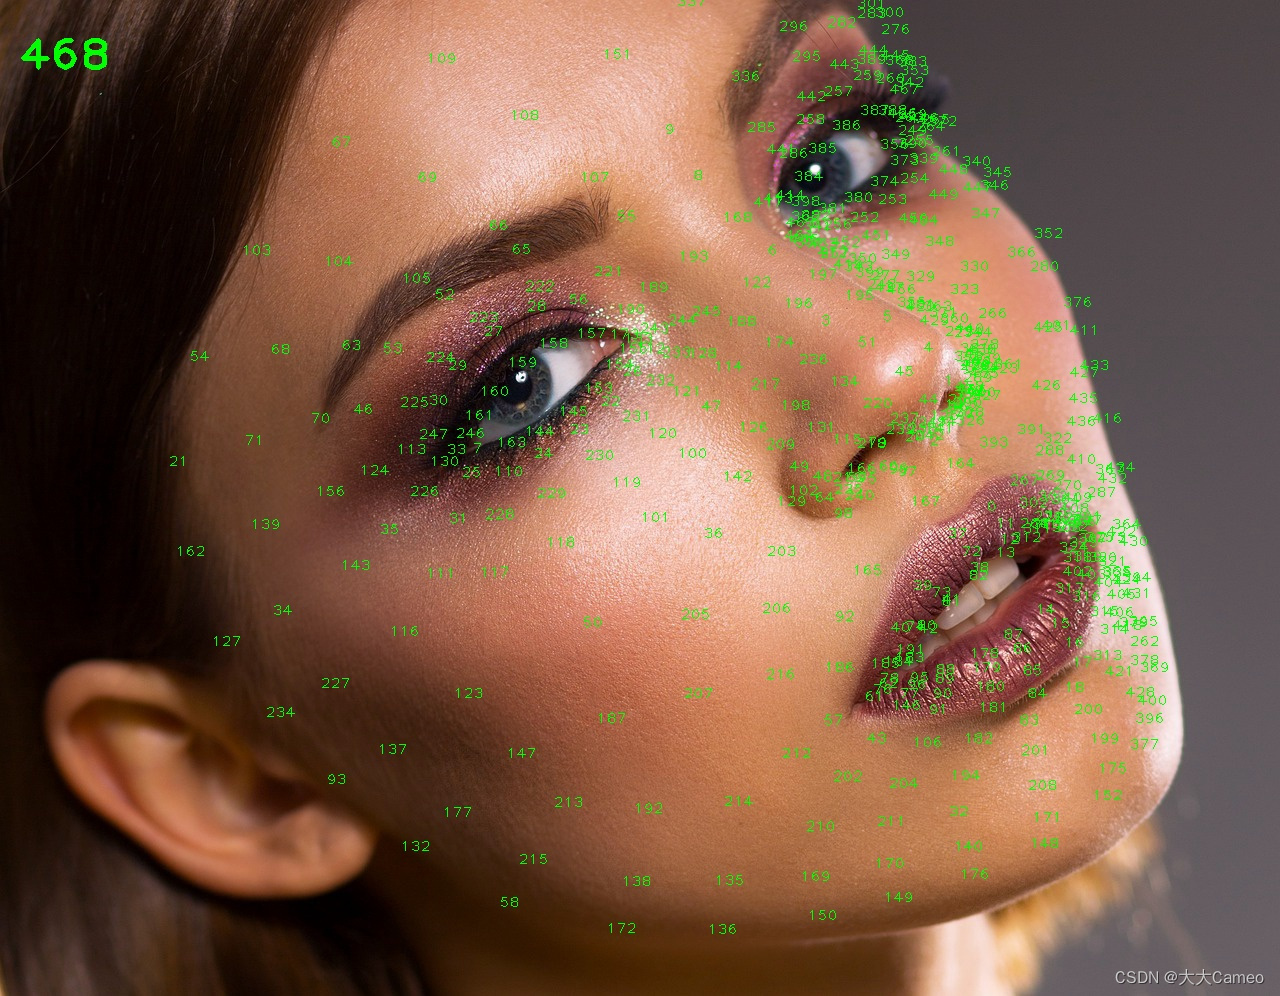
由此可得人眼的坐标信息,然后根据坐标可以实时检测人眼。
二、实战
(1)安装环境
pip install opencv-python
pip install cvzone==1.5.6
pip install mediapipe==0.8.3.1
(2)OpenCV加载视频
import cv2

cap = cv2.VideoCapture('Videos/2.mp4') #加载视频

while True:
    success, img = cap.read() #读取视频

    img = cv2.resize(img, (640, 360))  # 设置视频高、宽
    cv2.imshow('Image', img)
    cv2.waitKey(1)
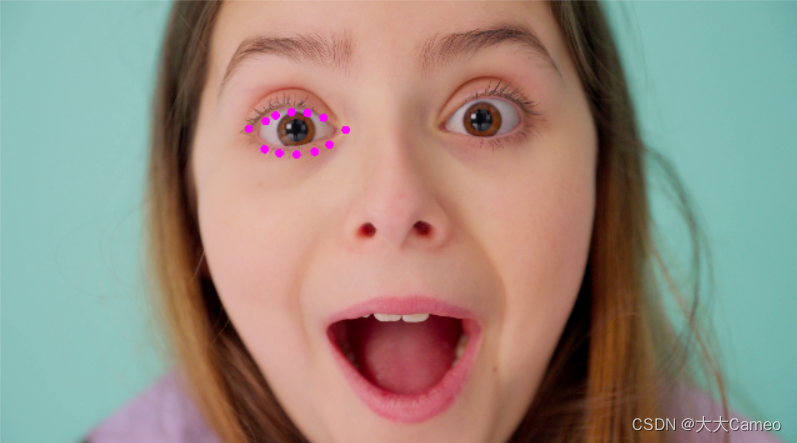
(3)捕捉人眼
使用cvzone的FaceMeshDetector方法,可快速检测到人眼,代码如下:
import cv2
import cvzone
from cvzone.FaceMeshModule import FaceMeshDetector

cap = cv2.VideoCapture('Videos/2.mp4')  # 加载视频
detector = FaceMeshDetector(maxFaces=1)  # 创建检测器
idList = [22, 23, 24, 26, 110, 157, 158, 159, 160, 161, 130, 243]  # 左眼坐标
color = (255, 0, 255)

while True:
    success, img = cap.read()  # 读取视频
    img, faces = detector.findFaceMesh(img, draw=False)
    if faces:
        face = faces[0]
        for id in idList:
            cv2.circle(img, face[id], 20, color, cv2.FILLED) #标定左眼

    img = cv2.resize(img, (640, 360))  # 设置视频高、宽
    cv2.imshow('Image', img)
    cv2.waitKey(1)
效果:
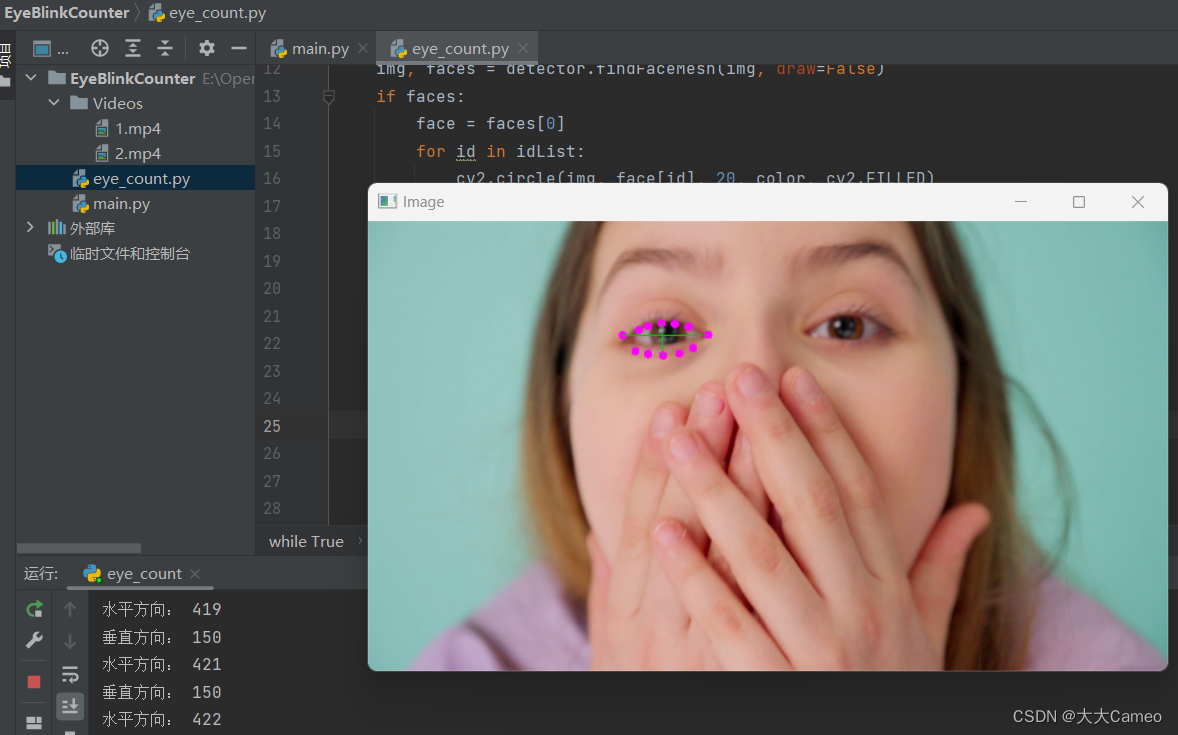
(4)连线
连接眼睛上下、左右四点,输出两点间的距离
import cv2
import cvzone
from cvzone.FaceMeshModule import FaceMeshDetector

cap = cv2.VideoCapture('Videos/2.mp4')  # 加载视频
detector = FaceMeshDetector(maxFaces=1)  # 创建检测器
idList = [22, 23, 24, 26, 110, 157, 158, 159, 160, 161, 130, 243]  # 左眼坐标
color = (255, 0, 255)

while True:
    success, img = cap.read()  # 读取视频
    img, faces = detector.findFaceMesh(img, draw=False)
    if faces:
        face = faces[0]
        for id in idList:
            cv2.circle(img, face[id], 20, color, cv2.FILLED)

        # 眼睛四个点
        leftUp = face[159]
        leftDown = face[23]
        leftLeft = face[130]
        leftRight = face[243]
        # 连接四个点
        cv2.line(img, leftUp, leftDown, (0, 200, 0), 3)
        cv2.line(img, leftLeft, leftRight, (0, 200, 0), 3)

        # 两点距离
        lengthVer = int(detector.findDistance(leftUp, leftDown)[0])
        lengthHor = int(detector.findDistance(leftLeft, leftRight)[0])
        print("垂直方向:", lengthVer)
        print("水平方向:", lengthHor)

    img = cv2.resize(img, (640, 360))  # 设置视频高、宽
    cv2.imshow('Image', img)
    cv2.waitKey(1)
效果:
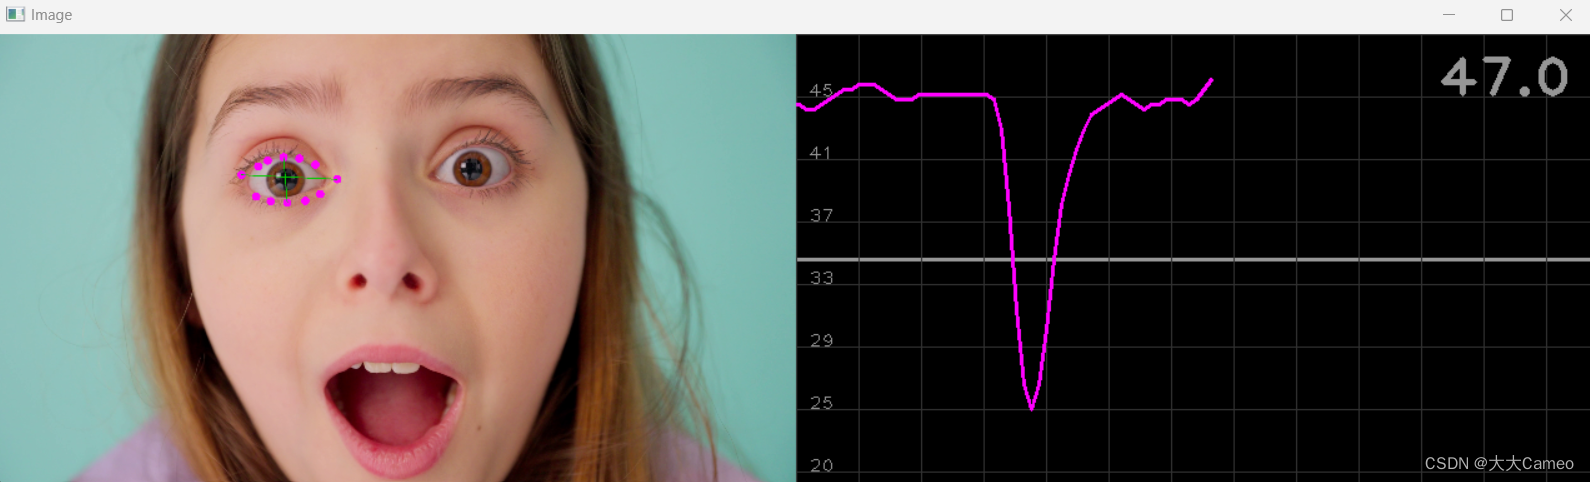
(5)绘制图像
人在眨眼的时候,眼皮上下两点的距离是动态变化的,而水平方向两点长度不变,因此可以取垂直/水平的比例作为检测值,来判断是否眨眼了。
代码:
import cv2
import cvzone
from cvzone.FaceMeshModule import FaceMeshDetector
from cvzone.PlotModule import LivePlot

cap = cv2.VideoCapture('Videos/2.mp4')  # 加载视频
detector = FaceMeshDetector(maxFaces=1)  # 创建检测器
plotY = LivePlot(640, 360, [20, 50], invert=True)  # 绘图器
idList = [22, 23, 24, 26, 110, 157, 158, 159, 160, 161, 130, 243]  # 左眼坐标
color = (255, 0, 255)
BlinkCounter = 0
ratioList = []
counter = 0

while True:
    success, img = cap.read()  # 读取视频
    img, faces = detector.findFaceMesh(img, draw=False)
    if faces:
        face = faces[0]
        for id in idList:
            cv2.circle(img, face[id], 20, color, cv2.FILLED)

        # 眼睛四个点
        leftUp = face[159]
        leftDown = face[23]
        leftLeft = face[130]
        leftRight = face[243]
        # 连接四个点
        cv2.line(img, leftUp, leftDown, (0, 200, 0), 3)
        cv2.line(img, leftLeft, leftRight, (0, 200, 0), 3)

        # 两点距离
        lengthVer = int(detector.findDistance(leftUp, leftDown)[0])
        lengthHor = int(detector.findDistance(leftLeft, leftRight)[0])
        # print("垂直方向:", lengthVer)
        # print("水平方向:", lengthHor)

        ratio = int((lengthVer / lengthHor) * 100)  # 垂直水平/水平方向的长度比
        print('比例:', ratio)
        ratioList.append(ratio)
        if len(ratioList) > 3:
            ratioList.pop(0)
        ratioAvg = sum(ratioList) / len(ratioList)  # 长度比均值
        print(ratioAvg)

        imgPlot = plotY.update(ratioAvg)  # 绘图更新
        img = cv2.resize(img, (640, 360))  # 设置视频高、宽
        imgStack = cvzone.stackImages([img, imgPlot], 2, 1)
    else:
        img = cv2.resize(img, (640, 360))  # 设置视频高、宽
        imgStack = cvzone.stackImages([img, img], 2, 1)

    cv2.imshow('Image', imgStack)
    cv2.waitKey(1)
效果:
(6)眨眼计数
由(5)可知,可以通过比例变化来判断是否眨眼,代码如下:
import cv2
import cvzone
from cvzone.FaceMeshModule import FaceMeshDetector
from cvzone.PlotModule import LivePlot

cap = cv2.VideoCapture('Videos/2.mp4')  # 加载视频
detector = FaceMeshDetector(maxFaces=1)  # 创建检测器
plotY = LivePlot(640, 360, [20, 50], invert=True)  # 绘图器
idList = [22, 23, 24, 26, 110, 157, 158, 159, 160, 161, 130, 243]  # 左眼坐标
color = (255, 0, 255)
BlinkCounter = 0
ratioList = []
counter = 0

while True:
    if cap.get(cv2.CAP_PROP_POS_FRAMES) == cap.get(cv2.CAP_PROP_FRAME_COUNT):
        cap.set(cv2.CAP_PROP_POS_FRAMES, 0)  # 重复播放视频
    success, img = cap.read()  # 读取视频
    img, faces = detector.findFaceMesh(img, draw=False)
    if faces:
        face = faces[0]
        for id in idList:
            cv2.circle(img, face[id], 20, color, cv2.FILLED)

        # 眼睛四个点
        leftUp = face[159]
        leftDown = face[23]
        leftLeft = face[130]
        leftRight = face[243]
        # 连接四个点
        cv2.line(img, leftUp, leftDown, (0, 200, 0), 3)
        cv2.line(img, leftLeft, leftRight, (0, 200, 0), 3)

        # 两点距离
        lengthVer = int(detector.findDistance(leftUp, leftDown)[0])
        lengthHor = int(detector.findDistance(leftLeft, leftRight)[0])
        # print("垂直方向:", lengthVer)
        # print("水平方向:", lengthHor)

        ratio = int((lengthVer / lengthHor) * 100)  # 垂直水平/水平方向的长度比
        print('比例:', ratio)
        ratioList.append(ratio)
        if len(ratioList) > 3:
            ratioList.pop(0)
        ratioAvg = sum(ratioList) / len(ratioList)  # 长度比均值
        print(ratioAvg)
        # 眨眼计数
        if ratioAvg < 35 and counter == 0:
            BlinkCounter += 1
            color = (0, 200, 0)
            counter = 1
        if counter != 0:
            counter += 1
            if counter > 10:
                counter = 0

        cvzone.putTextRect(img, f'Blink Count:{BlinkCounter}', (50, 200), 6, 5, colorR=color)  # 显示眨眼个数

        imgPlot = plotY.update(ratioAvg)  # 绘图更新
        img = cv2.resize(img, (640, 360))  # 设置视频高、宽
        imgStack = cvzone.stackImages([img, imgPlot], 2, 1)
    else:
        img = cv2.resize(img, (640, 360))  # 设置视频高、宽
        imgStack = cvzone.stackImages([img, img], 2, 1)

    cv2.imshow('Image', imgStack)
    cv2.waitKey(1)
效果:
OpenCV检测人眼、眨眼计数
三、最后
愿我们坚持学习下去,为了更美好的明天和更美好的自己。


 488
488

 被折叠的 条评论
为什么被折叠?
被折叠的 条评论
为什么被折叠?
 到【灌水乐园】发言


