


技术方案实践: 服务端 api 接入的实现 & 思考
文章目录
前言
在一个普通的 web 服务场景下,前后端的交互是非常常见的组合,甚至一个前端可能会调用多个后端服务,这时候如何接入并管理服务端提供的各种接口,同时保持前端代码的整洁性与正确性是非常重要的。
本篇将尝试的对这样的场景进行总结和实践,并讨论不同方案的优劣,以及后续实现的思考。
正文
事前准备:服务端接口
在开始之前我们先定义三个接口作为模版,来模拟需要接入的 api 接口作为代表
三个接口定义
-
requirement.md -
第一个接口:基本 GET 请求
method  : GET
path    : /
response: 'Hello World'
- 第二个接口:模拟 POST 请求
method      : POST
path        : /create
request body: { type }
    type := 'increment' | 'reset'
response: { code: 200, id }
    id := 0 | <auto_increment>
- 第三个接口:模拟接口失败抛出异常
method      : POST
path        : /error
request body: { success: boolean }
response: { code, msg }
    success = true 时,
        { code: 200, msg: 'success' }
    success = false 时,
        { code: 500, msg: 'fail' }
服务端代码
本篇使用 express 实现,给出简单的服务端代码来帮助了解接口的返回值
/be/src/index.ts
/**
 * 接口一
 */
app.get('/', (req, res, next) => {
  res.send('Hello World');
});

/**
 * 接口二
 */
enum ECreateType {
  Increment = 'increment',
  RESET = 'reset',
}

let id = 0;

app.post('/create', (req, res, next) => {
  const { type }: { type: ECreateType } = req.body;
  switch (type) {
    case ECreateType.Increment:
      id++;
      break;
    case ECreateType.RESET:
      id = 0;
      break;
    default:
      break;
  }
  res.send({ code: 200, id });
});

/**
 * 接口三
 */
app.post('/error', (req, res, next) => {
  const { success }: { success: boolean } = req.body;
  if (success) {
    res.send({ code: 200, msg: 'success' });
  } else {
    res.status(500);
    res.send({ code: 500, msg: 'fail' });
  }
});
接下来我们马上进入前端接入的实现环节
Version 1:JS 实现 + 简单封装
第一个版本我们先来看,仅仅使用 js,同时对于请求也就是简单的封装成一个方法,内部发起请求的方式是全部打散在方法里面,简单但是重复性是比较高的
/fe/src/api/v1/index.js
import axios from 'axios';

const host = 'http://localhost:3001';

export const helloREQ = () => {
  return axios.get(`${host}/`);
};

export const createREQ = (type) => {
  if (type !== 'increment' && type !== 'reset') {
    return Promise.reject(new Error(`unacceptable type: ${type}`));
  }
  return axios.post(`${host}/create`, { type });
};

export const errorREQ = (success) => {
  success = !!success;
  return axios.post(`${host}/error`, { success });
};
实际上就是为三个接口各自定义成一个方法,然后内部使用 axios 发出请求,看看效果

然而我们也看到代码中出现许多重复性的调用,这时候我们看到第二个版本,使用 TS 来约束类型定义
Version 2:TS 实现加入类型定义
/fe/src/api/v2/index.ts
import axios from 'axios';

const host = 'http://localhost:3001';

/******************** 接口一 ********************/
export const helloREQ = () => {
  return axios.get<string>(`${host}/`);
};

/******************** 接口二 ********************/
export enum ECreateType {
  Increment = 'increment',
  Reset = 'reset',
}

interface ICreateREQRes {
  code: number;
  id: number;
}

export const createREQ = (type: ECreateType) => {
  return axios.post<ICreateREQRes>(`${host}/create`, { type });
};

/******************** 接口三 ********************/
export interface IErrorREQRes {
  code: number;
  msg: string;
}

export const errorREQ = (success: boolean) => {
  return axios.post<IErrorREQRes>(`${host}/error`, { success });
};
第二版没有做太大的更动,而仅仅只是加上了类型,但是这样的好处在于确实的规范类型并保证传入类型的正确

Version 3:定义 apiRequest 统一管理请求发送途径
然而到此我们还是不满意的,下面我们尝试定义一个集中的 apiRequest 方法来统一处理请求的发送,这时候我们就可以将具体发出请求的逻辑封装到更底层来实现
/fe/src/api/v3/index.ts
import axios from 'axios';

const host = 'http://localhost:3001';

enum EHttpMethod {
  GET = 'GET',
  POST = 'POST',
}

export enum EApiRoute {
  Hello,
  Create,
  Error,
}

interface IApiConfigInfo {
  method: EHttpMethod;
  path: string;
  mock: boolean;
}

type ApiConfigRoute = {
  [key in EApiRoute]: IApiConfigInfo;
};

const apiConfigs: ApiConfigRoute = {
  [EApiRoute.Hello]: {
    method: EHttpMethod.GET,
    path: '/',
    mock: false,
  },
  [EApiRoute.Create]: {
    method: EHttpMethod.POST,
    path: '/create',
    mock: false,
  },
  [EApiRoute.Error]: {
    method: EHttpMethod.POST,
    path: '/error',
    mock: false,
  },
};

export function apiRequest(route: EApiRoute, data?: any): Promise<any> {
  const { method, path, mock } = apiConfigs[route];

  if (mock) {
    console.log('mock');
  }

  const url = `${host}${path}`;
  switch (method) {
    case EHttpMethod.POST:
      return axios.post(url, data);
    case EHttpMethod.GET:
    default:
      return axios.get(url);
  }
}
如此一来,调用请求的方法被转变为统一的方法,并透过 EApiRoute 来枚举接口类型
这样的好处在于不同接口间的调用逻辑能够被复用了,但是会造成接口语义化丧失的副作用

Version 4:V2 + V3 混合实现
因此最后一个版本我们考量到 V3 版本统一发送 api 请求的想法,同时保留 V2 版本的接口语义化方法
/fe/src/api/v4/http.ts
首先我们可以像先定义一个纯粹的 http 请求方法
import axios from 'axios';

export enum EHttpMethod {
  GET = 'GET',
  POST = 'POST',
}

/**
 * http 请求,基于 axios
 * @param {R} 返回类型
 * @param {B} 返回参数类型
 * @param url
 * @param method
 * @param body
 * @returns
 */
export const httpRequest = async <R, B>(
  url: string,
  method: EHttpMethod,
  body?: B
): Promise<R> => {
  switch (method) {
    // Http POST 请求
    case EHttpMethod.POST:
      try {
        const res = await axios.post<R>(url, body);
        return res.data;
      } catch (err) {
        return err.response.data;
      }

    // Http GET 请求
    case EHttpMethod.GET:
    default:
      try {
        const res = await axios.get<R>(url);
        return res.data;
      } catch (err) {
        return err.response.data;
      }
  }
};
/fe/src/api/v4/config.ts
接下来是保留接口的配置信息
import { randomBool } from '@utils/random';
import { EHttpMethod } from './http';

interface IApiConfigInfo {
  method: EHttpMethod;
  path: string;
  mock: boolean;
}

type ApiConfigRoute = {
  [key in EApiRoute]: IApiConfigInfo;
};

export enum EApiRoute {
  Hello,
  Create,
  Error,
}

/**
 * 接口配置信息
 */
export const apiConfigs: ApiConfigRoute = {
  [EApiRoute.Hello]: {
    method: EHttpMethod.GET,
    path: '/',
    mock: false,
  },
  [EApiRoute.Create]: {
    method: EHttpMethod.POST,
    path: '/create',
    mock: true,
  },
  [EApiRoute.Error]: {
    method: EHttpMethod.POST,
    path: '/error',
    mock: false,
  },
  //
};
/fe/src/api/v4/index.ts
最后我们为每个接口定义语义化的方法暴露给上层
import { apiConfigs, EApiRoute } from './config';
import { httpRequest } from './http';
import { mockData } from './mock';

const host = 'http://localhost:3001';

/******************** 接口一 ********************/
export const helloREQ = () => {
  return apiRequest<string>(EApiRoute.Hello);
};

/******************** 接口二 ********************/
export enum ECreateType {
  Increment = 'increment',
  Reset = 'reset',
}

interface ICreateREQBody {
  type: ECreateType;
}

interface ICreateREQRes {
  code: number;
  id: number;
}

export const createREQ = (type: ECreateType) => {
  return apiRequest<ICreateREQRes, ICreateREQBody>(EApiRoute.Create, { type });
};

/******************** 接口三 ********************/
interface IErrorREQBody {
  success: boolean;
}

export interface IErrorREQRes {
  code: number;
  msg: string;
}

export const errorREQ = (success: boolean) => {
  return apiRequest<ICreateREQRes, IErrorREQBody>(EApiRoute.Error, {
    success,
  });
};

/******************** 接口统一入口 ********************/
async function apiRequest<R, B = {}>(route: EApiRoute, body?: B): Promise<R> {
  const { method, path, mock } = apiConfigs[route];

  if (mock) {
    const res = mockData[route]() as any;
    return res;
  }

  const url = `${host}${path}`;

  return httpRequest<R, B>(url, method, body);
}
/fe/src/api/v4/mock.ts
另外我们还可以为每个接口配置一个 mock 数据返回的途径
import { randomBool } from '@utils/random';
import { EApiRoute } from './config';

export const mockData = {
  [EApiRoute.Hello]() {
    return 'Hello World';
  },
  [EApiRoute.Create]() {
    return {
      code: 200,
      id: 999,
    };
  },
  [EApiRoute.Error]() {
    return randomBool()
      ? {
          code: 200,
          msg: 'success',
        }
      : {
          code: 500,
          msg: 'fail',
        };
  },
};
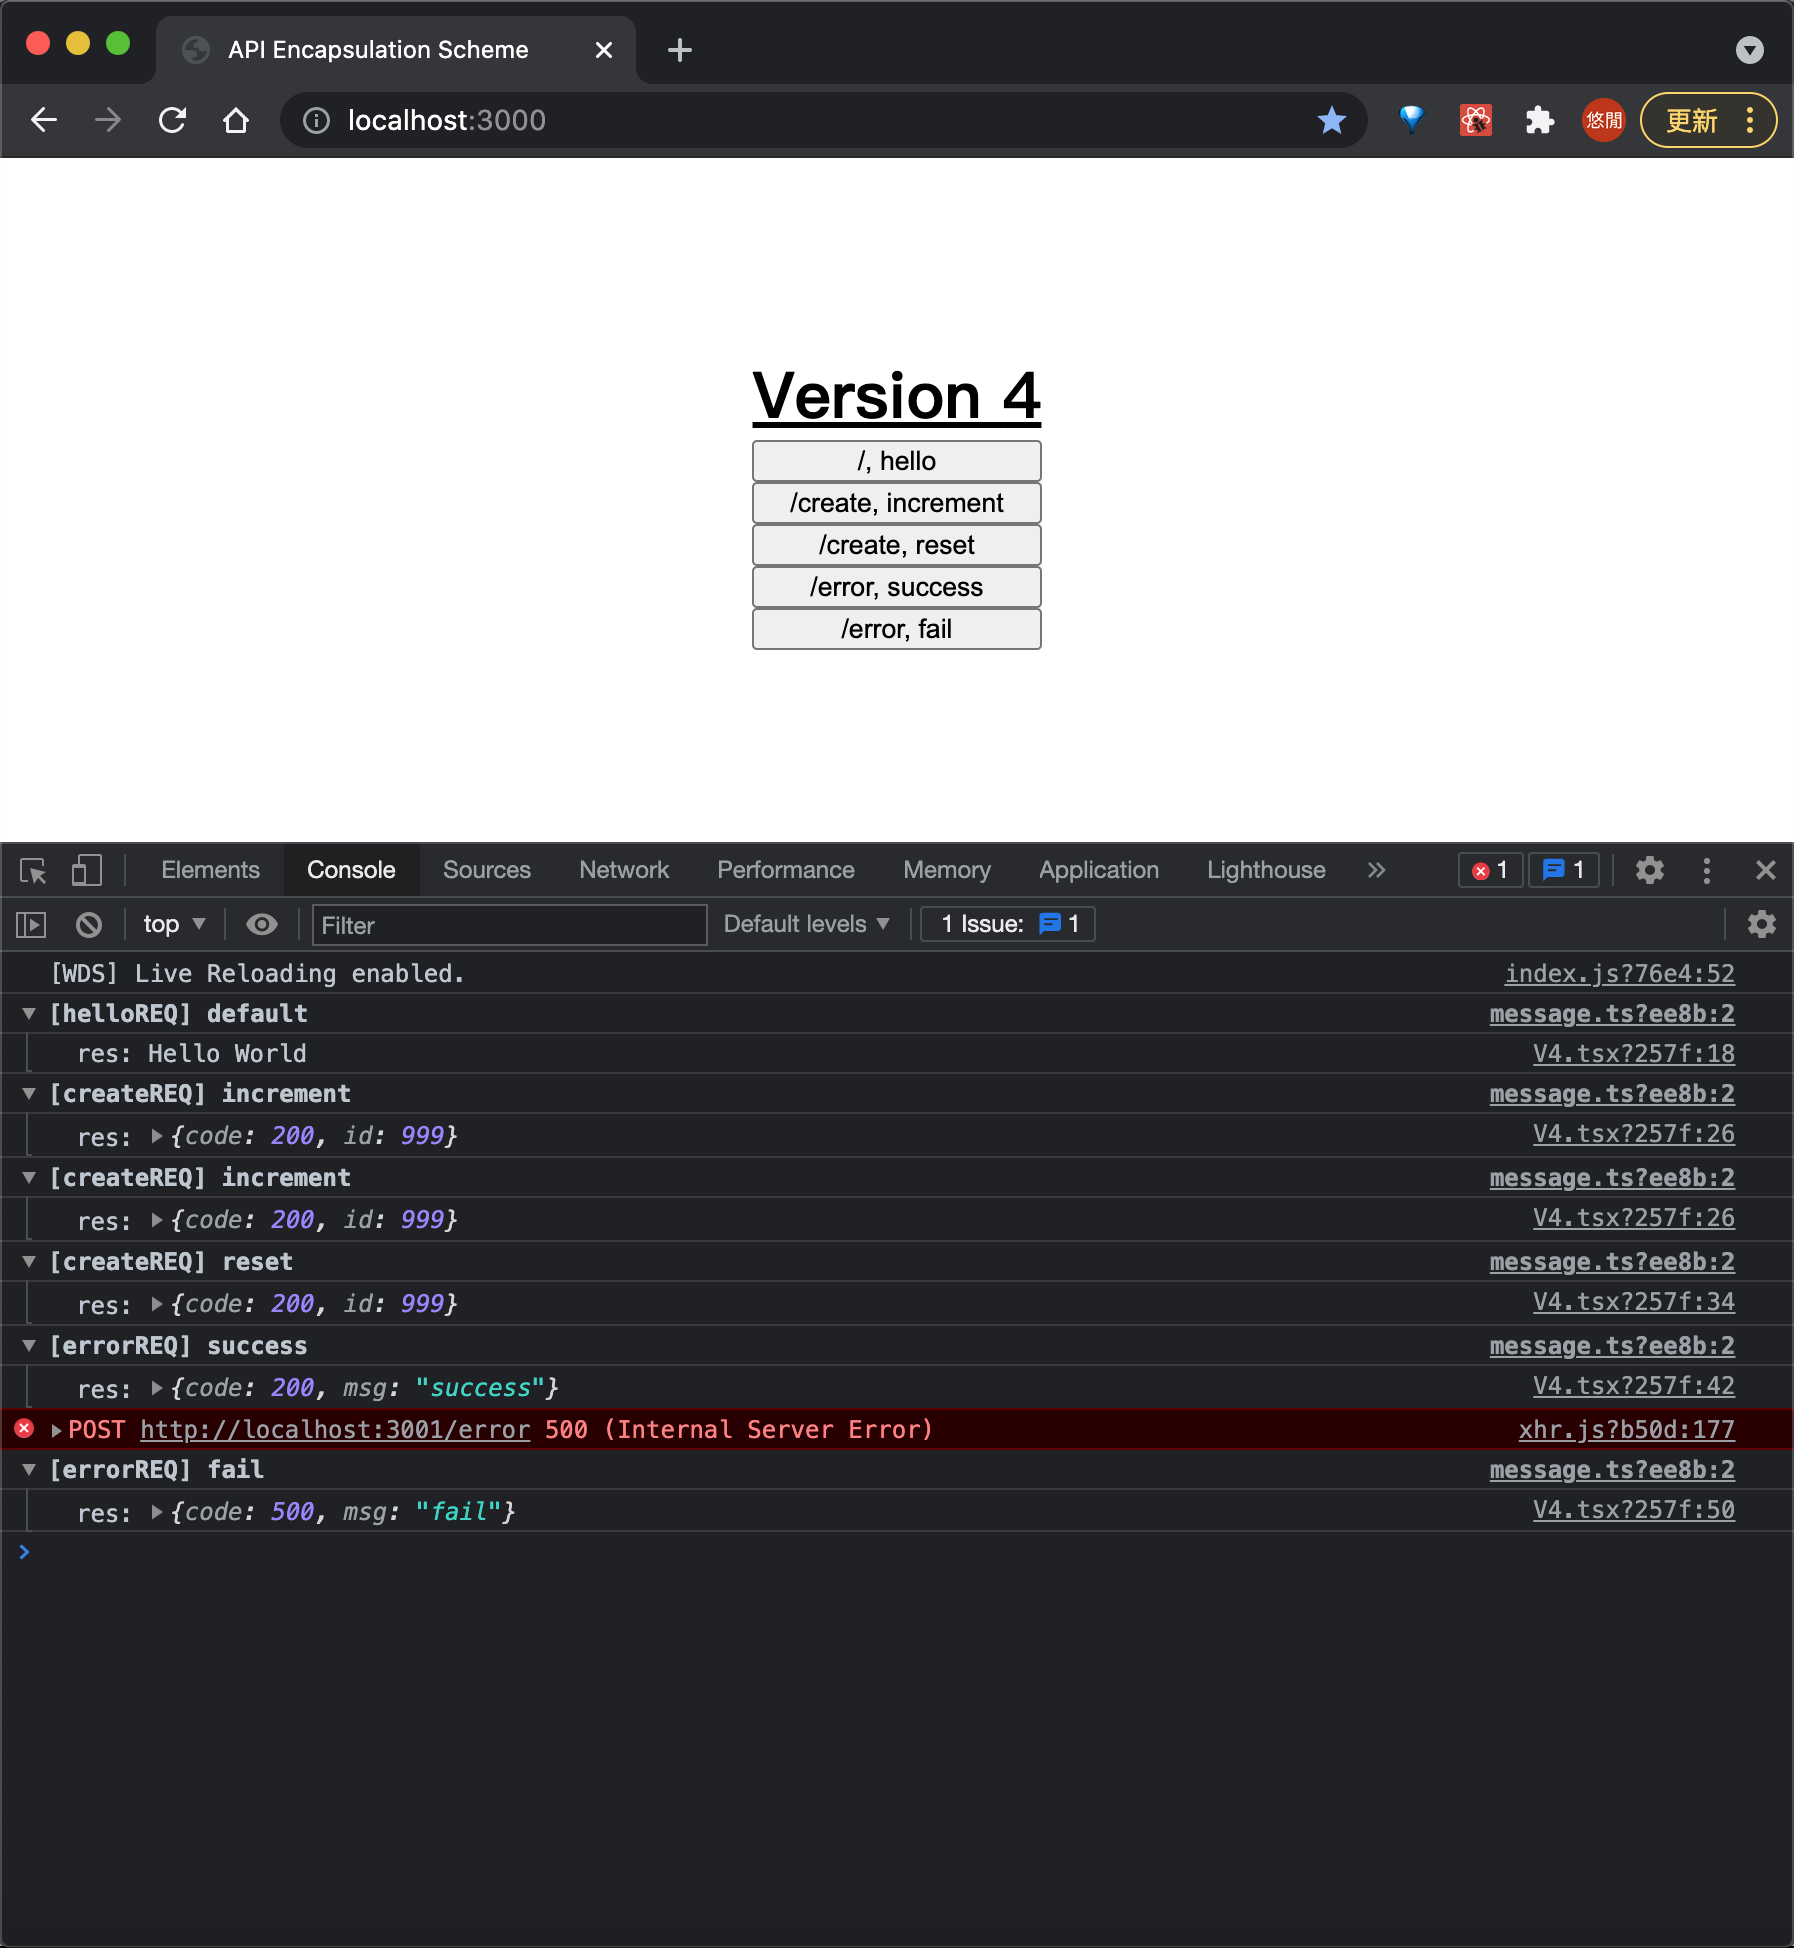
最终的效果如下
后续扩展 & 思考
本篇一共就提供四个例子,最终的成果仅仅在于对 api 接口的一种上层封装,同时我们可以思考以下几个问题作为扩展选项
- 加入请求失败重试机制
- 加入请求超时熔断
- 加入请求成功/失败动作上报(埋点
当前想到的一种封装模式可以参考中间件的设计模式,透过传入接口的配置信息并最终由中间件发起请求,具体方案与实现将于之后的博客来分享。
结语
本期对于 api 的实现与思考做了一定的尝试,但是并未添加更多的能力;不过作为后续的思考已经提出一个新的解决方案就是以中间件模式来实现请求方法的调用,期待对此有其他想法的小伙伴私戳作者一起讨论。
其他资源
参考连接
| Title | Link |
|---|---|
| vue axios调用接口方法报错500 internal server error的解决方法_每天学习一点点-程序员宅基地 | https://www.cxyzjd.com/article/liangmengbk/88533563 |
| REACTJS xhr.js:177 POST http://localhost:3000/registerUser 500 (Internal Server Error) | https://stackoverflow.com/questions/68414024/reactjs-xhr-js177-post-http-localhost3000-registeruser-500-internal-server |
| Axios POST request fails with error status code 500: Internal Server error | https://stackoverflow.com/questions/50950011/axios-post-request-fails-with-error-status-code-500-internal-server-error |
| 解决vscode开发react项目没有代码提示问题 | https://www.jianshu.com/p/9e2eda067317 |
| 如何从现有的JavaScript库中生成.d.ts“类型”定义文件? | https://qastack.cn/programming/12687779/how-do-you-produce-a-d-ts-typings-definition-file-from-an-existing-javascript |
完整代码示例
https://github.com/superfreeeee/Blog-code/tree/main/front_end/scheme/scheme_api_encapsulation


 505
505

 被折叠的 条评论
为什么被折叠?
被折叠的 条评论
为什么被折叠?
 到【灌水乐园】发言


