


虚拟主机
预备知识
1.什么是是虚拟主机?
- 一个虚拟主机相对于一个网站
- nginx中多个server标签就等于多个虚拟主机
2.nginx相关错误
- ping 域名
- curl 域名
- nginx配置及检查语法与reload平滑重启
nginx主机的常见模型
基于域名的虚拟主机必备(必备)
不同的域名访问不同的虚拟主机(网站)
- 1.nginx配置文件进行配置
[root@web01 /etc/nginx/conf.d]# vim 01.www.conf
 server   {
    listen      80;
    server_name  www.oldboy.com;
    access_log  /var/log/nginx/access_www.log  main;
    location / {
    root   /usr/share/nginx/html/www;
    index  index.html index.htm;
    }
}
[root@web01 /etc/nginx/conf.d]# vim 02.blog.conf
 server   {
    listen      80;
    server_name  blog.oldboy.com;
    access_log  /var/log/nginx/access_blog.log  main;
    location / {
    root   /usr/share/nginx/html/blog;
    index  index.html index.htm;
    }
}
- 2.nginx -t 检查语法 没问题后重启
[root@web01 /etc/nginx/conf.d]# nginx -t
nginx: the configuration file /etc/nginx/nginx.conf syntax is ok
nginx: configuration file /etc/nginx/nginx.conf test is successful
[root@web01 /etc/nginx/conf.d]# systemctl reload nginx
- 3.创建不同的站点目录。一个网站一个目录
mkdir -p /usr/share/nginx/html/{blog,www}
- 4.创建主页文件
[root@web01 /etc/nginx/conf.d]# for n in www blog
> do
> echo $n.oldboy.com >/usr/share/nginx/html/$n/index.html
> done
You have new mail in /var/spool/mail/root
[root@web01 /etc/nginx/conf.d]# cat /usr/share/nginx/html/{blog,www}/index.html
blog.oldboy.com
www.oldboy.com
- 5.添加hosts解析
[root@web01 /etc/nginx/conf.d]# cat /etc/hosts
127.0.0.1   localhost localhost.localdomain localhost4 localhost4.localdomain4
::1         localhost localhost.localdomain localhost6 localhost6.localdomain6
172.16.1.5      lb01
172.16.1.6      lb02
172.16.1.7      web01 www.oldboy.com  blog.oldboy.com
172.16.1.8      web02
172.16.1.31     nfs01
172.16.1.41     backup
172.16.1.51     db01 db01.etiantian.org
172.16.1.61     m01
- 6.curl 域名 检查
[root@web01 /etc/nginx/conf.d]# curl www.oldboy.com
www.oldboy.com
[root@web01 /etc/nginx/conf.d]# curl blog.oldboy.com
blog.oldboy.com
基于端口的虚拟主机(网站)
- 1.配置nginx文件
[root@web01 /etc/nginx/conf.d]# vim 01.www.conf
 server   {
    listen      81;
    server_name  www.oldboy.com;
▽   access_log  /var/log/nginx/access_www.log  main;
    location / {
    root   /usr/share/nginx/html/www;
    index  index.html index.htm;
    }
}
[root@web01 /etc/nginx/conf.d]# vim 02.blog.conf
 server   {
    listen      82;
    server_name  blog.oldboy.com;
    access_log  /var/log/nginx/access_blog.log  main;
    location / {
    root   /usr/share/nginx/html/blog;
    index  index.html index.htm;
    }
}
- 2.nginx检查语法之后重启
[root@web01 /etc/nginx/conf.d]# nginx -t
nginx: the configuration file /etc/nginx/nginx.conf syntax is ok
nginx: configuration file /etc/nginx/nginx.conf test is successful
You have new mail in /var/spool/mail/root
[root@web01 /etc/nginx/conf.d]# systemctl reload nginx
- 3.检查nginx端口
[root@web01 /etc/nginx/conf.d]# ss -lntup|grep nginx
tcp    LISTEN     0      128       *:80                    *:*                   users:(("nginx",pid=13621,fd=8),("nginx",pid=10510,fd=8))
tcp    LISTEN     0      128       *:81                    *:*                   users:(("nginx",pid=13621,fd=14),("nginx",pid=10510,fd=14))
tcp    LISTEN     0      128       *:82                    *:*                   users:(("nginx",pid=13621,fd=15),("nginx",pid=10510,fd=15))
- 4.检查结果
[root@web01 /etc/nginx/conf.d]# curl 10.0.0.7:81
www.oldboy.com
[root@web01 /etc/nginx/conf.d]# curl 10.0.0.7:82
blog.oldboy.com
基于ip的虚拟主机(网站)
- 1.配置nginx文件
[root@web01 /etc/nginx/conf.d]# vim 01.www.conf
 server   {
    listen      10.0.0.7:80;
    server_name  www.oldboy.com;
    access_log  /var/log/nginx/access_www.log  main;
▽   location / {
    root   /usr/share/nginx/html/www;
    index  index.html index.htm;
    }
}
root@web01 /etc/nginx/conf.d]# vim 02.blog.conf
 server   {
    listen     10.0.0.9:80;
    server_name  blog.oldboy.com;
    access_log  /var/log/nginx/access_blog.log  main;
    location / {
    root   /usr/share/nginx/html/blog;
    index  index.html index.htm;
    }
}
- 2.检查语法
[root@web01 /etc/nginx/conf.d]# nginx -t
nginx: the configuration file /etc/nginx/nginx.conf syntax is ok
nginx: [emerg] bind() to 10.0.0.9:80 failed (99: Cannot assign requested address)
nginx: configuration file /etc/nginx/nginx.conf test failed
出现错误提示,第一行提示我们语法没有问他,第二行提示无法分配ip,原因是我们配置文件配置的10.0.0.9这个ip是不存在的。可以给它临时添加一个。
- 3.添加ip
[root@web01 /etc/nginx/conf.d]# ip addr add 10.0.0.9/24 dev eth0 label eth0:1
这条命令含义是添加10.0.0.0.9这个ip 基于eth0这个网卡 给它起个小名叫eth:1
- 4.检查添加的ip
[root@web01 /etc/nginx/conf.d]# ip a s eth0
2: eth0: <BROADCAST,MULTICAST,UP,LOWER_UP> mtu 1500 qdisc pfifo_fast state UP group default qlen 1000
    link/ether 00:0c:29:0f:39:5c brd ff:ff:ff:ff:ff:ff
    inet 10.0.0.7/24 brd 10.0.0.255 scope global eth0
       valid_lft forever preferred_lft forever
    inet 10.0.0.9/24 scope global secondary eth0:1
       valid_lft forever preferred_lft forever
    inet6 fe80::20c:29ff:fe0f:395c/64 scope link
       valid_lft forever preferred_lft forever
- 5.添加之后再检查语法 没问题就重启
[root@web01 /etc/nginx/conf.d]# nginx -t
nginx: the configuration file /etc/nginx/nginx.conf syntax is ok
nginx: configuration file /etc/nginx/nginx.conf test is successful
[root@web01 /etc/nginx/conf.d]# systemctl restart nginx
在这里就不能使用reload平滑重启了。
reload一般只是从新读取一次配置文件。
restart则是把进程停掉,从头启动一次。
所有有关ip的修改需要重启服务
- 6.curl 域名 检查
[root@web01 /etc/nginx/conf.d]# curl 10.0.0.7
www.oldboy.com
[root@web01 /etc/nginx/conf.d]# curl 10.0.0.9
blog.oldboy.com
nginx处理用户请求过程
http://nginx.org/en/docs/http/request_processing.html
nginx日志格式
    log_format  main  '$remote_addr - $remote_user [$time_local] "$request" '
                      '$status $body_bytes_sent "$http_referer" '
                      '"$http_user_agent" "$http_x_forwarded_for"';

    access_log  /var/log/nginx/access.log  main;
log_format 用来定义日志格式
access_log 是用来开启,指定日志路径,调用日志格式的变量
这里可以使用的参数有main gzip buffer=16k flush=5s
main 相对于给后面的日志格式定义了一个变量方便后面调用
gzip 对日志文件进行压缩
buffer=16k 相对于把日志临时放到内存中 最多能放16k的
flush=5s 相对于5秒钟将内存里的日志往硬盘里写一次,access_log /var/log/nginx/access_www-gzip.log main gzip buffer=16k flush=5s ;
-
日志格式的每列含义
log_format  main          ##定义日志的格式 放到main变量的
$remote_addr -            ##客户端的地址
$remote_user              ## 远程用户(空)
$time_local]                 ##系统时间
$request" '                   ## 请求报文的起始行 $request_uri 只取出uri
'$status                       ##请求报文的起始行 $request_uri 只取出uri
'$status                        ## 状态码

$status $body_bytes_sent "    ##服务端发给客户端大小(每个文件的大小)
$http_referer" '            ##  记录着用户从哪里跳转过来的
$http_user_agent" "     ##用户浏览器

$http_x_forwarded_for"';   ##负载均衡: web服务器用来记录用户真实ip地址
nginx配置文件切割
nginx一个server模块相对于一个虚拟主机,我们就可以为每一个网站创建一个文件,每个文件里写一个server模块
[root@web01 /etc/nginx/conf.d]# ll
total 16
-rw-r--r-- 1 root root 224 Jun  5 17:55 01.www.conf
-rw-r--r-- 1 root root 226 Jun  5 17:56 02.blog.conf
[root@web01 /etc/nginx/conf.d]# cat 01.www.conf
 server   {
    listen      80;
    server_name  www.oldboy.com;
    access_log  /var/log/nginx/access_www.log  main;
    location / {
    root   /usr/share/nginx/html/www;
    index  index.html index.htm;
    }
}

You have new mail in /var/spool/mail/root
[root@web01 /etc/nginx/conf.d]# cat 02.blog.conf
 server   {
    listen    80;
    server_name  blog.oldboy.com;
    access_log  /var/log/nginx/access_blog.log  main;
    location / {
    root   /usr/share/nginx/html/blog;
    index  index.html index.htm;
    }
}
在nginx主配置文件中调用
include /etc/nginx/conf.d/*.conf
[root@web01 /etc/nginx]# tail nginx.conf

    sendfile        on;
    #tcp_nopush     on;

    keepalive_timeout  65;

    #gzip  on;

    include /etc/nginx/conf.d/*.conf;
}
nginx的状态模块和权限控制
配置状态模块
权限控制 限制ip
[root@web01 /etc/nginx/conf.d]# cat /etc/nginx/conf.d/status.conf
server {
   listen 89;     ##nginx状态我们并不想让所有人都能看,所以可以给它修改监听端口
   server_name status.oldboy.com;    ##指定域名
   stub_status on;                                ##开启状态
   access_log off;                                ##关闭日志
   allow 172.16.1.0/24;                        ##只允许这个网段的访问
   deny all;                                           ##其他网段的都不可以访问
}
nginx -t 检查语法后reload重启
配置hosts解析
[root@web01 /etc/nginx/conf.d]# vim /etc/hosts
127.0.0.1   localhost localhost.localdomain localhost4 localhost4.localdomain4
::1         localhost localhost.localdomain localhost6 localhost6.localdomain6
172.16.1.5      lb01
172.16.1.6      lb02
172.16.1.7      web01 www.oldboy.com  blog.oldboy.com status.oldboy.com
172.16.1.8      web02
172.16.1.31     nfs01
172.16.1.41     backup
172.16.1.51     db01 db01.etiantian.org
172.16.1.61     m01
curl 域名指定端口
[root@web01 /etc/nginx/conf.d]# curl status.oldboy.com:89
Active connections: 1
server accepts handled requests
 3 3 3
Reading: 0 Writing: 1 Waiting: 0
Active connections: 1 当前的连接数量(已经建立的连接)
server accepts 服务器接收到的请求数量
server handled 服务器接处理的请求数量
server requests 用户一共向服务器发出多少请求
Reading: 0 当前nginx正在读取的用户请求头的数量
Writing: 1 当前nginx正在响应用户请求的数量
Waiting: 0 当前等待被nginx处理的 请求数量
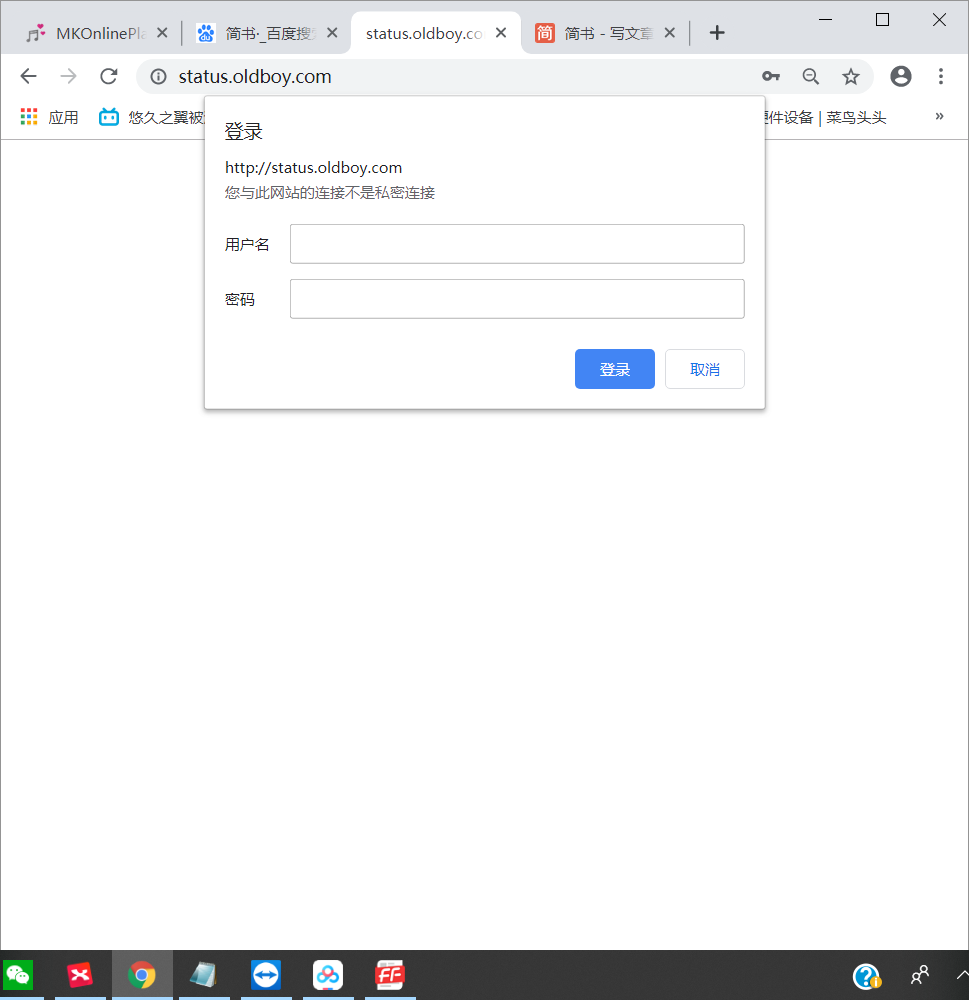
权限控制密码验证
server {
   listen 80;
   server_name status.oldboy.com;
   stub_status;
   access_log off;
   auth_basic "Auth access Blog Input your password";
   auth_basic_user_file /etc/nginx/htpasswd;
#   allow 172.16.1.0/24;
#   deny all;
}
创建密码文件
下载软件 yum install -y htpasswd. 并修改所有者为nginx和权限为600
[root@web01 /etc/nginx/conf.d]# htpasswd -bc /etc/nginx/htpasswd  oldboy   oldboy
Adding password for user oldboy
[root@web01 /etc/nginx/conf.d]# ll /etc/nginx/htpasswd
-rw-r--r-- 1 root root 45 Jun  6 09:15 /etc/nginx/htpasswd
[root@web01 /etc/nginx/conf.d]# chmod 600 /etc/nginx/htpasswd
[root@web01 /etc/nginx/conf.d]# ll /etc/nginx/htpasswd
-rw------- 1 root root 45 Jun  6 09:15 /etc/nginx/htpasswd
[root@web01 /etc/nginx/conf.d]# chown nginx.nginx /etc/nginx/htpasswd
[root@web01 /etc/nginx/conf.d]# ll /etc/nginx/htpasswd
-rw------- 1 nginx nginx 45 Jun  6 09:15 /etc/nginx/htpasswd
浏览器打开
取出本地的状态码
获取请求页面的请求头信息
[root@web01 /etc/nginx/conf.d]# curl  -I blog.oldboy.com
HTTP/1.1 200 OK
Server: nginx/1.16.0
Date: Fri, 07 Jun 2019 23:57:28 GMT
Content-Type: text/html
Content-Length: 16
Last-Modified: Wed, 05 Jun 2019 09:30:35 GMT
Connection: keep-alive
ETag: "5cf78bbb-10"
Accept-Ranges: bytes
想取出第一行的200
1.直接使用管道加awk
[root@web01 /etc/nginx/conf.d]# curl -I blog.oldboy.com|awk 'NR==1{print $2}'
  % Total    % Received % Xferd  Average Speed   Time    Time     Time  Current
                                 Dload  Upload   Total   Spent    Left  Speed
  0    16    0     0    0     0      0      0 --:--:-- --:--:-- --:--:--     0
200
发现确实取出来了,不过却多了一些额外的东西
这些信息表示从网站下载了多少东西和下载速度,可是这些信息我们一般不想要
管道之前把这些信息定向到空
[root@web01 /etc/nginx/conf.d]# curl -I blog.oldboy.com 2>/dev/null|awk 'NR==1{print $2}'
200
使用-s参数
[root@web01 /etc/nginx/conf.d]# curl -sI blog.oldboy.com|awk 'NR==1{print $2}'
200
-s参数就表示静音模式。不输出任何东西。
使用-w参数
[root@web01 /etc/nginx/conf.d]# curl -s -w "%{http_code}\n" blog.oldboy.com
blog.oldboy.com
200
-w参数表示按指定的参数显示某一列 可是还多点东西,他吧网站内容也显示出来了。
使用-o参数
[root@web01 /etc/nginx/conf.d]# curl -s -w "%{http_code}\n" -o /dev/null blog.oldboy.com
200
-o表示把-w指定的东西之外的不想要的东西放到一个文件中
location匹配规则
2.1 location的作用
根据用户请求的URL来执行不同的应用,即URI的内容。
2.2 location语法
location[=|~|~*|^~]url{
           ……
        }
2.3 location语法说明
| location | [=||*|^~] | url | {……} |
|---|---|---|---|
| 指令 | 匹配标识 | 匹配的网站网址 | 匹配URL后要执行的配置段 |
2.4 匹配标识分别代表的含义
| 匹配标识 | = | ~ | ~* | ^~ |
|---|---|---|---|---|
| 含义 | 精确 | 区分大小写的正则匹配 | 不区分大小写的正则匹配 | 不做正则表达式的检查 |
location优先级测试
配置文件修改
[root@web01 /etc/nginx/conf.d]# vim 01.www.conf
server {
    listen       80;
    server_name  www.oldboy.com;
    root   html/www;
    location / {
       return 200  "location / \n";
    }
    location = / {
        return 200 "location = \n";
    }

    location /documents/ {
        return 200 "location /documents/ \n";
    }
    location ^~ /images/ {
        return 200 "location ^~ /images/ \n";

    }
    location ~* \.(gif|jpg|jpeg)$ {
        return 200 "location ~* \.\(gif|jpg|jpeg) \n";
    }
    access_log off;
}
例子:return 200 "location /documents/ \n"
表示符合规则后显示出状态码和引号里的内容 /n 表示换行
测试优先级更直观
[root@web01 /etc/nginx/conf.d]# curl 10.0.0.7/oldboy.html
location /
[root@web01 /etc/nginx/conf.d]# curl 10.0.0.7/documents/alex.txt
location /documents/
[root@web01 /etc/nginx/conf.d]# curl 10.0.0.7/lidao/documents/alex.txt
location /
[root@web01 /etc/nginx/conf.d]# curl 10.0.0.7/oldboy.jpg
location ~* \.(gif|jpg|jpeg)
优先级验证·
#验证/documents 与 ~* 优先级
[root@web01 /etc/nginx/conf.d]# curl 10.0.0.7/documents/oldboy.jpg
location ~* \.(gif|jpg|jpeg)
#验证 ~* 与 ^~  优先级
[root@web01 /etc/nginx/conf.d]# curl 10.0.0.7/images/oldboy.jpg
location ^~ /images/
总结:当^~ 和 ~* 都满足条件时 ^~的优先级更高。
优先级排名
=
^~  匹配的不匹配正则   优先匹配 (更优先)
~*   匹配正则不区分大小写
/documents
/


 7840
7840


 被折叠的 条评论
为什么被折叠?
被折叠的 条评论
为什么被折叠?
 到【灌水乐园】发言


