


一.配置spring环境,写第一个helloWorld程序
1.创建一个Java project
2.在src目录下创建一个lib目录
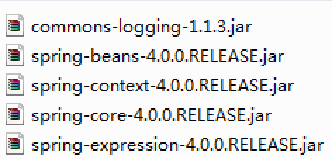
3.在lib中导入jar包
4.创建一个com.xxxx.spring.beans包
5.创建一个HelloWorld类
package com.zengxiong.spring.beans;

public class HelloWorld {
	private String name;
	public void setName2(String name) {//setName2与spring配置文件中的name2属性对应,不能不一致
		this.name = name;
	}
	public void hello() {
		System.out.println("hello:"+name);//name在spring文件中进行配置
	}
	//写一个无参构造器
	public HelloWorld() {
		// TODO Auto-generated constructor stub
		System.out.println("Helloworld.Constructor");
	}
}
6创建一个主方法类
package com.zengxiong.spring.beans;

import org.springframework.context.ApplicationContext;
import org.springframework.context.support.ClassPathXmlApplicationContext;

public class Main {
	public static void main(String[] args) {
		/*
		 //创建实例对象
		  HelloWorld hellWorld = new HelloWorld();

		 //属性赋值
		  hellWorld.setName("zengxiong");
		  //上面两个可交给sprin获取beans实例
		  hellWorld.hello();
		*/

		//第一步创建spring IOC容器 ApplicationContext 实际上是一个接口
		//ClassPathXmlApplicationContext是ApplicationContext接口实现类,该实现类从类路径下加载配置文件
		ApplicationContext ctx = new ClassPathXmlApplicationContext("applicationContext.xml");
		//利用类型获取ICO中的bean,但要求IOC中只有一个该类型的bean
		//HelloWorld helloWorld = (HelloWorld) ctx.getBean(HelloWorld.class);
		//第二步从IOC容器中获取beans实例 利用id定位到IOC中的beans
		HelloWorld hellWorld = (HelloWorld) ctx.getBean("helloWorld");
		System.out.println(hellWorld);
		//3调用hello方法
		//	hellWorld.hello();


	}
}
6.创建一个applicationContext.xml
<!--
	配置bean
	class全类名 通过反射的方式在IOC容器中创建bean,所以要求Bean中必须带有无参构造器
	id标识容器中的getname
	name="name"利用set方法进行注入
	 -->
	<bean id="helloWorld" class="com.zengxiong.spring.beans.HelloWorld">
		<property name="name2" value="spring"></property>
	</bean>


 703
703


 被折叠的 条评论
为什么被折叠?
被折叠的 条评论
为什么被折叠?
 到【灌水乐园】发言


