


百度地图自定义覆盖物添加与删除
起因
因为UI设计的地图覆盖物没用使用百度地图的默认样式,而且UI又不想给我切图,并且这个样式还带有动画效果,所以参考了百度地图自定义覆盖物demo之后自己写了自定义覆盖物。
1、添加自定义覆盖物
因为是在vue项目中的,所以很多数据前都带有this。添加自定义文本覆盖物的例子百度已经有了,所以这里只写了自定义图片覆盖物的例子。
初始化百度地图
baiduMapInit () {
    this.map = new BMap.Map("mapContainer", {enableMapClick: false});
    var point = new BMap.Point(113.404, 23.915);
    this.map.centerAndZoom(point, 12);
    this.map.enableScrollWheelZoom(true);

	// 配置地图插件
    var opts = { offset: new BMap.Size(25, 50) };
    this.map.addControl(new BMap.NavigationControl(opts));
    this.map.addControl(new BMap.ScaleControl(opts));
    this.map.addControl(new BMap.OverviewMapControl());
    this.map.addControl(new BMap.MapTypeControl());
}
添加自定义覆盖物方法
	/**
     * @name: 在地图上添加自定义覆盖物
     * @param {Object} deviceObj 这里的deviceObj是需要在地图上显示的目标,不用管它是什么
     */
addMapDeviceMarker (deviceObj) {
  let map = this.map;
   let _this = this;
   function ComplexCustomOverlay (point, text, mouseoverText) {
     this._point = point;
     this._text = text;
     this._overText = mouseoverText;
   }

   ComplexCustomOverlay.prototype = new BMap.Overlay();

   ComplexCustomOverlay.prototype.initialize = function (map) {
     this._map = map;
     // 覆盖物容器样式
     var div = this._div = document.createElement('div');
     div.style.position = 'absolute';
     div.style.zIndex = BMap.Overlay.getZIndex(this._point.lat);
     div.style.backgroundColor = 'transparent';
     div.style.border = 'none';
     div.style.color = 'white';
     div.style.height = '55px';
     div.style.width = '43px';
     div.style.cursor = 'pointer'
     div.style.padding = '0';
     div.style.lineHeight = '18px';
     div.style.whiteSpace = 'nowrap';
     div.style.MozUserSelect = 'none';
     div.style.fontSize = '12px';
     div.style.transform = 'translate(-10px, -20px)';

     var span = this._span = document.createElement('span');
     div.appendChild(span);
     span.appendChild(document.createTextNode(this._text));
     var that = this;

     // 覆盖物箭头样式,但是我并不需要,所以就只设置了大小
     var arrow = this._arrow = document.createElement('div');
     arrow.style.position = 'absolute';
     arrow.style.width = '11px';
     arrow.style.height = '10px';
     arrow.style.top = '22px';
     arrow.style.left = '10px';
     arrow.style.overflow = 'hidden';
     div.appendChild(arrow);
     map.getPanes().labelPane.appendChild(div);

     // 覆盖物图片样式
     let imgDiv = div.children[1];
     imgDiv.style.top = 0;
     imgDiv.style.left = 0;
     imgDiv.style.height = '55px';
     imgDiv.style.width = '43px';
     imgDiv.style.padding = '0';
     // 根据参数返回不同的图片,可以写死
     imgDiv.style.background = _this.getMarkerPng(deviceObj);
     return div;
   }

   ComplexCustomOverlay.prototype.draw = function () {
     var pixel = map.pointToOverlayPixel(this._point);
     this._div.style.left = pixel.x - parseInt(this._arrow.style.left) + "px";
     this._div.style.top  = pixel.y - 30 + "px";
   }


   let myCompOverlay = new ComplexCustomOverlay(new BMap.Point(deviceObj.lat, deviceObj.lng), '', '');
   map.addOverlay(myCompOverlay);

	// 将覆盖物对象存储起来,方便以后删除
   deviceObj.myCompOverlay = myCompOverlay;
}
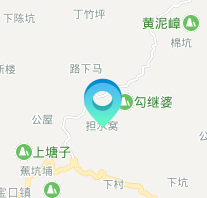
实现效果
2、自定义覆盖物的两种删除
2.1、直接删除
在需要删除的地方调用这段代码
// deviceObj指储存了myCompOverlay对象的数据,参考上面代码最后一行的操作
this.map.removeOverlay(deviceObj.myCompOverlay));
2.2、遍历覆盖物进行删除
for (let item of this.map.getOverlays()) {
	// 对比对象是否相等,相等返回true,遍历后发现其中有一个是相等的
   if (Object.is(item, device.myCompOverlay)) {
     this.map.removeOverlay(item)
   }
 }
3、另一种自定义覆盖物的添加方式及自定义覆盖物的点聚合
https://blog.csdn.net/weixin_44849078/article/details/89362561


 被折叠的 条评论
为什么被折叠?
被折叠的 条评论
为什么被折叠?
 到【灌水乐园】发言


