


SSM框架相关理论
2 Spring 5
2.1 Spring配置与主要功能介绍
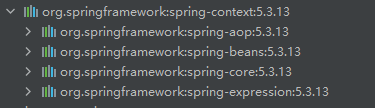
- 核心jar包
2.2 IOC(控制反转)
2.2.1 底层原理
- XML文件解析
- 工厂模式
- 反射
- IOC容器的两个主要实现接口
- BeanFactory
- IOC容器的基本实现,在框架内部使用,配置文件加载后不会自动创建对象
- ApplicationContext
- 子接口,配置文件加载完之后会自动创建配置文件中的对象,推荐使用。
- 两个主要的实现类
- FileSystemXmlApplicationContext:加载系统中绝对路径的配置文件。
- ClassPathXmlApplicationContext:加载类路径下的配置文件。
- BeanFactory
2.2.2 IOC的Bean管理
- 即对象的创建和属性值的注入,Spring创建对象时默认使用无参构造。
- 实现方式
- xml文件配置
- DI注入(IOC的具体实现)
- 注解
- xml文件配置
2.2.3 DI注入的实现
-
set方法注入(依赖于属性的set方法)
<bean id="唯一标识(对象名)" class="类的带包名称"> <property name="属性名" value="属性值"></property> ... </bean> -
有参构造注入
<bean id="唯一标识(对象名)" class="类的带包名称"> <constructor-arg name="有参构造的形参名" value="属性值"></constructor-arg> <constructor-arg index="有参构造中形参的位置,从0开始" value="属性值"></constructor-arg> </bean> -
特殊类型的值的注入
-
null值
<bean id="唯一标识(对象名)" class="类的带包名称"> <property name="属性名"> <null/> </property> ... </bean> -
包含特殊符号的属性值
<bean id="唯一标识(对象名)" class="类的带包名称">
    <!--
		1:把特殊字符进行转义
		2:利用CDATA
	-->
    <property name="属性名">
    	<value><![CDATA[特殊的属性值]]></value>
    </property>
    ...
</bean>
-
-
引用类型的值的注入
<bean id="唯一标识(对象名)" class="类的带包名称"> <!--级联属性赋值--> <property name="属性名" ref="对应的bean的id"></property> ... <!--内部bean赋值--> <property name="属性名"> <bean id ="" class=""> <property name="" value=""></property> </bean> </property> <property name="属性名" ref="对应的bean的id"></property> <property name = "内部bean.属性名" value="属性值"></property> </bean> -
集合类型的属性值注入
- 集合元素为普通类型
<bean id="唯一标识(对象名)" class="类的带包名称">
    <!--数组类型-->
    <property name="属性名">
    	<array>
        	<value>值1</value>
            <value>值2</value>
            ...
        </array>
    </property>
        <!--list类型-->
    <property name="属性名">
    	<list>
        	<value>值1</value>
            <value>值2</value>
            ...
        </list>
    </property>
        <!--set类型-->
    <property name="属性名">
    	<set>
        	<value>值1</value>
            <value>值2</value>
            ...
        </set>
    </property>
        <!--map类型-->
    <property name="属性名">
    	<map>
            <entry key="" value=""></entry>
            <entry key="" value=""></entry>
        	...
        </array>
    </property>
    ...
</bean>
2 集合元素为对象
<bean id="唯一标识(对象名)" class="类的带包名称">
    <!--list类型-->
    <property name="属性名">
    	<list>
        	<ref bean="其他bean的id值"></ref>
            <ref bean="其他bean的id值"></ref>
            ...
        </list>
    </property>
    ...
</bean>
3 引入util名称空间对集合类属性注入进行提取
<!--先引入名称空间util-->
<?xml version="1.0" encoding="UTF-8"?> <beans xmlns="http://www.springframework.org/schema/beans" xmlns:xsi="http://www.w3.org/2001/XMLSchema-instance" xmlns:p="http://www.springframework.org/schema/p" xmlns:util="http://www.springframework.org/schema/util" xsi:schemaLocation="http://www.springframework.org/schema/beans http://www.springframework.org/schema/beans/spring-beans.xsd http://www.springframework.org/schema/util http://www.springframework.org/schema/util/spring-util.xsd">

<util:list id="list">
	<value></value>
    ....
    <ref bean=""></ref>
    ....
</util:list>
    <bean id="唯一标识(对象名)" class="类的带包名称">
        <property name="属性名" ref="list"></property>
        ...
	</bean>

</beans>
2.2.4 Bean类型
-
普通bean : 配置文件中定义的bean类型就是返回类型
-
工厂bean(FactoryBean): 配置文件中定义的bean类型可以与返回类型不一致
-
创建类实现FactoryBean接口,
-
实现接口中的方法,在方法中定义返回的类型
//实现FactoryBean接口的工厂类 public class MyBean implements FactoryBean<ReturnClass> { //定义返回bean @Override public ReturnClass getObject() throws Exception { ReturnClass rc = new ReturnClass("实际返回类型"); return rc; } @Override public Class<?> getObjectType() { return null; } @Override public boolean isSingleton() { return false; } } //实际返回类型 class ReturnClass{ private String name; public ReturnClass(){} public ReturnClass(String name){ this.name =name; } } //测试代码 public void test(){ ApplicationContext ac = new ClassPathXmlApplicationContext("applicationContext.xml"); ReturnClass rc = ac.getBean("mybean",ReturnClass.class); System.out.println(rc); }<bean id = "mybean" class ="com.lzx.MyBean"></bean>
-
2.2.5 Bean管理(作用域与生命周期)
-
Bean的作用域 (即单实例还是多实例)
-
Spring中的bean默认是单实例对象
-
通过bean标签中的scope属性设置是单实例还是多实例
<!--scope属性的默认值是singleton(单实例),加载spring配置文件的时候就会创建单例对象
	scope的值设置为prototype(多实例)时,加载Spring配置文件时不会创建对象,当调用getBean()方法时才会创建多实例对象-->
<bean id="" class="" scope=""></bean>
-
-
Bean的生命周期(对象从创建到销毁的过程)
- 通过无参构造创建bean实例
- 通过set方法为bean实例的属性赋值
- 把bean实例传递给bean的后置处理器的postProcessBeforeInitialization()方法
- 调用bean的初始化方法,需要在配置文件的bean标签中配置调用的初始化方法
- 把初始化后的bean对象传递给bean的后置处理器的postProcessAfterInitialization()方法
- 获取bean实例对象
- 当容器关闭时,执行自定义且需要在配置文件的bean标签中配置的销毁方法(当bean是多实例对象时,调用close()方法不会执行销毁方法)
-
后置处理器的创建及生命周期演示
<!--配置初始化及销毁方法-->
<bean id="student1" class="com.lzx.bean.Student" scope="prototype" init-method="initial" destroy-method="destroy">
        <property name="name" value="张飞"></property>
        <property name="id" value="13"></property>
</bean>
<!--配置后置处理器-->
<bean id="myPostProcessor" class="com.lzx.bean.MyBeanPostProcessor"></bean>
//后置处理器的创建,实现BeanPostProcessor接口,并重写其中的方法 package com.lzx.bean; import org.springframework.beans.BeansException; import org.springframework.beans.factory.config.BeanPostProcessor; public class MyBeanPostProcessor implements BeanPostProcessor { @Override public Object postProcessBeforeInitialization(Object bean, String beanName) throws BeansException { System.out.println("初始化之前执行"); return bean; } @Override public Object postProcessAfterInitialization(Object bean, String beanName) throws BeansException { System.out.println("初始化之后执行"); return bean; } } package com.lzx.bean; public class Student { private int id; private String name; public Student() { System.out.println("无参构造执行了"); } public Student(int id, String name) { System.out.println("有参构造执行了"); this.id = id; this.name = name; } public void setId(int id) { this.id = id; } public void setName(String name) { System.out.println("set方法执行了"); this.name = name; } public void initial(){ System.out.println("初始化方法执行了"); } public void destroy(){ System.out.println("销毁方法执行了"); } }
2.2.6 引用类型的自动注入
- 根据类型注入,注入与引用类型同源的对象,本质是调用对应属性的set方法。
- 据有继承关系的
- 同类型的
- 接口与实现类
<bean id="" class="" autowire="byType"></bean>
- 根据名称自动注入,本质是调用对应属性的set方法。
<bean id="" class="" autowire="byName"></bean>
2.2.7 引入外部配置文件
- 创建外部属性配置文件
- 把外部属性配置文件引入到Spring配置文件中
- 引入context名称空间
- 使用标签引入外部属性文件
<beans xmlns="http://www.springframework.org/schema/beans"
xmlns:xsi="http://www.w3.org/2001/XMLSchema-instance" xmlns:context="http://www.springframework.org/schema/context" xsi:schemaLocation="http://www.springframework.org/schema/beans http://www.springframework.org/schema/beans/spring-beans.xsd http://www.springframework.org/schema/context http://www.springframework.org/schema/context/spring-context.xsd">
 <!--引入外部属性文件-->
 <context:property-placeholder location="classpath:jdbc.properties"/>
 </beans>
2.3 基于注解的DI(依赖注入)
2.3.1 几种常见的注解
- @Component 调用无参构造创建对象
- @Repository 创建dao对象,访问数据库
- @Service 创建service对象,执行业务方法,可以有事务的功能
- @Controller 创建控制器对象,能够接受用户的请求,显示处理的结果
- @Autowired 用于引用类型的属性的赋值,默认是byType的方式
- @Qualifier 指定对象的名称,配合@Autowired使用,通过byName的方式赋值
- @Resource JDK提供的注解,可以根据类型及名称注入
- @Value 用于普通类型的属性值的注入
2.3.2 利用注解创建对象的步骤
- 加入依赖

-
在配置文件中开启组件扫描
<beans xmlns="http://www.springframework.org/schema/beans" xmlns:xsi="http://www.w3.org/2001/XMLSchema-instance" xmlns:context="http://www.springframework.org/schema/context" xsi:schemaLocation="http://www.springframework.org/schema/beans http://www.springframework.org/schema/beans/spring-beans.xsd http://www.springframework.org/schema/context http://www.springframework.org/schema/context/spring-context.xsd"> <!--开启组件扫描--> <!--多个包可以用,隔开 也可以扫描父包--> <context:component-scan base-package="需要扫描的类所在的包"></context:component-scan> </beans>-
组件扫描的相关配置
<!--不使用默认的filter,自己配置filiter指定扫描的内容-->
<context:component-scan base-package="需要扫描的类所在的包" use-default-filters="false">
    <context:include-filter type="annotation"
      expression="org.springframework.stereotype.Controller"/>
</context:component-scan>

<!--使用默认的filter,自己配置filiter指定不扫描的内容-->
<context:component-scan base-package="需要扫描的类所在的包">
    <context:exclude-filter type="annotation"
      expression="org.springframework.stereotype.Controller"/>
</context:component-scan>
-
-
在类上面添加对应的注解来创建对象
@Resource(name="对象名")  //按照名称进行注入  默认按照名称注入,名称注入不成功按照类型注入
//注解中的value属性值可以省略,默认创建的对象名是类名的首字母小写
@Autowired//默认是利用类型注入,不需要添加set方法,可以与@Qualifier配合使用名称注入
2.4 AOP(面向切面编程 Aspect Orient Programming)
2.4.1 相关概念
- 连接点:可以被增强的业务方法,
- 切入点:实际被增强的方法
- 通知:实际增强的功能及该功能执行的时间
- 切面:是一系列完整的动作,包括找到切入点,确定执行时间,完成功能增强。
2.4.2 底层实现原理
- spring一般通过集成aspectJ框架来实现AOP的功能
- aspectJ底层通过动态代理的方式来实现AOP功能
2.4.3 aspectJ框架利用注解实现AOP功能的步骤
-
加入aspectJ的依赖
<dependency> <groupId>org.springframework</groupId> <artifactId>spring-aspects</artifactId> <version>5.3.13</version> </dependency> -
创建业务类与代理增强类并在Spring配置文件中开启生成代理对象,通过注解或者xml配置文件的方式创建这两个类的对象
<!--通过配置文件的方式创建对象--> <bean id="someService" class="com.lzx.service.impl.SomeServiceImpl"/> <bean id="myAspect" class="com.lzx.aspect.MyAspect"/> <!--通过注解的方式创建对象需要配置组件扫描器--> <context:component-scan base-package="com.lzx"></context:component-scan> <!--开启生成代理对象--> <aop:aspectj-autoproxy></aop:aspectj-autoproxy> -
在代理增强类的上面添加@Aspect注解,在增强方法上添加对应的通知注解,一共有5种不同的通知注解类型
- @Before 前置通知:对应的方法没有返回值,可以有参数JoinPoint表示目标方法
- @AfterReturning 后置通知:该注解有额外属性 returning = “res” 用于接收目标方法的返回值,对应的切面方法也有参数 建议为Object类型,形参名与returning属性的值一致 (res)
- @Around 环绕通知:相当于JDK的动态代理,对应的切面方法有返回值,有参数。返回值为目标方法的返回结果,可以对该结果进行修改,修改的结果将影响目标方法的执行结果。参数ProceedingJointPoint pjp 等同于Jdk动态代理的InvocationHandler的invoke方法中的Method,用来执行代理对象的方法。pjp.proceed() 等同于method.invoke() ,方法的返回结果为 Object res = pjp.proceed()。
- AfterThrowing 异常通知:相当于try…catch…块中的catch部分,用于监控目标方法的异常。该注解有额外的属性throwing,属性的值要与切面方法的形参名一致,形参的类型为Exception。
- After 最终通知:相当于finally块中的语句,无论异常发生与否该切面方法都会执行。
package com.lzx.aspect;

import com.lzx.domain.Student;
import org.aspectj.lang.JoinPoint;
import org.aspectj.lang.ProceedingJoinPoint;
import org.aspectj.lang.annotation.*;

import java.util.Date;

@Aspect
public class MyAspect {

    @Before(value = "execution(public void com.lzx.service.impl.SomeServiceImpl.doSome(String,Integer))")
    public void addAspect(JoinPoint JP){
        System.out.println("现在时间是" + new Date());
    }

    @AfterReturning(value = "execution(* *..SomeServiceImpl.*AfterReturning(..))", returning = "res")
    public void afterReturning(Object res){
        System.out.println("==========后置通知方法执行了");
        res = (Student) res;
        ((Student) res).setAge(23);
        System.out.println(res);
    }

    @Around(value = "execution(* *..SomeServiceImpl.*Around(..)) ")
    public Object around(ProceedingJoinPoint pjp) throws Throwable {
        Object res = null;
        System.out.println("========目标方法之前========");
        res = pjp.proceed();
        ((Student) res).setName("小犊子");
        System.out.println("========目标方法之后========");
        System.out.println(res);
        return res;
    }

    @AfterThrowing(value = "pointCut()",throwing = "ex")
    public void afterThrowing(Exception ex){
        System.out.println("有异常发生了");
    }

    @After(value = "pointCut()")
    public void after(){
        System.out.println("最终通知方法执行了");
    }

    @Pointcut(value = "execution(* *..*.*(..))")
    private void pointCut(){

    }
}
-
公共切入点表达式的提取
//在其他的通知注解中可以用pointCut()来代替切入点表达式 @Pointcut(value = "execution(* *..*.*(..))") private void pointCut(){} -
被增强类类型与代理模式
- 当被增强类实现了接口时,默认使用jdk动态代理,可以在配置文件中使用<aop:aspectj-autoproxy proxy-target-class=“true”/>指定有接口时使用cglib动态代理。
- 没有接口默认使用cglib动态代理。
2.5 Spring操作数据库
2.5.1 Spring集成Mybatis操作数据库
-
操作步骤
-
加入相关的依赖
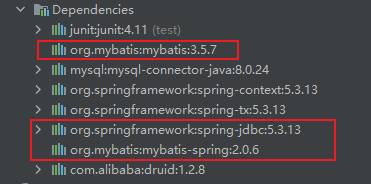
-
在Spring配置文件中配置数据库连接池对象以及SqlSessionFactory对象和Mapper映射配置文件
<?xml version="1.0" encoding="UTF-8"?> <beans xmlns="http://www.springframework.org/schema/beans" xmlns:xsi="http://www.w3.org/2001/XMLSchema-instance" xmlns:context="http://www.springframework.org/schema/context" xsi:schemaLocation="http://www.springframework.org/schema/beans http://www.springframework.org/schema/beans/spring-beans.xsd http://www.springframework.org/schema/context https://www.springframework.org/schema/context/spring-context.xsd"> <context:property-placeholder location="classpath:jdbc.properties"/> <context:component-scan base-package="com.lzx"/> <bean id="druidDataSource" class="com.alibaba.druid.pool.DruidDataSource" init-method="init" destroy-method="close"> <property name="url" value="${jdbc.url}"/> <property name="username" value="${jdbc.username}"/> <property name="password" value="${jdbc.passwd}"/> <property name="maxActive" value="${jdbc.maxActive}"/> </bean> <!--创建sqlSessionFactory对象,指定数据库对象以及Mybatis配置文件--> <bean id="sqlSessionFactory" class="org.mybatis.spring.SqlSessionFactoryBean"> <property name="dataSource" ref="druidDataSource"/> <property name="configLocation" value="classpath:mybatis.xml"/> </bean> <!--创建映射扫描配置对象,指定mapper映射文件所在的包--> <bean class="org.mybatis.spring.mapper.MapperScannerConfigurer"> <property name="sqlSessionFactoryBeanName" value="sqlSessionFactory"/> <property name="basePackage" value="com.lzx.dao"/> </bean> </beans> -
利用Mybatis相关功能
package com.lzx.dao;

import com.lzx.domain.Student;

import java.util.List;

public interface StudentDao {
    public int insertStudent(Student student);
    public List<Student> selectAllStudents();
}
package com.lzx.service.impl;

import com.lzx.dao.StudentDao;
import com.lzx.domain.Student;
import com.lzx.service.StudentService;
import org.springframework.beans.factory.annotation.Autowired;
import org.springframework.stereotype.Service;

import java.util.List;

@Service("studentService")
public class StudentServiceImpl implements StudentService {

    @Autowired
    private StudentDao studentDao;

    public void setStudentDao(StudentDao studentDao) {
        this.studentDao = studentDao;
    }

    @Override
    public int addStudent(Student student) {
        int nums = studentDao.insertStudent(student);
        return nums;
    }

    @Override
    public List<Student> queryAllStudents() {
        List<Student> students = null;
        students = studentDao.selectAllStudents();
        return students;
    }
}

package com.lzx;

import com.lzx.domain.Student;
import com.lzx.service.StudentService;
import org.junit.Test;
import org.springframework.context.ApplicationContext;
import org.springframework.context.support.ClassPathXmlApplicationContext;

import javax.annotation.Resource;
import java.util.List;

public class TestContainer {
    @Test
    public void test01(){
        String config = "applicationContext.xml";

        ApplicationContext atx = new ClassPathXmlApplicationContext(config);

        String[] names = atx.getBeanDefinitionNames();
        for (String name : names){
            System.out.println(name);
            Object bean = atx.getBean(name);
            System.out.println(bean);
        }
    }

    @Test
    public void test02(){
        String config = "applicationContext.xml";

        ApplicationContext atx = new ClassPathXmlApplicationContext(config);

        StudentService studentService = (StudentService) atx.getBean("studentService");

        int nums = studentService.addStudent(new Student(1006, "叶凡", "yefan@tiandi.com", 1000));

        System.out.println(nums);
    }

    @Test
    public void test03(){
        String config = "applicationContext.xml";

        ApplicationContext atx = new ClassPathXmlApplicationContext(config);

        StudentService studentService = (StudentService) atx.getBean("studentService");

        List<Student> students = studentService.queryAllStudents();
        for(Student student : students){
            System.out.println(student);
        }
    }
}
-
2.5.2 Spring利用JdbcTemplate操作数据库
-
操作步骤
-
加入相关的依赖
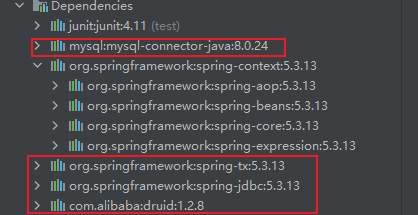
-
在Spring配置文件中配置数据库连接池对象以及jdbcTemplate对象
<?xml version="1.0" encoding="UTF-8"?> <beans xmlns="http://www.springframework.org/schema/beans" xmlns:xsi="http://www.w3.org/2001/XMLSchema-instance" xmlns:context="http://www.springframework.org/schema/context" xsi:schemaLocation="http://www.springframework.org/schema/beans http://www.springframework.org/schema/beans/spring-beans.xsd http://www.springframework.org/schema/context http://www.springframework.org/schema/context/spring-context.xsd"> <context:component-scan base-package="com.lzx"/> <context:property-placeholder location="classpath:jdbc.properties"/> <bean id="druidDataSource" class="com.alibaba.druid.pool.DruidDataSource"> <property name="url" value="${jdbc.url}"/> <property name="username" value="${jdbc.username}"/> <property name="password" value="${jdbc.password}"/> <property name="driverClassName" value="${jdbc.driverClass}"/> </bean> <bean id="jdbcTemplate" class="org.springframework.jdbc.core.JdbcTemplate"> <property name="dataSource" ref="druidDataSource"/> </bean> </beans> -
创建实体类,dao类以及service类,实现对应的功能
package com.lzx.dao;

import com.lzx.domain.Student;

public interface StudentDao {
    int insertStudent(Student student);

}

package com.lzx.dao.impl;

import com.lzx.dao.StudentDao;
import com.lzx.domain.Student;
import org.springframework.beans.factory.annotation.Autowired;
import org.springframework.jdbc.core.JdbcTemplate;
import org.springframework.stereotype.Repository;

@Repository
public class StudentDaoImpl implements StudentDao {
    @Autowired
    private JdbcTemplate jdbcTemplate;

    @Override
    public int insertStudent(Student student) {
        String sql = "insert into t_student values(?,?,?,?)";
        Object[] args={student.getId(),student.getName(),student.getEmail(),student.getAge()};
        return jdbcTemplate.update(sql,args);
    }
}
package com.lzx.service;

import com.lzx.dao.StudentDao;
import com.lzx.domain.Student;
import org.springframework.beans.factory.annotation.Autowired;
import org.springframework.stereotype.Service;

@Service
public class StudentService {
    @Autowired
    private StudentDao studentDao;

    public void insert(Student student){
        int res = studentDao.insertStudent(student);
        System.out.println(res);
    }
}
-
-
JdbcTemplate的相关操作
-
添加功能
String sql = "insert into t_student values(?,?,?,?)"; Object[] args={student.getId(),student.getName(),student.getEmail(),student.getAge()}; int insert = jdbcTemplate.update(sql,args); -
修改和删除功能
//删除 String sql = "deltete from t_student where id = ?"; int delete = jdbcTemplate.update(sql,id); //修改 String sql = "update t_student set name = ?,email = ?, age =? where id = ?"; Object[] args = {student.getName(),student.getEmail(),student.getAge,student.getId()}; int update = jdbcTemplate.update(sql,args); -
查询功能
//查询单个值 public <T> T queryForObject(String sql, Class<T> requiredType) throws DataAccessException{} //查询返回单个对象 public <T> T queryForObject(String sql, RowMapper<T> rowMapper, @Nullable Object... args) throws DataAccessException //查询返回集合 public <T> List<T> query(String sql, RowMapper<T> rowMapper, @Nullable Object... args) throws DataAccessException -
批量操作功能
//批量添加,删除,修改
public int[] batchUpdate(String sql, List<Object[]> batchArgs) throws DataAccessException
-
2.6 Spring的事务管理
2.6.1 Spring事务管理的介绍
-
Spring进行事务管理的两种方式
- 编程式事务管理
- 声明式事务管理
- 基于注解方式(中小型项目)
- 基于xml配置文件的方式
-
Spring声明式事务管理机制底层使用的是AOP原理
//spring给业务方法加入事务:在你的业务方法执行之前,先开启事务,在业务方法之后提交或回滚事务,使用aop的环绕通知 @Around("你要增加的事务功能的业务方法名称") Object myAround(){ //开启事务,spring给你开启 try{ //业务逻辑 //spring的事务管理器.commit(); }catch(Exception e){ //发生异常 //spring的事务管理器.rollback(); } } -
通过事务管理器(PlatformTransactionManager接口)对象实现事务功能,针对不同的数据库访问技术,生成不同的事务管理器实现类对象。
- jdbc以及mybatis访问数据库---------------->DataSourceTransactionManager
- hibernate访问数据库-------------------------->HibernateTransactionManager
-
事务应当作用在service层的业务方法上,因为service层的业务方法会调用dao层的多个dao方法,执行多个sql语句。
2.6.2 Spring注解式声明事务管理的步骤
-
在spring的配置文件中配置事务管理器
<!--第一步:创建事务管理器TransactionManager对象,并给dataSource赋值--> <bean id="transactionManager" class="org.springframework.jdbc.datasource.DataSourceTransactionManager"> <property name="dataSource" ref="druidDataSource"/> </bean> -
在spring的配置文件中引入名称空间tx并开启事务注解
<?xml version="1.0" encoding="UTF-8"?> <beans xmlns="http://www.springframework.org/schema/beans" xmlns:xsi="http://www.w3.org/2001/XMLSchema-instance" xmlns:context="http://www.springframework.org/schema/context" xmlns:tx="http://www.springframework.org/schema/tx" xsi:schemaLocation="http://www.springframework.org/schema/beans http://www.springframework.org/schema/beans/spring-beans.xsd http://www.springframework.org/schema/context https://www.springframework.org/schema/context/spring-context.xsd http://www.springframework.org/schema/tx http://www.springframework.org/schema/tx/spring-tx.xsd"> <bean id="transactionManager" class="org.springframework.jdbc.datasource.DataSourceTransactionManager"> <property name="dataSource" ref="druidDataSource"/> </bean> <!--开启事务注解--> <tx:annotation-driven transaction-manager="transactionManager"/> </beans> -
在service类的公共方法或者类上添加@Transactional注解
//集成Mybatis的Transactional注解实现 //定义两个dao类 package com.lzx.dao; import com.lzx.domain.Goods; import com.lzx.domain.Order; import java.util.List; public interface GoodsDao { public int updateGoods(Order order); public List<Goods> selectAllGoods(); public Goods selectGoodsByGid(int gid); } package com.lzx.dao; import com.lzx.domain.Order; public interface OrderDao { public int insertOrder(Order order); } package com.lzx.exception; public class OutOfStockException extends RuntimeException{ public OutOfStockException() { super(); } public OutOfStockException(String message) { super(message); } } //定义service类 package com.lzx.service.impl; import com.lzx.dao.GoodsDao; import com.lzx.dao.OrderDao; import com.lzx.domain.Goods; import com.lzx.domain.Order; import com.lzx.exception.OutOfStockException; import com.lzx.service.BuyService; import org.springframework.transaction.annotation.Isolation; import org.springframework.transaction.annotation.Propagation; import org.springframework.transaction.annotation.Transactional; public class BuyServiceImpl implements BuyService { private OrderDao orderDao; private GoodsDao goodsDao; public void setOrderDao(OrderDao orderDao) { this.orderDao = orderDao; } public void setGoodsDao(GoodsDao goodsDao) { this.goodsDao = goodsDao; } //在业务方法上添加@Transactional注解 @Transactional(propagation = Propagation.REQUIRED,isolation = Isolation.DEFAULT,readOnly = false,rollbackFor = {NullPointerException.class,OutOfStockException.class}) @Override public void buy(int gid, int nums) { Order order = new Order(); order.setGid(gid); order.setNums(nums); orderDao.insertOrder(order); Goods goods = goodsDao.selectGoodsByGid(gid); if(goods==null){ throw new NullPointerException("商品编号为" + gid + "的商品不存在"); }else if (goods.getStock()<nums){ throw new OutOfStockException("商品编号为" + gid + "的商品库存不足"); } goodsDao.selectAllGoods(); goodsDao.updateGoods(order); } } -
@Transactional注解属性介绍
-
propagation属性:事务的传播行为
package org.springframework.transaction.annotation; public enum Propagation { REQUIRED(0), SUPPORTS(1), MANDATORY(2), REQUIRES_NEW(3), NOT_SUPPORTED(4), NEVER(5), NESTED(6); private final int value; private Propagation(int value) { this.value = value; } public int value() { return this.value; } } /* PROPAGATION_REQUIRED 表示当前方法必须运行在一个事务中,如果当前存在一个事务,那么该方法运行在这个事务中,否则,将创建一个新的事务 PROPAGATION_REQUIRES_NEW 表示当前方法必须运行在自己的事务中,如果当前存在一个事务,那么这个事务将在该方法运行期间被挂起 PROPERGATION_MANDATORY 表示方法必须运行在一个事务中,如果当前事务不存在,就抛出异常 PROPAGATION_NESTED 表示如果当前事务存在,则方法应该运行在一个嵌套事务中。否则,它看起来和 PROPAGATION_REQUIRED 看起来没什么俩样 PROPAGATION_NEVER 表示方法不能运行在一个事务中,否则抛出异常 PROPAGATION_NOT_SUPPORTED 表示方法不能运行在一个事务中,如果当前存在一个事务,则该方法将被挂起 PROPAGATION_SUPPORTS 表示当前方法不需要运行在一个是事务中,但如果有一个事务已经存在,该方法也可以运行在这个事务中 */- PROPAGATION_REQUIRED
- 当外围方法未开启事务的情况下,当前传播行为修饰的内部方法会新开启自己的事务,且内部方法的事务相互独立,互不干扰。
- 当外围方法开启事务时,当前传播行为修饰的内部方法会加入到外围方法的事务中,所有的内部方法都属于外围方法的事务,只要任意一个方法回滚,整个事务都会回滚,即使内部方法catch异常不被外围方法感知,整个事务依然回滚。
- PROPAGATION_REQUIRES_NEW
- 当外围方法未开启事务的情况下,当前传播行为修饰的内部方法会新开启自己的事务,且内部方法的事务相互独立,互不干扰。
- 当外围方法开启事务时,当前传播行为修饰的内部方法会单独开启新的独立事务,与外部方法的事务之间相互独立,内部方法之间也相互独立。
- PROPAGATION_NESTED
- 在外围方法未开启事务时和PROPAGATION_REQUIRED一致
- 在外围方法开启事务时,当前传播行为修饰的内部方法属于外部事务的子事务,外围事务回滚,子事务一定回滚,而内部子事务可以单独回滚(异常被内部方法自己catch时)而不影响其它子事务和外围的主事务
- PROPAGATION_REQUIRED
-
isolation属性:事务的隔离级别
package org.springframework.transaction.annotation; public enum Isolation { DEFAULT(-1), READ_UNCOMMITTED(1), READ_COMMITTED(2), REPEATABLE_READ(4), SERIALIZABLE(8); private final int value; private Isolation(int value) { this.value = value; } public int value() { return this.value; } } /* ISOLATION_DEFAULT 使用后端数据库默认的隔离级别 ISOLATION_READ_UNCOMMITTED 允许读取未提交的数据(对应未提交读),可能导致脏读、不可重复读、幻读 ISOLATION_READ_COMMITTED 允许在一个事务中读取另一个已经提交的事务中的数据(对应已提交读)。可以避免脏读,但是无法避免不可重复读和幻读 ISOLATION_REPEATABLE_READ 一个事务不可能更新由另一个事务修改但尚未提交(回滚)的数据(对应可重复读)。可以避免脏读和不可重复读,但无法避免幻读 ISOLATION_SERIALIZABLE 这种隔离级别是所有的事务都在一个执行队列中,依次顺序执行,而不是并行(对应可序列化)。可以避免脏读、不可重复读、幻读。但是这种隔离级别效率很低,因此,除非必须,否则不建议使用。 */ -
timeout属性:
- 如果一个事务长时间运行,这时为了尽量避免浪费系统资源,应为这个事务设置一个有效时间,使其等待数秒后自动回滚。
- 默认是-1,表示不会超时,设置时间以秒为单位。
-
readOnly属性:是否为只读操作
- 只读表示只能进行查询,写表示还可以进行添加修改和删除。
- 默认为false,可以读写。
-
rollbackFor属性:发生异常时回滚,可以自定义异常的类型。
rollbackFor = {NullPointerException.class,OutOfStockException.class} -
noRollbackFor属性:发生异常时不进行回滚的异常类型的集合。
-
2.6.3 XML配置文件声明式事务管理
-
实现步骤
-
加入aspectJ的依赖
<dependency> <groupId>org.springframework</groupId> <artifactId>spring-aspects</artifactId> <version>5.3.13</version> </dependency> -
在Spring的配置文件中配置事务管理器,切入点和通知
	<!--配置事务管理器-->
	<bean id="transactionManager" class="org.springframework.jdbc.datasource.DataSourceTransactionManager">
        <property name="dataSource" ref="druidDataSource"/>
    </bean>
	<!--配置通知-->
    <tx:advice id="myAdvice" transaction-manager="transactionManager">
        <tx:attributes>
            <tx:method name="buy" propagation="REQUIRED" isolation="DEFAULT"
                       rollback-for="java.lang.NullPointerException,com.lzx.exception.OutOfStockException"/>
        </tx:attributes>
    </tx:advice>
	<!--配置切入点表达式-->
    <aop:config>
        <aop:pointcut id="servicePt" expression="execution(* *..service..*.*(..))"/>
        <aop:advisor advice-ref="myAdvice" pointcut-ref="servicePt"/>
    </aop:config>
-
2.6.4 完全注解声明式事务管理
-
生成配置类
//创建配置类,使用配置类替代xml配置文件
@Configuration //配置类
@ComponentScan(basePackages = "com.lzx") //组件扫描
@EnableTransactionManagement //开启事务
public class TxConfig {
    //创建数据库连接池
    @Bean
    public DruidDataSource getDruidDataSource() {
        DruidDataSource dataSource = new DruidDataSource();
        dataSource.setDriverClassName("com.mysql.cj.jdbc.Driver");
        dataSource.setUrl("jdbc:mysql://localhost:3306/spring_db");
        dataSource.setUsername("username");
        dataSource.setPassword("password");
        return dataSource;
    }
    //创建JdbcTemplate对象
    @Bean
    public JdbcTemplate getJdbcTemplate(DataSource dataSource) {
        //到ioc容器中根据类型找到dataSource
        JdbcTemplate jdbcTemplate = new JdbcTemplate();
        //注入dataSource
        jdbcTemplate.setDataSource(dataSource);
		return jdbcTemplate;
    }
    //创建事务管理器
    @Bean
    public DataSourceTransactionManager getDataSourceTransactionManager(DataSource dataSource) {
        DataSourceTransactionManager transactionManager = new DataSourceTransactionManager();
        transactionManager.setDataSource(dataSource);
        return transactionManager;
    }
}
2.7 Spring整合log4j2
-
引入相关的依赖

-
添加log4j2.xml配置文件
- 文件名一般为log4j2-test.xml或者log4j2.xml
<?xml version="1.0" encoding="UTF-8"?>
 <Configuration status="WARN">
   <Appenders>
     <Console name="Console" target="SYSTEM_OUT">
       <PatternLayout pattern="%d{HH:mm:ss.SSS} [%t] %-5level %logger{36} - %msg%n"/>
     </Console>
   </Appenders>
   <Loggers>
     <Root level="error">
       <AppenderRef ref="Console"/>
     </Root>
   </Loggers>
 </Configuration>
2.8 Spring整合Junit
2.8.1 整合Junit4
-
加入spring-test依赖
<dependency> <groupId>org.springframework</groupId> <artifactId>spring-test</artifactId> <version>5.3.13</version> </dependency> -
创建测试类
package com.lzx;

import com.lzx.domain.Student;
import com.lzx.service.StudentService;
import org.junit.Test;
import org.junit.runner.RunWith;
import org.springframework.beans.factory.annotation.Autowired;
import org.springframework.context.annotation.Configuration;
import org.springframework.test.context.ContextConfiguration;
import org.springframework.test.context.junit4.SpringJUnit4ClassRunner;

@RunWith(SpringJUnit4ClassRunner.class)
@ContextConfiguration("classpath:applicationContext.xml")
public class TestJunit4 {
    @Autowired
    private StudentService studentService;
    @Test
    public void test1(){
        studentService.insert(new Student(1019,"张深度","sfaf",23));
    }
}
2.8.2 整合Junit5
-
加入junit5依赖
<dependency> <groupId>org.junit.jupiter</groupId> <artifactId>junit-jupiter-api</artifactId> <version>5.8.2</version> <scope>test</scope> </dependency> -
创建测试类
package com.lzx;

import com.lzx.domain.Student;
import com.lzx.service.StudentService;
import org.junit.jupiter.api.Test;
import org.junit.jupiter.api.extension.ExtendWith;
import org.springframework.beans.factory.annotation.Autowired;
import org.springframework.test.context.ContextConfiguration;
import org.springframework.test.context.junit.jupiter.SpringExtension;

@ExtendWith(SpringExtension.class)
@ContextConfiguration("classpath:applicationContext.xml")
public class TestJunit5 {
    @Autowired
    private StudentService studentService;
    @Test
    public void test1(){
        studentService.insert(new Student(1020,"傻狗","sdfa",1));
    }
}
//合并两个注解
@SpringJUnitConfig(locations = "classpath:applicationContext.xml")
public class TestJunit5 {
    @Autowired
    private StudentService studentService;
    @Test
    public void test1(){
        studentService.insert(new Student(1021,"傻狗","sdfa",1));
    }
}
2.9 Spring新功能
-
支持@Nullable注解
- 用在方法上面表示方法的返回值可以为空
- 用在方法的形参前面,表示参数可以为空
- 用在属性上面,表示属性值可以为空
-
支持函数式风格GenericApplicationContext
public void testGenericAppilicationContext(){
    //创建GenericAppilicationContext对象
    GenericAppilicationContext context = new GenericAppilicationContext();
    //调用context的方法注册对象
    context.refresh();
    context.registerBean("beanName",Bean.class, () -> new Bean());
    //获取上一步注册的对象
    Bean bean = context.getBean("beanName",Bean.class);
}


 1万+
1万+


 被折叠的 条评论
为什么被折叠?
被折叠的 条评论
为什么被折叠?
 到【灌水乐园】发言


