


一、采购订单的模型分析关系
- 如果是下拉列表:一般是多对一,一对一
如果是复选框:一般是多对多,一对多 - 在一个页面同时操作2张表采购订单和采购订单明细
- 组合关系映射配置要求
整体和部分,整体和部分不能分割,本质还是双向一对多
一方(主表):
@OneToMany(cascade = CascadeType.ALL, mappedBy = "bill", fetch = FetchType.LAZY, orphanRemoval = true)
private List<purchasebillitem> items = new ArrayList<purchasebillitem>();
cascade = CascadeType.ALL级联操作最全
mappedBy = "bill"一方放弃管理多方,多方的外键字段bill_id,一方不管
orphanRemoval = true如果在一方解除了和多方的关系,一方是可以删除掉多方
4. 多方(从表)billitem:bill_id配置为非空
@ManyToOne(fetch = FetchType.LAZY, optional = false)
@JoinColumn(name = "bill_id")
private Purchasebill bill;// 组合关系,非空
- 页面管理:一方和多方同时管理
二、实体关系
- 一个采购员buyer_id可以下采购多张采购订单,需要选择框
- 一个制单员inputUser_id可以填写多张采购订单,录入人就是当前登录用户
- 一个采购经理auditor_id可以审核多张采购订单,外键可以为空,审核的当前登录用户
三、组合关系,实体类
- 3.1.Purchasebill组合关系的一方
/**
 *
 * 采购订单:组合关系的一方
 *
 */
@Entity
@Table(name = "purchasebill")
public class Purchasebill extends BaseDomain {
  private Date vdate;// 交易时间 -> 需要录入(时间set的时候加上@DateTimeFormat(pattern = "yyyy-MM-dd"))
  private BigDecimal totalAmount; //总金额 -> 明细计算
  private BigDecimal totalNum; //总数量 -> 明细计算
  private Date inputTime = new Date(); //录入时间 ->当前系统时间
  private Date auditorTime; //审核时间 -> 可以为空,审核时自己生成
  /**
   * 0待审,1已审,-1作废
   */
  private Integer status = 0; //单据状态 -> 默认待审
  @ManyToOne(fetch = FetchType.LAZY, optional = false)
  @JoinColumn(name = "supplier_id")
  private Supplier supplier;// 多对一,非空 供应商(需要选择)
  @ManyToOne(fetch = FetchType.LAZY)
  @JoinColumn(name = "auditor_id")
  private Employee auditor;// 多对一,可以为空
  @ManyToOne(fetch = FetchType.LAZY, optional = false)
  @JoinColumn(name = "inputUser_id")
  private Employee inputUser;// 多对一,非空 录入人 -> 登录用户就是录入人
  @ManyToOne(fetch = FetchType.LAZY, optional = false)
  @JoinColumn(name = "buyer_id")
  private Employee buyer;// 多对一,非空 采购员 -> 需要
  // 一般组合关系使用List
  @OneToMany(cascade = CascadeType.ALL, mappedBy = "bill", fetch = FetchType.LAZY, orphanRemoval = true)
  private List<Purchasebillitem> items = new ArrayList<Purchasebillitem>();

…
@JsonFormat(pattern = "yyyy-MM-dd HH:mm:ss",timezone = "GMT+8")
public Date getVdate() {
    return vdate;
}

@DateTimeFormat(pattern = "yyyy-MM-dd")
public void setVdate(Date vdate) {
    this.vdate = vdate;
}
spring MVC接收封装对象的时间字段应该加上注解
@DateTimeFormat(pattern = “yyyy-MM-dd”)
最强配置级联,将关系维护交给bill字段,懒加载,孤儿删除
@OneToMany(cascade = CascadeType.ALL, mappedBy = "bill", fetch = FetchType.LAZY, orphanRemoval = true)
前台页面取值,在get方法加上注解
@JsonFormat(pattern = “yyyy-MM-dd HH:mm:ss”,timezone = “GMT+8”)
前台页面封装对象调用的set方法加上注解
@DateTimeFormat(pattern = “yyyy-MM-dd”)
- 3.2.purchasebillitem组合关系的多方实体类配置
/**
 *
 * 采购订单明细:组合关系的多方
 *
 */
@Entity
@Table(name = "purchasebillitem")
public class purchasebillitem extends BaseDomain {
  private BigDecimal price; //价格
  private BigDecimal num; //数量
  private BigDecimal amount; //小计 = 价格*数量
  private String descs; //描述
  @ManyToOne(fetch = FetchType.LAZY, optional = false)
  @JoinColumn(name = "product_id")
  private Product product;// 多对一,非空 产品
  @ManyToOne(fetch = FetchType.LAZY, optional = false)
  @JoinColumn(name = "bill_id")
  @JsonIgnore //生成json的时候忽略这个属性
  private Purchasebill bill;// 组合关系,非空
- 供应商Supplier 实体类
@Entity
@Table(name="supplier")
public class Supplier extends BaseDomain {

    private String name;

    public String getName() {
        return name;
    }

    public void setName(String name) {
        this.name = name;
    }

}
四、查询,展示页面
- jsp页面
<table id="purchasebillGrid" class="easyui-datagrid" enableHeaderClickMenu="true"
       data-options="url:'/purchasebill/page',fitColumns:true,onRowContextMenu:showMenu,singleSelect:true,pagination:true,fit:true,toolbar:'#gridTools'">
    <thead>
    <tr>
        <th width="20" field="vdate" sortable="true">交易时间</th>
        <th width="20" field="totalnum">总数量</th>
        <th width="20" field="totalamount">总金额</th>
        <th width="20" field="status" sortable="true" data-options="formatter:statusFormat">订单状态</th>
        <th width="20" field="supplier" sortable="true" data-options="formatter:nameFormat">供应商</th>
        <th width="20" field="inputUser" sortable="true" data-options="formatter:nameFormat">录入员</th>
        <th width="20" field="buyer" sortable="true" data-options="formatter:nameFormat">采购员</th>
    </tr>
    </thead>
</table>
- 解决没有展示数据的问题
发现数据是有的但是出现了死循环,管理对象相互查询。。 - 解决方法:在字段上加上注解
 @JsonIgnore //生成json的时候忽略这个属性
  private Purchasebill bill;// 组合关系,非空
- 有了展示数据,展示的是object,怎么展示对象的数据
增加formatter方法
data-options="formatter:nameFormat"
在js中调用方法展示数据,展示出关联对象的名称
function statusFormat(v) {
    if (v==0){
        return `<span style="color: mediumvioletred">待审</span>`
    }else if (v==-1){
        return `<span style="color: grey"><s style="color: #1e282c">删除</s></span>`
    } else if (v==1){
        return `<span style="color: greenyellow">已审核</span>`
    }
}
function nameFormat(v) {
    //判断名字是否存在,员工的名字是username
    return v?v.name || v.username:"";
}
展示效果
 添加高级查询
<%--grid顶部工具栏--%>
<div id="gridTools" style="padding:5px;height:auto">
    <%--功能条--%>
    <div style="margin-bottom:5px">
        <a href="#" data-method="add" class="easyui-linkbutton" iconCls="icon-add" plain="true">添加</a>
        <a href="#" data-method="update" class="easyui-linkbutton" iconCls="icon-edit" plain="true">修改</a>
        <a href="#" data-method="del" class="easyui-linkbutton" iconCls="icon-remove" plain="true">删除</a>
    </div>
    <%--高级查询查询条--%>
    <form id="querySearch">
        时间: <input name="beginDate" class="easyui-datebox" style="width:150px">
        -<input name="endDate" class="easyui-datebox" style="width:150px">
        审核状态:
        <select class="easyui-combobox" name="status"
                data-options="panelHeight:'auto',width:150"
        >
            <option value=""></option>
            <option value="0">待审</option>
            <option value="-1">作废</option>
            <option value="1">已审</option>
        </select>
        <%--点击查询触发js  绑定函数   发送请求数据  高级查询条件封装成对象--%>
        <a href="#" data-method="search" class="easyui-linkbutton" iconCls="icon-search">查询</a>
    </form>
</div>
查询的是时间的区间,添加了两个name属性,但是后台没有这两个字段
在查询对象中增加两个字段,标签打上时间的注解
public class PurchasebillQuery extends BaseQuery{

    @DateTimeFormat(pattern = "yyyy-MM-dd")
    private Date beginDate;
    @DateTimeFormat(pattern = "yyyy-MM-dd")
    private Date endDate;
    private Integer status;
    @Override
    public Specification creatSpec(){
        Date teampDate=null;
        if (endDate!=null){
            teampDate = DateUtils.addDays(endDate, 1);
        }
        Specification<Purchasebill> spec = Specifications.<Purchasebill>and()
        		//property是类对象的属性,beginDate是前台传的值
                .eq(status!=null,"status",status)
                //小于
                .lt(endDate!=null,"vdate",teampDate )
                //大于等于
                .ge(beginDate!=null,"vdate",beginDate )
                .build();
        System.out.println(endDate);
        System.out.println(beginDate);
        return spec;
    }
    。。。。
    }
- 注意时间的修改
- 应该把vdate设计为date类型(yyyy-MM-dd),而不是datetime时间戳
- 1.前端的日期时分秒按照0:00:00来处理,如果不对日期+1处理,结束时间是不能成功获取查询的值.
- 如下单时间是09-30 15:00:00,而endDate输入09-30,后台获取到09-30 0:00:00
- 2.加了一天之后进行查询,不能写<=,只能写<,如果是<=就会查询到第二天去
- 解决方法
org.apache.commons.lang.time.DateUtils对时间进行修改
完成了订单的高级查询和展示
五、采购订单的添加
- 基础添加,之加入订单,先不加入明细
弹出模态框,展示数据是对象点属性,设置datebox和下拉框combobox
<%--添加和修改的弹出模态框--%>
<div id="editDialog" class="easyui-dialog" title="功能编辑" style="width:900px;"
     data-options="iconCls:'icon-save',resizable:true,modal:true,closed:true">
    <form id="editForm" method="post">
        <input id="purchasebillId" type="hidden" name="id">
        <table cellpadding="5">
            <tr>
                <td>交易时间:</td>
                <td><input class="easyui-datebox" type="text" name="vdate"></input></td>
                <td>供应商:</td>
                <td>
                    <input class="easyui-combobox" name="supplier.id"
                           data-options="valueField:'id',textField:'name',panelHeight:'auto',url:'/util/findAllSupplier'">
                </td>
                <td>采购员:</td>
                <td>
                    <input class="easyui-combobox" name="buyer.id"
                           data-options="valueField:'id',textField:'username',url:'/util/findBuyer'">
                </td>
            </tr>
        </table>
    </form>
    <div style="text-align:center;padding:5px">
        <a href="javascript:void(0)" class="easyui-linkbutton" data-method="save">提交</a>
        <a href="javascript:void(0)" class="easyui-linkbutton" data-method="closeDialog">关闭</a>
    </div>
</div>
效果
 下拉框的数据动态加载
查询出部门是采购部的所有员工,因为明确是采购部的员工,直接查询的时候就可以写入条件
订单的业务层PurchasebillServiceImpl
@Service
public class PurchasebillServiceImpl extends BaseServiceImpl<Purchasebill,Long> implements IPurchasebillService {
    @Autowired
    private EmployeeRepository employeeRepository;
    @Override
    public List<Employee> findBuyer() {
        List<Employee> list = employeeRepository.findBuyer("采购部");
        return list;
    }
    }
UtilController层用于返回展示的下拉框数据
@RequestMapping("/findBuyer")
    @ResponseBody
    public List<Employee> findBuyer(){
        return iPurchasebillService.findBuyer();
    }
点击提交保存,现在只能提交订单,所以需要加上订单明细数据
但是报错了
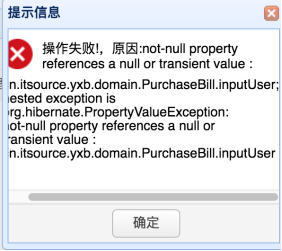

因为我们设置了录入员(当前登陆)不能为空,但是前台保存的时候并没有保存所以保存
- 解决方法
保存的时候将当前用户存到purchasebill对象中
PurchasebillService
@Override
public void save(Purchasebill purchasebill) {
    Employee user = UserContext.getUser();
    //当前系统登陆用户就是录入员
    purchasebill.setInputUser(user);
    super.save(purchasebill);
}
六、明细的添加,明细数据的操作
- 添加明细模块的结构
找到easyui扩展库下载扩展插件http://www.easyui-extlib.com/ ->Datagrid-Edit -单元格编辑把相应的示例与js代码拷备下来 - 在添加的模态框中引入即可
<%--明细数据--%>
        <table id="itemsGrid" style="height: 300px"></table>
js动态生成
添加工具栏
 //这段代码要写在最后面
    /**
     * dg: 明细的grid组件
     * defaultRow:默认的行数据(表头)
     *insertPosition:插入数据的位置 (bottom:下面)
     */
    var dg = $("#itemsGrid"),
        defaultRow = { id: "", product: "", productColor: "", productImg: "", num: 0, price: 0, amount: 0,descs:"" },
        insertPosition = "bottom";
    //明细的grid组件的初始化设置
    var dgInit = function () {
        //datagrid的列数据
        var getColumns = function () {
            var result = [];

            var normal = [
                {
                    field: 'product', title: '商品', width: 180,
                    editor: {
                        /*设置为下拉框*/
                        type: "combobox",
                        options: {
                            valueField:'id',
                            textField:'name',
                            panelHeight:"auto",
                            /*加载产品行数据*/
                            url:'/util/findAllProduct',
                            required: true
                        }
                    },
                    formatter(v){
                        return v?v.name:"";
                    }
                },
                {
                    //加载产品颜色不用传给后台,只做展示,不用对应字段
                    field: 'productColor', title: '颜色', width: 80,
                    formatter(value,row,index){
                        if (row && row.product){
                            return row?`<div style="width: 20px;height: 20px;background: ${row.product.color};" width="20px" ></div>`:'';
                        }
                    }
                },
                {//加载产品图片,不用传给后台,只做展示,不用对应字段
                    field: 'productImg', title: '图片', width: 100,
                    formatter(value,row,index){
                        if (row && row.product){
                            return row?`<img   src="${row.product.pic}" width="50px" `:'';
                        }
                    }
                },
                {//对应后台字段
                    field: 'num', title: '数量', width: 100,
                    editor: {
                        type: "numberbox",
                        options: {
                            /*只保留两位小数*/
                            precision:2,
                            required: true
                        }
                    }
                },
                {
                    field: 'price', title: '价格', width: 100,
                    editor: {
                        type: "numberbox",
                        options: {
                            precision:2,
                            required: true
                        }
                    }
                },
                {//计算小计
                    field: 'amount', title: '小计', width: 100,
                    formatter(value,row,index){
                        if (row && row.num && row.price){
                                //计算明细,截取小数点
                                return (row.num * row.price).toFixed(2);
                        }
                        return 0;
                    }
                },
                {
                    field: 'descs', title: '备注', width: 100,
                    editor: {
                        type: "text"
                    }
                }
            ];
            result.push(normal);

            return result;
        };
        //准备datagrid组件中的属性
        var options = {
            idField: "ID", //id的字段(唯一的)
            rownumbers: true, // 行号
            //fitColumns: true, //列的自适应
            singleSelect: true,
            columns: getColumns(),
            //添加工具栏
            toolbar:"#itemsTools",
            //表示开启单元格编辑功能
            enableCellEdit: true
        };
        //创建datagrid组件
        dg.datagrid(options);
    };

    //拿到插入的那一行数据的索引
    var getInsertRowIndex = function () {
        return insertPosition == "top" ? 0 : dg.datagrid("getRows").length;
    }

    //定义了一个变量,这个变量也是一个方法
    //button(按键)Bind(绑定)Event(事件)
    var buttonBindEvent = function () {
        //添加一行数据
        $("#btnInsert").click(function () {
            var targetIndex = getInsertRowIndex(), targetRow = $.extend({}, defaultRow, { ID: $.util.guid() });
            dg.datagrid("insertRow", { index: targetIndex, row: targetRow });
            dg.datagrid("editCell", { index: 0, field: "Code" });
        });
        //删除一行数据
        $("#btnRemove").click(function () {
            //获取到选中的行(这一行的数据)
            var row = dg.datagrid("getSelected");
            //这里要的是这一行的行号
            if (row){
                //得到索引
                var index = dg.datagrid("getRowIndex",row);
                dg.datagrid("deleteRow",index);
            }
        });
        /*
        $("#btnSave").click(function () {
            var rows = dg.datagrid("getRows"), len = rows.length;
            for (var i = 0; i < len; i++) {
                dg.datagrid("endEdit", i);
            }
        });
        */
    };

    //把grid初始化与事务绑定完成
    dgInit(); buttonBindEvent();
效果展示
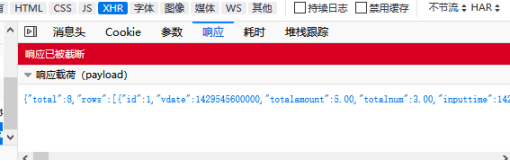
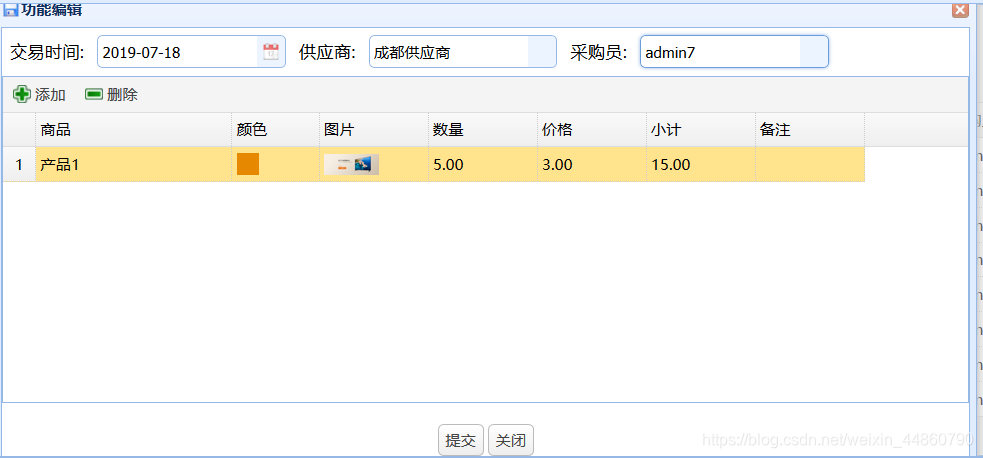 测试
测试
保存的时候成功保存,但是没有保存产品明细
因为表单中并没有传参

要想将明细也保存到订单对象中成功封装需要在js中,保存提交表单的时候增加参数
save(){
            /*如果有id则是提交表单到修改的controller*/
            var purchasebillId = $("#purchasebillId").val();
            url="/purchasebill/save";
            if(purchasebillId){
                url="/purchasebill/update?cmd=_update";
            }
            /*easyui的表单提交  在form中找的方法。。*/
            editForm.form('submit', {
                url:url,
                onSubmit: function(parma){
                    //得到提交表单中的所有数据
                    var rows = dg.datagrid("getRows")
                    console.debug(rows)
                    for(var i = 0;i<rows.length;i++){
                        var row = rows[i];
                        console.debug(row)
                        parma[`items[${i}].product.id`]=row.product.id;
                        parma[`items[${i}].num`]=row.num;
                        parma[`items[${i}].price`] = row.price;
                        parma[`items[${i}].descs`]=row.descs;
                    }
                    var isValid = $(this).form('validate');
                    return isValid;	// 返回false终止表单提交
                },
               /* 成功,后台返回结果*/
                success: function(data){
                    var result = JSON.parse(data);
                    if(result.success){
                        purchasebillGrid.datagrid("reload")
                    }
                    else {
                        $.messager.alert('失败',`操作失败了可能是因为:${result.msg}`,"warning");
                    }
                    //关闭弹出框
                    itsource.closeDialog();
                }
            });

        }
取得所有的行,遍历,发送正确参数
for(var i = 0;i<rows.length;i++){
    var row = rows[i];
    parma[`items[${i}].product.id`]=row.product.id;
    parma[`items[${i}].num`]=row.num;
    parma[`items[${i}].price`]=row.price;
    parma[`items[${i}].descs`]=row.descs;
}
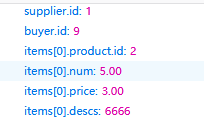
点击保存报错了
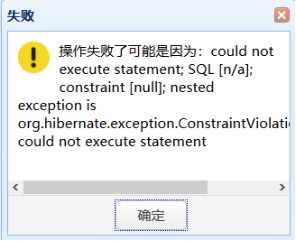
原因是级联操作的时候双方都要找得到对方,才可以在保存订单的时候也同时将明细保存成功,现在只有一方找得到多方,订单可以找到订单明细,但是订单明细找不到订单,controller层的数据测试
解决办法
在保存的时候将一方存入多方
purchasebill.getItems().forEach(e->
        e.setBill(purchasebill)
);
然后就可以保存
多方明细表中添加成功,并且关联了一方ID
七、计算明细,产品数量总价
前台将明细封装成了一个集合,封装到了订单对象中,里面是一个个明细对象
遍历明细,并且计算每一条明细的总价,数量
然后添加到改订单中保存
//保存的controller
    @RequestMapping("/save")
    @ResponseBody
    public SuccessBoolean save(Purchasebill purchasebill){
        return saveOrUpdate(purchasebill);
    }
    //修改
    @RequestMapping("/update")
    @ResponseBody
    public SuccessBoolean update(@ModelAttribute("editPurchasebill")Purchasebill purchasebill){
            return saveOrUpdate(purchasebill);
    }
    public SuccessBoolean saveOrUpdate(Purchasebill purchasebill){
        System.out.println(purchasebill);
        List<Purchasebillitem> items = purchasebill.getItems();
        BigDecimal totalNum=new BigDecimal("0");
        BigDecimal totalAmonut=new BigDecimal("0");
        for (Purchasebillitem item:items){
            //将 一方存入多方
            item.setBill(purchasebill);
            //计算单个明细的小计
            BigDecimal amount = item.getNum().multiply(item.getPrice());
            item.setAmount(amount);
            //计算产品的总数量和总价
            totalNum=totalNum.add(item.getNum());
            totalAmonut=totalAmonut.add(amount);
        }
        //将总数量与总价存入订单中
        purchasebill.setTotalamount(totalAmonut);
        purchasebill.setTotalnum(totalNum);
        try {
            //int a= 1/0;
            System.out.println(purchasebill);
            iPurchasebillService.save(purchasebill);
            return new SuccessBoolean();
        } catch (Exception e) {
            e.printStackTrace();
            //获取错误信息
            return new SuccessBoolean(false,e.getMessage());
        }
    }
数据丢失问题
修改的时候,
提交表单只提交了一部分数据
但是后台的方法是save,这个是更新方法,jpa后台就更新了信息
将没有设置参数的修改为了null
解决方法:在controller层添加方法,所有操作包括修改之前都会执行先查出数据
每一次传id的方法都会先执行这个方法,很浪费性能,解决方法 js 提交请求的时候传一个String过来 判断是否有才继续执行
@ModelAttribute("editPurchasebill")
    public Purchasebill beforEdit(Long id,String cmd){
        if (id!=null&&"_update".equals(cmd)){
            Purchasebill one = iPurchasebillService.findOne(id);
             //解决n-to-n  把关联对象设置为null
            one.setInputUser(null);
            one.setAuditor(null);
            one.setBuyer(null);
            one.getItems().clear();
            one.setSupplier(null);
            return one;
        }
        return null;
    }
解决了数据丢失,封装的对象变成了持久化对象,关联对象也变成了持久化对象
无法修改报错n-to-n
解决方法:将关联对象设置为空
八、修改时数据回显的问题
在js中的修改方法中
-
如果点击了添加或者修改但是没有保存
下一次点开就有缓存数据在表单中 -
解决方法
加载本地数据的方法,但是本地数据为空,就相当于清空
var date =[];
dg.datagrid(“loadData”,date) -
解决回显时,添加不保存会影响修改的回显
先复制一份选择的这一行
var items = […rows.items];
dg.datagrid(“loadData”,items); -
加载数据的时候要注意是加载的外层grid还是内存的表单数据
修改的js代码
update(){
            var rows = purchasebillGrid.datagrid("getSelected");
            if(!rows){
                $.messager.alert('注意','请选中再操作');
                return;
            }
            /*先清空再回显*/
            editForm.form("clear")
            //加载本地数据,清空再显示,相当于删除缓存数据
            /* 如果有部门,添加属性为department.id,和表单的department属性对应*/
            if(rows.supplier){
                /*添加属性*/
                rows["supplier.id"]=rows.supplier.id;
            }
            if(rows.buyer){
                /*添加属性*/
                rows["buyer.id"]=rows.buyer.id;
            }
            /*将密码框组件禁用   验证禁用    */
            $("*[data-edit] input").validatebox("disable");
            /*将密码框的表单隐藏*/
            $("*[data-edit]").hide();
            //加载外层回显
            editForm.form("load",rows)
            editDialog.dialog("center").dialog("open");
            var items = [...rows.items];
            dg.datagrid("loadData",items);
        }


 266
266


 被折叠的 条评论
为什么被折叠?
被折叠的 条评论
为什么被折叠?
 到【灌水乐园】发言


