


图像的几何变换
几何变换是图像变换的基本方法,包括图像的空间平移、比例缩放、旋转、仿射变换、透视变换和图像插值。图像几何变换的实质是改变像素的空间位置或估算新空间位置上的像素值。
1. 图像的平移变换

Jupyter notebook代码展示
import cv2
import numpy as np
from matplotlib import pyplot as plt
img = cv2.imread('D:\jupyter notebook\img/1.jpeg')
#构造移动矩阵H
#在x轴方向移动多少距离,在y轴方向移动多少距离
H = np.float32([[1, 0, 50], [0, 1, 25]])
rows, cols = img.shape[:2]
print(img.shape)
print(rows, cols)
#注意这里rows和cols需要反置,即先列后行
res = cv2.warpAffine(img, H, (2*cols, 2*rows))
cv2.imshow('origin', img)
cv2.imshow('new', res)
cv2.waitKey(0)
cv2.destroyAllWindows()
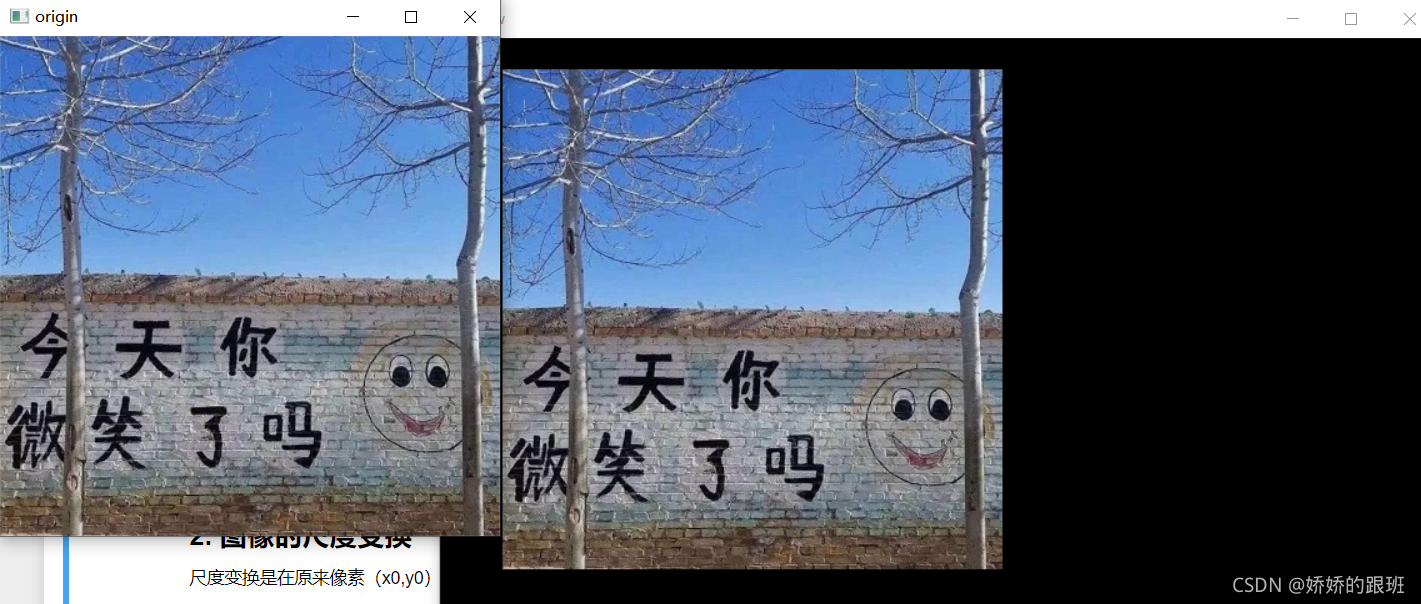
2. 图像的尺度变换
尺度变换是在原来像素(x0,y0)乘以一个倍数

Jupyter notebook代码展示
import cv2
import numpy as np

img = cv2.imread('D:\jupyter notebook\img/1.jpeg')
#方法一:通过设置缩放比例,来对图像进行放大
big = cv2.resize(img, None, fx=1.5, fy=1.5, interpolation=cv2.INTER_CUBIC)
height, width = img.shape[:2]
#方法二:直接设置图像的大小,不需要缩放因子
#cv2.INTER_NEAREST(最近邻插值) cv2.INTER_AREA (区域插值) cv2.INTER_CUBIC(三次样条插值) cv2.INTER_LANCZOS4(Lanczos插值)
small = cv2.resize(img, (int(0.5*width), int(0.5*height)),interpolation=cv2.INTER_LANCZOS4)
cv2.imshow('origin', img)
cv2.imshow('big', big)
cv2.imshow('small', small)
cv2.waitKey(0)
cv2.destroyAllWindows()

3. 图像的旋转变换

Jupyter notebook代码展示
import numpy as np
import cv2
from math import cos,sin,radians
from matplotlib import pyplot as plt

img = cv2.imread('D:\jupyter notebook\img/1.jpeg')

height, width, channel = img.shape

#求得图片中心点, 作为旋转的轴心
cx = int(width / 2)
cy = int(height / 2)
#旋转的中心
center = (cx, cy)

new_dim = (width, height)

#进行2D 仿射变换
#围绕原点 逆时针旋转30度
M = cv2.getRotationMatrix2D(center=center,angle=30, scale=1.0)
rotated_30 = cv2.warpAffine(img, M, new_dim)

#围绕原点 逆时针旋转45度
M = cv2.getRotationMatrix2D(center=center,angle=45, scale=1.0)
rotated_45 = cv2.warpAffine(img, M, new_dim)

#围绕原点  逆时针旋转60度
M = cv2.getRotationMatrix2D(center=center,angle=60, scale=1.0)
rotated_60 = cv2.warpAffine(img, M, new_dim)

plt.subplot(221)
plt.title("Src Image")
plt.imshow(img[:,:,::-1])

plt.subplot(222)
plt.title("Rotated 30 Degree")
plt.imshow(rotated_30[:,:,::-1])

plt.subplot(223)
plt.title("Rotated 45 Degree")
plt.imshow(rotated_45[:,:,::-1])

plt.subplot(224)
plt.title("Rotated 60 Degree")
plt.imshow(rotated_60[:,:,::-1])

plt.show()

4. 图像的仿射变换

仿射变换包括如下所有变换,以及这些变换任意次序次数的组合(平移、旋转、放缩、剪切、反射)

Jupyter notebook代码展示
import cv2
import numpy as np

img = cv2.imread('D:\jupyter notebook\img/1.jpeg')
height, width = img.shape[:2]

# 在原图像和目标图像上各选择三个点
mat_src = np.float32([[0, 0],[0, height-1],[width-1, 0]])
mat_dst = np.float32([[0, 0],[100, height-100],[width-100, 100]])

# 得到变换矩阵
mat_trans = cv2.getAffineTransform(mat_src, mat_dst)
# 进行仿射变换
dst = cv2.warpAffine(img, mat_trans, (width,height))

# 显示
imgs = np.hstack([img,dst])
cv2.namedWindow('imgs', cv2.WINDOW_NORMAL)
cv2.imshow("imgs",imgs)
cv2.waitKey(0)


 5712
5712

 被折叠的 条评论
为什么被折叠?
被折叠的 条评论
为什么被折叠?
 到【灌水乐园】发言


